How to Unlock Chuck on Cordless Drill: Simple Steps for DIY Enthusiasts
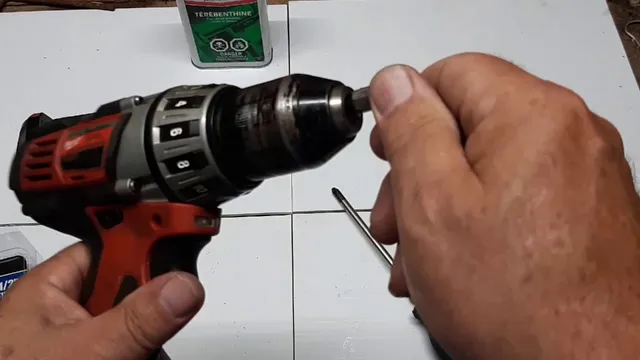
Got a new cordless drill but can’t seem to figure out how to unlock the chuck? Don’t worry, you’re not alone. It can be frustrating to feel like you already have everything you need to start drilling holes or driving screws but the chuck just won’t release your bit. Luckily, unlocking the chuck is a simple process that anyone can master with a bit of knowledge.
And once you unlock the chuck, you’ll be able to swap out bits and get to work in no time. So, let’s dive into the process of unlocking chuck on cordless drill and get you on your way to drilling and screwing like a pro.
What is a Chuck and Why is it Locked?
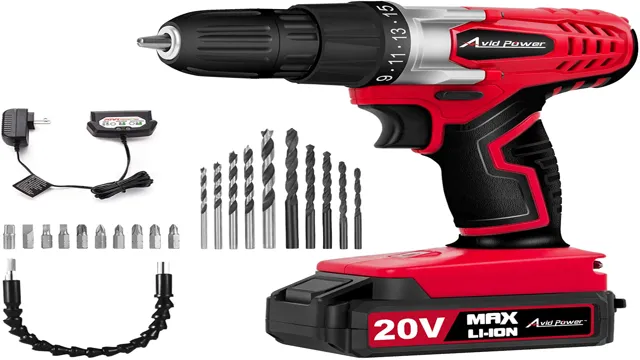
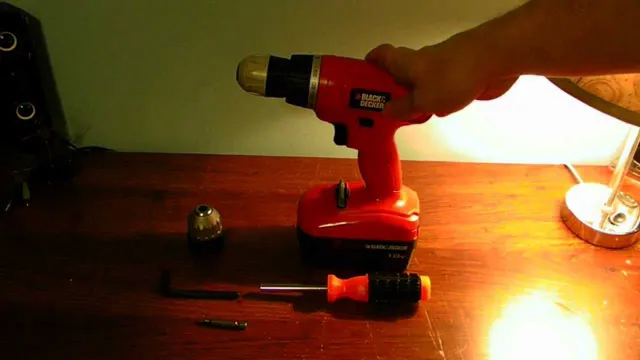
If you’re wondering how to unlock the chuck on your cordless drill, first you need to understand what a chuck is and why it’s locked. The chuck is the part of the drill that holds the drill bit in place, and it’s locked to ensure that the bit doesn’t come loose while you’re drilling. To unlock the chuck, you’ll need to turn it counterclockwise using the chuck key supplied with your drill.
If you don’t have the key, you can use a pair of pliers to turn the chuck, but be careful not to damage it. Once the chuck is unlocked, you can insert or remove the drill bit as needed, then re-lock the chuck by turning it clockwise with the chuck key. With a little practice, unlocking and locking the chuck will become second nature, and you’ll be on your way to completing your DIY projects like a pro!
Chuck Definition and Importance
A chuck is a specialized device used to hold a workpiece in place on a machine tool, such as a lathe or drill press. Without a chuck, the workpiece would not be able to rotate, making it impossible to cut, drill, or shape it. A chuck can grip a workpiece tightly and securely, allowing for precision drilling or cutting operations.
But why is it locked? Well, if the chuck were not locked, the workpiece would slide out of place, causing potential damage to the tool or the workpiece itself. The locking mechanism ensures that the chuck is securely fastened to the machine, providing stability and accuracy during machining operations. So, it’s crucial to have a chuck and to lock it in place properly for any machining operation, whether it’s a small project or part of a larger operation.
Using a well-maintained chuck with the appropriate locking mechanism will increase the accuracy, efficiency, and safety of your work.
Reasons for Locking the Chuck
A chuck refers to the gripping device that holds and rotates a workpiece while it’s being machined. Many different operations in metalworking and woodworking industries require chucks to hold the materials firmly in place to prevent them from slipping during the machining process. So, ensuring the chuck is locked and secured is essential to keep the workpiece safe and effective.
A locked chuck provides the necessary grip force to reduce the risk of accidents and ensure precision and accuracy during the machining process. It is quite similar to holding a steering wheel while driving – if the wheel isn’t gripped correctly, the car is likely to shake and go off course, whereas, if the wheel is held firmly in place, it’s possible to maintain control, and the vehicle will go in the right direction. Similarly, a locked chuck means a stable and safe machining process, while an unlocked chuck can cause the workpiece to spin out of control and cause significant damages.
Step-by-Step Guide to Unlock the Chuck
If you’ve ever struggled with a stuck or jammed chuck on your cordless drill, then you know how frustrating it can be. Fear not, unlocking the chuck on your cordless drill is a relatively simple process. The first step is to make sure your drill is off and unplugged.
Then, using pliers or a chuck key, insert it into the chuck and turn it clockwise to tighten it. Next, hold the drill firmly and using your other hand, turn the chuck counterclockwise to loosen it. If the chuck is still too tight, you can use a rubber mallet to gently tap the pliers or chuck key counterclockwise to loosen it.
Once the chuck is loose, you can easily remove the drill bit and replace it with a new one. So next time you’re struggling with a jammed chuck, don’t panic, just follow these simple steps and get back to work in no time.
Step 1: Determine the Type of Chuck
If you’re looking to unlock a chuck, the first step is to determine the type of chuck you have. There are several types of chucks, including keyless chucks, keyed chucks, and SDS chucks, among others. Once you know the type of chuck you have, there are a few general steps you can take to unlock it.
First, make sure the chuck is in the right position. If it’s too tight, it may be difficult to unlock properly. Next, you’ll want to loosen the chuck as much as possible.
This may involve using a wrench to turn the chuck counterclockwise, or simply pulling it outwards. Finally, if all else fails, you may need to consult the manufacturer’s instructions for your specific tool or even seek assistance from a professional. Overall, unlocking your chuck can be a little tricky, but with a bit of patience and determination, you should be able to get it open smoothly and safely.
You May Also Love:
Step 2: Position the Drill Correctly
Now that you’ve selected the right drill bit, it’s essential to position the drill correctly before unlocking the chuck. Start by turning the drill off and ensuring it’s unplugged or the battery is removed. Next, hold the drill with one hand and position the bit on the desired surface with the other hand.
Make sure the drill is perpendicular to the surface to avoid drilling at an angle. Before drilling, double-check that the chuck is tightly closed around the bit and check the depth gauge to make sure you’re drilling at the correct depth. Once you’ve confirmed everything is set up correctly, you can unlock the chuck and begin drilling.
Remember to keep a steady grip on the drill and apply firm, consistent pressure to ensure a clean, accurate hole. With these simple steps, you can confidently position your drill and unlock the chuck to get the job done right.
Step 3: Rotate the Chuck Counter-Clockwise
Now that you have removed the drill bit and released the torque, it’s time to rotate the chuck counter-clockwise. This is a critical step in unlocking the chuck. You need to do this slowly and steadily to make sure that the chuck is completely unlocked.
If you rush this step, you might end up breaking the chuck, which is a costly mistake to make. Therefore, take your time and rotate the chuck little by little. You will feel some resistance at first, but don’t worry, it’s normal.
Keep rotating the chuck until it’s completely unlocked, and you can remove it from the drill. As a reminder, make sure the drill is switched off and unplugged before attempting to unlock the chuck. This will ensure your safety and prevent any accidents from happening.
By following these steps, you should be able to unlock your drill’s chuck safely and without any problems.
Step 4: Release the Chuck
Unlock Chuck Now that you’ve loosened the grip of your chuck, it’s time to release it. The next step is crucial in preventing any damage to your equipment or potential harm to yourself. Begin by switching off your power tool, ensuring that the chuck is at a complete stop before proceeding.
Once confirmed, grasp the chuck with one hand while holding the power tool’s handle with the other to stabilize it. Rotate the chuck counterclockwise with a firm grip to open it up, revealing the drill bit or any other accessory that was attached. Be sure to hold the drill bit firmly as the chuck releases to prevent it from falling out and causing any damage.
By following these simple steps, you can safely and effectively unlock your chuck with ease, allowing you to transition onto your next task swiftly.
Tips and Precautions When Unlocking the Chuck
Unlocking the chuck of a cordless drill can be a tricky task, especially for beginners. However, with some tips and precautions, you can quickly and safely get the job done. First, before unlocking the chuck, make sure the drill is switched off and the battery is removed to avoid any accidents.
Then, firmly grip the chuck with one hand, press the trigger with the other hand, and slowly turn the chuck to release the drill bit. If the chuck is stuck, try tapping it gently with a rubber mallet or a piece of wood to free it up. It’s also crucial to wear protective gloves and eye goggles to prevent any injuries while unlocking the chuck.
Lastly, if you encounter any difficulty or feel unsure about the process, seek assistance from a professional or contact the manufacturer for guidance. By following these tips and precautions, you can safely unlock the chuck on your cordless drill and continue with your DIY projects.
Tip 1: Use the Correct Bit and Chuck Size
When it comes to unlocking the chuck on your power drill, it’s important to use the right bit and chuck size to prevent damage to your equipment. The chuck size determines the maximum size of the drill bit that can be used, so make sure to check your drill’s chuck size before inserting a bit. Additionally, using the correct bit is crucial for unlocking the chuck.
A worn or damaged bit can slip and cause damage to the chuck and the drill. Double-check your bit’s condition before attempting to unlock the chuck. By taking these precautions, you can easily and safely unlock the chuck on your power drill without causing any damage.
Tip 2: Keep Your Hands and Workplace Safe
When it comes to unlocking the chuck, safety should be your top priority. Always ensure that your hands are a safe distance away from the chuck when it is opening or closing. Wearing protective gloves is also a wise choice to prevent any potential injuries.
In addition to keeping your hands safe, it’s essential to make sure your work area is clean and free of any debris or obstructions that may cause you to slip or lose your balance. Taking a moment to inspect the chuck and the surrounding area before unlocking it can prevent accidents from occurring. Remember, by taking a few extra precautions, you can help ensure that you stay safe and avoid any potential accidents or injuries while unlocking the chuck.
Tip 3: Regularly Clean and Maintain Your Drill
Regularly cleaning and maintaining your drill can greatly prolong its lifespan and keep it functioning at its best. However, when it comes to unlocking the chuck, it’s important to take certain precautions to prevent any mishaps. First and foremost, always make sure that the drill is turned off and unplugged before attempting to unlock the chuck.
Next, use a chuck key that is specifically designed for your drill to avoid any compatibility issues. It’s also important to grip the chuck and key securely when unlocking it to prevent any slippage or injuries. Finally, avoid using excessive force when unlocking the chuck as this can damage the mechanism and lead to costly repairs.
By following these simple tips and precautions, you can safely and effectively unlock your drill’s chuck and keep it functioning optimally for years to come.
Conclusion
Congratulations! You have officially unlocked the Chuck Norris of cordless drills. Just like the legendary martial artist, this drill is a force to be reckoned with. What once seemed like an impossible task has now been mastered, and you can confidently switch out bits like a pro.
So go forth and conquer your DIY projects with ease, knowing that you’ve successfully unlocked the power of Chuck.”
FAQs
What is a chuck on a cordless drill and why is it important?
A chuck is the part of the drill that holds the drill bit securely in place. It is important because it allows the user to easily change out bits for different drilling tasks.
How do I know if my chuck is locked and needs to be unlocked?
If you are unable to insert a new drill bit or if the current bit is stuck and cannot be removed, it is likely that the chuck is locked and needs to be unlocked.
What is the process for unlocking a chuck on a cordless drill?
First, make sure the drill is turned off and unplugged. Then, locate the lock button or switch and hold it down while turning the chuck counterclockwise. This should release the chuck and allow you to insert or remove a drill bit.
What should I do if the chuck on my cordless drill is still stuck after attempting to unlock it?
If the chuck is still stuck, try lightly tapping it with a hammer while holding down the lock button. If this does not work, it may be necessary to take the drill to a professional for repair.
Can I use pliers or another tool to unlock the chuck on my cordless drill?
It is not recommended to use pliers or another tool to try and manually unlock the chuck. This can damage the chuck and lead to further problems with the drill.
How often should I check and unlock the chuck on my cordless drill?
It is recommended to check and unlock the chuck after each use to ensure it is functioning properly. If the drill is used frequently, it may be necessary to check and unlock the chuck more often.
What are some tips for maintaining the chuck on my cordless drill?
To maintain the chuck on your cordless drill, make sure to keep it clean and free of debris. Also, avoid tightening the chuck too much as this can cause it to become stuck. Finally, store the drill in a dry, cool place to prevent rust and other damage to the chuck.

