How to Use Black and Decker 20V Cordless Drill for Effortless DIY Projects
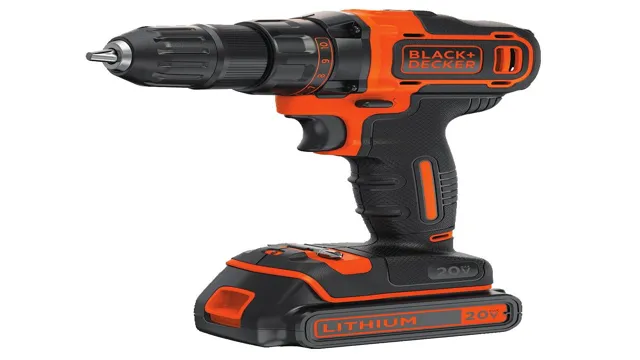
Have you recently purchased a Black and Decker 20V cordless drill but don’t know where to begin? Don’t worry, you’re not alone! Using a power tool for the first time can be intimidating, but with a little bit of guidance, you’ll be drilling holes and driving screws like a pro in no time. The Black and Decker 20V cordless drill is a versatile tool that can be used for a variety of DIY projects around the home. Whether you’re hanging shelves, assembling furniture, or building a treehouse in the backyard, this drill is the perfect tool for the job.
In this blog post, we’ll guide you through the basics of using your Black and Decker 20V cordless drill, including how to charge the battery, how to adjust the speed and torque settings, and how to change the drill bit. We’ll also offer some tips and tricks to help you get the most out of your drill and avoid common pitfalls. So grab your drill, charge up the battery, and let’s get started! By the end of this post, you’ll be a confident and capable user of your Black and Decker 20V cordless drill.
Unboxing and Features
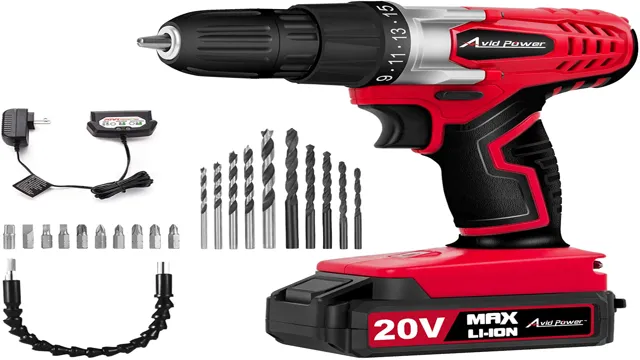
If you’ve just received your Black and Decker 20V cordless drill, you might be wondering how to get started. First things first, unboxing it is simple and straightforward. Inside the box, you’ll find the drill itself, a battery, and a charger.
Simply insert the battery into the bottom of the drill, and plug the charger into an outlet to charge the battery. Once the battery is fully charged, it’s time to put the drill to use. The Black and Decker 20V cordless drill features a powerful motor that can handle a variety of drilling and driving tasks, making it perfect for DIY projects around the house.
It also has an adjustable torque setting, which allows you to adjust the amount of force applied when drilling or driving screws. Additionally, the drill has a keyless chuck, which makes it easy to change out drill bits quickly and easily. Overall, the Black and Decker 20V cordless drill is a versatile and reliable tool that can make any DIY project a breeze.
With a little practice, you’ll be using it like a pro in no time.
What’s in the box
The excitement of receiving a new device or gadget is always accompanied by the anticipation of seeing what’s in the box. When it comes to unboxing a new piece of technology, the experience can be just as important as the item itself. So, what can you expect when you unbox your device? Well, usually, the box will contain the device itself, along with any necessary cords or accessories required to get started.
In some cases, there may also be a user manual or installation guide included. When it comes to features, it all depends on the type of device you’ve purchased. For example, if you’re unboxing a smartphone, you can expect features like a camera, touch screen, and various apps.
On the other hand, if you’re unboxing a smart speaker, you may find features such as voice recognition and integration with other smart home devices. Whatever you’re unboxing, taking the time to inspect the contents of the box and familiarize yourself with the device’s features can be extremely exciting and rewarding.
Understanding the features
If you’ve just purchased a new gadget, the first thing you’ll want to do is unbox it and discover all its features. Unboxing can be an exciting experience, and it gives you an opportunity to familiarize yourself with your new device. When unboxing a new electronic gadget, one of the things you want to do is inspect it carefully.
Check to see if there are any signs of damage, and make sure everything is in order. Once you’ve assessed your gadget, you can go ahead and explore its features. Most gadgets come with a user manual, which is an excellent resource for discovering all the features of your device.
You can also search online to find videos and tutorials that will guide you on how to use the device. Some gadgets may have unique features that you may not be familiar with, so it’s crucial to take the time to learn how to use them. By understanding all the features of your gadget, you’ll be able to optimize its performance and get the most out of it.
Charging the battery
When it comes to the battery of your device, it’s important to make sure it’s fully charged before using it. That’s why the unboxing of your device is an essential part of the setup process. In the box, you’ll find the charging cable and adapter needed to charge your battery.
Simply plug the charging cable into the adapter, and then connect it to an outlet. With its fast charging capabilities, your battery will be fully charged in no time. While other devices may only offer a few hours of battery life, the high-quality battery of your device can last all day.
This means you can use it for work or play without worrying about low battery levels. So, don’t forget to charge your battery before using your new device for the best experience possible.
You May Also Love:
Tips for Using Your Drill
If you’re wondering how to use a Black and Decker 20V cordless drill, don’t worry, you’re not alone. There are a few tips and tricks to maximize the efficiency and effectiveness of your drill. First, make sure the battery is fully charged and securely attached to the drill.
Next, choose the appropriate drill bit for your project and install it securely into the chuck. When drilling, apply steady and even pressure and avoid tilting the drill to the side. If you’re drilling through tougher materials like concrete or metal, consider using a slower speed setting and more force behind your drill.
Above all, always wear appropriate safety gear like eye protection and gloves, and keep your work area clean and clutter-free. With a little practice and know-how, using a Black and Decker 20V cordless drill can be a breeze.
Selecting the right drill bit
When it comes to using a drill, choosing the right bit is key to achieving a successful outcome. There are a few things to consider when selecting your drill bit. First, consider the material you will be drilling into.
Different materials require different bit types such as masonry, metal, or wood. For example, masonry bits have a specialized tip that can penetrate hard surfaces like concrete or brick. Secondly, make sure the size of your drill bit is appropriate for the type of hole you need.
A smaller bit is best for small holes, while a larger bit is ideal for drilling bigger or deeper holes. Lastly, think about the type of drill you are using and ensure the bit you select is compatible. There are many types of drill bits available, so take the time to find the one that is right for your project.
By following these tips, you can ensure that your drill bit selection is appropriate and will lead to a job well done.
Setting the clutch to prevent stripping
Drills are incredibly versatile tools that can be used in a variety of applications, from DIY projects to heavy-duty construction work. However, to get the most out of your drill, it’s important to know how to use it properly. A common issue that many people encounter when using a drill is stripping the screw or damaging the material they are working with.
To prevent this from happening, it’s important to set the clutch on your drill to the appropriate level. The clutch controls the torque of the drill, which is the twisting force applied to the screw or material. By setting the clutch to the proper level, you can prevent the drill from applying too much torque and damaging the material.
It’s important to adjust the clutch according to the material you are working with and the size of the screw or drill bit. By following these tips, you can prevent damage to your drill, your materials, and most importantly, yourself. So, if you want to get the most out of your drill, be sure to set the clutch accordingly!
Using the drill in different material types
When it comes to using your drill, the material you’re drilling into can make a big difference in the outcomes you achieve. For example, drilling into wood is very different from drilling into metal. When working with wood, you don’t need to apply much pressure with the drill.
In fact, you should let the drill’s weight do most of the work. Metal, on the other hand, requires a bit more pressure to get the job done. Be sure to use a sharp drill bit and lubricant to prevent overheating and breakage.
Drilling into concrete or masonry requires a special masonry drill bit, and you’ll need to use a hammer drill setting on your power tool. Always wear proper safety gear and take your time to ensure you get the best possible results. With a little practice and the right technique, you can become a pro at drilling into any material.
Maintenance and Storage
If you want to know how to use Black and Decker 20V cordless drill, there are a few things you should keep in mind. First of all, it’s important to read the manual and understand how the drill works before you even start using it. Make sure you know how to insert and remove the battery, adjust the torque settings, and change out the drill bits.
Once you’ve got the basics down, you can start using the drill for a variety of tasks around the house, from putting up shelves to drilling holes in wood or metal. It’s also important to take good care of your drill so that it lasts as long as possible. This means storing it in a dry, cool place and keeping it away from moisture and dust.
You should also regularly clean and lubricate the drill to keep it running smoothly. With a little bit of maintenance and the right know-how, your Black and Decker 20V cordless drill can be a useful and reliable tool for years to come.
Cleaning the drill
When it comes to maintaining your drill, cleaning it regularly is essential. Cleaning your drill not only keeps it in good working condition but also helps prolong its lifespan. To begin cleaning your drill, you will first need to unplug it and remove any accessories.
Next, use a soft cloth or brush to wipe away any dust or debris from the exterior of the drill. For the chuck and spindle, use a brush to remove any dirt or debris that may have accumulated. When cleaning the drill bits, use a cleaning solution to remove any rust or debris.
After cleaning, dry all parts of the drill with a clean cloth and store it in a dry, cool area to prevent any damage. By taking the time to properly clean and store your drill, you can ensure that it will continue to work efficiently and reliably for years to come.
Storing the drill and battery
Storing your drill and battery properly is crucial for their longevity and effectiveness. When not in use, it is essential to store them in a cool, dry place to prevent any damage. The battery should be removed from the drill and stored separately to avoid any discharge or damage to both the battery and the drill.
Keeping the battery charged when not in use can also help maintain its capacity and performance. It is also important to make sure the drill is clean and free of any debris or dust before storing it. This will prevent any malfunction or damage to the drill’s motor or other parts.
By properly maintaining and storing your drill and battery, you can ensure they continue to work efficiently and last for years to come.
Final Thoughts and Recommendations
Now that you have learned the basics of using the Black and Decker 20V cordless drill, you are ready to take on your DIY projects with confidence. Remember to always wear proper safety gear such as eye protection and gloves when using the drill. Before starting, make sure to fully charge the battery and choose the appropriate drill bit for your task.
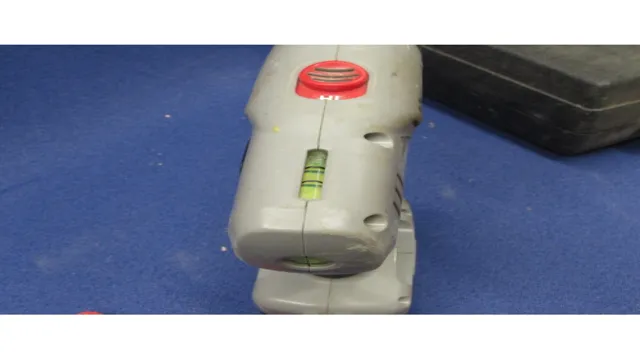
Take your time and start with a slow speed to avoid damaging your project or the drill itself. It’s also important to keep the drill level and perpendicular to the surface you are drilling into for accuracy. When you are finished, remove the battery and store it separately in a cool, dry place.
By following these simple tips, you can enjoy the versatility and convenience of the Black and Decker 20V cordless drill for years to come.
Conclusion
In conclusion, using the Black and Decker 20v cordless drill is a breeze! Simply insert the battery, adjust the torque settings to your desired level, and let the drill work its magic. Whether you’re hanging shelves or putting together furniture, this versatile tool is a must-have in any DIY enthusiast’s arsenal. So go ahead and drill away, and remember, with the Black and Decker 20v cordless drill in hand, the only limit is your imagination!”
FAQs
How do I charge my Black and Decker 20V cordless drill?
To charge your drill, insert the battery pack into the charger and plug in the charger. The charging time is typically 5-6 hours.
Can I use the Black and Decker 20V cordless drill on concrete?
Yes, the drill can be used on concrete with the appropriate drill bit. We recommend using a masonry bit for best results.
How do I change the drill bit on my Black and Decker 20V cordless drill?
To change the drill bit, first make sure the drill is turned off and the battery is removed. Then, loosen the chuck by rotating it counterclockwise, insert the new bit, and tighten the chuck by rotating it clockwise.
What is the maximum drilling capacity of the Black and Decker 20V cordless drill?
The maximum drilling capacity of this drill is 1 inch in wood and 3/8 inch in steel.
How long does the battery last on a single charge of the Black and Decker 20V cordless drill?
The battery life will vary based on usage, but on average, the battery will provide up to 30 minutes of continuous use.
Can the Black and Decker 20V cordless drill be used for driving screws?
Yes, the drill can be used for driving screws with the appropriate screwdriver bit.
Is the Black and Decker 20V cordless drill compatible with other 20V Black and Decker tools?
Yes, the battery packs used in the 20V cordless drill are interchangeable with other 20V Black and Decker tools, allowing you to share batteries and chargers between devices.

