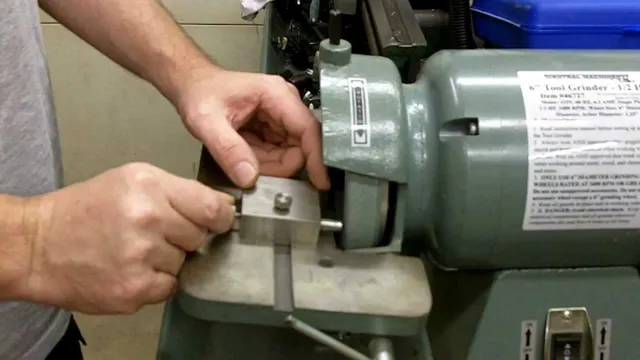
How to Change Grinding Wheel on Dewalt Bench Grinder: A Step-by-Step Guide
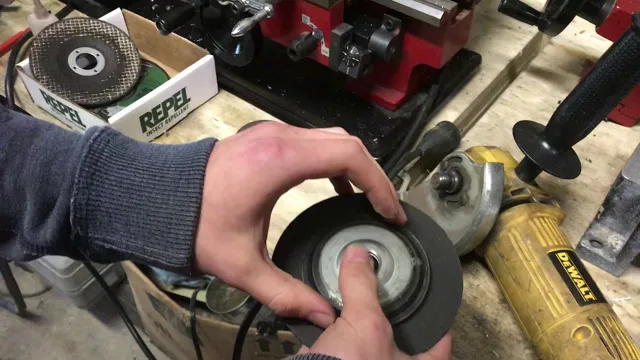
If you’re someone who has never changed a grinding wheel before, it can seem like a daunting task. However, changing the grinding wheel on your Dewalt bench grinder is actually a simple process. Whether you need to replace a damaged wheel or switch to a different grit, this blog post will show you how to change the grinding wheel on your Dewalt bench grinder in just a few easy steps.
So, grab your safety gear and let’s get started!
Preparation
Changing the grinding wheel on your Dewalt bench grinder may seem daunting at first, but with the right preparation, it can be a simple task. Firstly, you should ensure that the grinder is turned off and unplugged before attempting to change the wheel. Next, locate the spindle lock button on the side of the grinder and press it down to lock the spindle in place.
This will prevent the wheel from moving and allow you to safely remove it. It’s also a good idea to have your new wheel at the ready, ensuring that it matches the size and specifications of your grinder. With these steps taken care of, you’re now ready to proceed.
Turn Off Power to Grinder
Before attempting any maintenance or cleaning on your grinder, it’s crucial to first turn off the power. This step may seem obvious, but it’s easy to overlook when you’re eager to get the job done quickly. Accidentally leaving the power on can be dangerous and lead to serious injury, so it’s essential to take the time to verify that the grinder is completely disconnected from its power source.
This small but essential step can save you from a lot of potential harm and ensure that you’re able to complete the job safely and effectively. Remember, safety should always be the top priority when working with power tools.
Inspect Grinding Wheel
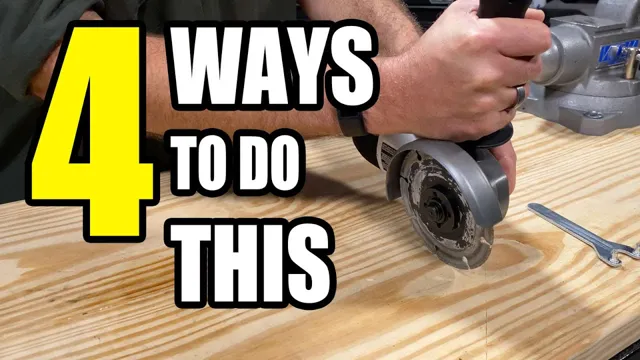
Inspect Grinding Wheel Before using a grinding wheel, it’s important to inspect it for any damage or wear. Inspecting the grinding wheel before use can help prevent accidents and ensure that the wheel operates effectively. To begin, check the wheel for any visible cracks, chips, or nicks.
If the grinding wheel has any of these imperfections, it should not be used. When inspecting the wheel, be sure to wear protective gear, such as gloves and eye protection. Additionally, check the spindle, arbor, and flanges to make sure they are clean and the flanges are not damaged or bent.
A damaged flange can cause the grinding wheel to fly off during use, which can cause serious injury. Once the grinding wheel has been inspected and deemed safe for use, it’s essential to follow the manufacturer’s guidelines for proper installation and use. Using a damaged or improperly installed grinding wheel can be dangerous and cause injury to the operator.
By taking the time to inspect the grinding wheel before use, operators can ensure their safety and the effectiveness of the grinding wheel.
Gather Tools
Preparing for any task is crucial, and when it comes to tackling a new project, gathering all the necessary tools beforehand can save you lots of time and headaches later on. Whether you’re planning a DIY home renovation, a gardening project, or simply assembling new furniture, having all the right tools at your disposal makes things go much smoother. Start by taking inventory of what you already own, then make a list of any missing tools you need to buy or borrow.
From hammers to screwdrivers, drills, saws, and measuring tape, having the right tools for the job can help you achieve professional results. Remember, the key to a successful project is being prepared, and having the right tools at your fingertips can make all the difference. So, before you embark on any project, take the time to plan and gather all the necessary tools, ensuring that you have everything needed to get the job done right.
Removing the Old Wheel
If you’re looking to change the grinding wheel on your DeWalt bench grinder, the first step is removing the old wheel. Ensure that the grinder is unplugged before beginning the process. Locate the shield covering the wheel and remove it by unscrewing the fasteners or carefully popping it off.
Use a wrench to loosen the nut holding the wheel in place and carefully remove it from the grinder. Pay attention to how the wheel was installed so that you can easily install the new one. Inspect the wheel arbor for any damage or residue and clean it off if necessary.
Once the arbor is clean and clear, you can install the new wheel. Properly securing the wheel with the nut is essential, so use a wrench to tighten it as snugly as possible. With the new wheel in place, you can now replace the shield and plug in your grinder, ready for your next project.
Overall, changing the grinding wheel on your DeWalt bench grinder is a straightforward process, but be sure to follow precautions and stick to the right steps to avoid accidents.
Loosen and Remove the Nut
Removing the old wheel is not as complicated as it may seem, but it’s important to ensure you’re doing it correctly to prevent any accidents or damage. The first step is to loosen and remove the nut that is holding the wheel in place. This nut can typically be found in the center of the wheel and is often secured tightly.
To remove it, you’ll need to use a wrench or socket wrench in the appropriate size for the nut. Apply firm pressure in a counterclockwise direction to loosen the nut, but be careful not to strip the threads or damage the nut itself. Once loosened, you can use your hands to twist the nut off and remove it altogether.
With the nut removed, you can gently lift the wheel away from the vehicle, taking care not to damage any other parts in the process. By following these steps, you can remove the old wheel safely and securely, making way for a new one and ensuring your vehicle is running at its best.
Unscrew and Remove the Flange
Removing the old wheel from your bike requires a few simple steps, and the first is to unscrew and remove the flange. The flange is the round metal piece that holds the wheel in place, and it’s typically found on the drive side of the bike. Before removing the flange, it’s important to ensure that the bike is stable and won’t tip over, as this could cause damage to the wheel or other components.
Once you’ve secured the bike, locate the nut or quick-release lever that attaches the flange to the bike frame. Use a wrench or your hands to loosen the nut or release the lever, taking care not to damage the threads or other parts of the bike. Once the nut or lever is loose, you should be able to slide the flange out of its slot and carefully remove the wheel from the frame.
With the flange removed, you can then move on to the next step in the process of replacing or repairing your bike’s wheels. Remember to take your time and work carefully to avoid damaging any of the bike’s components.
Remove the Grinding Wheel
When it comes to changing a grinding wheel, the first step is to remove the old wheel. While this may seem straightforward, it is important to take the necessary precautions to avoid injury. Begin by disconnecting the power source and removing any debris or particles that may be on the wheel.
Then, use a wrench to loosen the nuts or bolts that secure the wheel to the spindle. Once the nuts or bolts are loose, carefully slide the old wheel off the spindle and set it aside. It is important to inspect the spindle and mounting hardware for any damage or wear, as these components can affect the performance of the new wheel.
With the old wheel removed, you can now prepare to install the new one. By following these steps and taking the necessary safety measures, you can safely and efficiently remove an old grinding wheel and get ready for the next step in your project.
Installing the New Wheel
Changing the grinding wheel on your Dewalt bench grinder may seem daunting, but it’s a fairly simple process that you can do in just a few steps. First, turn off the power to the grinder and unplug it from the electrical outlet. Once that’s done, loosen the wheel retainer nut with a wrench and remove the old wheel.
Before installing the new wheel, make sure it’s the correct size and type for your grinder. Next, place the new wheel onto the spindle and tighten the retainer nut by hand. Finally, use the wrench to securely tighten the nut, being careful not to over-tighten it.
Once you’ve completed these steps, your Dewalt bench grinder is ready to use with its new wheel. Remember to wear the necessary protective gear such as eye protection and gloves while changing the wheel, as well as when using the grinder itself to avoid injury. By following these simple steps, you can easily change the grinding wheel on your Dewalt bench grinder and keep it in working order for years to come.
Check Arrows on the Wheel
Installing a new wheel can seem like a daunting task, but it doesn’t necessarily have to be. One thing to watch out for when putting the new wheel in place is ensuring that the check arrows on the wheel match up with those on the vehicle. This is important because it ensures that the wheel is mounted correctly and will function properly.
Without this step, the wheel could become unbalanced and potentially cause damage down the line. So before you tighten everything up, take a few moments to double-check the arrows, making sure they’re properly aligned. It may seem like a small detail, but it could save you from bigger issues later on.
Position the Flange
To start installing the new wheel, the first step is to position the flange correctly. The flange is the circular piece that attaches the wheel to the hub. To do this, you need to align the bolt holes on the flange with the ones on the hub.
Make sure that the flange is seated properly and evenly by moving it around until it is snug. Once you have positioned the flange correctly, start tightening the bolts using a torque wrench in a criss-cross pattern to evenly distribute the pressure. It is important to avoid over-tightening the bolts as this can cause damage to the wheel or the brake rotor.
With the flange in place, you are now ready to proceed with the rest of the installation process. Remember, accuracy and patience are key when handling the flange as it plays a significant role in holding the wheel in place while driving.
Install the Grinding Wheel
If you’re installing a new grinding wheel, the first step is to ensure that the wheel you’ve purchased is the correct size and type for your grinder. Once you’ve confirmed this, it’s time to get started on the installation process. First, make sure that your grinder is unplugged and turned off.
Then, remove the protective cover that sits over your grinder’s spindle. You’ll need to use a wrench to loosen and remove the spindle nut. Once this is done, you can remove the old wheel and replace it with the new one.
Make sure that the new wheel is properly aligned and snugly in place before tightening the spindle nut. Be careful not to overtighten, as this can cause damage to the wheel or spindle. Finally, replace the protective cover and plug in your grinder to ensure that everything is functioning properly.
Congratulations, you’ve successfully installed your new grinding wheel!
Tighten the Nut
After putting on the new wheel, it’s essential to tighten the nut correctly to ensure stability and safety on the road. To do this, use a wrench to turn the nut clockwise until it is snug but not overly tight. This step is crucial because if the nut is too loose, the wheel can wobble and cause an accident, and if it’s too tight, it can damage the bearings or spindle.
A good rule of thumb is to tighten the nut to the torque specifications provided in the owner’s manual or by the manufacturer. Remember to check the tightness occasionally and adjust as necessary, especially after the first ride. A loose nut is a common cause of wheel problems, so don’t take any chances, and make sure it’s secured before hitting the road.
Final Steps
If you’re looking to change the grinding wheel on your DeWalt bench grinder, it’s important to follow a few final steps to ensure that the installation is safe and effective. Before starting, turn off the grinder and unplug it from the electrical outlet. Next, loosen the nut that holds the old wheel in place and remove it carefully from the spindle.
Make sure to inspect the spindle for any damage or debris that could affect the new wheel’s installation. Once the spindle is clean and undamaged, you can replace the old wheel with the new one and tighten the nut securely. Finally, check the manufacturer’s guidelines to ensure that you’ve installed the new wheel correctly and that it’s compatible with your grinder.
With these final steps, you can change your grinding wheel with confidence and get back to work in no time. So, go ahead and give it a try!
Replace the Wheel Cover
Now that you’ve successfully removed the damaged wheel cover, it’s time to install the new one. First, ensure that the replacement cover matches the size and style of the old one. Clean the area where the new cover will sit to get rid of any dirt or debris.
Align the cover with the wheel and gently push it into place. When installing the new cover, ensure that all the clips snap into place and the cover is securely fitted. If you encounter any difficulties, don’t hesitate to refer to the vehicle manual.
Once you’ve replaced the cover, step back and admire your handiwork. Your car looks good as new!
Turn on Power to Grinder
When it comes to using a grinder, the final step is to turn on the power. Before flipping the switch, make sure the grinder is securely in place and all safety measures have been taken, such as wearing eye protection and keeping loose clothing away from the machine. After confirming everything is safe and in order, turn on the power to the grinder and listen for any unusual sounds or vibrations.
Once everything sounds normal, you’re ready to start grinding! Keep in mind that using a grinder can kick up quite a bit of dust, so it’s important to work in a well-ventilated area to avoid breathing in harmful particles. Overall, using a grinder can be a great way to sharpen tools and smooth out rough surfaces, but it’s important to take all necessary precautions and use the machine carefully.
Test the New Wheel
The final step in testing the new wheel is to take it out on the road and give it a real-world tryout. This will be a crucial test to see if the wheel can handle different terrains and how well it performs compared to other wheels on the market. It’s important to take note of any friction or lack of grip on wet or slippery surfaces as well.
By testing the wheel in various conditions, we can ensure that it’s reliable and efficient in all types of situations. Remember, the key to success is not just to have a new and innovative product, but to make sure it can stand up to the test of the real world. With this important step, we hope to have a product that revolutionizes the market and gives our customers the advantage they’ve been looking for.
So, let’s hit the road and see what this new wheel can do!
Conclusion
In conclusion, changing the grinding wheel on your Dewalt bench grinder is as easy as ordering a pizza online. Just follow the simple steps and voila! You’ll have a sharp new wheel in no time, ready to tackle any project that comes your way. So don’t let a dull grinding wheel slow you down, switch it out and get back to being the boss of your workshop.
“
FAQs
What are the safety precautions to be taken before changing the grinding wheel on a Dewalt bench grinder?
Before changing the grinding wheel on a Dewalt bench grinder, make sure the machine is unplugged, wear protective gear such as gloves and goggles, and make sure the new wheel matches the specifications of the machine.
How often should the grinding wheel on a Dewalt bench grinder be changed?
The frequency of changing the grinding wheel on a Dewalt bench grinder depends on the frequency of its use and the type of material being ground. A general rule of thumb is to change it after 6 months of regular use or when it is worn down to half its original size.
How do I remove the old grinding wheel on a Dewalt bench grinder?
To remove the old grinding wheel on a Dewalt bench grinder, use a wrench to loosen the nut holding it in place, then remove the nut and the flange. Gently lift the old grinding wheel out of the machine.
How do I install a new grinding wheel on a Dewalt bench grinder?
To install a new grinding wheel on a Dewalt bench grinder, place the wheel over the spindle and slide the flange back into place. Tighten the nut by hand, then use a wrench to securely tighten it.
What is the recommended angle for the grinding wheel on a Dewalt bench grinder?
The recommended angle for the grinding wheel on a Dewalt bench grinder is 30-45 degrees. This helps to prevent the wheel from overheating and damaging the material being ground.
What type of grinding wheel should I use for a Dewalt bench grinder?
The type of grinding wheel to use for a Dewalt bench grinder depends on the material being ground. For example, a silicon carbide wheel is suitable for grinding cemented carbides, while an aluminum oxide wheel is ideal for grinding high-speed steel.
How do I balance the grinding wheel on a Dewalt bench grinder?
To balance the grinding wheel on a Dewalt bench grinder, use a balancing tool or a dressable grinding wheel to remove any material that might be causing an imbalance. Repeat the process until the wheel is balanced and runs smoothly.

