How to Screw into Concrete without a Hammer Drill: A Step-by-Step Guide.

Are you facing a DIY project that involves screwing into concrete, but don’t have a hammer drill? Don’t worry; you don’t necessarily need one.
While a hammer drill is the recommended tool for drilling into concrete, there are alternative methods to get the job done. Concrete is a tough and durable material that requires more power and force to screw into than wood or drywall.
That is why a hammer drill is typically the go-to option, but not everyone has one on hand. Lack of access to a hammer drill doesn’t need to hinder your project progress. In this blog, we will explore alternative tools and techniques to screw into concrete without a hammer drill.
With a little creativity and problem-solving, the project can still be successfully completed. So let’s start exploring and see what tools and tricks can help us get the job done!
Preparation as the First Step
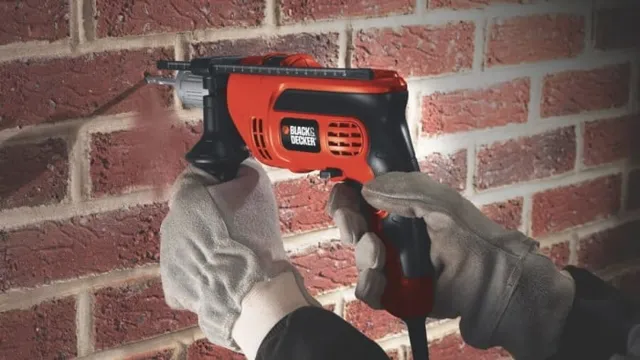
If you don’t have a hammer drill and need to screw into concrete, don’t worry, there are other options you can try. First, make sure you have the right tools and supplies. You’ll need a power drill, hammer, drill bits specifically designed for concrete, screws, and anchors.
Before drilling, mark the spot where you want to insert the screws. Next, use a hammer and nail to create a small indentation where you’ll be drilling. This will help prevent the drill from slipping, making the process easier and safer.
Once you start drilling, remember to apply even pressure and let the drill bit do the work. Don’t force it, as this can damage the drill, the bit, or the surface you’re working on. Once you’ve drilled the holes, insert your anchors and screws, making sure they’re tightened securely.
With a little preparation and care, you can screw into concrete even without a hammer drill.
Inspect the Concrete Surface
When you are preparing to work with concrete, it is crucial to inspect the surface to ensure a successful outcome. The first step in the preparation process is to remove any old concrete that may be damaged or in disrepair. This will allow for a clean canvas to work with and create a strong foundation.
After removing the old concrete, it is important to inspect the surface thoroughly. Look for any cracks or uneven areas that will need to be filled and smoothed out. These imperfections will cause problems later on if not addressed before pouring the new concrete.
In addition, make sure that the surface is free of any debris or dirt that may cause the new concrete to bond poorly. Once the inspection is complete, the surface must be cleaned and degreased before proceeding to the next step in the preparation process.
By taking the time to properly inspect and prepare the concrete surface, you can ensure that your project will go smoothly and that the finished product will be strong and durable for years to come.

Choose the Right Drill Bit
When it comes to drilling, preparation is key to choosing the right drill bit. Before you start your project, consider what type of material you’ll be drilling into and the size of hole you need. For softer materials like wood or plastic, a standard twist bit will do the job.
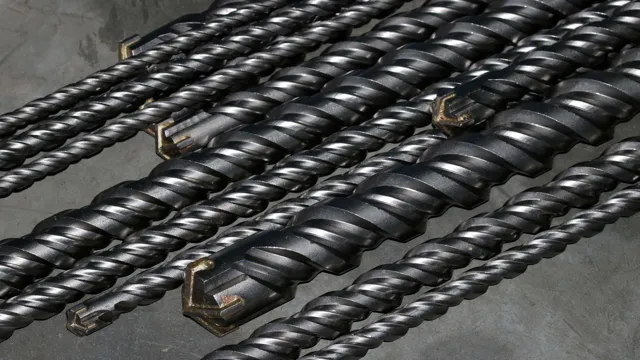
However, for harder materials like metal or concrete, you’ll need a specialized drill bit that can handle the increased resistance. It’s also important to select the right size bit for your project, as using a bit that’s too small can result in a weak or unstable hole.
Ultimately, taking the time to properly prepare and choose the right drill bit will ensure that your project is a success and that your holes are clean and precise.
Mark the Hole Location
Preparation is key when it comes to successfully installing anything, and marking the hole location is a vital step in the process. To start, gather the necessary tools and materials such as a tape measure, pencil, and drill. Once you have your supplies ready, find the area where the hole needs to be drilled and measure the location precisely.
Using your pencil, mark the spot with a small X to ensure accuracy and remind you where to drill. It’s important to take your time during this step to avoid any mistakes or miscalculations. Remember, a small error in marking the hole location can lead to a large mistake during the installation process.
So, double-check your measurements and marks before proceeding to the next step. Following this simple preparation step will give you a greater chance of success when installing your desired object.
Prepare the Drill Bit
Before drilling a hole, it’s important to prepare your drill bit properly to ensure a smooth and easy drilling experience. First, make sure to select the appropriate bit for the material you will be drilling into (wood, metal, concrete, etc.).
Once you have the right bit, you’ll want to check the manufacturer’s instructions to determine the optimal speed for drilling. This is important for both safety and effectiveness. Next, attach the drill bit securely to the drill chuck and check for any wobbling or looseness.
Also see: Can I Use Hammer Drill for Screwdriver? Tips and Tricks to Get It Right
If there is any movement, tighten the chuck further. Lastly, you may want to consider applying a lubricant before drilling to reduce friction and prolong the life of your drill bit. By properly preparing your drill bit, you can ensure a successful drilling experience with clean and accurate holes.
Remember, safety always comes first when operating power tools!
Method One: Using a Power Screwdriver
If you don’t have a hammer drill, you might be wondering how to screw into concrete. Luckily, there are alternative methods you can use to get the job done. One of the easiest ways is by using a power screwdriver.
While it may take a bit longer, it’s still an effective method. First, you’ll need to make sure you have the right type of screws. Masonry screws are designed specifically for use with concrete and will provide the most secure hold.
Next, you’ll want to use a hammer and a nail to make a small indentation in the spot where you want to insert the screw. This will give the screw a starting point and make it easier to insert. Finally, you’ll use the power screwdriver to drive the screw into the concrete.
Just be sure to use the slowest setting and apply steady pressure so you don’t strip the screw or damage the concrete. With a little patience and the right tools, you can easily screw into concrete without a hammer drill.
Insert the Screwdriver Bit
Inserting a screwdriver bit can be done in different ways, and one of the most convenient methods is by using a power screwdriver. To begin, choose the right screwdriver bit that corresponds to the screw you need to tighten or loosen. Ensure that the bit is not worn, damaged, or corroded to avoid slipping or damage to the screw head.
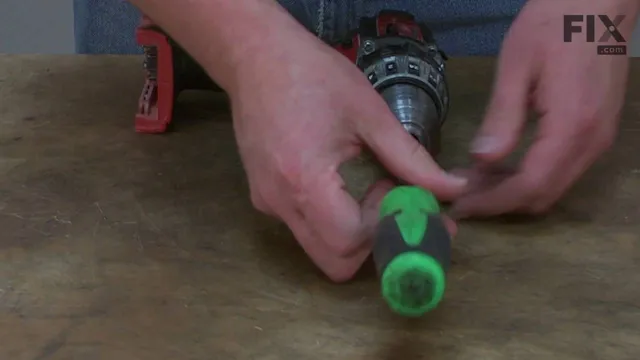
Next, locate the chuck, which is the area in the front of the screwdriver where the bit will be inserted. Some screwdrivers have a manual chuck that requires rotating to open or close, while others have an automatic chuck that simply needs to be pressed down. Once the chuck is open, insert the screwdriver bit firmly into the chuck and release it to let it grip the bit.
You can test if the bit is secure by giving it a gentle tug. Remember to disconnect the power screwdriver from its power source before changing the bit to avoid any accidents. With this method, you can easily change the screwdriver bit to match the task at hand and work more efficiently.
Insert the Screw
Inserting screws can be a daunting task, but luckily, power screwdrivers are here to save the day. With a power screwdriver, you can easily insert screws into any surface with minimal effort. First, ensure that you have the correct size screwdriver bit for your screw.
Once you have the bit size sorted, place it into the screwdriver’s chuck and tighten it securely. Next, line up the screw with the surface you want to insert it into and hold it in place. Finally, slowly press the power screwdriver into the screw while applying slight pressure to ensure it inserts smoothly.
It’s important not to apply too much pressure, or you risk damaging the material. With this technique, you’ll be inserting screws like a pro in no time.
Screw in the Screw
If you’re wondering how to screw in a screw effectively, there are a few methods you can use. One of the quickest and easiest ways is to use a power screwdriver. This is especially helpful if you have a lot of screws to put in.
First, make sure you have the correct screwdriver bit for the screw you’re using. Then, insert the bit into the chuck of the power screwdriver and tighten it. Line up the screw with the hole and press the screwdriver gently against the screw head.
Hold the screwdriver straight and press the trigger to start the drill. The screw will be driven into the surface quickly and efficiently. However, be careful not to apply too much pressure, as this can cause the screw to strip or break.
With this method, you’ll have all the screws screwed in a matter of minutes!
Method Two: Using a Screwdriver and Hammer
If you don’t have access to a hammer drill, but still need to screw into concrete, don’t worry. You can use a screwdriver and hammer as an alternative method. First, use a masonry bit to create a pilot hole in the concrete.
This will help guide the screw and prevent it from wandering off course. Next, select the appropriate screw size and insert it into the pilot hole. Hold the screw firmly in place with one hand while using a hammer and screwdriver to tap it in.
Be sure to use a bit of force to ensure that the screw penetrates the concrete surface. Once the screw is securely in place, you can use a wrench or pliers to tighten it. Keep in mind that this method may be time-consuming and require more effort than using a hammer drill, but it can still be an effective solution for those without access to more specialized tools.
Just remember to take your time and be patient, as rushing the process could result in a sloppy job or even injury. With a bit of practice, you’ll be screwing into concrete like a pro in no time.
Pilot Hole
If you don’t have a drill or want to avoid the noise, you can use a screwdriver and hammer to create a pilot hole. Although not as precise as a drill, this method works well for smaller screws. First, use your screwdriver to create a small dent in the center of where you want the screw to go.
This will serve as an initial guide for your hammer and nail. Then, using a small nail and hammer, gently tap and create a hole in the center of the dent. Make sure not to force the nail too hard, or it may damage the surface or go in at an angle.
Once the hole is created, back out the nail, and you’re ready to screw in your fastener. Overall, this method requires more patience and precision, but it’s a great alternative if you don’t have access to a drill or want to avoid the noise.
Insert the Screwdriver Bit
To insert the screwdriver bit using a screwdriver and hammer, you’ll need to follow a few simple steps. First, place the screwdriver bit onto the head of the screw so that it fits securely. Then, hold the screwdriver firmly in one hand while holding the hammer in the other hand.
Next, use the hammer to tap the end of the screwdriver carefully, ensuring that the bit is inserted into the screw head correctly. Continue tapping gently until the bit is firmly seated in the screw head. You should now be able to turn the screwdriver handle to tighten or loosen the screw as needed.
Remember to select the appropriate screwdriver bit for the screw you’re working with to avoid damaging the material or the screw head. With these simple steps, you’ll be able to quickly and easily insert a screwdriver bit using a screwdriver and hammer.
Insert the Screw
Inserting a screw may seem like a simple task, but it’s important to do it correctly to avoid damaging the material you’re working with or the screw itself. One method for inserting a screw is to use a screwdriver and hammer. First, choose the right size of screwdriver tip for your screw and insert it into the screw’s head.
Then, hold the screwdriver firmly in place and gently tap the tip with a hammer to create a small pilot hole in the material. This pilot hole will make it easier to start the screw and ensure that it goes in straight. Once the pilot hole is made, remove the screwdriver and start the screw by hand.
Use the screwdriver to tighten the screw, making sure not to overtighten it. By following these simple steps, you can easily insert a screw using a screwdriver and hammer.
Use a Hammer to Screw In
If you find yourself without a screwdriver, don’t worry — you can still screw in a screw with a hammer! This method may seem unconventional, but it can be practical if you don’t have any other tools available. To get started, you’ll need a hammer and a screw. Hold the screw in place with your hand or a pair of pliers, then gently tap it on the head with the hammer.
Continue to tap the screw, making sure it stays straight, until it is fully screwed into place. It’s essential to make sure the screwdriver slots are not damaged while tapping with a hammer. This method may require a bit of patience and practice, but with time, you’ll find it easy to screw in screws using a hammer.
Final Thoughts
If you need to screw into concrete without a hammer drill, there are a few options available. The first is to use a masonry nail and a hammer to create a pilot hole for the screw. This can be time-consuming and may not be appropriate for larger screws or projects.
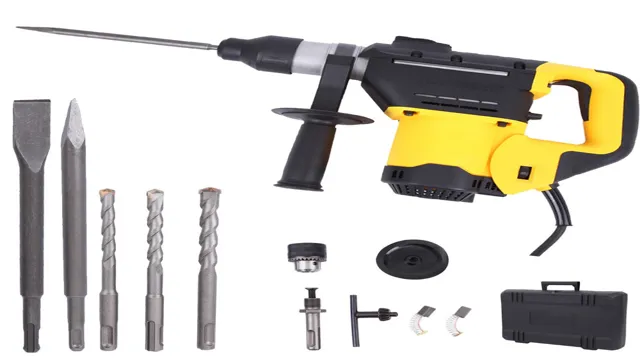
Another option is to use a screw anchor, which is designed specifically for use in concrete. These come in various sizes and can be pre-drilled or self-drilling. Finally, you can use a rotary hammer drill with a special masonry bit to create a hole for the screw.
This method is the most efficient but may not be accessible to everyone due to the cost of the equipment. Overall, it’s important to consider the specific requirements of your project when deciding on a method for screwing into concrete without a hammer drill.
Conclusion
In conclusion, screwing into concrete may seem like a daunting task, especially if you don’t have a hammer drill in hand. But fear not! With the right tools and technique, you can drive a screw into concrete like a pro. Whether you choose to pre-drill using a masonry bit and a regular drill, or use a screw with a thread design that’s made for concrete, there are plenty of options to choose from.
Just remember to take your time, be patient, and don’t be afraid to get a little creative with your DIY skills. After all, sometimes the best solutions are the ones you come up with yourself. So go ahead and give it a try – you might just surprise yourself with how easy it is to screw into concrete without a hammer drill.
FAQs
What are some tools needed to screw into concrete without a hammer drill?
Some tools to screw into concrete without a hammer drill include a masonry drill bit, rotary hammer drill, socket wrench, and concrete screws.
Can you screw into concrete without a hammer drill?
Yes, you can screw into concrete without a hammer drill by using a masonry drill bit and a rotary hammer drill or impact driver.
What size masonry drill bit should I use to screw into concrete without a hammer drill?
The size of the masonry drill bit depends on the size of the screw. Generally, a 3/16 inch or 1/4 inch bit is suitable for most concrete screws.
How do I prepare the concrete surface before screwing without a hammer drill?
To prepare the concrete surface, clean the area where you plan to screw, remove any debris, and mark the location of the hole.
What are some tips for screwing into concrete without a hammer drill?
Some tips for screwing into concrete without a hammer drill include using a slow speed, applying even pressure, and using a stable work surface.
What type of concrete screws should I use for screwing into concrete without a hammer drill?
There are many types of concrete screws available, including wedge anchors, sleeve anchors, and expansion anchors. Choose the type of screw based on the weight and size of the object you are attaching.
Can I use a regular drill for screwing into concrete without a hammer drill?
It is not recommended to use a regular drill for screwing into concrete without a hammer drill. A rotary hammer drill or impact driver is needed for this task.


