How to Cut Floor Tiles with Angle Grinder: A Step-by-Step Guide
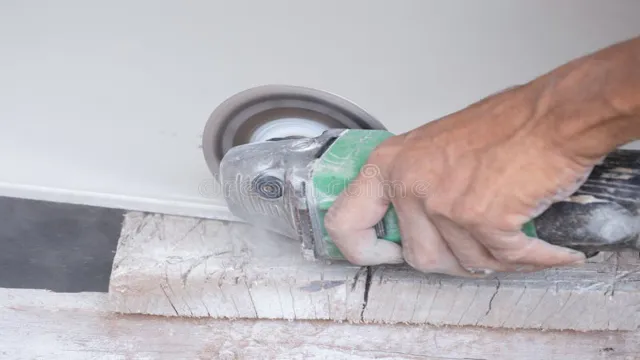
Cutting floor tiles can be a daunting task, especially if you don’t have the right tools for the job. However, if you want to get the job done quickly and efficiently, an angle grinder might just be your new best friend. Not only is it a powerful tool, but it’s also versatile enough to cut through various materials, including floor tiles.
With an angle grinder, you can easily make precise cuts on tiles and get them to fit perfectly into your space. But, it’s essential to note that using an angle grinder can also be dangerous if proper safety precautions are not taken. Before you begin cutting, make sure you have the necessary safety gear on, including eye and ear protection.
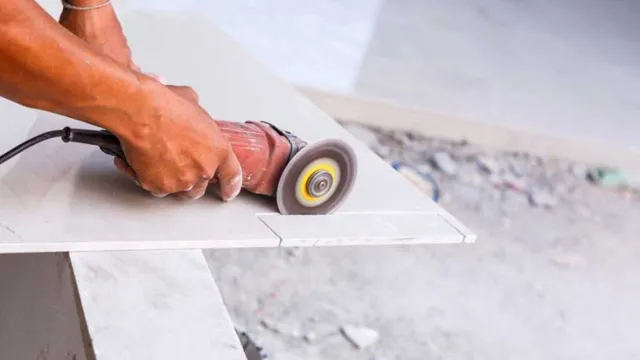
Now, the real question is, how do you cut floor tiles with an angle grinder? Well, it’s surprisingly easy. All you need is a diamond cutting disc that’s suitable for cutting tiles, and you’re good to go. Simply mark the tile where you want to make the cut, then align the angle grinder on the marked line and start cutting.
It’s that simple! However, keep in mind that cutting the tiles can cause a lot of dust. To avoid a huge mess, you can wet the tiles with water before cutting them. This will also help prevent the blade from overheating, which can cause the tiles to crack.
In conclusion, using an angle grinder to cut floor tiles is a practical and efficient way to get the job done. Just make sure to follow all the necessary safety precautions, and you’ll have beautifully cut tiles in no time.
What You’ll Need:
If you’re starting on a tiling project, then you probably already know that cutting floor tiles with an angle grinder is a useful skill. But what exactly will you need to make the job easier? Firstly, ensure that you have all of the correct safety gear, such as gloves, goggles, a dust mask, and earplugs. It’s also a good idea to have a bucket of water or a wet saw nearby to cut down on dust (and to keep the blade cool).
Next, you’ll need the right blade for the job. A dry-cut diamond blade is ideal for cutting tiles, and you can find them in most hardware stores or online. Finally, have a tile nipper handy for any small cuts or angled corners.
With all of these tools, you’ll be able to confidently cut floor tiles with an angle grinder with both safety and precision.
Tools and Materials
When it comes to starting a new project, having the right tools and materials is essential. Depending on the task at hand, your list of necessary items may differ. For example, if you’re planning on painting a room, you’ll need brushes, rollers, drop cloths, and paint.
On the other hand, if you’re putting together a piece of furniture, you’ll need screwdrivers, wrenches, and maybe even a hammer. One thing that can make your life easier is having a well-stocked toolbox. This includes basics like pliers, a tape measure, and a level, as well as specialty tools like a handsaw or pipe cutter.
Investing in quality tools can also save you time and frustration in the long run. In addition to tools, you’ll also need materials specific to your project. This can include things like lumber, drywall, paint, and nails.
Having enough of these materials on hand to complete your project without running out is important. It’s also a good idea to consider safety equipment. Depending on the task at hand, you may need goggles, gloves, or a face mask.
Don’t skimp on safety gear, as it can protect you from injury or illness. Overall, having the right tools and materials on hand can make your project go smoothly and efficiently. Take the time to gather everything you’ll need before starting, and you’ll be well on your way to a successful outcome.
Preparing the Tile
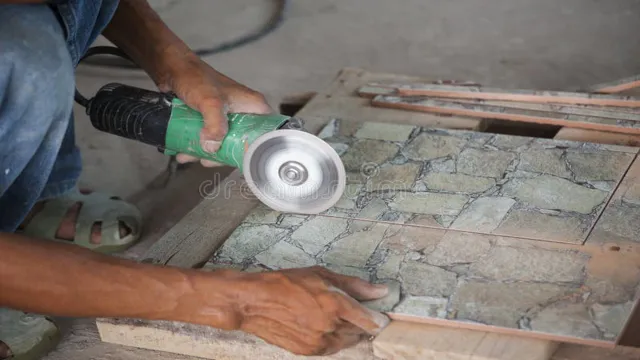
If you’re wondering how to cut floor tiles with an angle grinder, the first step is to prepare the tile for cutting. This involves measuring and marking the area you want to cut, as well as ensuring the tile is secured in place to prevent it from moving during the cutting process. You may want to use a clamp or a tile holder to keep the tile steady.
It’s also important to choose the right blade for your angle grinder, as blades can vary in size and cutting ability. A diamond blade is the most commonly used blade for cutting tiles, as it is tough enough to handle the hard surface of the tile. Once you’ve set up the tile and the angle grinder with the appropriate blade, you’re ready to start cutting.
Remember to wear protective gear such as gloves, goggles, and a dust mask, and take your time to ensure accuracy and safety. With these steps in mind, you’ll have no trouble cutting your floor tiles with an angle grinder.
Measure and Mark
When it comes to preparing the tile for installation, the first step is to measure and mark the area where the tiles will go. This is a crucial step that ensures the tiles are properly aligned and spaced. Start by measuring the length and width of the area and dividing it into smaller sections.
This will help you determine the exact size of the tiles you need. Next, use a chalk line or straight edge to mark the center point of the area. This will serve as your reference point for positioning the tiles.
Make sure to take into account any obstacles such as outlets or corners and adjust your measurements accordingly. By properly measuring and marking the area, you can minimize mistakes and ensure that the tiles are installed correctly.
Setting Up Your Equipment
When it comes to setting up your equipment to start a tiling project, preparing the tiles is a crucial step. Before you start, make sure you have all the necessary tools like a measuring tape, a tile cutter and safety glasses, and then begin by cleaning the surface where the tiles will be installed. If the surface is uneven, you may need to use a leveler to even it out and create a smooth surface.
If you’re tiling on a concrete surface, use a patching compound to fill in any cracks or holes. It’s important to make sure the surface is completely dry before you start tiling. Once you’ve prepared the surface, measure and mark the center point of the area you’re tiling.
From there, you can start laying out the tiles, starting from the center and working your way outward. By taking the time to properly prepare the tile before laying it down, you’ll ensure a smooth and even finish that will last for years to come.
Cutting the Tile
Cutting floor tiles with an angle grinder requires precision and care. First and foremost, you must make sure to equip yourself with the necessary safety gear, including eye and ear protection, as well as a dust mask. Next, you need to choose the right blade type for your specific tile material.
Diamond blades are a popular choice for their ability to cut through tough materials like porcelain and stone. Once you have all your gear assembled, mark your cutting lines on the tile surface with a pencil, and make sure to secure the tile properly on your work surface. Place the blade at the edge of the tile and slowly guide it along the cutting line, applying constant and even pressure.
Be sure to take breaks to prevent overheating of the blade and to clear away any dust or debris that accumulates. Cutting floor tiles can be a bit of a challenge, but with these tips and the right tools, you’ll be able to cut through your tiles with ease and precision.
Starting the Cut
Starting the cut of your tile can be a bit daunting at first, especially if you’re new to the process. But with the right tools and technique, you’ll be able to create precise cuts that will fit your space perfectly. First, ensure that your tile is secured and won’t move during cutting.
You can use clamps or a tile cutter for this purpose. Next, mark the cut line on the tile using a pencil or marker. Using a tile cutter or a wet saw, slowly and steadily cut along the marked line.
It’s important to take your time and let the tool do the work to avoid any mistakes. Once you’ve made the cut, check for any rough edges or unevenness. Use sandpaper or a tile file to smooth out any imperfections.
And voila! You’re ready to fit your newly cut tile into place. Remember, practice makes perfect, so don’t be afraid to practice on some scrap tiles before starting on your actual project.
Making the Cut
Cutting porcelain tile is not as easy as it may seem, especially for beginners. However, with the right tools and techniques, it can be done effectively and efficiently. The most common tools used for cutting porcelain tiles are a wet saw or an angle grinder.
A wet saw is a power tool that has a diamond-coated blade for precise and clean cuts. On the other hand, an angle grinder is a hand-held tool that uses a diamond blade to cut through the tile. However, it produces more dust and is not as precise compared to a wet saw.
To avoid breaking or damaging the tile, it is essential to measure the tile accurately and mark the cutting line before cutting. It is also crucial to wear safety gear, such as protective eyewear and gloves, while cutting the tile. With the right tools, safety precautions, and techniques, cutting porcelain tile can be a breeze for anyone.
Finishing the Cut
Cutting tile is a crucial step in finishing any tile installation project. To properly cut tile, you will need a tile cutter or wet saw. It is important to measure the space where you need to cut the tile, and then mark it with a pencil or marker.
Once you have your mark, place the tile on the cutter and then score it along the line with the cutting wheel or saw blade. Apply enough pressure to make a distinct cut but not so much that you crack or break the tile. Then, snap or cut the tile along the scored line.
Remember to wear safety goggles and gloves during this process to protect yourself from any flying debris or sharp edges. With the right tools and techniques, cutting tile can be a simple and efficient part of finishing your tile project.
Final Thoughts
Cutting floor tiles with an angle grinder may seem like a daunting task, but with proper technique and preparation, it can be a breeze. First and foremost, safety should be a top priority. Using a protective mask, gloves, and eyewear is crucial to prevent any potential accidents.
Secondly, make sure your angle grinder is equipped with a diamond blade designed for cutting tiles. Next, measure and mark the tiles where they need to be cut and make sure they are securely clamped down. Begin cutting along the marked lines, using a steady hand and ensuring the blade stays perpendicular to the surface.
It’s important to take breaks and reposition the tiles if necessary to ensure a clean cut. Finally, use a tile file or sandpaper to smooth out any rough edges. With these simple steps, cutting floor tiles with an angle grinder will be a walk in the park.
Conclusion
Cutting floor tiles with an angle grinder may seem like a daunting task, but with the right technique and safety precautions, you’ll be slicing and dicing those tiles like a pro in no time. Remember, measure twice and cut once, always wear proper protective gear, and take breaks as needed to avoid fatigue. With a steady hand and a bit of patience, you’ll be on your way to a beautifully tiled floor or wall.
So go ahead, rev up that angle grinder, and show those tiles who’s boss!”
FAQs
What safety measures should be taken before cutting floor tiles with an angle grinder?
Before cutting floor tiles with an angle grinder, make sure to wear protective gear, such as goggles, earplugs, and a dust mask. Also, ensure the tile is securely clamped down to prevent it from moving during cutting.
How can I ensure that the tiles are cut evenly with an angle grinder?
To ensure even cuts, use a straight edge or ruler to mark the area to be cut. Keep the angle grinder steady and move it slowly along the marked line. Apply even pressure throughout the cut.
What type of blade is best for cutting floor tiles with an angle grinder?
A diamond-tipped blade is the best option for cutting floor tiles with an angle grinder. It is designed specifically for cutting through hard materials like porcelain and ceramic.
Can I cut curves in floor tiles with an angle grinder?
Yes, you can cut curves in floor tiles with an angle grinder. However, it is recommended to use a tile-cutting blade and not a diamond-tipped blade. Make small cuts and adjust as necessary to achieve the desired curve.
How do I prevent my angle grinder from overheating when cutting floor tiles?
To prevent overheating, make sure the blade is sharp and that the blade guard is properly installed. Take breaks during the cutting process to allow the grinder to cool down.
How can I make sure my cuts are straight when using an angle grinder to cut floor tiles?
Use a straightedge or ruler to guide the angle grinder along the marked line. Make sure the tile is clamped securely in place. Take your time and maintain steady pressure to ensure straight cuts.
What is the best way to handle the dust and debris when cutting floor tiles with an angle grinder?
Always wear a dust mask and eye protection when cutting tiles with an angle grinder. Use a wet tile saw or attach a dust collection system to the angle grinder to minimize the amount of dust and debris produced.

