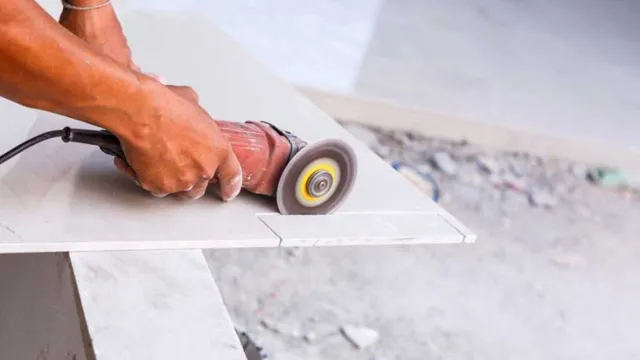
How to Put on Angle Grinder Disc Easily: Step-by-Step Guide
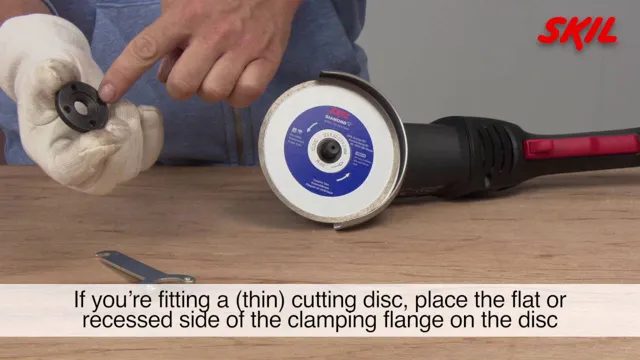
Angle grinders are versatile and handy tools to have in your workshop, but putting on the disc can be a pesky chore. Are you tired of fumbling with the equipment and unsure of where to start?
In this blog post, we’ll guide you through the simple steps of putting on an angle grinder disc, so you can tackle your work with confidence and ease. Putting on a disc is an essential aspect of using an angle grinder, and we’ll provide you with all the necessary information you need to get started.
Whether you’re a beginner or an experienced user, these tips will be helpful in getting your angle grinder up and running in no time. So grab your tool and let’s begin!
Understanding Angle Grinders
If you’re new to using angle grinders, putting on a disc might seem a bit daunting. However, it’s actually a relatively simple process that can be done in just a few steps. The first thing you need to do is make sure your angle grinder is unplugged and that the wheel nut is removed.
Next, you’ll want to choose the right disc for your project. There are a variety of discs available depending on the type of material you’re working with, so take some time to research and choose the right one. Once you have your disc selected, place it onto the spindle of the grinder and then slide the spindle back into the tool.
Tighten the wheel nut back onto the spindle, but make sure not to overtighten or it could cause the disc to crack. Once everything is secure, you’re ready to get to work! Remember to always wear proper safety gear and take extra precautions when using power tools. With a bit of practice, you’ll soon be a pro at using angle grinders like a pro!
What is an Angle Grinder?
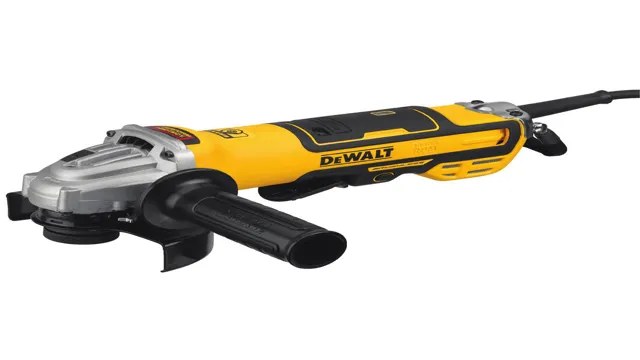
Angle Grinder An angle grinder is a versatile power tool that can be used for various applications like cutting, grinding, and polishing. It consists of a motor, a gearbox, and a spindle where abrasive or cutting discs can be attached. These tools come in different sizes, from small handheld ones for DIY projects to large ones used by professionals in construction sites.
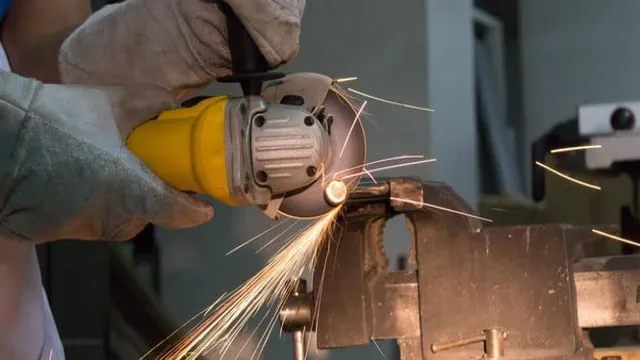
When using an angle grinder, it is important to wear protective gear like goggles, gloves, and a mask as it can produce dust and debris that can be harmful to your eyes and skin. It is also important to read the manufacturer’s instructions carefully and use the appropriate disc for the task at hand. Angle grinders are a powerful tool that can help you get most of your grinding and cutting tasks done in no time.
Types of Angle Grinders
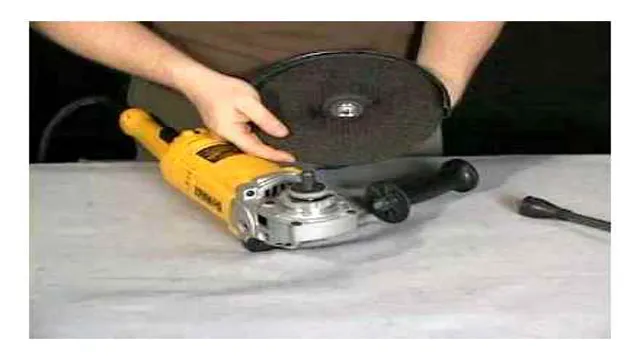
Angle Grinders Angle grinders are versatile tools that can be used for a variety of tasks, including cutting, grinding, and polishing. There are two main types of angle grinders: electric and pneumatic. Electric angle grinders are the most common and come in a variety of sizes, from small handheld models to larger benchtop versions.
They are powered by electricity and are great for cutting through thick materials like metal or concrete. Pneumatic angle grinders are powered by compressed air and are often used in industrial settings because they offer more power than electric models. They are also lighter and easier to handle.
When choosing an angle grinder, it’s important to consider the size of the grinder, the power source, and the type of blade or disc that can be used with it. Always follow safety guidelines when using an angle grinder, including wearing protective gear and securing the workpiece properly.
Understanding Discs
Understanding angle grinders is essential in choosing the right tool for your project. These grinders are versatile and can be used for various tasks such as grinding, cutting, and polishing. The key feature of angle grinders is their ability to use different types of discs.
The most common discs used are grinding discs, cutting discs, and diamond discs. Grinding discs are designed for grinding and sanding. Cutting discs are used for cutting through materials such as metal, concrete, and tiles.
Diamond discs are ideal for cutting through hard materials like stone and granite. It is important to choose the right disc for your job to avoid damaging the material or injuring yourself. When using an angle grinder, always wear appropriate safety gear like gloves and goggles.
Remember to keep the grinder firmly and securely in your hand to prevent any accidents. Overall, with the right understanding of angle grinders and their discs, you can easily complete your projects with ease and efficiency.
Types of Discs
Angle grinders are powerful tools that can be used for a variety of tasks. They are versatile and can be fitted with different types of discs depending on the job that needs to be done. Some of the most common types of discs that can be used with angle grinders include abrasive cutting discs, diamond cutting discs, flap discs, and grinding discs.
Abrasive cutting discs are used for cutting metal and other materials. Diamond cutting discs are used for cutting hard materials like concrete and masonry. Flap discs are used for finishing and polishing work, and grinding discs are used for shaping and smoothing metal.
It’s important to choose the right type of disc for the job to ensure a clean and efficient cut or grinding finish. Using the wrong type of disc could result in damage to the tool or the workpiece. When selecting a disc for an angle grinder, it’s also important to consider the size of the disc, the thickness of the disc, and the arbor size.
Choosing the right disc for your angle grinder is crucial for achieving the best results and ensuring the safety of the user.
Preparation
If you’re new to angle grinding, figuring out how to put on the disc can be a bit confusing, but don’t worry, it’s not as daunting as it may seem. First things first, safety precautions are essential, so be sure to turn off your grinder and unplug it before changing your disc. Ensure that the nut and washer are clean and free of debris before inserting the disc.
Then, place the disc on the spindle and align it with the threaded hole. Tighten the nut by hand, ensuring the disc is flush with the grinder’s faceplate. Use a wrench to tighten the nut further to prevent the disc from slipping during use.
Finally, give the disc a spin to make sure it sits evenly. Double-check the disc’s compatibility with your grinder model before operating, and remember to always wear protective gear. With these steps, you’ll be ready to use your angle grinder safely and effectively.
Safety Precautions
When it comes to preparing for any activity that involves physical exertion, it’s important to take necessary safety precautions. This is especially true when it comes to activities like hiking, camping, or rock climbing.
One of the first things you’ll want to do is research the specific area you’ll be visiting and become familiar with any potential hazards or risks.
Depending on the location, you may need to pack specific gear or clothing to ensure your safety. It’s also crucial to let someone know where you are going, when you plan to return, and to bring along a first-aid kit in case of emergencies.
By taking these steps and being prepared, you’ll be able to enjoy your adventure with peace of mind knowing you’ve taken the necessary steps to ensure your safety.
Gather Materials
When it comes to any project, preparation is crucial, and gathering materials is a key part of that process. Whether you’re embarking on a DIY project or a professional undertaking, it’s important to start with a clear idea of what materials you’ll need and to make sure you have everything on hand before you begin.
This will save you time and hassle later on, not to mention help you stay on track with your timeline and budget.
Make a list of everything you’ll need, including tools, equipment, and supplies, and check it twice before heading out to the store. This way, you’ll be sure to have everything you need right at your fingertips, and you can dive into your project with confidence.
So, take the time to gather materials before you get started, and you’ll be well on your way to a successful and satisfying outcome.
Check Compatibility
When it comes to checking compatibility, preparation is key. Before making any purchases or installations, take the time to research and understand what systems and devices are compatible with each other. This will save you time, money, and potentially prevent any headaches down the line.
Start by checking the specifications of your current devices and the ones you plan to add. Look for any compatibility requirements or restrictions and make sure they match up. It’s also important to consider any software or firmware updates that may be required for compatibility.
Double checking everything beforehand can prevent any costly mistakes and ensure that your systems run smoothly. Remember, being prepared is the first step in avoiding any compatibility issues.
Putting on Disc
If you’re new to using an angle grinder, putting on a disc might seem like a daunting task. But with a bit of practice, it’s a relatively simple process. First, make sure that your angle grinder is switched off and unplugged before attempting to change the disc.
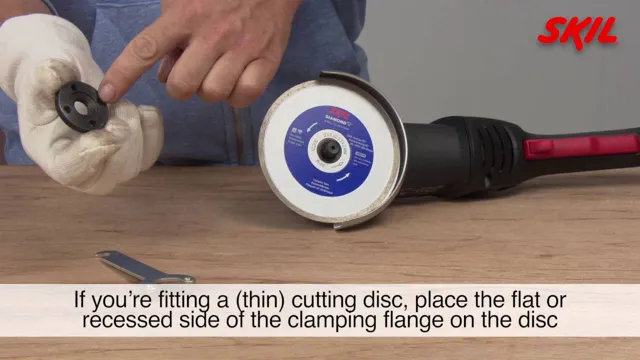
Next, locate the spindle lock button on the angle grinder and press it down to keep the spindle from turning. Use the included wrench to loosen the nut on the holding flange, then remove the old disc and install the new one. Make sure that the new disc is properly aligned with the arrow on the holding flange, and then tighten the nut with the wrench.
Once the nut is secure, release the spindle lock button and your angle grinder is ready to go. Remember to always wear the appropriate safety gear when using an angle grinder, including eye protection and gloves. By following these steps, you’ll be able to swap out your angle grinder disc in no time!
Remove Power Source
When it comes to putting a disc into your computer or game console, it’s important to remove the power source before doing so. This may seem like a simple step, but it can prevent electrical damage to your device and ensure a smooth installation process. To remove the power source, simply unplug your computer or console from the wall.
For a laptop or other mobile device, make sure it’s turned off and remove the battery. It’s also a good idea to wait a few minutes before proceeding with the disc installation to ensure that all residual electricity has dissipated. By taking this precautionary step, you can avoid the frustration and expense of having to repair or replace your device due to electrical damage.
Remember, safety first!
Insert Disc Correctly
Insert Disc Correctly One of the most frustrating things when it comes to playing games is putting on a disc, only to get an error message saying it wasn’t inserted properly. While it may seem like a simple task, inserting a disc requires a bit of finesse, especially with newer consoles that feature slot-loading drives. A common mistake is simply shoving the disc into the drive, which can cause it to scratch and become unreadable.
Instead, it’s important to guide the disc in gently, making sure it sits flat and centered on the drive. For slot-loading drives, this may mean placing the disc into the slot and letting the drive pull it in, rather than trying to push it in yourself. By taking a little more care when inserting discs, you can avoid frustrating errors and ensure your games run smoothly.
Tighten Disc Securely
Putting on a disc can be a bit of a challenge, especially if you’re not quite sure how to tighten it securely. To begin with, ensure that the disc is properly seated all the way onto the hub of the wheel. This is crucial since an improperly seated disc can cause serious accidents by wobbling or getting jammed in the wheel.
Once you’re sure that the disc is placed correctly, you can then move on to tightening it. Tightening the disc requires a bit of elbow grease, so be sure to use a torque wrench to ensure that you’re getting the correct amount of force. You want to tighten the disc until you hear a click or feel resistance.
Try not to over-tighten the disc since this can also have adverse effects on your driving, such as warping the brake rotor. By following these simple steps, you can ensure that your disc is safely and securely attached, so that you can hit the road with confidence.
Conclusion
So there you have it, folks! Putting on an angle grinder disc is not rocket science, but it’s important to follow a few simple steps to get the job done right. With a little bit of practice and the right equipment, you can be slicing through metal like a pro in no time. Just remember to always wear the proper safety gear, take your time, and be gentle with your tool.
And who knows, maybe one day you’ll be able to impress your friends with your newly acquired angle grinding skills. Happy grinding!”
FAQs
What safety measures should be taken before putting on an angle grinder disc?
Before putting on an angle grinder disc, make sure the grinder is unplugged and the disc is compatible with the grinder. Wear safety glasses and gloves, and secure the workpiece to a stable surface.
How do I attach an angle grinder disc to my grinder?
Remove the locking nut from the grinder and then place the disc on the spindle. Thread the locking nut back onto the spindle and tighten it securely with a spanner wrench.
Can I use any type of disc on my angle grinder?
No, you cannot use any type of disc on your angle grinder. Make sure the disc is compatible with the grinder and suitable for the material you are working on.
How do I properly position the angle grinder disc on the workpiece?
Hold the grinder with both hands and position the disc at the correct angle to the workpiece. Make sure the disc is not touching the surface before turning on the grinder.
How do I know when it’s time to replace my angle grinder disc?
You should replace your angle grinder disc when it becomes worn or damaged, or if you notice a decrease in performance. Check the disc regularly for signs of wear or damage.
Can I sharpen tools with an angle grinder disc?
Yes, you can sharpen some types of tools with an angle grinder disc. Make sure to use the correct type of disc and follow proper safety precautions.
How do I store my angle grinder discs?
Store your angle grinder discs in a dry, clean area away from extreme temperatures and humidity. Keep them in their original packaging or label them with the type of disc and date of purchase.

