How to Sand Concrete with Angle Grinder: Step-by-Step Guide for a Smooth Finish
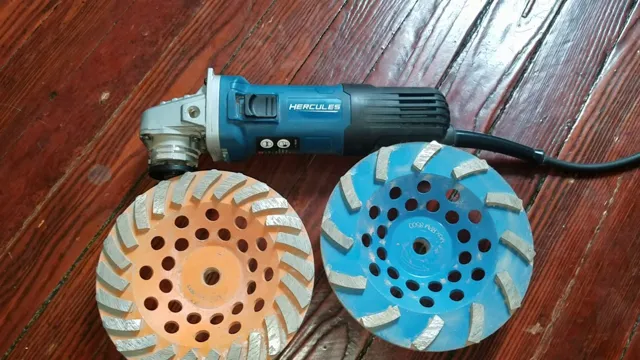
Want to give your concrete surface a new lease of life? Maybe a little revamp or a fresh look? If so, then sanding that concrete surface is a great, cost-effective way to do it! You can use an angle grinder to sand down the rough concrete surface to a smooth and polished finish. But before you dive right in, there are some things you need to know to make sure you get the best possible results. In this blog post, we’ll go over how to sand concrete with an angle grinder in a way that’s safe and effective.
Whether you’re a seasoned DIYer or a complete novice, we’ve got you covered with our step-by-step guide. So, let’s get started!
Introduction
If you’re looking to remove blemishes, stains or scratches from a concrete surface, an angle grinder might be the right tool for the job. Although it may sound intimidating at first, learning how to sand concrete with an angle grinder is actually quite simple. Following some basic steps, you can achieve a smooth, even surface that’s ready for painting or sealing.
Before you start, make sure you have all the necessary safety gear, including protective eyewear, a dust mask, and work gloves. Then, attach a diamond grinding wheel to your angle grinder and begin sanding the surface of the concrete in a circular motion. Take your time and work in small sections to ensure a consistent finish.
Once you’ve sanded the entire surface, use a vacuum to clean up any debris left behind. With a little patience and effort, you can transform a lackluster concrete surface into a smooth, polished finish that looks like new.
What is an Angle Grinder?
An angle grinder is a versatile, handheld power tool used for cutting, grinding, polishing, and sanding. It consists of a motor, a gear system, and a rotating disc or wheel mounted on an arbor. The disc or wheel can be made of various materials, including steel, stone, diamond, or abrasive materials, depending on the task.
Angle grinders come in different sizes, from small and lightweight to larger, heavy-duty models. They can be powered by electricity, battery, or compressed air. The tool’s compact size and maneuverability make it ideal for various applications, such as construction, metalworking, auto repair, and DIY projects.
Whether you are cutting metal pipes, removing rust or old paint, or sharpening blades, an angle grinder is a must-have tool that can handle a wide range of tasks with ease.
Why Use an Angle Grinder to Sand Concrete?
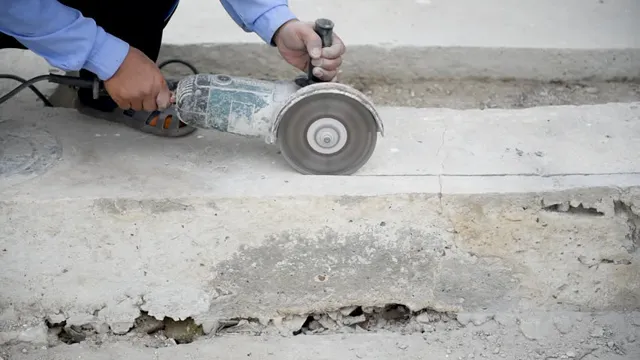
When it comes to getting a smooth and even surface on your concrete project, using an angle grinder to sand it down might be your best option. Not only does using an angle grinder allow you to remove rough spots and imperfections quickly, but it also gives you more control over the speed and pressure applied to the surface. This versatile tool can cut through concrete with ease, making it ideal for shaping and finishing a variety of surfaces.
Plus, by using the right grinding disc, you can achieve a polished or matte finish that looks great and is durable enough to handle heavy foot traffic. So, if you’re looking for a fast and effective way to prep your concrete for staining or sealing, an angle grinder is definitely worth considering.
Preparing to Sand Concrete
If you’re looking to resurface your concrete floors or walls, sanding it down with an angle grinder can be an effective solution to achieve a smooth finish. Before starting, make sure you have all the necessary safety gear, such as gloves, safety glasses, and a dust mask, as the dust particles can be harmful when inhaled. You will also need to ensure that your angle grinder has a diamond blade attachment for concrete and a variable speed setting.
Start by using a coarse grit sandpaper to remove any imperfections, gouges, or rough spots from the concrete surface. Once done, move on to a finer grit sandpaper to achieve a smoother finish. Remember to keep the angle grinder moving at all times and to avoid applying too much pressure in one area, as it can cause unevenness and create chunks or divots in the surface.
With patience and practice, you can achieve a professional-looking result by sanding down concrete with an angle grinder.
Safety Precautions
Safety Precautions for Preparing to Sand Concrete Before beginning any project, safety should always be a top priority. When it comes to sanding concrete, there are several safety precautions that you should take to ensure that you are protected at all times. First and foremost, make sure that you are wearing the appropriate safety gear.
This should include a dust mask, safety goggles, and gloves. Concrete dust can be very harmful to both your respiratory system and your eyes, so it’s crucial to protect these areas. Another important safety measure is to make sure that the area you are working in is well-ventilated.
Concrete dust can be very fine and difficult to see, and inhaling it can lead to serious respiratory issues. Keeping the area ventilated will help to minimize the amount of dust in the air and lower the risk of breathing it in. Finally, it’s essential to be aware of your surroundings at all times.
When sanding concrete, it’s easy to get absorbed in the task at hand and not realize what’s going on around you. Make sure that you are aware of any potential hazards, such as tripping or slipping, and take steps to avoid them. By taking these safety precautions, you can help to ensure that your concrete sanding project goes smoothly and safely.
Gathering Materials and Equipment
Before starting to sand concrete, it’s important to gather all the necessary materials and equipment to ensure a successful job. First and foremost, you’ll need a concrete sander, which can be either a handheld or floor sander depending on the size of the project. You’ll also need sandpaper or diamond pads with varying grits, ranging from coarse to fine, to allow for different levels of abrasion.
Protective gear such as a respirator, safety glasses, and earplugs should also be worn to ensure your safety during the sanding process. Additionally, make sure to clear the area of any furniture or debris and thoroughly clean the concrete surface before beginning to sand. By gathering all these materials and equipment beforehand, you can ensure a safe and efficient concrete sanding experience.
Sand Concrete with Angle Grinder: Step-by-Step Guide
If you’re wondering how to tackle stubborn bumps or rough edges on your concrete surface, sanding it with an angle grinder can do the trick. This tool is designed to smooth out rough surfaces by grinding away the top layer of concrete with its rotating discs. Before you start, make sure that you have the right grinding disc for concrete as using the wrong type might not achieve the desired results.
You also need to protect yourself by wearing a mask to prevent inhaling dust, goggles to keep your eyes safe, and earplugs to muffle the noise. Once you’re all geared up, start by making shallow cuts across the surface and overlapping each pass to ensure even sanding. Use gentle pressure to avoid damaging the concrete and work in small sections to get a smooth finish.
Remember to change the disc if it becomes worn or damaged during the sanding process. With a bit of practice, you’ll soon get the hang of using an angle grinder to sand concrete, revealing a beautifully smooth and polished surface that will be the envy of all.
Step 1: Choose The Right Disc
Angle Grinder _________________________________________________________________________________________________ When it comes to sanding concrete with an angle grinder, the first step is to choose the right disc. Not all discs are created equally, so it’s crucial to select one that is specifically designed for concrete. Look for a disc with diamond abrasives, as these will cut through concrete with ease.
Moreover, consider the size of the disc you need depending on the size of the job. It’s also important to keep in mind the level of coarseness you require. If you need to remove a lot of material, a coarser disc will be better suited.
Conversely, a finer disc is more appropriate for smoothing out and finishing surfaces. Selecting the right disc will make all the difference in achieving the desired finish quickly and efficiently. So, take the time to choose the perfect disc for the job before getting started with sanding your concrete with an angle grinder.
Step 2: Mark The Area You Want To Sand
To effectively sand concrete with an angle grinder, it’s important to first mark the area you want to work on. This ensures that you don’t waste time or energy sanding areas that don’t need it. One easy way to mark the area is by using a chalk line or painter’s tape.
Simply draw a line where you want the sanding to start and finish. This will give you a clear idea of where to focus your efforts and help you avoid accidentally sanding outside the desired area. It’s important to take your time with this step to ensure that you get the desired results.
By marking the area beforehand, you can ensure that your sanding will be efficient and effective, and that you won’t accidentally damage any areas of the concrete that you want to keep intact. With this step completed, you’re ready to move on to sanding the concrete with your angle grinder.
Step 3: Attach The Disc To The Angle Grinder
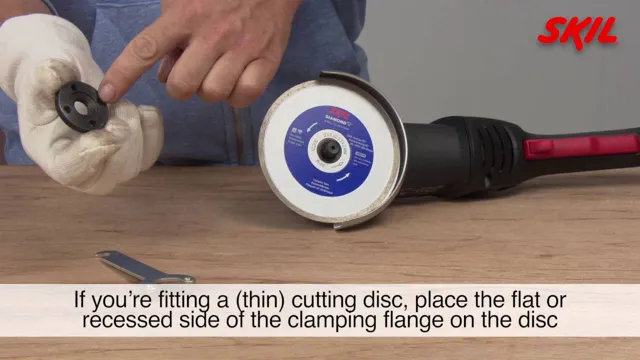
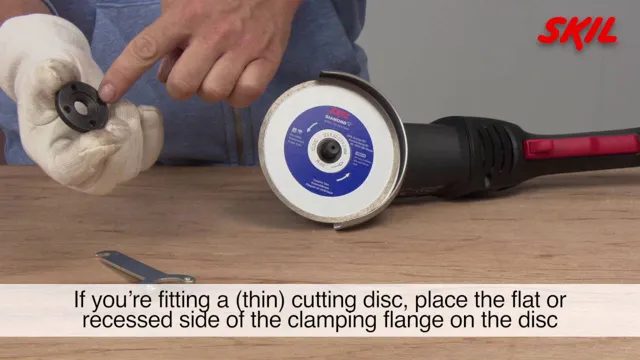
Now that you have selected the appropriate disc for your concrete sanding project, it’s time to attach it to the angle grinder. Before getting started, ensure that both the disc and angle grinder are turned off and unplugged. Find the spindle on the angle grinder and remove any existing disc.
Take your new disc, place it onto the spindle, and secure it with the flange and nut provided. Be sure to fasten the nut tightly to ensure the disc is secure. Once attached, turn on the angle grinder, and make sure the disc is spinning correctly.
This step is crucial as an incorrectly attached disc can cause serious harm. Following these steps will ensure that you can safely and effectively sand your concrete using an angle grinder. So, what are you waiting for? Let’s get started on your concrete sanding project!
Step 4: Turn On The Angle Grinder And Begin Sanding The Concrete
If you want to achieve a smooth finish on your concrete surface, using an angle grinder is a great way to go. Before turning it on, make sure to wear safety gear such as gloves, goggles, and a face mask to avoid any potential accidents. The next step is to choose the right sanding disc for the job, with a higher grit being best for a polished finish while a lower one is ideal for a rough texture.
Once you have the right disc for the job, it’s time to start by using the side of the disc instead of the center to grind the surface down. Move the angle grinder back and forth in a sweeping motion, taking care not to apply too much pressure to avoid damaging the surface. Remember to keep the tool moving as you grind the concrete to avoid any uneven spots.
Using a steady hand and patience, you can create a beautiful finish on your concrete surface in no time.
Step 5: Clean Up The Dust
When it comes to giving your concrete a fresh and clean surface, sanding is one of the most important steps. And the best tool to do that job is an angle grinder. But before you start sanding, you need to clean up the dust first.
The last thing you want is to have all that dust flying around your workspace and ruining the rest of your work. So, grab a broom or a vacuum and clean up the surface thoroughly. Be sure to get into all the nooks and crannies, especially if you’re working on a surface with a lot of textures.
Once the surface is clean, you can start sanding with your angle grinder. Remember to wear protective gear, such as gloves and a mask, to keep yourself safe from the dust and debris. With your grinder, you can make quick and easy work of the sanding process, ensuring your concrete looks polished and new.
Tips for Sanding Concrete with Angle Grinder
If you’re wondering how to sand concrete with an angle grinder, the process is actually quite simple with the right tools and techniques. First, be sure to wear proper safety gear such as eye and ear protection, gloves, and a mask to prevent inhalation of dust. Next, attach a diamond cup wheel or sanding disc to the grinder, selecting a grit size appropriate for the job.
Start by grinding the surface in a circular motion, applying light pressure and making sure to overlap your passes to avoid leaving any uneven spots. Once the surface is roughed up, switch to a finer grit and continue grinding until you reach the desired level of smoothness. Remember to keep the grinder moving to avoid creating deep gouges, and use a vacuum attachment or wet cloth to keep debris under control.
With a bit of practice and patience, you can achieve a professional-looking finish on your concrete surfaces with an angle grinder.
Tip 1: Start Slowly
When it comes to sanding concrete with an angle grinder, it is important to start slowly and work your way up to higher speeds. This will not only ensure a smoother finish but also prevent the grinder from overheating. It is important to use the right type of disc for the job, with diamond-tipped discs being the best choice for concrete.
When using the grinder, it is also important to keep it at the right angle, typically around 30 degrees. This will ensure that even pressure is applied, preventing the grinder from digging into the concrete. Lastly, it is important to wear the appropriate safety gear, including goggles, gloves, and a dust mask.
With these tips in mind, anyone can achieve a professional-looking finish when sanding concrete with an angle grinder.
Tip 2: Don’t Apply Too Much Pressure
When it comes to sanding concrete with an angle grinder, it’s important to remember not to apply too much pressure. This tip may seem simple, but it’s crucial for achieving the desired results. You may be tempted to push down hard on the grinder to get the job done faster, but this will only result in a rougher finish and potentially damage the concrete surface.
Instead, let the weight of the grinder do the work for you and apply minimal force. It’s also important to keep the grinder moving in a circular or back-and-forth motion to ensure even sanding. By following this tip, you’ll achieve a smoother, more polished surface without any unwanted blemishes or mistakes.
So remember, don’t apply too much pressure and let the grinder do the work for you.
Tip 3: Work In Small Areas
When it comes to sanding concrete with an angle grinder, one important tip to keep in mind is to work in small areas. It can be tempting to try and tackle large sections all at once, but this can actually do more harm than good. By working in small sections, you can better control the amount of pressure being applied, ensuring that you don’t damage the surface or leave any deep scratches or gouges.
Additionally, working in small areas allows you to focus on the details and ensure that you’re getting a consistent finish throughout the entire surface. Whether you’re using an angle grinder for a DIY project or a large construction job, taking the time to work in small areas can help you achieve the best possible results. So next time you fire up your angle grinder, take it slow and work in small sections to get the job done right.
Tip 4: Pay Attention to The Surface You Are Grinding
When it comes to sanding concrete with an angle grinder, paying attention to the surface you are grinding is essential. This means being aware of any bumps, cracks, or inconsistencies that may impact the quality of your work. If you’re working on a particularly rough or uneven surface, you may need to use a rougher grit sandpaper to start with, gradually moving to a finer grit as you smooth out the surface.
It’s also important to keep the angle grinder at a consistent angle as you work, as this will ensure an even finish and reduce the risk of accidentally damaging the concrete. By taking your time and being patient, you can achieve a smooth and even finish that looks professional and polished. So, the next time you’re working on a concrete surface, don’t forget to pay attention to the details and take the necessary precautions to ensure a job well done.
Conclusion
In conclusion, sanding concrete with an angle grinder requires patience, skill, and a bit of elbow grease. But with the right technique and equipment, you can achieve a smooth and polished finish that will make your concrete surfaces shine like never before. As with any DIY project, remember to take safety precautions, wear protective gear, and follow manufacturer instructions carefully.
So grab your angle grinder, put on your work gloves, and get ready to unleash your inner concrete craftsman – the results will be worth the effort!”
FAQs
What safety precautions should I take when sanding concrete with an angle grinder?
It is recommended to wear protective gear such as safety glasses, dust mask, and gloves. Make sure the work area is well-ventilated and keep bystanders away.
How do I choose the right type of angle grinder disc for sanding concrete?
Look for a diamond cup wheel or grinding disc specifically designed for concrete. Make sure the disc size matches the size of your angle grinder.
Can I use water to cool down the angle grinder while sanding concrete?
Yes, using a wet sanding method with water and a diamond cup wheel can help control dust and prevent overheating of the angle grinder.
How do I prepare the concrete surface before sanding with an angle grinder?
Remove any debris or coatings, fill any uneven areas with a patching compound, and allow it to dry completely before sanding.
What is the recommended grit size for sanding concrete with an angle grinder?
It depends on the condition of the surface – start with a coarse grit (30-50) to remove any rough patches, then switch to a finer grit (80-120) for a smoother finish.
How do I maintain my angle grinder after sanding concrete?
Clean the tool and disc thoroughly after use, remove any dust buildup, and oil moving parts to prevent rust.
Can an angle grinder be used to polish concrete?
Yes, with the right attachment and polishing pads, an angle grinder can be used for concrete polishing – however, it is a more time-consuming process than sanding.

