How to Use an Angle Grinder for Sanding: Tips and Tricks for Perfect Smooth Finish
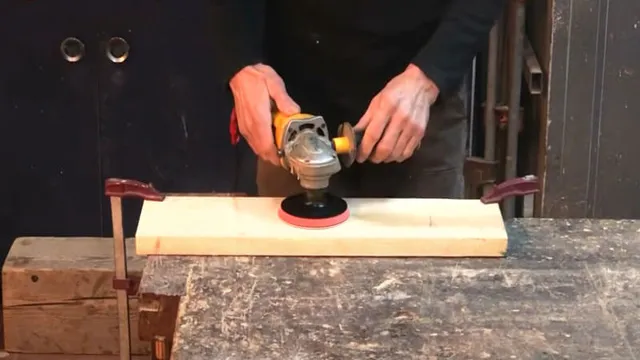
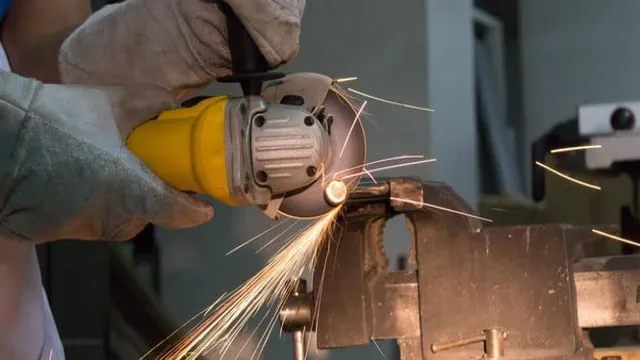
If you’re a DIY enthusiast, you’re probably familiar with angle grinders. They are common tools in most workshops and have a variety of functions ranging from cutting metal rods to grinding concrete surfaces. But did you know that you can use an angle grinder for sanding? Yes, you read that right, sanding! It’s an excellent option for those who have to deal with materials like metal, wood, or concrete.
Angle grinders can sand down any rough surfaces, leaving them smooth and polished. So, whether you want to refurbish your old furniture or remove paint from a wall, an angle grinder can do the job. In this blog post, we’ll show you how to use an angle grinder for sanding, step-by-step.
Gathering Materials
When it comes to sanding with an angle grinder, the first step is to gather all of the necessary materials. In addition to the angle grinder itself, you’ll need sanding discs or pads, safety gear such as goggles and a dust mask, and a work table or surface that’s sturdy enough to hold your project securely. Once you have everything you need, it’s important to take the time to set up your workspace properly.
Make sure your angle grinder is securely mounted to the work surface, and take steps to minimize dust and debris by using a dust collection system or working in a well-ventilated area. With the right preparation, you’ll be ready to start using your angle grinder for sanding in no time. Remember to always prioritize safety when using power tools, and don’t hesitate to seek out additional resources or guidance if you’re feeling unsure about any aspect of the process.
Angle Grinder
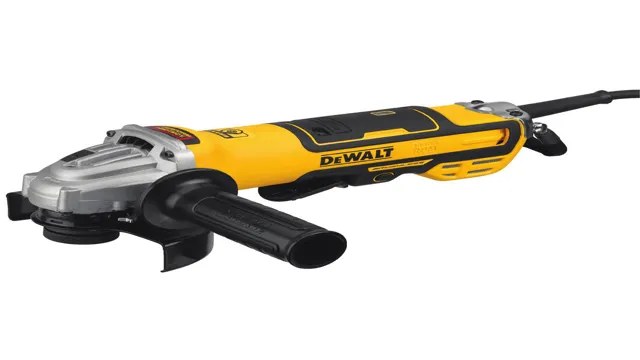
Angle grinder is one of the most versatile power tools that every DIY enthusiast should have in their toolbox. When it comes to gathering materials for your upcoming project, you need to be careful with the type of discs you choose for your angle grinder. There are different discs available, such as grinding discs, flap discs, cutting discs, and wire brush discs that are specially designed to perform different tasks.
Choosing the wrong type of disc can lead to accidents or poor results. It’s recommended to opt for high-quality discs that are designed for your specific angle grinder to ensure maximum safety and performance. Additionally, you should consider the materials you’ll be working with and the task you’ll be performing to determine the appropriate grit, thickness, and size of the disc.
Researching and selecting the right materials for your angle grinder will help you to achieve your desired results with precision and accuracy.

Sanding Discs
Sanding Discs When it comes to sanding, it’s important to have the right materials on hand to get the job done effectively. One of the most essential materials for any sanding project is the sanding disc. These discs come in a wide range of sizes and materials, so it’s important to choose the right one for your project.
Before you start, gather all of your materials so you’re prepared and ready to work. Make sure you have the appropriate sandpaper grits for your project, as well as any necessary backing pads or discs. Once you have everything you need, you’ll be able to get to work and achieve professional-level results.
So don’t skimp on the materials – invest in high-quality sanding discs to ensure the best possible outcome for your project.
Protective Gear
Protective Gear When it comes to protecting yourself while engaging in potentially dangerous activities, reliable and high-quality protective gear is essential. But before you invest in any protective gear, it’s important to gather the necessary materials. First and foremost is research.
Ensure you are aware of the potential risks and hazards of the activity you plan to participate in. Once you have a good understanding of what you need protection from, do some research on the recommended protective gear. This may include helmets, pads, gloves, or specialized footwear.
Consider the impact resistance, durability, and comfort of each piece of gear. You’ll also want to take into account the fit of the gear and any adjustability features that will enable you to customize your protection level. Above all, choose gear that is appropriate for your level of activity and the risks you are taking.
With the right gear and materials, you’ll be able to enjoy your activity with greater confidence and peace of mind.
Preparing the Area
Using an angle grinder for sanding is a great way to save time and effort when it comes to smoothing down rough surfaces. But before you dive right in, it’s important to prepare the area first. Begin by clearing the space and ensuring that there are no flammable materials in the vicinity.
Cover nearby objects with protective covering such as plastic sheets or cardboard. It’s essential that you wear safety equipment such as goggles and earplugs, and fitting dust masks to prevent inhaling dust and other particles. Once you’ve completed these necessary precautions, you can then proceed with the sanding process, starting at a slow speed and carefully working your way up to the desired speed setting.
With a bit of practice and patience, using an angle grinder for sanding can help you achieve professional results that will make your projects look amazing.
Clearing the Space
Clearing the space before starting any work is crucial to ensure a safe and efficient work environment. This includes removing any obstacles or debris that may impede movement or pose a hazard. The first step is to clear the immediate area of all potential hazards.
This may involve removing furniture, equipment, tools, and any other objects that could cause a trip or fall. Once this has been done, it is essential to clear the floor of any loose materials or debris, such as dust, dirt, or rocks. This can be accomplished through sweeping or vacuuming.
It is also important to ensure that the area is well-lit and ventilated to promote good visibility and air quality. Taking these steps before starting any work will not only help prevent accidents but also create a more organized and efficient work environment. By clearing the space beforehand, you can have a smoother, safer, and more productive workday.
Securing the Workpiece
To prevent accidents, securing the workpiece during a woodworking project is crucial. Preparing the area where you will be working is the first step to ensuring a safe work environment. Always make sure to clear out your workspace and remove any unnecessary objects or tools that may get in your way.
Next, verify that the surface where you’ll be working on is stable and level. If you’re working on an unstable surface, your workpiece can easily slip and move around, causing damage to your project or even to yourself. Make sure to also clamp your workpiece securely onto the work surface to prevent any unwanted movements when you’re working with tools like a saw or drill.
A good-quality clamp can help secure your workpiece tightly and free up your hands to operate your tools with ease. By preparing and securing the area where you will be working, you can help prevent accidents and ensure that your project will turn out beautifully.
Attaching the Sanding Disc
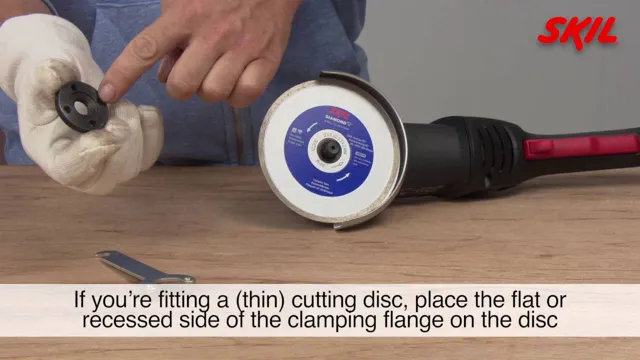
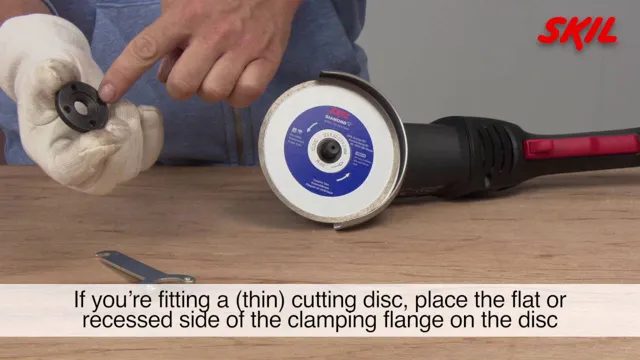
If you’re wondering how to use an angle grinder for sanding, attaching the sanding disc is a crucial first step. Angle grinders are powerful tools that can quickly smooth rough surfaces, but without a properly attached sanding disc, you won’t get the results you want. To attach the sanding disc, first make sure the grinder is unplugged.
Then, remove the nut and any other hardware holding the existing disc in place. Place the sanding disc on the grinder, making sure it is centered on the spindle. Tighten the nut firmly but not excessively, and make sure the disc rotates freely.
It’s important to use the right type of sanding disc for your specific project- there are different grits and materials available. Always wear protective gear such as goggles and gloves when using an angle grinder. With the sanding disc properly attached, you’re ready to start sanding down those rough surfaces!
Choosing the Right Disc
When it comes to sanding, choosing the right disc is crucial for achieving the desired results. The disc you select will depend on the type of material you are sanding and the level of abrasiveness required. You want to make sure that you are using a disc that is suitable for the task at hand.
Once you have chosen the correct disc, it’s important to attach it properly to your sander. Start by lining up the holes in the disc with the holes in the sanding pad and then press the disc onto the pad. Make sure the disc is centered on the pad and that it is securely attached before turning on the sander.
A poorly attached disc can come loose during sanding and cause damage to your workpiece or even injure you. So take the time to attach the sanding disc correctly, and enjoy a smooth and successful sanding experience!
Affixing the Disc to the Grinder
When it comes to using a grinder for sanding, one of the most important steps is attaching the sanding disc properly. This might sound like a simple task, but it’s actually a crucial one that can impact the quality of your sanding and even your safety. First, make sure the grinder is unplugged and the disc is appropriate for the project you’re working on.
Then, remove the locking nut and place the disc onto the grinder’s shaft. Reattach the locking nut and tighten it with a wrench, being careful not to overtighten. It’s important to check that the disc is centered and not wobbling before beginning to sand, as an unbalanced disc can cause damage to the grinder and even fly off during use.
Taking the time to properly attach your sanding disc will ensure a smooth and safe sanding experience.
Starting the Tool
Using an angle grinder for sanding can be daunting, but once you have it down, it’s a useful tool for any DIY project. The first step before starting the tool is to dress appropriately. Safety should always come first, so put on some protective goggles, gloves, and a long sleeve shirt.
If you are using a corded angle grinder, then plug it into a power outlet. If you are using a cordless one, make sure it is charged. Before fitting the sandpaper, ensure the tool is turned off and unplugged.
Then, select the appropriate grit sanding disc for your needs, depending on the surface’s coarseness you plan to sand. Once that’s done, secure the sandpaper onto the backing pad and snap it into the angle grinder. Tighten the locking nut to keep it in place, and you’re good to go!
Testing the Angle Grinder
When it comes to testing the angle grinder, one of the first steps is to start up the tool. To begin, make sure the power source is secure and the cord is unwound and free of any knots or tangles. With the guard in place and the disc properly fitted, turn the tool on by pressing the trigger switch.
You should hear a satisfying whirring sound as the motor spins up to speed. It’s important to keep a firm grip on the tool and maintain proper footing throughout the testing process to ensure your safety. Additionally, be sure to pay attention to any unusual noises or vibrations that could indicate an issue with the tool.
By starting the angle grinder properly and staying alert to any warning signs, you can ensure a successful and safe testing experience.
Beginning the Sanding Process
Starting the tool is the first step when beginning the sanding process. Before beginning, ensure that the sanding pad is attached securely to the tool, and then plug it in. You can also use a battery-operated tool if you prefer.
Once the tool is connected to the power source, turn it on and test it on a small, inconspicuous area to ensure that it’s working correctly. Once you’re satisfied with the tool’s performance, you’re ready to begin sanding your project. Remember to always wear personal protective equipment such as goggles and gloves to protect yourself from flying debris and dust.
With the tool primed and ready to go, now you’re ready to achieve a perfectly smooth finish!
Sanding Techniques
If you have an angle grinder, you can use it for so much more than simply grinding or cutting on a construction site. With a few easy adjustments, you can use an angle grinder for sanding, making it the perfect tool for smoothing out rough surfaces or restoring old furniture. The key to getting the best results when using an angle grinder for sanding is to use the right type of sandpaper and to properly hold and move the tool.
Use a sanding flap disc for precise sanding, and hold the tool tightly with both hands, moving it in a circular motion to avoid leaving marks or scratches on the surface. Remember to always be cautious and wear appropriate protective gear when working with power tools, and keep the work area clean and free of debris to prevent slips and falls. With these tips, you’ll be able to use your angle grinder for sanding like a pro!
Maintaining the Correct Angle
When it comes to sanding, maintaining the correct angle is a crucial technique that can make or break your project. The angle at which you hold your sandpaper determines how much pressure is applied to the surface you’re sanding, and can either create a smooth finish or leave unsightly scratches and gouges. To maintain the correct angle, it’s important to use consistent, even strokes and keep the sandpaper flat against the surface.
Tilting the sandpaper too far in one direction or the other can cause uneven wear, leading to an uneven finish. Think of it like shaving: you wouldn’t shave your face or legs at an angle, would you? The same concept applies to sanding. By keeping the sandpaper at the correct angle, you’ll achieve a professional-looking finish that’s sure to impress.
Avoiding Sanding Too Much or Too Little
When it comes to sanding, there’s a fine line between too much and too little. Sanding too little can lead to uneven surfaces and poor painting results, while over-sanding can damage the wood and make it difficult to repair. The key is to start with coarse sandpaper and work your way up to finer grits, gradually smoothing out the surface.
Remember to sand in the direction of the grain and take special care around corners and edges. It’s also important to keep moving the sandpaper around, as spending too much time in one spot can create divots and grooves. If you’re unsure how much to sand, a good rule of thumb is to stop when the surface feels smooth to the touch and all rough spots or imperfections have been removed.
By using proper sanding techniques and practicing patience, you can avoid the pitfalls of over- or under-sanding and achieve a beautiful, flawless finish on your woodworking project.
Finishing the Job
If you need to smooth out a rough surface or remove rust and paint from metal, an angle grinder can be a highly effective tool for sanding. However, it’s important to use the right attachments and techniques to get the job done safely and effectively. First, choose a sanding disc or flap disc that’s appropriate for the surface you’re working with.
For example, a coarse grit disc is ideal for heavy metal work, while a finer grit disc is better for lighter tasks. Next, attach the disc securely to the angle grinder and turn it on. Move the grinder back and forth across the surface in smooth, even strokes, applying light pressure to avoid gouging the material.
Finally, be sure to wear protective gear, including safety glasses and a dust mask, to avoid injury and inhaling debris. With the right tools and techniques, using an angle grinder for sanding can be a quick and efficient way to finish any job.
Inspecting the Sanded Surface
When undertaking a sanding project, the final step is inspecting the sanded surface. This step is crucial in ensuring satisfaction with the finished product. Take a moment to assess the surface and check for any areas that may require additional sanding or buffing.
Imperfections, such as scratches or dents, could be hidden beneath any remaining dust and may become more visible once the surface has been cleaned. Once the surface has been thoroughly inspected and no further work is required, it’s time to finish it to your liking. Depending on the type of project, you can add additional coatings or finishes for added protection and enhance the appearance of the surface.
With proper inspection and finishing, your newly sanded surface will be looking good as new.
Switching Out Discs for Finishing
When it comes to finishing a job, it’s essential to switch out discs to ensure you get the best results. While it may seem like a hassle to take the time to change out discs, it’s worth it in the end. Each disc is designed for a specific job, and using the wrong one can lead to less than desirable results.
Swapping them out is easy and can save you time and frustration in the long run. It’s like having a toolbox, and using the wrong tool for the job can lead to a lot of extra work and even damage. Taking the extra time to switch out discs can make all the difference in the finished product.
So, next time you’re finishing a job, make sure you have the correct discs and take the time to switch them out when needed. Your finished product will thank you.
Cleaning Up the Work Area
After completing a task, always remember to clean up your work area. Not only does it create a safer environment, but it also promotes a sense of organization and professionalism. Begin by gathering all tools and materials used during the project and making sure they are properly stored.
Dispose of any waste in the appropriate containers, and wipe down surfaces and equipment to remove any lingering debris or residue. Taking the time to tidy up after completing a task not only ensures safety, but it also demonstrates a level of consideration and respect for others who may use the same space. So, before you consider the task complete, take a few extra minutes to clean up and leave the work area better than you found it.
Conclusion
Well there you have it folks, sanding with an angle grinder can be a powerful and useful tool when handled properly. Remember to always wear protective gear and work in a well-ventilated area. With some practice and patience, you can achieve a perfectly smooth and polished finish on your projects using this versatile tool.
So go ahead and sand those rough edges with confidence, just don’t forget to angle grind responsibly!”
FAQs
What safety precautions should I take before using an angle grinder for sanding?
Before using an angle grinder for sanding, make sure you wear eye protection, a dust mask, and gloves. Also, secure the item you are sanding in place and position the angle grinder in a way that minimizes kickback.
What types of sanding discs should I use with an angle grinder?
Depending on the material you are sanding, you can use sanding discs made from materials such as aluminum oxide for wood and metal, silicon carbide for concrete and stone, and zirconia alumina for heavy-duty sanding.
How do I attach a sanding disc to an angle grinder?
To attach a sanding disc to an angle grinder, first, remove any disc that is currently on the grinder. Then, place the new sanding disc on the grinder’s spindle, making sure it fits snugly. Finally, tighten the disc using the wrench that comes with the grinder.
How do I adjust the speed of my angle grinder for sanding?
Most angle grinders have a speed control option that allows you to adjust the grinder’s speed. A slower speed is recommended for sanding to prevent overheating or damaging the material. However, be sure to follow the manufacturer’s instructions when adjusting the speed.
Can I use an angle grinder for wet sanding?
Yes, you can use an angle grinder for wet sanding by attaching a diamond polishing pad or other wet sanding attachments. However, be sure to use a GFCI (ground-fault circuit interrupter) outlet and wear rubber boots to avoid electric shock.
How do I clean my angle grinder after sanding?
To clean your angle grinder after sanding, first, unplug the grinder and wipe down the exterior with a damp cloth. Then, remove the sanding disc and use a wire brush to remove any debris or residue from the grinder’s spindle. Finally, wipe down the interior of the grinder with a clean cloth.
Can I use an angle grinder for fine sanding or polishing?
Yes, you can use an angle grinder for fine sanding or polishing by attaching a finer-grit sanding disc or polishing pad. However, be sure to use a lower speed and steady hand to avoid removing too much material.

