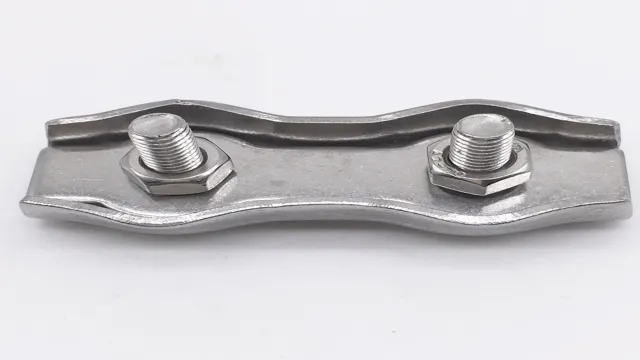
How to Remove Hose Clamps Easily in 5 Simple Steps
Have you ever struggled with removing a hose clamp? It can be frustrating, especially if you don’t know the proper steps. But fear not, we have a step-by-step guide to help make the process simple and stress-free. Whether you’re replacing a hose or just need to remove a clamp for maintenance, this guide will have you covered.
So grab your tools and let’s dive in! Think of it like taking off a tight bracelet – it may be difficult at first, but with the right technique, it will slide right off. By the end of this guide, you’ll be a pro at removing hose clamps.
Understanding Hose Clamps
If you’re looking to remove hose clamps from your vehicle, you’ll first need to understand the basic structure of these clamps. Hose clamps are often used to secure hoses in place, and they work by clamping the hose onto a fitting or connector. These clamps can be made from a variety of materials, including stainless steel, plastic, or rubber.
Depending on the type of hose clamp you’re trying to remove, you may need special tools, such as pliers or a wrench. To remove a hose clamp, you’ll typically need to loosen the screw or nut located on the clamp, and then carefully wiggle the clamp off of the hose. Be sure to use caution when removing hose clamps, as they can be sharp and potentially dangerous if mishandled.
With a little patience and the proper tools, however, you should be able to remove your hose clamps with ease. So, whether you’re making repairs or upgrades to your vehicle, knowing how to remove hose clamps is an essential skill for any DIY mechanic.
What are hose clamps?
Hose clamps are an essential component in any plumbing system. They are used to securely fasten hoses and tubes onto pipes, ensuring a leak-free connection. Generally, hose clamps are made up of a metal band and a screw, which tightly wraps around the hose and holds it in place.
Understanding hose clamps and their purpose is crucial when it comes to maintaining a plumbing system. These clamps come in various sizes and designs, suitable for different types of hoses and pipes. It’s essential to choose the right clamp for your system to prevent any leaks or damage to the pipes.
In simple terms, hose clamps are the binding agents that keep the entire plumbing system together. Without them, the system would fall apart, resulting in a complete catastrophe. So, it’s always necessary to keep an eye on the clamps to ensure that they are in good condition and functioning correctly.

Types of hose clamps
Hose clamps are used to secure hoses onto pipes or fittings, preventing leakage of fluids or gasses. There are various types of hose clamps available in the market today. One of the most commonly used types is the worm gear hose clamp, which has a screw-like mechanism to tighten or loosen the clamp.
Another popular type is the spring clamp, which is easy to install and remove and has a lower clamping force. T-bolt clamps are suitable for high-pressure applications as they provide a more secure connection with their bolt and nut fastening mechanism. Constant tension clamps are another type of hose clamp that has self-adjusting technology to maintain a constant tension on the hose.
Each type of hose clamp has its unique benefits and is suitable for specific applications. Understanding the types of hose clamps available can help you make the right choice for your specific needs.
When to remove hose clamps
Hose clamps are essential components of any plumbing system as they help secure hoses and prevent leaks. Knowing when to remove hose clamps is crucial in maintaining the efficiency of the system. It is recommended to remove and replace hose clamps every time you remove the hose for maintenance or repair purposes.
If the hose clamp appears rusty or damaged, it is also advisable to replace it immediately. Leaving old or damaged hose clamps in place can cause leaks, leading to costly damages. Always inspect the hose clamp and hose assembly regularly to ensure they are in good condition.
In summary, when in doubt, replace the hose clamp, and prevent unnecessary headaches down the road.
Tools You Will Need
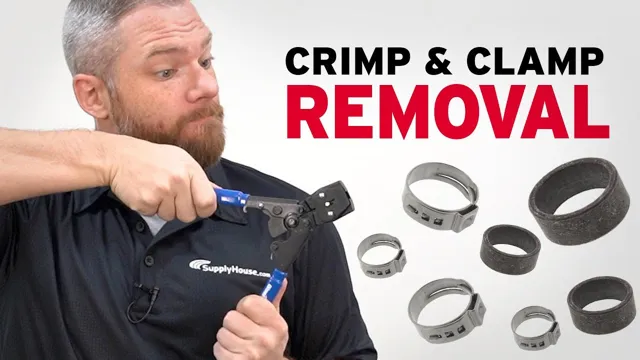
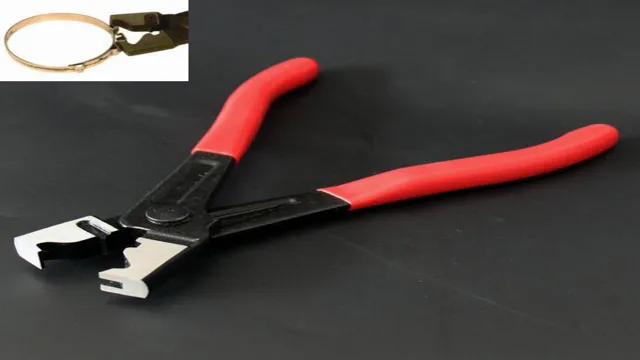
Removing hose clamps can seem like a daunting task, especially if you’re not familiar with the necessary tools. To effectively remove these clamps, you’ll need a few things. First and foremost, you’ll need a set of pliers or a clamp removal tool.
These tools will allow you to grip the clamp and loosen it without damaging the hose. Additionally, it’s a good idea to have some lubricant on hand. This can be as simple as a spray-on silicone lubricant or even some soapy water.
Lubricant can help to loosen the clamp and make it easier to remove. Finally, it’s important to have a good pair of gloves to protect your hands from any sharp edges or hot surfaces. With these tools in hand, you’ll be able to remove hose clamps with ease and without causing any damage to your hoses or other components.
List of required tools
When it comes to starting a new project, the list of required tools can be daunting. But fear not, we’re here to help you navigate the process! Depending on the project, the necessary tools may vary, but here are some staples that should be in everyone’s toolbox. Firstly, a good quality hammer.
Whether you need to hang a picture or build a bookshelf, a hammer is a must-have tool. A screwdriver set is another essential in any toolkit, as many projects involve screws. A tape measure is also important for ensuring accurate measurements, and a level helps keep everything straight and even.
A drill is an incredibly versatile tool that can be used for many projects, and a set of various drill bits will give you even more options. Finally, a pair of pliers can come in handy for various tasks, such as removing nails or bending wire. With these tools in your arsenal, you’ll be well on your way to completing any project that comes your way!
How to choose the right tool
When it comes to choosing the right tools for any project, it can be overwhelming to sift through the endless options available. However, there are a few key factors to consider that will help make the decision-making process easier. Firstly, consider the specific task at hand and what type of tool will be required.
Is it a power tool, hand tool, or specialized tool? This will narrow down your options significantly. Secondly, consider the quality of the tool. Investing in a quality tool will save you time and money in the long run, as they tend to last longer and perform better.
Finally, consider your own comfort level with the tool. If you are not familiar with a particular tool, it may be worth taking the time to learn how to use it properly before beginning your project. By keeping these factors in mind, you can choose the right tools for any job and ensure its success.
Step-by-Step Guide to Removing Hose Clamps
Removing hose clamps can be a bit of a hassle, but with the right steps, it can be easy and stress-free. First, identify the type of hose clamp you have, as different types require different removal methods. Next, locate the screw or nut that holds the clamp in place and use the appropriate tool to loosen it.
Once the clamp is loose enough, gently slide it off the hose. If the hose is stuck to the clamp, use a flathead screwdriver or pliers to carefully pry it off. It’s important to be extra careful when removing hose clamps from delicate or hard-to-reach areas, as any damage could lead to leaks and other problems.
Following these steps will ensure that you’re able to remove hose clamps quickly and safely, without causing any additional damage to your hose or vehicle. So, if you’re wondering how to remove hose clamps, just remember to take it slow, be gentle, and always use the proper tools for the job.
Step 1: Locate the hose clamp
If you are ready to remove a hose clamp, you’ll want to be prepared with the proper steps to get it done. Step one is to locate the hose clamp on the particular hose you want to detach. This simple yet crucial step requires you to inspect the hose and identify where the clamp is situated.
Once you have located the clamp, the next step is to use pliers to loosen the clamp’s grip. Before doing this, make sure to wear safety gloves to protect your hands from being grazed by the screwdriver or pliers. If the hose is difficult to access, try using a mirror to spot the clamp without causing any harm to the hose.
With these safety tips and preliminary instructions, you’re one step closer to having the hose clamp removed and replaced with ease.
Step 2: Loosen the clamp
When it comes to removing hose clamps, it’s important to follow a step-by-step guide to avoid any mishaps. Step 2 in the process involves loosening the clamp. This can be done using a flathead screwdriver or pliers.
Loosening the clamp will allow you to slide it off the hose without damaging either the hose or the clamp. It’s important to note that some clamps may require a bit more force to loosen than others. If you encounter a stubborn clamp, try spraying it with a lubricant or using more force while carefully ensuring that you don’t damage any surrounding components.
Overall, taking the time to properly loosen the clamp will make your hose removal process much smoother and more efficient. So, don’t rush through this step and ensure that you take the necessary precautions to avoid any accidents.
Step 3: Slide the clamp off the hose
To successfully remove a hose clamp, the third step is to slide the clamp off the hose. This may sound easy, but it’s important to take caution and not be too forceful. Hose clamps can be tight, especially if they have been holding a hose in place for a long time.
To slide the clamp off, use a flathead screwdriver to loosen the screw that’s holding the clamp together. Then, gently slide the clamp off the hose. Be careful not to damage the hose in the process, as this can result in leaks or other issues down the line.
It’s a good idea to inspect the hose and clamp for any signs of wear or damage before reassembling everything. By taking the time to carefully remove the hose clamp, you can ensure a job well done and avoid any potential pitfalls.
Step 4: Remove the hose if needed
When you need to remove a hose clamp, there are a few steps you need to take to ensure that you do it correctly and safely. The first step is to locate the hose clamp and determine which type of clamp it is. Once you’ve determined that, you need to use the appropriate tools to loosen the clamp.
In some cases, you may need to remove the hose itself to get better access to the clamp. If this is the case, you need to be careful not to damage the hose or any other components that may be nearby. Removing the hose can be a bit tricky, but with the right tools and a steady hand, you should be able to get it done.
Just remember to take your time and be patient – rushing through the process could lead to mistakes that could be costly to fix. By following these steps and practicing good technique, you should be able to remove hose clamps with ease and confidence.
Tips and Precautions
If you’ve ever worked on a car or appliance, you know that removing hose clamps can be a tricky task. Luckily, with a few tips and precautions, you can easily remove them without causing damage. First, make sure to use the correct size wrench or pliers to avoid slippage and potential injury.
If the hose clamp has been corroded or rusted, applying some penetrating oil or heat can help loosen it. It’s important to also be mindful of the surrounding parts and wiring to prevent accidentally damaging or disconnecting them. Lastly, always have a spare hose clamp on hand in case the old one needs to be replaced.
With these precautions and tool tips in mind, removing hose clamps can be a breeze.
Safety precautions when removing hose clamps
When it comes to removing hose clamps, safety should always be your top priority. These clamps can be under a lot of pressure, and mishandling them can result in serious injury or damage to your vehicle. To start, make sure you’re wearing appropriate protective gear such as gloves and eye protection.
Next, carefully inspect the clamp and surrounding area to make sure there’s no undue tension or wear. Once you’re ready to remove the clamp, use a suitable tool such as pliers or a clamp removal tool, and don’t try to remove it with your bare hands. If the clamp is particularly stubborn, don’t force it and try spraying some penetrating oil to loosen it instead.
Lastly, always make sure to properly dispose of the clamp as it can be sharp and pose a hazard to others. By taking these precautions, you can safely and effectively remove hose clamps without risking injury or damage to your vehicle.
Tips to make the process easier
If you’re planning a big project, there are a few tips and precautions you can take to make the process easier and more manageable. First, make sure you have a clear plan and timeline in place before you begin. This will help you stay on track and avoid getting overwhelmed.
Be sure to also break the project down into smaller, more manageable tasks that you can tackle one at a time. This will help you stay focused and motivated throughout the process. Additionally, it’s important to stay organized and keep track of your progress.
Consider using tools like spreadsheets or project management software to help you stay on top of things. Finally, be sure to take breaks and prioritize self-care. Large projects can be stressful and taxing, so it’s important to take care of yourself throughout the process.
By following these tips and precautions, you can make any big project much easier to handle.
Conclusion
In conclusion, removing hose clamps requires a combination of finesse and force. An understanding of different types of clamps, pliers and wrenches along with a can-do attitude will ensure success. So next time, let’s not be clamped down by the problem, but confidently clamp on and get the job done!”
FAQs
What are the different types of hose clamps available in the market?
There are several types of hose clamps available in the market such as worm gear clamps, spring clamps, t-bolt clamps, and ear clamps.
How do I know which type of hose clamp to use for my specific application?
To determine which type of hose clamp to use, consider factors such as the hose material, the size of the hose, and the pressure and temperature requirements of the system.
Can I reuse hose clamps?
While it is possible to reuse hose clamps, it is not recommended as they may not provide the same level of sealing and security as a new clamp.
What tools do I need to remove hose clamps?
To remove hose clamps, you will typically need a screwdriver, pliers, or a specialized clamp removal tool.
Is it necessary to replace hose clamps when replacing a hose?
While it is not always necessary to replace hose clamps when replacing a hose, it is recommended as worn or damaged clamps can lead to leaks and other issues.
Can hose clamps be tightened too much?
Yes, hose clamps can be tightened too much, which can damage the hose or cause it to collapse. Be sure to follow manufacturer recommendations for tightening torque.
Can I remove hose clamps without damaging the hose?
Yes, it is possible to remove hose clamps without damaging the hose. Use caution and appropriate tools to avoid cutting, puncturing, or deforming the hose during the removal process.

