How to Hang Christmas Lights with a Staple Gun: A Beginner’s Guide
Ready to add some festive cheer to your home? One of the easiest ways to do so is by hanging Christmas lights. Whether you’re decorating the exterior or interior of your home, using a staple gun is a quick and efficient way to secure your lights. Plus, it saves you the hassle of untangling and repositioning strings of lights that are secured with adhesives or clips.
But how exactly do you hang Christmas lights with a staple gun? Don’t worry, we’ve got you covered! In this blog post, we’ll provide a step-by-step guide on how to hang Christmas lights with a staple gun with minimal effort and maximum impact. So, grab your staple gun and let’s get started!
Why Use a Staple Gun
If you’re wondering how to hang Christmas lights with a staple gun, it’s important to understand the benefits of using this tool in the first place. Staple guns are a great option for a variety of DIY projects, including hanging decorations like lights. They’re easy to use, require minimal effort, and can make the task go much quicker than using traditional methods like nails or screws.
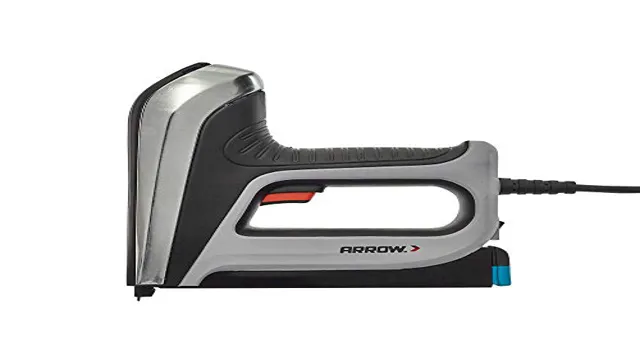
Plus, staple guns offer a secure hold, ensuring that your lights stay in place all season long. When using a staple gun for holiday decorating, be sure to choose one that is appropriate for the job, such as a heavy-duty model that can handle the thickness of your light cords. With a little practice, you can get the hang of using a staple gun and finish your holiday decorating in no time.
So, why not try it out?
Fast and Efficient
Staple guns are an essential tool for anyone who wants to get the job done quickly and efficiently. From DIY enthusiasts to professional contractors, a staple gun is a must-have in any toolkit. They make fast work of attaching materials to surfaces and are a real time-saver.
Not only are they fast and efficient, but they can also be adjusted to suit the job at hand. Whether you need to attach fabric, wood, or even leather, there’s a staple gun that’s perfect for the job. So, if you’re looking for a tool that can help you get the job done in half the time, consider using a staple gun.
It’s easy to use, versatile, and will save you time and effort while delivering professional results every time.
Less Damage to Surfaces
Staple guns are amazing tools that are often taken for granted. One of the most significant advantages of staple guns is that they cause less damage to surfaces than other fasteners like nails or screws. By using a staple gun, you can easily attach materials together without worrying about splitting, cracking, or chipping the material.
Unlike nails or screws, staples won’t leave large holes or carve out sections of wood or plaster. That’s why staple guns are the go-to choice for DIY enthusiasts and contractors alike. Staple guns come in different sizes and shapes, allowing you to choose the perfect one for your project.
Additionally, they are much faster to use than conventional fasteners, saving you time and effort. By using a staple gun, you can enjoy a cleaner, smoother, and less damaging work experience, allowing you to achieve professional-looking results without any hassle. So, why not get yourself a staple gun and see the difference for yourself!
What You Will Need
Are you ready to deck the halls this holiday season with festively glowing lights? One of the best ways to hang Christmas lights with ease is by utilizing a staple gun. But, before you start stringing lights and stapling away, it’s important to gather a few essentials. Firstly, ensure that you have enough lights to cover the areas you want to decorate.
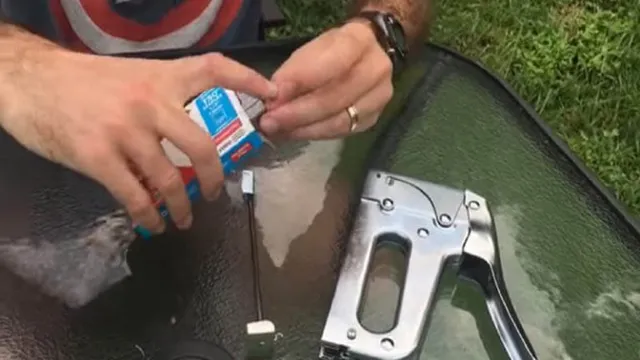
Measure the space you will be hanging the lights and ensure that you have enough cords to connect all the lights. Additionally, make sure that you have a reliable and sturdy staple gun that can handle being used multiple times. Choose the right size of staples for your staple gun and ensure that it’s fully loaded before you get started.
Lastly, make sure you have a safe and secure ladder or step stool to help you reach the areas that need to be decorated. Once you have all the necessary items, you’re ready to start hanging your Christmas lights and creating a festive wonderland. Happy holidays!
Staple Gun
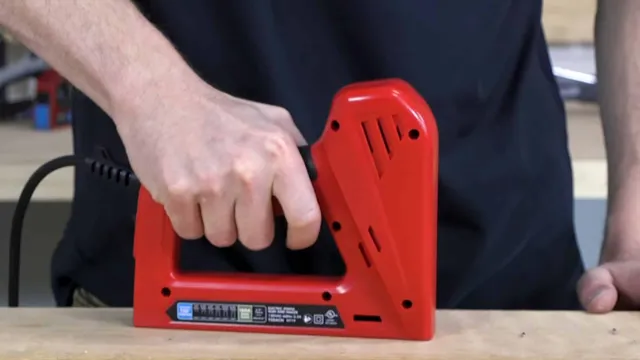
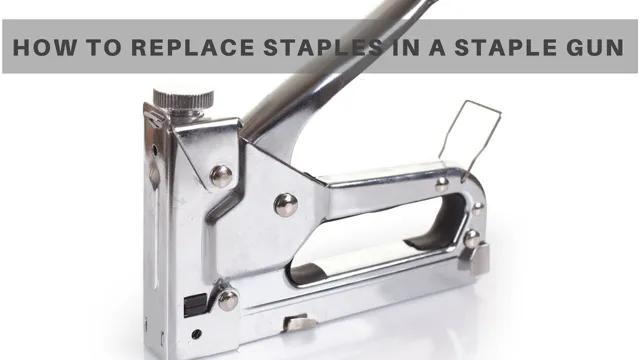
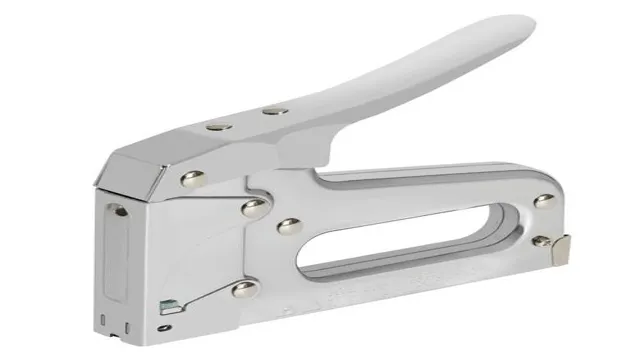
If you’re planning on doing some DIY projects that involve attaching materials together, you’ll most likely need a staple gun. But before you go ahead and buy one, it’s important to understand what you’ll need. First and foremost, you’ll obviously need a staple gun! There are various types of staple guns available, such as manual, electric, and pneumatic staple guns.
Decide on which one you prefer and make sure to buy the appropriate staples to match your staple gun’s size. You’ll also need a sturdy surface to work on, such as a worktable or a hardwood floor. And last but not least, make sure you have eye protection and gloves for your safety.
With these items on hand, you’ll be ready to tackle any DIY project that comes your way!
Staples
When it comes to shopping for office supplies, there are a few staples that you’ll always want to keep on hand. First and foremost are pens and pencils, as these writing utensils are essential for taking notes, filling out forms, and signing documents. You’ll also need paper, whether it’s loose-leaf or notebook style, for writing and jotting down ideas.
Sticky notes and index cards are great for reminders and organization, while markers and highlighters can help you color-code and emphasize important information. A stapler and staples are necessary for putting together documents, and a desktop organizer can keep all of your supplies neat and easy to access. Whether you’re working from home or in an office setting, having these staples on hand will help you to stay productive and efficient throughout the day.
Extension Cord
When it comes to using an extension cord, there are a few things you need to consider to ensure your safety and the proper function of your devices. Firstly, you will need an appropriate extension cord that can handle the power requirements of your electronics. Make sure to check the cord’s rating and the voltage of your devices before purchasing an extension cord.
Additionally, it’s important to choose a cord with a length that suits your needs but doesn’t exceed it. A longer cord can lead to voltage drops and potential fires. You will also need to consider the environment in which you will be using the cord.
For outdoor use, be sure to select a cord that is designed for the weather conditions in your area. Last but not least, always inspect the cord for signs of wear and tear before use and avoid overloading it with too many electrical devices. By taking these factors into consideration, you can safely and effectively use an extension cord for your needs.
Step Ladder
When it comes to home and DIY projects, having the right tools on hand can make all the difference. If you’re planning to tackle a task that requires reaching higher heights, a step ladder can be a game changer. To get started, you’ll need a few basic supplies.
Firstly, consider the height you’ll need to reach and choose a ladder with the appropriate number of steps. You’ll also want to make sure the ladder is sturdy and well-constructed to ensure safety. Additionally, if you plan to use the ladder on hard surfaces, investing in slip-resistant feet can reduce the risk of accidents.
Finally, make sure you have enough space to store the ladder when it’s not in use. With the right preparation and equipment, you’ll be able to tackle any project with ease using a step ladder.
Christmas Lights
Christmas Lights If you’re planning on putting up Christmas lights this year, there are a few things you’ll need to make sure you have on hand. First and foremost, you’ll need the lights themselves. There are many different types of Christmas lights available, from traditional incandescent bulbs to more energy-efficient LED options.
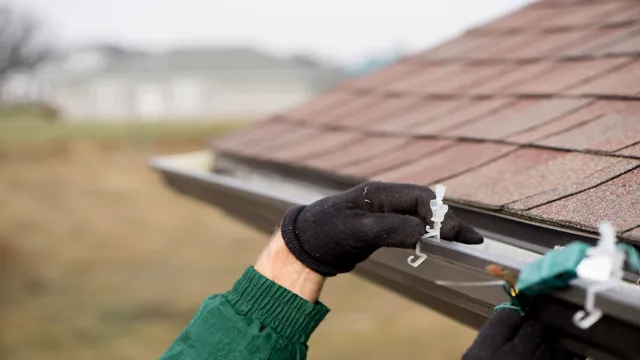
Make sure you choose lights that are designed for outdoor use if you plan on putting them outside. You’ll also need some extension cords to plug the lights in and connect them together. And if you plan on placing the lights on your roof or in trees, you may want to invest in some clips or hooks to make the task a bit easier.
Don’t forget a ladder if you need to reach the higher spots! With these items in hand, you’ll be well on your way to creating a festive display that will brighten up your neighborhood and bring joy to your family and friends.
Prep the Area
When it’s time to hang your Christmas lights with a staple gun, the first step is to prep the area. This means cleaning the surface where the lights will be stapled, removing any debris, and ensuring the area is dry. If you’re stapling lights to the roofline or gutters, use a ladder to access those areas safely.
It’s important to note that if the area is wet or slippery, wait until it dries completely or consider using a safer method than a staple gun, such as clips or hooks. Once the area is prepped and safe, you can start to hang your Christmas lights with ease. Using a staple gun can save you time and effort when it comes to hanging your decorations, especially if you have a large area to cover.
Just remember to be cautious and safe when using a staple gun, and do not staple over electrical wires or near any water sources. With these precautions in mind, you’ll be able to create a festive and magical display for the holiday season.
Inspect the Lights and Cords
Before you start decorating your house with twinkling lights and festive ornaments, it’s important to prepare the area where you’ll be hanging them first. This means inspecting the lights and cords that you’ll be using to ensure they’re in good condition and won’t cause any safety hazards. Look for any frayed wires, loose connections, or broken bulbs and replace them as needed.
Additionally, make sure to use extension cords that are specifically designed for outdoor use and that they’re rated for the amount of electricity that your lights require. Finally, take note of the location where you’ll be hanging your decorations and make sure that there aren’t any obstacles or potential fire hazards nearby. With these precautions in place, you’ll be able to enjoy your festive decorations without any worries.
Clean the Surface
When it comes to prepping the surface for a painting project, the first step is to clean the area thoroughly. Whether you’re painting a wall, furniture, or any other surface, it’s essential to remove dirt, dust, and debris to ensure a smooth finish. Start by wiping the surface with a dry cloth to remove any loose dust or dirt.
If you notice any stubborn stains or dirt, use a cleaning solution recommended by the manufacturer or a mixture of warm water and mild soap. Avoid using abrasive or harsh chemicals that can damage the surface or affect the paint adhesion. Once you’ve cleaned the area, let it dry completely before moving on to the next step of your painting project.
Taking the time to prep the surface properly can make a significant difference in the final result of your painting project. So, don’t skip this crucial step!
Plan the Placement
Before placing anything, it is essential to thoroughly prepare the area where you intend to put it. Start by clearing any clutter or debris and cleaning the surface. Depending on what you plan to place, you may need to level the ground or apply a protective coating.
It is also crucial to consider the surrounding environment. Will the placement be in direct sunlight or heavy foot traffic? Is it near any plants or water sources? These factors will impact the durability and longevity of the item you are placing. Additionally, you want to ensure that the placement is visually appealing and fits seamlessly into the surrounding area.
Taking the time to prep the area will result in a more successful placement that provides lasting value.
Start Hanging the Lights
One of the best ways to add sparkle to your home during the holiday season is by hanging Christmas lights. While there are many ways to do it, using a staple gun is an easy and effective method. To begin, plug in your lights and test them to make sure they work.
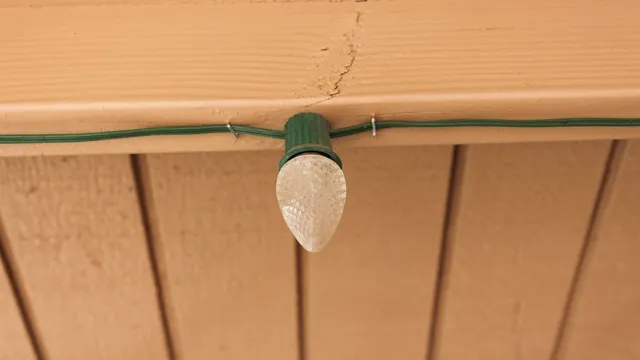
Then, select a starting point and attach the lights to the wall with trim or painter’s tape. Next, line the staple gun up with the cord on the lights and press it firmly against the wall. Make sure to place the staples close to the sockets to hold the lights securely in place.
Continue this process along the length of the cord until you reach the end. Be careful not to staple the cords too tightly or you may damage them. Once you’re done, step back and admire your handiwork – your house is sure to be the talk of the neighborhood!
Load the Staple Gun
When it comes to hanging Christmas lights, few tools are as essential as the staple gun. This handy device makes it easy to secure strings of lights firmly in place, ensuring they don’t come loose or droop over time. Before you begin, make sure you have a reliable staple gun loaded up with plenty of staples.
As you work, be sure to press the gun firmly against the surface you’re attaching the lights to. This will help ensure that the staple goes in smoothly and doesn’t damage the lights or the underlying material. With a little bit of practice, you’ll be able to quickly and easily attach string after string of beautiful, twinkling lights.
So load up that stapler and get ready to transform your home into a winter wonderland!
Attach the Staples
Now that you’ve got everything ready, it’s time to start hanging those holiday lights! The first step is to attach the staples to the surface where you want to hang the lights. This will ensure that the lights stay in place and don’t fall off. Make sure to use the right kind of staples, depending on the surface you’re hanging the lights on.
For example, if you’re hanging them on wood, use the wood staples, while if you’re hanging them on concrete, use the concrete staples. Once you’ve got your staples, position them where you want the lights to hang. Try to space them out evenly so that the lights are evenly distributed and don’t bunch up in one area.
Then, fasten the staples to the surface using a hammer, being careful not to damage the surface. Now that you’ve got your staples in place, you’re ready to start hanging those lights and making your home look festive and bright!
Hang the Lights
The most wonderful time of the year is almost upon us, and that means it’s time to start hanging the lights! Whether you’re a traditionalist with classic white lights or a trendsetter with colorful blinking bulbs, there’s nothing quite like the warm glow of holiday lights to bring a little magic to your home. Before you start hanging, take a quick safety check: make sure you have sturdy ladders, outdoor-rated extension cords, and potentially enlist the help of a friend or family member. Once you have all the necessary materials, it’s time to get creative! Consider draping lights along your roofline, wrapping them around tree trunks, or even hanging them from your gutters.
Don’t be afraid to mix and match sizes and colors for a truly unique look that showcases your own personal style. Happy decorating!
Tips to Consider
If you’re wondering how to hang Christmas lights with a staple gun, here are a few tips to consider. Firstly, make sure you have the right staple gun – a heavy-duty staple gun is recommended for outdoor use. Secondly, measure the length of lights you need and plan where you want to put them up.
It’s easier to start at one end and work your way along, taking care to space out the lights evenly. Thirdly, ensure safety by turning off the electricity supply in the areas where you plan to hang the lights. Fourthly, place the staple gun over the light cord and onto the surface where you want to attach the lights.
Press down gently on the trigger to fire the staple and secure the lights in place. Be careful not to press too hard or the staple may damage the cord. Finally, step back and admire your handiwork – a beautifully lit-up Christmas display! With these tips in mind, you can create a festive atmosphere in no time.
Use Outdoor-rated Lights
If you’re planning to light up your outdoor space, it’s important to choose lights that are designed for outdoor use. Outdoor-rated lights are built to withstand the elements such as wind, rain, and humidity. They are also created to provide sufficient light while being energy-efficient.
When looking for outdoor lights, consider the different types of lighting available, such as string lights, floodlights, pathway lights, and garden lights. These different types of lighting serve different purposes, and you’ll want to choose the right ones depending on your needs. For example, pathway lights are ideal for lighting up your garden walkway, while floodlights are great for providing security lighting.
Always make sure that you are buying high-quality outdoor-rated lights that meet your specific needs to ensure that they will last long and serve their purpose.
Follow the Instructions
When it comes to following instructions, whether it’s for assembling furniture, using new technology, or cooking a recipe, it can be easy to get overwhelmed. However, it’s important to remember that each step is there for a reason and can lead to a successful outcome if followed correctly. One tip to consider is to read through all the instructions before starting.
This will give you a better understanding of the task at hand and help you plan accordingly. Another tip is to take your time and not rush through the steps. Skipping over crucial instructions or performing them incorrectly can lead to errors and ultimately result in having to start over.
Lastly, if you do run into any issues or questions, don’t hesitate to refer back to the instructions or seek help from a professional or online resource. Remember, following instructions can be a tedious task, but it can also lead to great results!
Check the Staple Placement
When it comes to stapling, placement is key! It’s important to make sure that the staple is in the right spot so that your documents stay secure and organized. One tip to consider is using a ruler or measuring tape to make sure that your staple is placed evenly on both sides of your document. Another helpful trick is to use a pencil to mark where you want to staple before actually squeezing down on the stapler.
This will help ensure that your staples are in exactly the right place. When checking your staple placement, be sure to pay attention to the length of the staple as well. If the staple is too long or too short, it can cause problems with the document.
Overall, taking a little extra time to check your staple placement can save you a lot of frustration down the road. So the next time you go to staple something, remember to measure, mark, and double-check your staple placement for a job well done.
Consider Removing the Staples After the Holidays
As the holiday season comes to a close, it’s time to start thinking about putting away all of your decorations until next year. One small detail that you may not have considered is removing the staples from your decorations before storing them away. While it may seem like a hassle, removing the staples can help prolong the life of your decorations and prevent any potential damage from occurring.
Over time, staples can rust or corrode, and can even leave small holes in your decorations. By taking the extra step to remove them, you can ensure that your decorations stay in top condition and are ready to use again next holiday season. So before you pack everything away, take a few minutes to carefully remove any staples that may be holding your decorations together.
Your future self will thank you!
Conclusion
In conclusion, hanging Christmas lights with a staple gun may seem daunting, but with a little patience and finesse, you can create a winter wonderland that would make Clark Griswold proud. Just remember to prioritize safety, use the right tools and techniques, and don’t be afraid to get a little creative. And who knows, maybe Santa will bring you some extra twinkle lights for your efforts.
Happy decorating and Merry Christmas!”
FAQs
What type of staple gun is best for hanging Christmas lights?
A heavy-duty staple gun with a narrow crown is the best option for hanging Christmas lights.
How far apart should staple gun staples be when hanging Christmas lights?
Staples should be spaced approximately 12 inches apart to ensure the lights are securely in place.
Are there any safety tips to keep in mind when using a staple gun to hang Christmas lights?
Yes, always wear protective eyewear and gloves to prevent injury. Also, be sure to disconnect any power sources before beginning the project.
Can I use a staple gun to hang Christmas lights on my home’s exterior?
Yes, a staple gun can be used to hang lights on the exterior of your home, but make sure to use outdoor-rated staples and lights designed for outdoor use.
How do I ensure the Christmas lights are straight and evenly spaced when using a staple gun?
Use a measuring tape and marks to ensure even spacing, and use a level to make sure the lights are straight.
What is the best way to remove staple gun staples from my home after the holiday season is over?
Use a pair of pliers or a staple remover tool to gently pull out the staples. Be careful not to damage your walls or other surfaces.
Is it necessary to use a staple gun to hang Christmas lights, or are there alternative methods?
You can also use small clips or hooks made specifically for Christmas lights, but a staple gun is a quick and reliable option for securing lights.

