How to Load a Bostitch Model T5 Staple Gun: Step-by-Step Guide

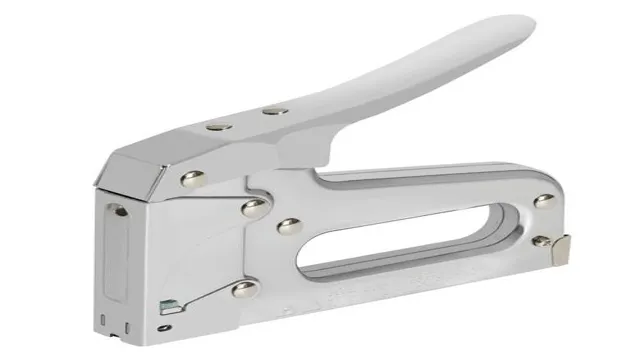
Staple guns are essential tools for many DIY projects, and the Bostitch Model T5 Staple Gun is one of the most popular options on the market. But, as with any tool, it’s important to know how to properly load it to avoid frustration and errors. If you’re wondering how to load a Bostitch Model T5 Staple Gun, then you’ve come to the right place.
In this blog post, we will provide you with step-by-step instructions on how to load your Bostitch Model T5 Staple Gun, so you can start your next project with confidence. So, let’s dive in and get your staple gun fired up!
Step 1: Release the Magazine
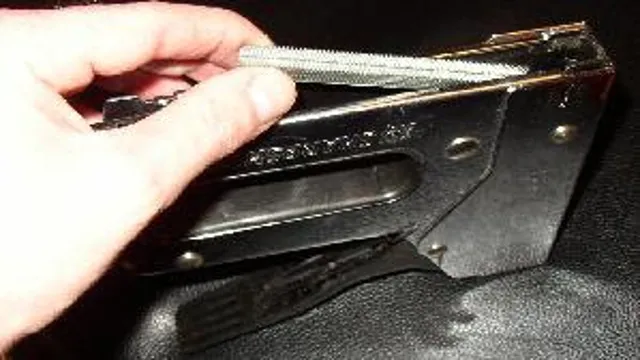
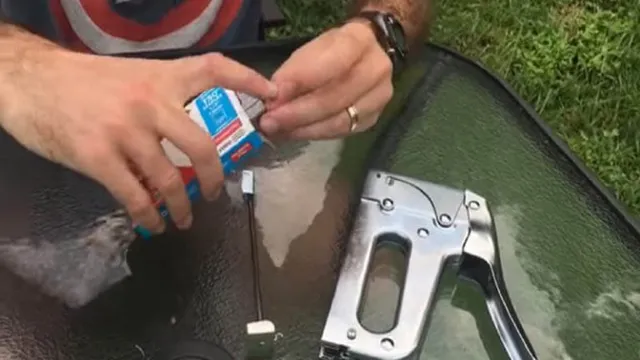
If you’re new to using a Bostitch Model T5 staple gun, one of the most important steps is learning how to properly load it with staples. The first step is to release the magazine at the back of the staple gun by pulling on the release lever. This will allow you to access the loading chamber and insert the staples.
Make sure that you have the correct size staples for your particular model, as using the wrong size can cause jams or other problems. Once you’ve loaded the staples in the chamber, slide the magazine back into place until it clicks into position. It’s important to remember to keep your fingers away from the staple ejection area while loading and using the gun to avoid accidental injury.
With these simple steps, you should be able to load your Bostitch Model T5 staple gun like a pro in no time!
Push the lever on the back of the stapler to release the magazine
If you’re struggling to load staples into your stapler, the first step is to release the magazine. To do this, turn your stapler over and locate the lever on the back. It’s usually a small metal tab that you can push or slide.
Once you’ve found it, press down or slide it to release the magazine from the stapler body. This will give you access to the staple channel, where you can insert fresh staples or remove any jammed ones. It’s important to note that stapler models vary, and some might have slightly different mechanisms for releasing the magazine.
So, if you’re still unsure how to do this, consult your stapler’s instruction manual. By following this simple step, you’ll be able to keep your stapler in good working order and get back to stapling with ease!
Step 2: Load the Staples
Once you’ve loaded the staple gun, it’s time to load the staples into your Bostitch Model T First, make sure that your staple gun is unlocked and that the handle is pulled completely upward. Once you have access to the loading area, slide the staples into the magazine.
Be sure to align the pointed ends of the staples with the channel in the magazine, as this will ensure that they feed smoothly. Once you’ve filled the magazine, gently push down on the handle to close the loading area. You can then test your staple gun on a scrap piece of material to make sure that the staples are properly aligned and firing correctly.
With some practice, you’ll be able to quickly and efficiently load your Bostitch Model T5 staple gun, saving you time and effort on all of your stapling projects.
Pull the magazine from the stapler
After you’ve pulled the magazine from the stapler, it’s time to load the staples. But before you do that, take a moment to ensure that you have the correct staples for your stapler. Staples come in different sizes, so it’s important to select the right size that corresponds with your stapler.
Once you have the right staples, locate the loading mechanism on your stapler. Some staplers have a button on the back, while others have a release mechanism on the bottom or side of the stapler. Press or release the loading mechanism to open the stapler and reveal the staple tray.
Then, take a strip of staples and insert it into the tray so that it sits snugly against the back of the stapler. Finally, push the loading mechanism back into place until it clicks or locks into position. Voila! Your stapler is now loaded and ready for action.
Insert a strip of staples into the magazine
To load the staples into your stapler, follow these simple steps. Step 2 is to insert a strip of staples into the magazine. Start by holding the stapler so that the base is facing towards you.
Locate the magazine, the area where the staples will be loaded. Depending on the stapler model, the magazine may be located on the base or on the top of the stapler. Take the strip of staples and place it into the magazine.
The staples should fit snugly into the magazine with no resistance. Remember that inserting a strip of staples is a crucial step in stapling any paper documents together. If the staples are not loaded properly, then your stapling will be ineffective and you may end up with pages flying all over the place.
You also want to ensure that you have enough staples in the magazine to complete the job you have in mind. So, make sure to check your stapler before you start to ensure that it is properly loaded with enough staples. Once you’ve completed this step, you’re ready for the next one, which is to align your papers and start stapling.
Slide the magazine back into the stapler
To load the staples in a stapler, the next step is to slide the magazine back into the stapler. This is a crucial step since it ensures that the staples are in the correct position and ready to be used. To do this, locate the magazine release button near the back of the stapler and press it.
This will release the magazine from its locked position. Next, insert the strip of staples into the magazine, ensuring that the pointed ends of the staples are facing downwards. Make sure that the staples are properly aligned with the magazine slot, and firmly press down on the magazine until it snaps back into place.
Once the magazine is securely in place, pull down on the spring-loaded tab at the back of the stapler to load the first staple into the firing position. With the magazine loaded and in position, you’re now ready to start stapling! Remember to use the right size staples for your stapler to ensure optimal performance.
Step 3: Cock the Stapler
Now that we have successfully inserted the staples into the magazine of the Bostitch Model T5 staple gun, it’s time to cock the stapler in preparation for firing. Cocking the staple gun is an essential step as it sets the spring and tension in preparation for firing the staples. To do this, hold the stapler firmly and pull the silver handle back until you hear a clicking sound.
The handle should lock in the backward position, indicating that the stapler is now cocked and ready for use. Be sure to keep your fingers away from the staple exit area while cocking the staple gun to avoid injury. With the stapler now cocked, you are now ready to fire staples into any material of your choice like wood, paper, and cloth.
Remember to keep your trigger finger clear of the staple exit area and aim at the material before squeezing the trigger to avoid any accidents. With these simple steps, you’re now all set to take on any stapling project with your trusty Bostitch Model T5 staple gun.
Push down on the lever until you hear a click
Push down on the lever until you hear a click, that’s right, it’s time to cock the stapler! Cocking the stapler is an essential step to ensure that your paper is evenly stapled together. To start, have your stapler in front of you and locate the metal lever at the back of the stapler. Press down on the lever firmly using your thumb until you hear a satisfying click.
This sound indicates that the stapler is now loaded and ready to go. Once you’ve cocked the stapler, you’re now ready to insert your paper. Press the stapler down firmly on the paper, and press the handle down.
Voila! You now have a perfectly stapled document. Remember, always check how many papers you can staple together at once before loading your stapler. Overloading your stapler can cause it to jam or not staple correctly, so it’s always better to staple a smaller number of papers at one time.
So, don’t forget to cock your stapler before use!
For maximum power, push down until the lever touches the stapler
When it comes to stapling papers, it’s essential to cock the stapler properly to ensure maximum power and accuracy. After loading the staples, you should push down until the lever touches the stapler’s base. Once the stapler is fully loaded, you should proceed to cock the stapler to activate the mechanism that will drive the staple into the paper.
To do this, pull the metal tab at the back of the stapler upwards until it clicks into place. You should feel a slight resistance when pulling the tab, indicating that the stapler is ready to fire. Cocking the stapler is crucial to ensure that the staple drives straight and efficiently into the paper.
If the stapler is not correctly cocked, it may misfire or produce a weak, ineffective staple. So, take the time to cock your stapler correctly, and you’ll have a powerful tool to help you stay organized and productive. Don’t forget to repeat the process before each use, maintaining your stapler in the best possible condition.
Step 4: Start Stapling
To load a Bostitch Model T5 staple gun, you need to insert the staples into the magazine. Load the staples by pulling back on the magazine-release lever located at the bottom of the staple gun. Once you have opened the magazine, carefully insert the staples with the pointy end facing down.
Push the staples all the way to the back of the magazine until they click into place. One important thing to remember is to ensure that the staples are compatible with the T5 staple gun, otherwise your stapling work will be inefficient. After loading the staples, re-close the magazine by pressing it back into place.
Now, you’re ready to begin stapling. Hold the staple gun at a 90-degree angle to the surface you want to staple and press the trigger. The Bostitch Model T5 staple gun will easily penetrate the material and fasten the staples securely.
With these simple steps, you can now load and use a Bostitch Model T5 staple gun quickly and easily for a wide range of stapling applications.
Press the trigger to release a staple
Now that you’ve loaded your stapler with staples, it’s time to start stapling! Press the trigger to release a staple onto your document or paper stack. You’ll want to align the stapler with where you want the staple to go before pressing down, so make sure you have everything lined up properly. You can use one hand to hold the stapler in place and the other to press down on the trigger, or you can use both hands to ensure even pressure.
It’s important to remember to not press too hard, or else the staple may go through the paper and not properly fasten. Take your time and make sure each staple is lined up correctly before pressing down on the trigger. With a little practice, you’ll be stapling like a pro in no time!
Repeat until the magazine is empty and needs to be refilled again.
Now that you’ve prepared your stapler, loaded the magazine with staples, and placed your papers in position, it’s time to start stapling! It’s as easy as pressing down on the stapler head with your hand and hearing that satisfying “click” sound. Keep in mind that you should start with the top left corner and work your way down the left side, then move on to the right side. Repeat until the magazine is empty and needs to be refilled again.
It may seem like a mundane task, but proper stapling can make a big difference in the overall appearance and organization of your documents. Plus, it’s much more efficient than manually folding and securing papers together. So go ahead and get stapling, and don’t forget to reload the magazine when it runs out of staples!
Conclusion
Well, loading a Bostitch Model T5 staple gun is easier than stealing office supplies from your boss’s desk. Simply slide the pusher rod back, insert the staples, and push the rod forward. Now you’re ready to staple like a boss-titch.
Happy stapling!”
FAQs
What is a Bostitch model T5 staple gun?
The Bostitch model T5 is a type of staple gun commonly used for upholstery and woodworking projects.
How do I load staples into a Bostitch model T5 staple gun?
First, ensure the staple gun is not loaded and pointed away from you. Then, use the release button to open the magazine. Load the staples into the magazine with the pointed ends down. Close the magazine and you are good to go!
Can I use any size staples in a Bostitch model T5 staple gun?
No, the Bostitch model T5 requires specific staples. Make sure to check the manual or packaging to ensure you have the correct size and type of staples.
What is the firing mode of a Bostitch model T5 staple gun?
The Bostitch model T5 has a manual firing mode, meaning you must pull the trigger each time you want to staple.
Can a Bostitch model T5 staple gun be used for heavy-duty projects?
While the Bostitch model T5 can handle some heavy-duty projects, it is best suited for lighter jobs such as upholstery and woodworking. For heavier projects, consider a more heavy-duty staple gun.
How do I properly maintain my Bostitch model T5 staple gun?
Regularly cleaning your staple gun with a soft cloth and lubricating it with a small drop of oil can increase the lifespan and performance of your Bostitch model T5.
Can the Bostitch model T5 staple gun be used on delicate materials?
Yes, as long as the correct staple size is used, the Bostitch model T5 can be used on delicate materials such as fabrics and thin woods. However, it is recommended to test on a small and inconspicuous area before proceeding with the project.

