How to Load a Pneumatic Staple Gun: A Beginner’s Guide to Effortless Stapling
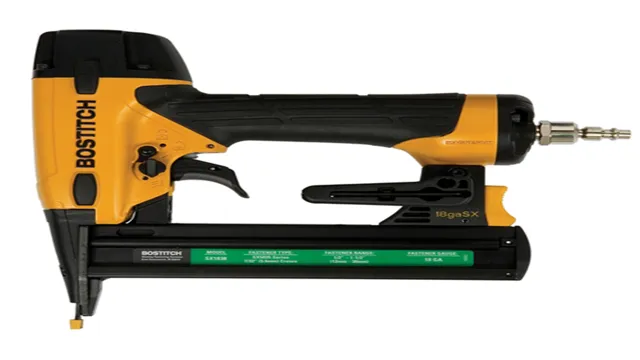
Do you have a pneumatic staple gun but aren’t quite sure how to load it? Don’t worry, you’re not alone! Loading a staple gun can be tricky, but once you know the steps, it’s a piece of cake. In this blog post, we’ll guide you through the process of loading a pneumatic staple gun, step by step. So put on your safety goggles and let’s get started!
Overview
If you’re new to using a pneumatic staple gun, loading it can seem like a daunting task. But once you get the hang of it, it’s actually quite easy. To start, make sure you’ve chosen the right kind of staples for your gun and have them on hand.
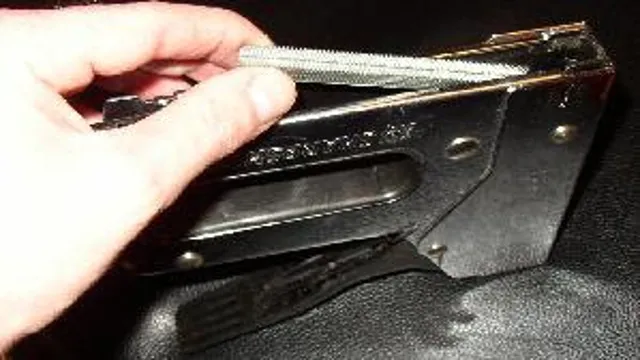
Most pneumatic staple guns have a magazine that slides out of the bottom or back of the tool. Simply press the release button and slide the magazine out. Place the new staples into the magazine according to the manufacturer’s instructions, making sure they’re aligned properly.
Then slide the magazine back into the gun until it clicks into place. Finally, attach the air hose to the gun and you’re ready to go. Remember to always wear safety gear and keep the gun pointed away from yourself and others while in use.
By following these simple steps, you’ll be a pro at loading your pneumatic staple gun in no time!
Introduction to pneumatic staple gun
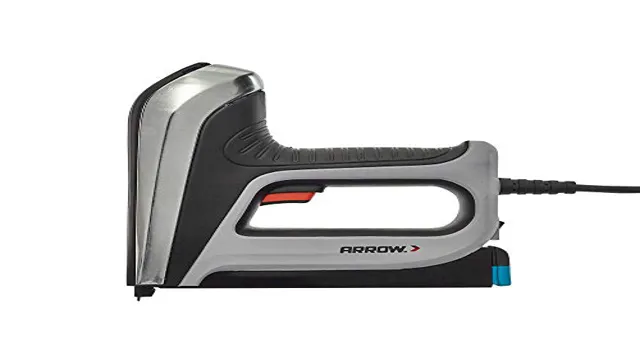
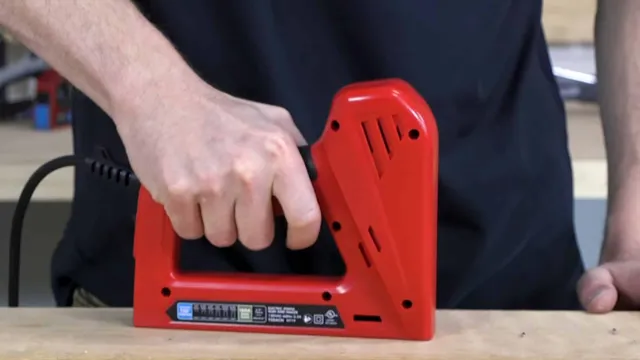
If you’re looking for a powerful tool to help you with your DIY projects, a pneumatic staple gun might be just what you need. This versatile machine uses compressed air to drive staples into wood and other materials quickly and efficiently. Pneumatic staple guns are popular among craftsmen and hobbyists because they can tackle a wide range of tasks, including upholstery work, carpentry, and even home repairs.
With their lightweight design and ease of use, they’re also a great option for those who want a tool that’s easy to handle. So if you’re looking for a reliable and effective way to knock out your next project, a pneumatic staple gun might be just what you need.
Types of pneumatic staple gun
When it comes to securing materials together, a pneumatic staple gun is the go-to tool for many enthusiasts and professionals alike. These powerful devices provide a high level of accuracy and speed, making them perfect for a range of different tasks. There are many different types of pneumatic staple guns available on the market today, each with its own unique features and capabilities.
Some of the most common types of pneumatic staple guns include pinners, finish staplers, and upholstery staplers. Pinners are ideal for delicate work such as cabinetry and craft projects. Finish staplers are perfect for finishing tasks like baseboards and window casings, while upholstery staplers are strong and powerful tools designed for use with heavy-duty fabrics.
No matter what type of material you want to secure, there is a pneumatic staple gun out there that is perfect for the job.
Safety measures
When it comes to ensuring safety measures in any situation, it’s important to take a comprehensive approach. This means paying attention to potential hazards and taking steps to prevent accidents from happening. Whether you’re working in a high-risk job or just going about your daily routine, safety should always be a top priority.
From wearing protective gear to staying alert and aware of your surroundings, there are many ways to reduce the risk of injury or harm. As an example, if you are driving on the road, you should always wear a seatbelt, obey traffic laws, and avoid distractions like texting or eating while behind the wheel. By being mindful of your actions and surroundings and taking proactive steps to stay safe, you can help ensure that you and those around you stay safe and healthy.
Step-by-Step Guide
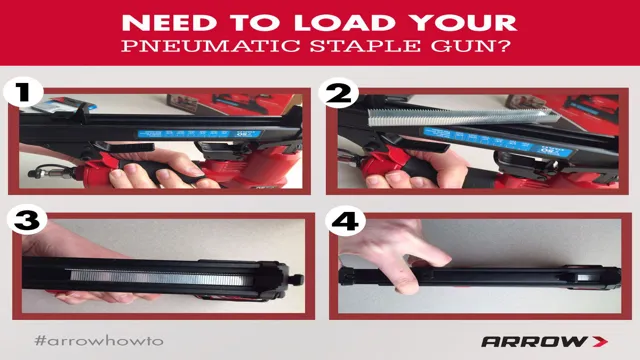
If you’re wondering how to load a pneumatic staple gun, it’s actually pretty easy! First, make sure the gun is unplugged and empty of any staples or nails. Next, locate the magazine release button on the back of the gun and press it to open the magazine. Now, insert a strip of staples into the magazine with the points facing down.
Make sure the strip is lined up properly and flush against the guide rails. Once you’ve done that, release the magazine and it should snap shut, locking the staples in place. Finally, double-check that the air hose is properly attached and you’re ready to start stapling! With a little bit of practice, you’ll be a pro at loading and using your pneumatic staple gun in no time.
Step 1: Check the staple gun’s load chamber
When working with a staple gun, it’s important to ensure that the load chamber is prepared before you start using it. To do this, first make sure that the staple gun is unplugged or has no power source attached. Then, open up the load chamber and check if it’s loaded with staples or not.
If it’s empty, begin by loading the staple gun with the right size and type of staples. Take note of the manufacturer’s recommended staples, as using the wrong type can damage the staple gun or make it malfunction. Once you’ve successfully loaded the staple gun, close the load chamber and make sure that it snaps securely into place.
By taking the time to check and load your staple gun properly, you’ll reduce the risk of accidents, jams, and other hazards. Remember to always follow the manufacturer’s instructions and recommended safety practices to keep yourself and others safe.
Step 2: Open staple gun’s magazine
Now that you’ve loaded your staple gun with staples, the next step is to open the gun’s magazine. Usually, the magazine is located at the bottom part of the staple gun. To open it, you need to locate the latch or release button.
Depending on your staple gun, the latch may be a lever that you need to pull back or a button that you need to press. Once you have found the latch or release button, hold it down or pull it back while you slide the magazine out of the gun. Be careful not to accidentally release the magazine during this process, as this can cause staples to fly out and potentially cause injury.
Once you have opened the magazine, you can load the staples in and slide the magazine back into the staple gun. Remember to always follow your staple gun’s instructions and safety precautions when using it to avoid any accidents.
Step 3: Load staples into magazine
Loading staples into the magazine of a stapler can be tricky for those who have never done it before. The first step is to locate the button or lever that releases the magazine. Once the magazine is open, carefully align the staples in the right direction and push them down until they click into place.
It is important to note that different staplers require different types of staples, so be sure to use the right size and shape. It is also important to not overload the magazine, as this can cause the stapler to malfunction or jam. By properly loading staples into the magazine, you can ensure that your stapler is always ready to use for your next task.
With these simple steps, you can become a pro at loading staples in no time.
Step 4: Close the magazine
Closing a magazine may seem like a simple task, but it’s important to do it properly to avoid damaging the pages or cover. The fourth step in our step-by-step guide for closing a magazine is to actually close it. This involves gently bringing the two covers together, ensuring that the pages are lined up evenly.
Avoid bending the magazine or forcefully slamming it shut, as this can cause creases or tears in the pages. Once closed, give the magazine a gentle tap along the spine to align the pages even further. By following these steps, you can ensure that your magazine stays in good condition and is ready for your next reading session.
Testing the stapler
If you’re wondering how to load a pneumatic staple gun, the first step is to make sure it’s unplugged or the air supply is turned off. Next, locate the magazine release lever and push it towards the back of the gun to open the magazine. Place the staples into the magazine, making sure they are facing the right direction.
Then, press the magazine into place until it clicks. Finally, test the stapler by firing a few staples into a scrap piece of wood or cardboard. It’s important to note that different staple guns may have slightly different loading processes, so always read the manufacturer’s instructions before loading your staple gun.
With a little practice and patience, loading a pneumatic staple gun can be done easily and safely.
Step 1: Insert the air hose
When testing the stapler, the first step is to insert the air hose. This may seem like a simple task, but it is important to ensure that the hose is securely attached to the stapler before beginning the test. Once the hose is attached, turn on the air compressor and adjust the pressure accordingly.
It is recommended to start with a lower pressure and gradually increase it to avoid damaging the stapler. Now, it’s time to test the stapler. Load the staple magazine with the desired size and type of staples, and place a piece of scrap material under the stapler.
Hold the stapler perpendicular to the material and press down on the trigger. If the stapler doesn’t fire or the staples are not securely fastened, adjust the pressure or change the staples until the desired result is achieved. By following these simple steps, you can ensure that your stapler is in good working condition and ready for any project.
Step 2: Activate the stapler
Now that we have loaded the stapler with staples, it’s time to test it out! To activate the stapler, simply press down on the top handle until you hear a satisfying “click”. This signals that the staple has been fastened securely to your paper. It’s important to note that if you encounter any resistance while stapling, you may need to adjust the stapler’s tension settings.
This can typically be done with a small knob located near the back of the stapler. Once you have adjusted the tension, you can give the stapler another test run to ensure that it’s working properly. With a fully functioning stapler by your side, you’ll never have to worry about loose pages or documents again!
Conclusion
Loading a pneumatic staple gun may seem daunting at first, but with these simple steps, you will be shooting staples like a pro! Just remember to properly align the staples, make sure the gun is loaded with the right size staples, and keep your fingers safe by wearing protective gloves. With all these precautions in place, you’ll be stapling your way to success in no time!”
Summary of the process
After going through the process of finding the right stapler for your needs, it’s important to test it out and ensure that it works properly. Testing the stapler can prevent any frustration or mishaps down the line. First, make sure that the stapler is loaded with the correct size of staples.
Then, try stapling a piece of paper to test the functionality. If the stapler doesn’t staple smoothly or the staples are misaligned, try adjusting the tension or reloading the staples. It’s also important to test the stapler’s capacity to see how many pages it can staple at once without jamming.
By taking the time to properly test and adjust your stapler, you’ll be able to use it with ease and avoid any unnecessary frustration.
Final tips and caution
Testing the stapler may seem like a simple task, but it’s important to do it properly to avoid any frustration or accidents in the future. First off, make sure to use the correct staples for your stapler. Using the wrong size or type can cause jams or damage the stapler.
Next, test the stapler on a small stack of paper to see if the staples go all the way through and are secure. If they’re not, try adjusting the stapler’s settings or using a different type of staple. It’s also a good idea to test the stapler’s durability by stapling through thicker materials or multiple layers of paper.
Lastly, always be cautious when using a stapler and never point it at yourself or others. By following these tips and taking caution, you can ensure your stapler works properly and safely.
FAQs
What is a pneumatic staple gun and how is it different from an electric staple gun?
A pneumatic staple gun is powered by compressed air, while an electric staple gun uses electricity from an outlet. Pneumatic staple guns are generally more powerful and can be used for heavier-duty jobs.
What size air compressor do I need to power a pneumatic staple gun?
It depends on the specific model of the staple gun, but typically a compressor with a minimum of 2-3 gallons and 2-4 CFM is recommended.
Can I use regular office staples with a pneumatic staple gun?
No, you need to use staples specifically designed for pneumatic staple guns. Using regular staples can damage the staple gun and the materials you are working with.
How do I load staples into a pneumatic staple gun?
First, make sure the staple gun is unplugged and the air pressure is released. Then, locate the staple chamber and slide the staples in until they click into place. Close the chamber and you’re ready to use the staple gun.
What are some safety precautions to keep in mind when using a pneumatic staple gun?
Always wear eye protection and gloves to prevent injury. Keep your fingers clear of the firing area and never point the staple gun at anyone. Make sure the air compressor is properly maintained and the staple gun is not loaded when not in use.
What types of projects are best suited for a pneumatic staple gun?
Pneumatic staple guns are ideal for heavy-duty woodworking projects like building cabinets or laying flooring. They are also commonly used in upholstery and furniture making.
My pneumatic staple gun is jammed. How do I fix it?
First, make sure the staple gun is unplugged and the air pressure is released. Then, check for any visible obstructions or debris in the staple chamber. Use pliers or tweezers to remove any jammed staples. If the problem persists, consult the manufacturer’s instructions or a professional repair service.

