How to Sharpen Rotary Hammer Drill Bits: Quick and Easy Tips
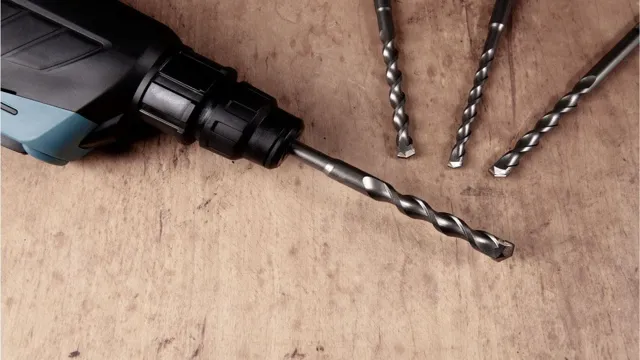
Do your rotary hammer drill bits need sharpening? It’s a question that many DIYers and professionals often ponder. After all, a dull bit can cause frustration and make even the simplest of tasks more challenging. But before you toss those bits, know that sharpening them is possible.
In this comprehensive guide, we’ll take you through the steps of sharpening your rotary hammer drill bits, so you can achieve precise and efficient drilling without breaking the bank. We’ll cover everything from selecting the right tools to understanding the sharpening process and safety tips to keep in mind. So, grab your bits and let’s get started!
Benefits of Sharpening Rotary Hammer Drill Bits
Sharpening rotary hammer drill bits is an essential practice that can help you achieve better performance and longevity with your equipment. When your drill bits become dull and worn out, they tend to produce less accurate and efficient results. By taking the time to sharpen your bits, you can ensure that they have a sharper edge, less friction, and can quickly perform their intended task.
Sharpening helps make the drill bits more productive, efficient, and save both time and money. So, learning how to sharpen rotary hammer drill bits is a necessary skill for anyone who wants to maintain their equipment properly. You can sharpen your bits using a sharpening stone, a drill bit sharpener, or a bench grinder.
Regular sharpening of your rotary hammer drill bits is critical to ensuring optimal performance, and it’s particularly useful if you frequently use your drill bits. Come on, let’s start sharpening and keep your drilling pace sharp like a knife!
Improved Drill Performance
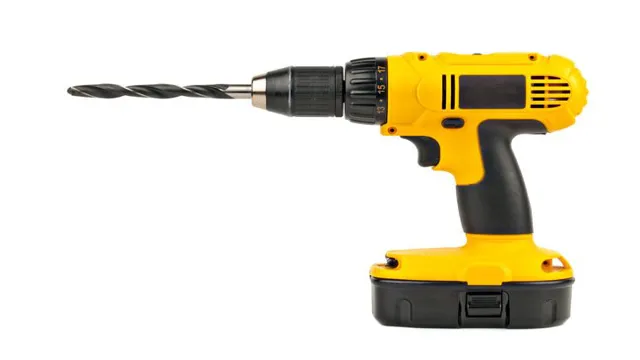
Rotary Hammer Drill Bits Sharpening your rotary hammer drill bits can significantly improve their performance, making your drilling tasks more effective and efficient. Dull bits can result in slower drilling, and in some cases, cause damage to your drill. By sharpening your bits, you not only save on the cost of replacing them but also improve the precision and accuracy of your drilling.
With sharper bits, you can drill deeper and faster, while reducing the risk of slipping or jamming. It is essential to sharpen your rotary hammer drill bits regularly, especially if you use them extensively. A good rule of thumb is to sharpen them every 50 to 100 holes or after noticing a decrease in performance.
Think of it as maintaining your car for optimal performance. Just like a car requires regular oil changes and tune-ups, so does your power tool. By taking care of your drill and regularly sharpening your bits, you’ll get the most out of your investment, ensuring that it works at its peak performance for years to come.
Longer Drill Bit Life
When it comes to using rotary hammer drill bits, one of the most significant benefits of sharpening them is a longer lifespan. Over time and constant use, drill bits can become dull and worn. This can result in slower drilling times, less precise holes, and even damage to the drill itself.
By regularly sharpening your drill bits, you can ensure that they are always performing at their best. This not only saves you time and money in the long run, but it also ensures that you are always getting the most out of your tool. Think of it like a chef sharpening their knives – it may seem like a small task, but it can make a world of difference in the quality of the end product.
So, take the time to sharpen your rotary hammer drill bits, and enjoy a longer lifespan and improved performance from your tool. Your projects will thank you for it!
Cost Savings on Drill Bits
If you’re in the business of construction or DIY, you’re likely familiar with the importance of sharp and durable drill bits. Not only do they make your work easier and more efficient, but they also save you money in the long run. Sharpening your rotary hammer drill bits is an excellent way to ensure that they stay in good condition, allowing you to stretch your budget further and get more work done.
Dull bits require more pressure and effort to work, which may cause overheating and damage to your equipment. This can lead to expensive repairs and replacements that can add up quickly. By sharpening your bits, you’ll be able to maintain the integrity of your equipment and extend its lifespan, all while saving money on replacements.
Additionally, sharpening your bits can improve the quality and speed of your work, allowing you to complete projects with greater accuracy and efficiency. Overall, the benefits of sharpening your rotary hammer drill bits are clear, making it a smart investment for anyone in the construction or DIY industry.
Tools Needed to Sharpen Rotary Hammer Drill Bits
If you’re looking to sharpen rotary hammer drill bits, you’ll need a few tools to do it right. First and foremost, you’ll need a bench grinder to sharpen the bit itself. A diamond-tipped wheel is ideal, as it will produce a clean, sharp edge.
You’ll also need a clamp or vice to hold the bit securely in place while you work on it. Additionally, you may need a sharpening stone or honing oil to touch up any nicks or rough spots on the bit. It’s important to exercise caution while sharpening the bit, as the high speed of the grinder can be dangerous.
Always wear safety gear, and be sure to maintain the correct angle while grinding to ensure optimal performance. With the right tools and a little practice, you’ll be able to keep your rotary hammer drill bits sharp and effective for all your drilling needs.
Bench Grinder
Bench Grinder To properly sharpen rotary hammer drill bits, you’ll need some essential tools. One such tool is a bench grinder, which allows you to grind away dull surfaces on the bit and reshape its edges into a sharper point. When using a bench grinder for this purpose, make sure the bit is secure in a vise, clamp, or other sturdy holding device to prevent it from moving while grinding.
Use the coarsest grinding wheel available to remove any metal that’s been damaged during use, and then move on to a finer wheel to create a sharp edge. Make sure to clean the bit frequently during the process to prevent overheating and maintain the accuracy of the sharpening. With a bench grinder and a steady hand, you can restore your dull rotary hammer drill bits to their former sharpness and get back to work in no time.
Gloves
When it comes to sharpening your rotary hammer drill bits, there are a few tools you’ll need to get started. First and foremost, you’ll need a bench grinder with a high-quality grinding wheel. This will allow you to easily sharpen the tips of your bits without causing damage or reducing their lifespan.
Additionally, you should always wear gloves when working with this type of equipment, as the grinding process can create a lot of heat and friction that can cause burns or other injuries. Other tools you’ll need include a set of pliers to hold the drill bits in place while you’re sharpening them, a wire brush to clean up any debris or dust that may accumulate during the grinding process, and a sharpening jig or guide to help you maintain the correct angle and depth on your drill bits. With the right tools and a little bit of patience, you can easily sharpen your rotary hammer drill bits and keep them in top condition for years to come.
Safety Glasses
Safety Glasses Sharpening rotary hammer drill bits requires some essential tools to ensure accurate and efficient results. One of the vital tools you must have is a bench grinder with diamond grinding wheels. The grinder will enable you to sharpen the tip of the drill bit to its specified angle and smoothen its surface.
Additionally, you need to invest in a drill bit gauge to measure the angles carefully. To hold the drill bits in place, you’ll need a drill bit holder or vise. Safety glasses are equally important when sharpening rotary hammer drill bits to protect your eyes from flying debris or metal shavings.
The glasses should fit well and have side shields to provide maximum protection. Sharpening rotary hammer drill bits can be challenging, but having the proper tools and safety gear makes the task more manageable and safer.
Step-by-Step Guide to Sharpening Rotary Hammer Drill Bits
If you want to save money and keep your rotary hammer drill bits sharp and efficient, then you need to learn how to sharpen them. Sharpening your rotary hammer drill bits is easy and only requires a few basic tools. First, you’ll need a bench grinder with a fine-grit wheel, then you’ll need to disassemble the bit and clamp it securely to the grinder.
Turn on the grinder and carefully sharpen the bit at a 45-degree angle, making sure to apply even pressure to both sides of the bit. After sharpening one side, flip the bit over and repeat the process on the other side. Once both sides are sharpened, test the bit on a piece of scrap wood or metal to make sure it’s cutting properly.
With a little bit of practice and patience, you’ll be able to sharpen your drill bits like a pro, ensuring that they stay sharp and efficient for all your drilling needs.
Step 1: Secure the Drill Bit
If you’re looking to sharpen your rotary hammer drill bits, you’ve come to the right place! In this step-by-step guide, we’ll walk you through the process so you can restore your dull bits back to their original sharpness. So, let’s get started with Step 1: Secure the Drill Bit. It’s important to make sure your drill bit is held securely in place before you begin sharpening.
A vice can be used to hold the bit in place, but if you don’t have one, you can also use a pair of clamps. Just be sure to position the bit at a comfortable height and angle so you can easily access it during the sharpening process. Once you have the bit firmly secured, you’re ready to move on to the next step.
Remember, taking the time to properly secure your drill bit will ensure a safe and effective sharpening process.
Step 2: Position the Drill Bit
When it comes to sharpening rotary hammer drill bits, the second step is to position the drill bit correctly. It’s crucial to make sure that the drill bit is firmly in place to avoid any accidents. Start by clamping the bit securely in a vise to ensure that it doesn’t move around while you’re working.
You want to position the bit so that you can sharpen it without any interference. It’s also important to choose the right size drill bit for the job at hand. Once you’ve got the correct drill bit, make sure that it’s positioned so that you can easily access all the parts that need to be sharpened.
This will ensure that the bit is sharpened uniformly and that it stays sharp for as long as possible. By taking the time to properly position the drill bit, you’ll be able to sharpen it with confidence and get back to your project quickly.
Step 3: Adjust the Bench Grinder
Once you’ve set up your bench grinder and secured your rotary hammer drill bit, it’s time to adjust the grinder to the correct angle. This is a crucial step, as the angle determines the sharpness and effectiveness of the bit. The angle you need to adjust to will vary depending on the type of bit you’re sharpening.
For example, a masonry bit typically needs a 60-degree angle, while a wood bit might require a 25-degree angle. To adjust the angle, start by turning off the grinder and unplugging it from the power source. Then, locate the adjustment mechanism on the grinder.
This is usually a knob or lever that allows you to move the grinding wheel up or down. Consult your drill bit manufacturer’s instructions to determine the correct angle for your specific bit. Once you’ve set the angle, turn on the grinder and gently lower the bit onto the grinding wheel.
Be sure to keep a firm grip on the bit as you grind it, moving it back and forth slightly across the wheel to ensure an even grind. Don’t apply too much pressure; let the grinder do the work. After a few passes, turn off the grinder and inspect the bit.
If it still looks dull, adjust the angle slightly and repeat the grinding process. Continue adjusting and grinding until the bit is sharp and effective. It may take a bit of practice to get the hang of adjusting the grinder, but with patience and persistence, you’ll be sharpening drill bits like a pro in no time.
Step 4: Begin Grinding the Drill Bit
As you begin grinding your rotary hammer drill bit, it’s important to take your time and make sure you’re doing it correctly. First, secure the bit in your vise grip and position it so that it’s level. Then, using your bench grinder, carefully grind away the dull edges of the bit.
The key is to keep the bit cool while doing this, as overheating can lead to a brittle and ineffective bit. Try using short, controlled grinding strokes, and take breaks to allow the bit to cool down if necessary. You may also want to use a diamond file to sharpen the edges of the bit, ensuring that it’s sharp and effective for your next drilling task.
By taking your time and using the right tools, you’ll be able to sharpen your rotary hammer drill bits and keep them in top condition for all your drilling needs.
Step 5: Check the Drill Bit Angle
When it comes to sharpening rotary hammer drill bits, checking the angle of the bit is crucial for ensuring its effectiveness. Step 5 involves carefully examining the angle of the drill bit to ensure it is properly shaped. A dull or rounded bit angle will not penetrate the surface efficiently, leading to decreased effectiveness and even potential damage to the bit.
To check the angle of the bit, locate the chisel edge on the underside of the bit and hold it up to a light source. The angle should be approximately 45 degrees for optimal performance. If the angle is off, use a grinding wheel or file to reshape the edge, being careful to maintain a consistent angle across the entire edge.
By taking the time to check and adjust the angle of the drill bit, you can ensure it is ready to tackle any tough job with ease and effectiveness.
Step 6: Repeat on the Other Flute
Now that you’ve sharpened one flute on your rotary hammer drill bit, it’s time to repeat the process on the other flute. Remember to flip the bit over and secure it in the vice before starting. Again, use the correct size file, and aim to sharpen the flute to the same angle and depth as the previous one.
Make sure to check your progress frequently and adjust your technique as needed. Once you’re done, the two flutes should be identical in size and shape, ensuring an even and efficient drilling experience. With your newly sharpened bit, you’ll be able to power through even the toughest materials with ease.
Happy drilling!
Step 7: Debur the Flutes
When it comes to sharpening rotary hammer drill bits, the final step is just as important as the rest: deburring the flutes. This process involves removing any burrs or rough edges that may be present on the flutes of the bit. To deburr the flutes, you can use a small file or a deburring tool.
Gently run the file or tool along the edges of each flute, being sure to remove any sharp or uneven bits. This will help to ensure that the bit can operate smoothly without snagging or causing damage to the surface you are drilling into. Don’t overlook this crucial step, as even the slightest burrs can have a big impact on the longevity and effectiveness of your bit.
By taking the time to deburr the flutes, you will be able to get the most out of your rotary hammer drill bit and tackle even the toughest projects with ease.
Step 8: Check the Goodness of the Drill Bit
After sharpening your rotary hammer drill bit, it’s essential to check the quality of the work you’ve done. To do so, examine the flutes, the edges of the bit, and the point. The flutes, located along the length of the bit, should be well-defined and free of cracks or chips.
The edges should be sharp and smooth, without any visible dullness or nicks. Finally, the point should be crisp and unworn. Once you’ve checked each of these aspects, you can test the bit’s performance by drilling into a scrap piece of material.
If the bit cuts easily and cleanly, without getting stuck or overheating, then you can be confident in the job you’ve done. Keep in mind that a poorly sharpened bit can result in unnecessary strain on your tool and a less than desirable outcome, so it’s worth taking the time to double-check your work.
Conclusion
In conclusion, sharpening rotary hammer drill bits is a task that may seem daunting at first, but with the right tools and techniques, can be accomplished easily and efficiently. By following the steps outlined above, you’ll be able to breathe new life into your dull drill bits, saving both time and money in the long run. Remember to keep your safety goggles on, take breaks when necessary, and stay sharp – not just your bits, but your wit and cleverness as well!”
Benefits of Sharpening Rotary Hammer Drill Bits Again
Rotary hammer drill bits can get dull over time, leading to decreased drilling efficiency and even reduced tool life. But did you know that sharpening your rotary hammer drill bits can have numerous benefits? For one, it can help maintain the sharpness of your drill bits, allowing you to drill faster and more accurately. Sharpened drill bits can also reduce friction and heat buildup, preventing damage to your equipment and increasing the lifespan of your tools.
In addition, sharpening can save you money by extending the life of your tools and reducing the need for replacements. If you’re looking to sharpen your rotary hammer drill bits on your own, it’s crucial to follow a step-by-step guide to ensure proper technique and safety. Start by cleaning the bits so that you can easily see any damage or signs of wear.
Then, use a grinding wheel or sharpening stone to remove any dull or damaged bits. Make sure to keep your drill bit at the correct angle during sharpening, and be patient with the process to avoid overheating and damaging the bit. Finally, test your drill bit to ensure that it’s sharp and ready for use.
Overall, sharpening your rotary hammer drill bits is a valuable practice that can improve drilling efficiency, tool life, and cost-effectiveness. With the right tools and technique, you can sharpen your bits at home and enjoy the benefits of a sharper, more efficient drill.
Maintenance Tips for Rotary Hammer Drill Bits
Rotary hammer drill bits are vital tools for construction, but like any tool, they require maintenance to retain their effectiveness and longevity. One essential maintenance tip is to sharpen your rotary hammer drill bits regularly. Here is a step-by-step guide to sharpening your drill bits.
Firstly, secure the bit in a vise to prevent movement during sharpening. Next, use a diamond file to grind away any dullness from the cutting edge. Avoid using too much pressure and restrict yourself to light, smooth strokes.
Along with that, make sure to hold the file at the same angle as the bit’s cutting edge. After you finish the entire surface, use a honing stone to enhance the sharpness even more. Finally, use a bit of oil to lubricate your bit, and you’re ready to go.
Taking care of your rotary hammer drill bits is critical for maintaining their performance levels at the construction site. Performing routine maintenance, such as regular sharpening, can save you money, increase efficiency, and ensure safety while working.
FAQs
What is a rotary hammer drill bit?
A rotary hammer drill bit is a specialized tool used to drill through tough surfaces like concrete and masonry.
Why do rotary hammer drill bits become dull?
Rotary hammer drill bits become dull due to constant use and exposure to tough materials like concrete and masonry.
How often should I sharpen my rotary hammer drill bits?
It is recommended to sharpen your rotary hammer drill bits every 50-100 holes, depending on the type of material you are drilling through.
What is the best way to sharpen rotary hammer drill bits?
The best way to sharpen rotary hammer drill bits is by using a sharpening stone or diamond blade to remove the dull edges and restore the sharpness of the bit.
Can I sharpen my rotary hammer drill bits myself or should I take them to a professional?
You can sharpen your rotary hammer drill bits yourself, but it is recommended to take them to a professional if you are not experienced in using sharpening tools.
What are some common mistakes to avoid when sharpening rotary hammer drill bits?
Some common mistakes to avoid when sharpening rotary hammer drill bits include applying too much pressure, using the wrong angle, and not properly securing the bit during sharpening.
How can I prolong the life of my rotary hammer drill bits?
To prolong the life of your rotary hammer drill bits, avoid using them on materials they are not designed for, regularly clean and lubricate them, and store them properly in a dry, secure location.

