How to Start a Welding Torch: A Step-by-Step Guide for Beginners
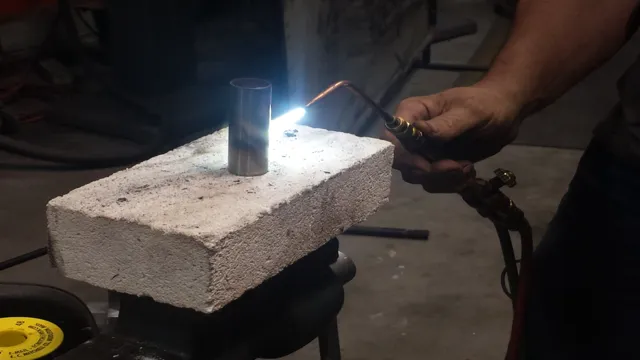
Have you ever wanted to try welding but didn’t know where to start? Well, fear not, because starting a welding torch is easier than you think. Whether you’re a beginner or an experienced welder, knowing how to properly start a welding torch is crucial for a successful welding experience. In this blog, we’ll go over the step-by-step process of starting a welding torch and some tips to keep in mind.
So, put on your safety gear and let’s get started!
Gather Necessary Equipment
Starting a welding torch requires certain equipment, and it’s essential to gather everything you need before beginning. You will need the welding torch itself, which typically includes a handle, trigger, and nozzle. Make sure you choose the right type of torch for the type of welding you will be doing; some torches may be better suited for higher heat or thicker metals than others.
You’ll also need a tank of gas, usually either oxygen or acetylene, depending on the torch you’re using. The torch will need a regulator to control the pressure of the gas flow. You’ll also need a pair of safety goggles to protect your eyes from the bright light of the torch.
And, of course, don’t forget the welding rods or wire, which will vary depending on the type of welding you’re doing. By ensuring you have the right equipment on hand, you’ll be able to start your welding torch and get the job done safely and effectively.
Welding Torch
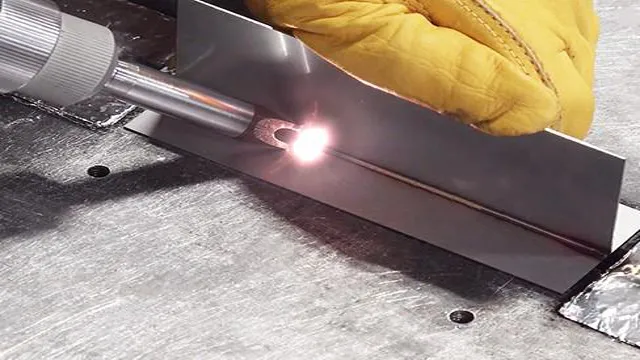
When it comes to welding, the torch is one of the essential tools that you’ll need to get the job done. Before you start, be sure to gather all the necessary equipment to ensure everything goes smoothly. Firstly, you’ll need a welding torch head, which consists of a handle, nozzle, and tip, and the necessary fuel or gas supply.
The fuel or gas can be in the form of acetylene, propane, or methane, depending on the type of welding you’re performing. Additionally, you’ll need a regulator to control the gas flow, hoses to connect all the components, and a spark lighter to ignite the flame. Make sure that all your equipment is in good condition, and that you have the correct size and type of nozzle for your project.
With all your equipment ready, you’ll be well-prepared to use your welding torch safely and efficiently to create high-quality welds and complete a successful welding project. Remember to always wear protective gear such as gloves and goggles before using the welding torch to prevent any injuries from flying sparks or hot metal.
Gas Cylinder
One of the first steps when dealing with gas cylinders is to gather the necessary equipment. This ensures that you have everything you need before starting any work with the cylinder. The equipment you need varies depending on the task you need to perform, but there are a few tools you should always have on hand.
One of the most important pieces of equipment is a pair of protective gloves made of heat-resistant material. These gloves protect your hands from hot surfaces and any chemicals that may be present. Additionally, you should have safety glasses and a face shield to protect your eyes and face from any debris that may come off the cylinder during handling.
A wrench, regulator, and hose are also essential tools when dealing with a gas cylinder. These tools allow you to control the flow of gas and ensure that the cylinder is properly connected. By gathering the right tools, you can perform any task on your gas cylinder safely and efficiently.
Welding Gloves
If you’re getting ready to tackle a welding project, one of the most important pieces of equipment you’ll need are welding gloves. These specialized gloves are designed to protect your hands from the intense heat and sparks produced during the welding process. Before you start welding, it’s essential to gather the necessary equipment, including a sturdy pair of welding gloves.
When choosing your gloves, make sure they fit comfortably and provide adequate protection. Look for gloves made from sturdy materials such as leather or heavy-duty fabric, and ensure they have reinforced seams and heat-resistant liners. With the right gloves, you can protect your hands and complete your welding project safely and efficiently.
Safety Goggles
Safety goggles are a vital piece of equipment when working with hazardous materials or in environments where debris or particles are present. Gathering the necessary equipment before starting a task is essential to ensure that the task can be completed safely and efficiently. Safety goggles should be at the top of the list when considering what equipment is required.
When selecting safety goggles, it is important to choose the right fit and style. Safety goggles come in a variety of sizes and shapes and are designed to fit various face shapes and sizes. Proper fit is critical because if the safety goggles do not fit correctly, they may not provide adequate protection, leaving the wearer vulnerable to potential eye injuries.
Another important factor to consider when selecting safety goggles is the lens material. The lens material should be selected based on the specific hazards associated with the task. For example, if working with chemicals, goggles with chemical-resistant lenses should be used.
If working in an environment where there is a risk of impact, goggles with impact-resistant lenses should be chosen. In conclusion, gathering necessary equipment is vital when performing tasks that require safety goggles. It is essential to choose the correct fit and style and the appropriate lens material to ensure maximum protection against potential eye injuries.
By utilizing safety goggles, workers can perform their tasks confidently and safely.
Prepare the Torch
Starting a welding torch is an essential step before beginning any welding project. To prepare the torch, first ensure that your workspace is clean and free of any flammable materials. Next, check that your gas and oxygen tanks are adequately filled and securely attached to the torch.
Then, open the tanks’ valves, and adjust the regulators to the desired pressure level. Finally, ignite the torch using a striker or a spark igniter, being careful to keep the flame away from yourself or anything that might ignite. Once the torch is lit, adjust the flames to the proper size and shape according to your project’s specifications.
By properly preparing your torch, you can ensure a smooth welding experience that produces quality results every time.
Attach the Regulator
Now that you’ve assembled the torch, it’s time to attach the regulator to your gas tank. This is a crucial step to ensure that your torch is working safely and efficiently. First, make sure your gas tank is secure and upright.
Locate the connection point on the bottom of the regulator and align it with the valve on the gas tank. Tighten the regulator to the valve by turning the T-handle clockwise until it’s snug. Be careful not to overtighten, as this can damage the valve.
Once attached, turn the valve on the gas tank counterclockwise to release the gas and check for leaks. Use a leak detection solution and inspect all the joints for bubbles, tightening any areas that have bubbles present. Once the regulator is securely attached and checked for leaks, you’re ready to move on to lighting the torch.
Turn On the Gas Cylinder
If you’re preparing to use a torch, then it’s important to know how to turn on the gas cylinder. This will ensure that you have a steady gas flow and can get your job done quickly and efficiently. To begin, make sure that your torch is set to the off position.
Next, locate the valve on the gas cylinder and make sure that it’s fully closed. Then, slowly open the valve by turning it counterclockwise. Be careful not to turn it too quickly, as this can cause a sudden burst of gas.
You should also listen for the sound of gas escaping the cylinder. Once you’re sure that the valve is open, turn on your torch and ignite the gas. You’re now ready to start using your torch! Remember to always use caution when working with open flames and to follow all safety guidelines to avoid injury or accidents.
Open the Torch Valve
When it comes to torch welding, it’s essential to start with a fully prepared torch. Before lighting the torch, you’ll need to open the torch valve, which regulates the flow of gas to the torch tip. To do this, locate the torch valve and turn it counter-clockwise until it’s fully open.
This will allow gas to flow through the supply hose and into the torch head. Keeping the valve open will ensure a consistent flow of gas throughout your welding process. It’s crucial to remember to close the valve when you’ve finished using the torch, as leaving it open can lead to dangerous gas leaks.
By opening the torch valve at the beginning of your welding project, you’ll be well on your way to a successful outcome. So, go ahead, turn that valve open and start welding like a pro!
Light the Torch
Starting a welding torch might seem intimidating, but with a little practice and some basic knowledge, it can become second nature. First, make sure that the gas valve is closed and the regulator is attached. Then, connect the striker to the torch and hold it a few inches away from the tip.
With a quick motion, strike the striker against the flint to create a spark, igniting the gas. Adjust the flame and you’re ready to start welding. Remember to always wear proper safety gear, including gloves and a welding helmet, and to work in a well-ventilated area.
With these steps, you’ll be able to safely and efficiently light the torch and start your welding project.
Adjust the Flame
If you want to start using a torch, then you must learn how to adjust the flame. Lighting a torch can be intimidating, but don’t worry, it’s not as difficult as it seems. First, you should check that there is enough fuel in the torch, and then you can begin to adjust the flame.
The flame can be adjusted by moving the lever on the torch’s body. If you need a bigger flame, move the lever up, and for a smaller flame, move it down. When adjusting the flame, be confident and take your time to get the right size flame.
Too small and the torch won’t light, but too large, and it can become dangerous. Once you’ve got the flame to the right size, it’s time to light the torch! Use a lighter or matches to light the torch, and then you can start using it for all sorts of different tasks. Remember, practice makes perfect, so don’t be worried if you don’t get it right the first time.
With a little bit of practice, you’ll be adjusting the flame like a pro.
Test the Torch
If you’re an avid camper or hiker, then you understand the importance of having a reliable torch at your disposal. But have you ever wondered just how durable and effective your torch really is? That’s where “test the torch” comes in! By putting your trusty torch to the test, you can ensure that it can withstand the elements and provide you with the light you need when you need it the most. When testing your torch, there are a few key factors to consider.
Start by examining the torch’s brightness and beam distance. Is it bright enough to light up your entire campsite or trail? Does the beam reach far enough to help you navigate safely in the dark? Additionally, you’ll want to test the torch’s battery life to ensure that it won’t die on you in the middle of the night. But that’s not all – you should also test the torch’s durability.
Drop it on hard ground, expose it to rain and water, and see how it handles the elements. After all, you never know what Mother Nature might throw your way during a camping trip. Finally, consider the torch’s size and weight – is it easy to carry around with you during your adventures? By taking the time to test your torch before your next camping or hiking trip, you can ensure that you’re fully prepared for whatever the great outdoors might throw your way.
So light up that torch, and put it to the test – you won’t regret it!
Conclusion
Starting a welding torch may seem daunting, but fear not! It’s as easy as lighting a birthday candle, albeit with a lot more safety precautions. With proper handling, equipment, and the right technique, you can weld up some amazing creations. So, whether you’re a seasoned pro or a newbie, grab your torch and start welding your way to glory – just remember to keep those safety goggles on and your wits sharp!”
FAQs
What is a welding torch and how does it work?
A welding torch is a tool used for welding metals together. It uses a combination of fuel gas and oxygen to create a high-temperature flame that melts the metal surfaces, allowing them to bond together.
How do you prepare a welding torch for use?
To prepare a welding torch, you first need to ensure that the gas and oxygen tanks are properly connected and turned on. Then, adjust the gas and oxygen flow to the desired levels, and light the torch using a striker or spark.
What safety precautions should you take when using a welding torch?
When using a welding torch, it is important to wear protective gear, including goggles, gloves, and flame-resistant clothing. You should also work in a well-ventilated area to avoid inhaling harmful fumes, and keep a fire extinguisher nearby in case of emergency.
What are the different types of welding torches?
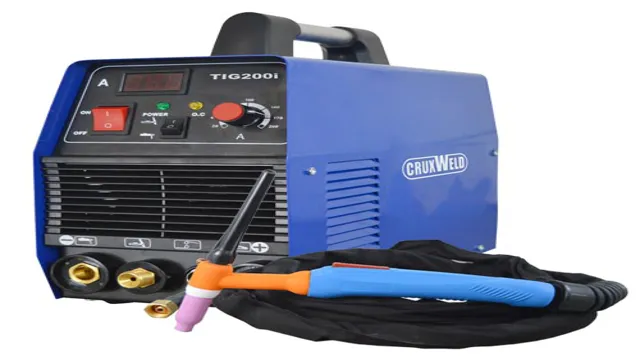
There are several different types of welding torches, including oxy-acetylene torches, plasma cutters, TIG torches, and MIG torches. The type of torch you use will depend on the specific welding job you are working on.
How do you troubleshoot common problems with a welding torch?
Common problems with a welding torch include a weak flame or no flame at all, a flame that is too hot or too cold, or a torch that is difficult to light. To troubleshoot these issues, check the gas and oxygen tanks for leaks or low levels, adjust the flame height as needed, and clean or replace any blocked or damaged torch parts.
What are some tips for maintaining a welding torch?
To maintain a welding torch, you should regularly check and replace any damaged or worn out parts, keep the torch clean and free of debris, and store it in a dry, safe location when not in use. You should also follow the manufacturer’s instructions for maintenance and use, and have the torch professionally serviced as needed.
How do you safely extinguish a welding torch?
To safely extinguish a welding torch, first turn off the gas and oxygen flow at the tanks. Then, close the torch valves and allow the torch to cool down completely before storing it. Finally, make sure to properly store the tanks and any other equipment and accessories used during welding.

