How to Charge Auto Darkening Welding Helmet for Better Visibility
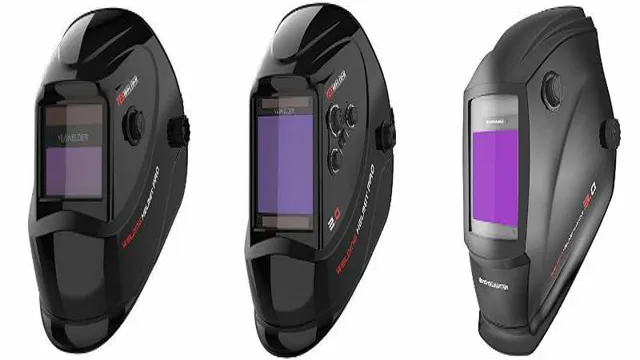
Do you want to extend the life of your auto-darkening welding helmet and ensure that it works properly every time you use it? One of the key steps you can take is to learn how to charge your welding helmet correctly. Properly charging your helmet ensures that it is always ready for use, and it can prolong the life of your battery, ultimately saving you money in the long run. But if you’re not sure how to charge your helmet, don’t worry – we’ve got you covered.
In this blog post, we’ll give you a step-by-step guide on how to charge your auto-darkening welding helmet, so you can get back to welding with peace of mind.
What You’ll Need
If you’re wondering how to charge your auto-darkening welding helmet, the process is actually quite simple. All you’ll need is a power source and your helmet’s charging cable. Start by plugging one end of the cable into the helmet’s charging port and the other into a power outlet.
Some helmets may have a specific charging time listed in the user manual, so make sure to follow those instructions. Once the helmet is fully charged, you’ll be able to use it for your welding needs. It’s important to keep your helmet charged and ready to go, as this will ensure that the auto-darkening feature works properly and provides you with the necessary protection during welding.
So go ahead and charge up, and get ready to tackle your next welding project with ease!
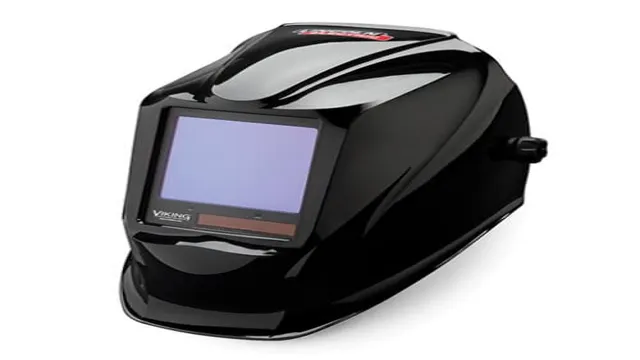
Auto-Darkening Welding Helmet
If you’re a welder, you know how important it is to have the right equipment to protect yourself from the hazards of arc welding. One essential piece of gear is an auto-darkening welding helmet. This type of helmet has a special lens that darkens automatically when you strike an arc, reducing the amount of UV and infrared light that reaches your eyes.
This not only enhances visibility but also prevents eye damage in the long run. When shopping for an auto-darkening welding helmet, you’ll need to consider several factors. These include the lens size, the quality of the filter, and the type of headgear.
You’ll also want to look for a helmet that offers a clear view of the workpiece and has a comfortable fit. Investing in a high-quality welding helmet can make the difference between a successful job and a hazardous one. So, don’t skimp on safety gear, and always wear an auto-darkening welding helmet to protect your eyes and face from the intense light of welding.
Charging Cord
When it comes to charging your electronic devices, having the right charging cord is essential. So, what exactly do you need to consider? Firstly, make sure you have the right type of charging cord for your device. This means checking the manufacturer’s specifications to find the right cord for your device model.
Secondly, consider the length of the cord. If you’re charging from an outlet far away, a longer cord may be more convenient. Thirdly, think about the durability of the cord.
Invest in a higher quality cord that will last longer, rather than cheap cords that can fray and break easily. Finally, consider the charging speed of the cord. Some cords can charge devices faster than others, so if you’re always in a rush, a faster charging cord may be more beneficial.
Remember, having the right charging cord ensures that your device is charged quickly and safely, so choose wisely.
Steps to Charge Your Auto-Darkening Welding Helmet
If you’re new to welding, figuring out how to charge your auto-darkening welding helmet can be a bit of a head-scratcher. However, it’s a pretty easy process once you know what to do. First, locate the charging port on the helmet, which is typically located on the top or side.
Once you’ve found it, plug in the battery charger that came with your helmet. Leave it plugged in until the charging indicator light turns green, which typically takes around 8 hours. Make sure you don’t overcharge the battery, as it can damage the helmet’s internal components.
Also, keep in mind that the battery lifespan varies depending on how often you use your helmet. To ensure your helmet’s battery remains in good condition, recharge it every few weeks or as needed. With these few simple steps, you’ll be ready to start welding with your fully charged auto-darkening welding helmet in no time.
Step One: Find the Charging Port
If you’re in the middle of welding and your auto-darkening welding helmet’s battery is running low, don’t worry, charging it is quick and easy! The first step is to locate the charging port. Most welding helmets have a micro-USB charging port that’s typically found on the helmet’s exterior, either near the battery or the lens. If you’re struggling to find it, consult your user manual for guidance.
Once you’ve located the charging port, simply plug in your charger. Remember, it’s important to use the correct charger for your helmet to ensure it charges properly. Some helmets include a charger, but if you don’t have one, you can purchase a compatible charger online or at a welding supply store.
The charging time varies depending on the helmet’s model and battery life, but on average, it takes around 2-4 hours to fully charge. Once it’s fully charged, you’re ready to go back to welding with clear and protected vision.
Step Two: Connect the Charging Cord
Once you’ve identified the charging port for your auto-darkening welding helmet, the next step is to connect the charging cord. Typically, welding helmets come with a standard USB charging cord, but you may need to check your manual or consult the manufacturer for specific instructions. Make sure that the charging cord is clean and free from any damage before plugging it in.
It’s best to charge your welding helmet using a wall outlet, not a computer or other electronic device, to ensure a steady and uninterrupted power supply. Once you’ve connected the charging cord, wait for the indicated amount of time, usually a few hours, for your helmet to fully charge before using it again. By taking care to ensure a proper charging cycle, you can help lengthen the lifespan of your welding helmet and keep yourself safe during welding projects.
Step Three: Let it Charge
When it comes to charging your auto-darkening welding helmet, it’s important to follow a few simple steps to ensure that you get the most out of your helmet. Step three is the point at which you finally get to let your helmet charge up so that it can provide you with the protection you need. All you need to do is plug in the charger and let it do its work.
While some helmets may only require a few hours to fully charge, others may take longer, so it’s important to consult your owner’s manual or the manufacturer’s instructions to determine exactly how long your helmet needs to charge. Additionally, you should never leave your helmet unattended while it’s charging, as this can pose a fire risk. Instead, be sure to monitor it closely to ensure that it’s charging properly and that there are no issues to worry about.
By taking the time to properly charge your auto-darkening welding helmet, you can be sure that it will be fully prepared to protect you during your next welding project.
Tips to Extend Battery Life
If you want to know how to charge an auto darkening welding helmet, it’s essential to follow the instructions provided by the manufacturer. However, there are a few tips that can extend your welding helmet’s battery life. First, it’s essential to turn off the auto darkening feature when you’re not welding.
This feature consumes significant battery power, and turning it off can save you some juice. Second, if your welding helmet and charger have been exposed to extreme temperatures, it’s vital to let them return to normal temperature before charging. Otherwise, the battery may not hold a full charge.
Finally, make sure to charge your welding helmet regularly, even if you don’t use it often. This practice keeps the battery fresh and helps prevent it from losing its charge over time. By following these simple tips, you should be able to extend the life of your welding helmet’s battery and minimize the need for frequent replacements.
Turn Off When Not in Use
When it comes to extending the battery life of your electronic device, one simple but effective tip is to turn it off when it’s not in use. This is especially true for devices like laptops, tablets, and smartphones that are equipped with various features that consume power even when they are left idle. Turning off the device completely will help conserve the battery life and avoid unnecessary drainage.
Another helpful tip is to adjust the screen brightness. A dimmer screen setting consumes less battery power than a brighter one. So, try reducing the brightness to a comfortable level to prolong the battery life of your device.
By implementing these tips into your daily routine, you can get the most out of your electronic device’s battery and avoid frequent charging or battery replacements.
Avoid Extreme Temperatures
One of the most essential tips for extending your battery life is to avoid exposing your device to extreme temperatures. We all know how our phones tend to get hot when we use them continuously for an extended period. Excessive heat can seriously damage your device’s battery over time and lead to performance issues.
Similarly, exposing your device to overly freezing temperatures can cause the battery to lose its efficiency. When exposed to extreme heat or cold, the lithium-ion battery degrades more quickly, and its performance eventually declines. So, avoid leaving your phone in your car during hot summers or cold winters, and try to keep it in a moderate environment to ensure maximum battery life.
By doing this, you can significantly extend your device’s battery life, ensuring the best performance when you need it the most.
Conclusion
In conclusion, charging your auto darkening welding helmet is like giving it a little jolt of energy to keep it going strong. Think of it like drinking a cup of coffee in the morning. Just plug in your helmet, let it charge up, and get ready to tackle your welding projects with clarity and confidence.
So, remember to give your helmet the charge it needs, because a dull welding helmet is like trying to weld in the dark – not recommended.”
FAQs
What is an auto darkening welding helmet and how does it work?
An auto darkening welding helmet is a type of headgear that is used to protect the eyes and face during welding work. It works by using sensors to detect the light produced by the welding arc, and then instantly darkening the lens to protect the welder’s eyes.
Can auto darkening welding helmets be charged?
No, auto darkening welding helmets do not require charging. They are powered by batteries which need to be replaced periodically.
How often do the batteries in an auto darkening welding helmet need to be replaced?
The frequency of battery replacement depends on the brand and model of the welding helmet. On average, most batteries last for around 2 years before needing to be replaced.
What happens if the batteries in an auto darkening welding helmet die in the middle of a job?
If the batteries in an auto darkening welding helmet die while you are welding, the helmet will revert to its default state and provide the highest level of shading. This will keep your eyes protected until you can replace the batteries.
Can a dead battery damage the auto darkening filter in a welding helmet?
No, a dead battery will not damage the auto darkening filter in a welding helmet. However, it may cause the filter to behave erratically or fail to darken properly.
Is it possible to replace the batteries in an auto darkening welding helmet on your own?
Yes, it is possible to replace the batteries in most auto darkening welding helmets on your own. However, be sure to follow the manufacturer’s instructions carefully to avoid damaging the helmet.
Are there any maintenance tasks that should be performed regularly on an auto darkening welding helmet?
Yes, it is a good idea to clean the lenses and sensors of your welding helmet regularly to ensure that they are functioning properly. Additionally, be sure to replace the batteries as needed to avoid any disruptions in performance.

