How to Replace Welding Helmet Lens in 5 Easy Steps – A Comprehensive Guide
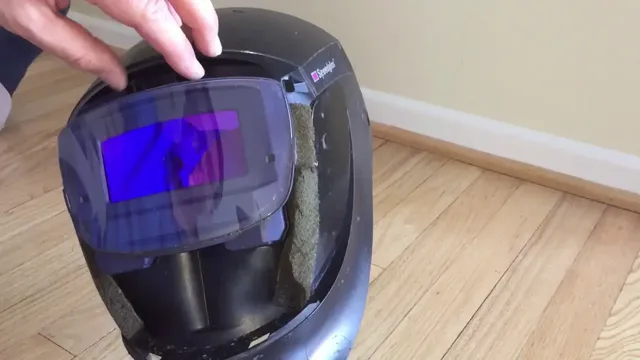
When it comes to welding, a high-quality helmet is an essential piece of safety gear. It protects your eyes and face from dangerous sparks and radiation, keeping you safe while you work. But what happens when the lens on your helmet gets scratched, cracked, or otherwise damaged? Replacing it might seem like a daunting task, but fear not: with the right tools and a few simple steps, you can easily swap out your old lens for a fresh one.
In this step-by-step guide, we’ll walk you through the process of replacing your welding helmet lens, from removing the old lens to installing the new one. We’ll cover everything you need to know, including the tools you’ll need, safety precautions you should take, and tips for ensuring the job goes smoothly. Whether you’re a seasoned welder or just getting started, replacing your helmet lens is an important part of keeping your equipment in top shape.
By following these simple instructions, you can keep your helmet in great condition and stay safe while you work. So let’s get started!
Introduction
If you’re a welder, you know how important it is to have a clear view of your work area. The last thing you want is to have a cracked or scratched welding helmet lens obstructing your vision. Fortunately, replacing a welding helmet lens is a fairly easy process that can be done in a matter of minutes.
First, you’ll need to determine the size and shape of the lens you need to replace. Next, remove the old lens from the helmet by unscrewing any retaining rings or clips holding it in place. Finally, insert the new lens into the helmet and secure it using the same retaining clips or rings as before.
With your new lens installed, you can get back to work with a clear view of your welding area and peace of mind knowing that you’re taking the necessary safety precautions.
Why Replace Your Welding Helmet Lens?
welding helmet lens replacement As a welder, your helmet is your most important possession. Not only does it protect you from sparks and harmful UV rays, but it also gives you a clear view of what you’re working on. However, over time, the lens in your welding helmet can become scratched or damaged, and this can affect your vision and overall safety.
That’s why it’s so important to replace your welding helmet lens regularly. By doing so, you’ll be able to see clearly while you work, and you’ll reduce your risk of injury. So, if you haven’t replaced your welding helmet lens in a while, it’s time to do so.
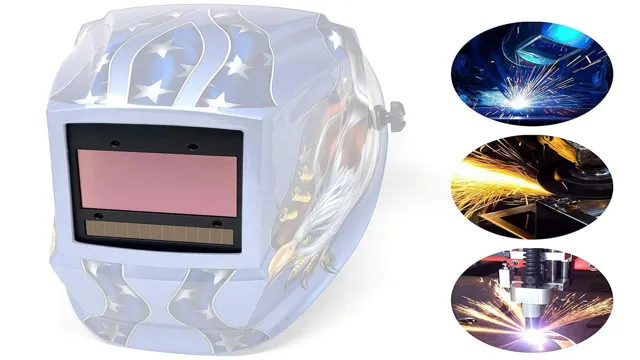
Important Note: Safety Precautions
As we go about our daily lives, it’s crucial to keep in mind the importance of safety precautions. Whether we’re at home, work, or out in public, there are always potential hazards that could pose a threat to our well-being. By taking simple steps like wearing protective gear, being aware of our surroundings, and following safety guidelines, we can greatly reduce the risk of accidents and injuries.
It’s important to remember that accidents can happen to anyone, regardless of how careful they may be. That’s why it’s essential to always remain vigilant and take the necessary precautions to keep ourselves and those around us safe. By doing so, we can enjoy our day-to-day lives with peace of mind and confidence.
So, let’s take a moment to review some basic safety tips and make a conscious effort to prioritize safety in everything we do. Stay safe, folks!
Step 1: Obtain the Correct Replacement Lens
If you need to replace your welding helmet lens, the first step is to obtain the correct replacement. Welding helmet lenses come in different shapes, sizes, and shades, so it’s essential to find the one that fits your helmet and your needs. You can refer to your helmet manual, check the manufacturer’s website, or bring your helmet to a welding supply store to find the right replacement lens.
The type of welding you do, the amperage you use, and the environment you work in can all affect your choice of lens shade. For example, if you do MIG welding, you might need a darker shade than if you do TIG welding. Once you have the correct replacement lens, it’s time to move on to the next step of the process.
Identify Requirements for Your Welding Helmet Lens
When it comes to welding helmets, the lens is an essential component that provides protection and clarity while welding. To ensure that your welding helmet remains functional and safe, it is important to identify the requirements for your welding helmet lens. This involves obtaining the correct replacement lens that fits your helmet model and meets the necessary safety standards.
It is always recommended to purchase replacement lenses from a reputable supplier to avoid buying counterfeit products. By obtaining the correct replacement lens, you can ensure that your welding helmet provides optimal protection and visibility, allowing you to work efficiently and safely. Remember, a small negligence in selecting the right replacement lens could jeopardize your safety during welding.
So, always take your time to identify the requirements for your welding helmet lens and purchase a quality replacement that meets the necessary standards.
Choosing the Right Replacement Lens
When it comes to replacing a lens, the first step is to ensure that you have the correct replacement for your specific needs. This may seem obvious, but there are many different types of lenses available and not all of them are suitable for every situation. For example, if you are replacing a lens on a camera, you will need to make sure that you choose a lens that is compatible with your camera make and model.
Additionally, you will need to choose a lens that is appropriate for the type of photography or videography you will be doing. If you are shooting portraits, for example, you may want to choose a lens with a wide aperture to create a shallow depth of field. On the other hand, if you are shooting sports or wildlife photography, you may need a telephoto lens to get close-up shots of distant subjects.
By taking the time to research and choose the right replacement lens, you can ensure that you get the best possible results from your equipment.
Step 2: Remove the Old Lens
Now that you’re ready to replace your welding helmet lens, it’s time to remove the old lens. First, you’ll need to locate the mounting retaining ring that holds the lens in place. This is usually located on the inside of your helmet.
Use a small screwdriver or pliers to release the retaining ring. Then, carefully remove the old lens from the helmet. Be sure to handle it gently so that you don’t damage it or cut yourself on any sharp edges.
Once the old lens is out, you can discard it or set it aside as a backup in case your new lens gets damaged. With the old lens removed, you’re now ready to install the new lens and get back to work.
Removing the Lens from Your Welding Helmet
Now that you have gathered the necessary tools for removing the lens from your welding helmet, let’s jump into step 2: removing the old lens. The first thing you need to do is locate the lens retaining mechanism on your helmet. This can vary depending on the type of helmet you have, but typically it will be on the front of the helmet and will require removing a cover plate or frame.
Once you have access to the retaining mechanism, carefully remove the old lens. It is important to note that some lenses may be held in place by screws or clips and may require the use of a screwdriver or pliers. Don’t be afraid to ask for help or consult the manufacturer’s instructions if you are unsure.
Once you have successfully removed the old lens, dispose of it properly and proceed to step 3: installing the new lens. Remember, safety is key when it comes to welding, so be sure to follow all necessary precautions and take your time during this process.
Cleaning the Lens Area
Now that you have gathered all the necessary tools, it’s time to remove the old lens. First, switch off your camera and remove the battery to avoid any accidental damage. Next, locate the lens release button, which is usually located near the lens mount.
Press down on the button and twist the lens to release it from the camera body. Be careful not to touch the electronic contacts on the lens or the camera as this can cause damage to the lens or the camera. Once you have removed the old lens, inspect the camera’s lens area for dust, dirt, or any other debris.
Use a soft-bristled brush or a blower to gently remove the debris, being careful not to touch the camera’s sensor or any other internal parts. With the old lens removed and the lens area cleaned, you are now ready to install the new lens.
Step 3: Install the New Lens
Now that you’ve removed the old lens from your welding helmet, it’s time to install the new one. First, ensure that the replacement lens you’ve purchased is the correct size and type for your particular helmet model. Next, carefully align the new lens with the lens housing, making sure that it’s flush against the frame.
Depending on the helmet’s design, you may need to snap the lens into place or screw it in. Be gentle when handling the new lens to avoid damaging it or leaving fingerprints or smudges that can interfere with your vision while welding. Once the lens is securely in place, inspect it closely for any gaps, cracks, or other signs of damage that could compromise your safety.
With the new lens installed, your welding helmet should provide clear and reliable protection for all your welding projects.
Preparing the New Lens for Installation
To install the new lens, take it out of the packaging carefully and inspect it for any defects or damage. It’s essential to handle the lens with care to prevent scratches or smudges on the surface. Before placing the new lens onto the camera, make sure to remove the rear lens cap and the protective cover on the lens mount.
To attach the lens to the camera body, align the lens mount’s red dot with the camera’s corresponding dot and gently push the lens in place. Then, rotate the lens clockwise until it locks securely in position. Be careful not to force the lens into the mount, as this can damage both the lens and the camera.
Also, check that the aperture ring is set to the “A” position if the lens has manual controls. Finally, attach the lens cap to protect the lens from dust and scratches and start capturing breathtaking images with your new lens. Remember to test your lens in different settings and lighting conditions to ensure that it performs correctly.
Installing the New Lens
Installing a new lens can be intimidating, but it doesn’t have to be. With just a few easy steps, you can have your new lens installed and ready to go in no time. First, remove the rear lens cap from your camera body and the front lens cap from your new lens.
Align the red dot on the lens with the corresponding dot on the camera body and gently twist the lens clockwise until it clicks into place. Finally, make sure the lens is securely fastened by giving it a gentle tug. Congratulations, you have successfully installed your new lens! Now it’s time to take it for a test drive and see how it performs.
Remember to keep your gear clean and well-maintained to ensure the longevity of your equipment.
Step 4: Inspect Your Work
Once you’ve finished replacing the welding helmet lens, it’s crucial to inspect your work thoroughly. After all, you don’t want to risk your safety while working on a project. Check for any scratches or damages on the new lens since it could affect the clarity and visibility while welding.
Ensure the lens is snugly fitted and tightly secured to avoid any airborne debris from entering. Don’t forget to double-check the sensitivity and delay settings on your welding helmet to make sure they’re properly calibrated. You wouldn’t want to have a delayed response while welding, leading to undesirable results.
By inspecting your work against any defects or misalignments, you’re ensuring optimal performance and protection while welding with your new helmet lens. Give yourself peace of mind – take a few moments to double-check everything and prevent any future hazards!
Checking for Proper Fit and Positioning
Once you’ve ensured that your hearing aid is properly placed and secured, take a minute to inspect your work. This means checking for proper fit and positioning. Make sure that the device is snug, but not so tight that it causes discomfort.
Pay attention to the way the sound is being transmitted. Is it too loud or too quiet? Can you hear all the necessary sounds? Don’t be afraid to make adjustments until you achieve the perfect balance. Just like a guitar string, the hearing aid needs to be tuned for optimal performance.
Remember, the goal is to improve your hearing, so take the necessary steps to ensure that your hearing aid is properly fitted and positioned. This way, you’ll be able to fully enjoy all the sounds of life!
Conclusion
In conclusion, replacing a welding helmet lens is a task that may seem daunting at first, but with a bit of patience and the right tools, you’ll be seeing sparks fly in no time. Remember to prioritize safety above all else, as compromising on eye protection can lead to serious injuries. And if all else fails, don’t be afraid to ask a seasoned welder for help – they may have a few tricks up their sleeve that could save you time and money.
So go out there, equip yourself with the know-how, and continue welding with clarity and precision!”
Final Safety Precautions
After completing the previous safety precautions, your work should be stable and should look well assembled. However, before you start testing your work, make sure that you thoroughly inspect it for any signs of damage or defects. This final step is crucial in ensuring that your work does not malfunction and cause harm to you or others.
Check if all the parts are secured tightly and if there are any loose connections or wires that need adjusting. Also, make sure that all the safety features, such as emergency stop buttons and power switches, are working as intended. Once you have thoroughly inspected your work and are confident that it is safe to use, you can proceed with testing it.
Remember, safety should always be your top priority, and investing time in inspecting your work can save you from potential injuries or accidents.
Testing Your Replacement Lens
Once you’ve replaced your lens, it’s time to put your camera to the test and inspect your work. Start by taking a few test shots, preferably in different lighting conditions to ensure that your lens is functioning as it should. Check for any changes in focus or color accuracy, as these are important factors in determining whether your replacement lens is of good quality.
Make sure to review your images on a computer screen to see any potential flaws that might not be visible on your camera’s small LCD display. Don’t hesitate to try out your new lens in different shooting conditions, and see what it’s capable of. Remember, every lens has its own unique characteristics, so it’s important to get to know your new gear and push it to its limits.
Enjoy the process and have fun capturing beautiful moments with your newly replaced lens!
FAQs
What are some signs that indicate it is time to replace my welding helmet lens?
Some signs include scratches, cracks, discoloration, or if it fails to meet safety standards.
How often should I replace my welding helmet lens?
It is recommended to replace your welding helmet lens every six months to a year, depending on usage and condition.
Can I replace the welding helmet lens myself?
Yes, you can replace the welding helmet lens yourself. Just make sure to follow proper instructions and safety precautions.
What type of lens should I use for my welding helmet?
The type of lens you use will depend on the type of welding you are doing. Consult the welding helmet manufacturer or refer to welding standards for guidance.
How do I properly clean my welding helmet lens?
Use a microfiber cloth and a lens cleaning solution specifically made for welding lenses. Avoid using harsh chemicals or abrasive cloths.
Can I use a scratched or damaged welding helmet lens?
No, using a scratched or damaged welding helmet lens can cause eye strain and damage to your eyes. Always replace damaged lenses.
What should I do if my welding helmet lens cracks while I am welding?
Stop welding immediately and replace the lens before continuing work. Using a cracked lens can compromise safety and lead to eye damage.

