How to Clean HomeRight Paint Sprayer: Step-by-Step Guide to Maintain Your Paint Sprayer for Longevity

Do you love the smooth and flawless look of a freshly painted wall? A paint sprayer is a great tool to achieve that professional finish quickly and easily. And if you own a HomeRight paint sprayer, you are already one step closer to achieving your painting goals. However, just like any other tool, your paint sprayer requires proper care for it to function at its best.
In this blog, we will guide you on how to clean your HomeRight paint sprayer, so you can use it for years to come and achieve that perfect finish every time. So, grab your cleaning supplies and let’s get started!
Intro to Cleaning Your Paint Sprayer
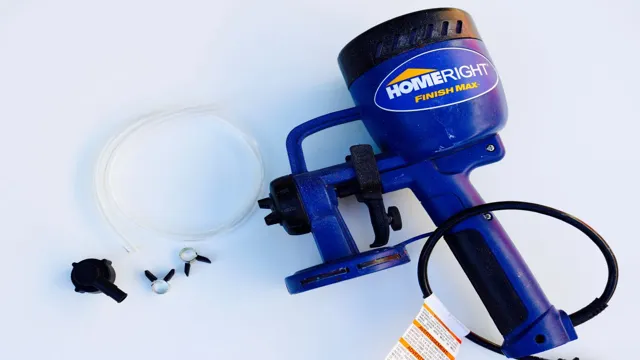
Cleaning your Homeright Paint Sprayer is an essential step that should not be overlooked. A clean paint sprayer will provide you with quality spray patterns and extend the life of your tool. Start by disconnecting the sprayer from the power source and detaching the spray gun from the hose.
Take apart any removable parts, such as the nozzle and the needle. Soak them in a cleaning solution or warm soapy water for an hour or more, depending on how much paint is on them. Use a soft brush to remove any remaining residue.
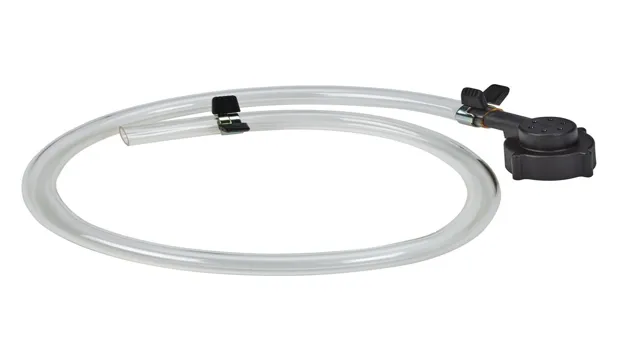
For the hose, fill a bucket with warm water, add cleaning solution, and let the hose run for a few minutes. Rinse with clean water and hang to dry. Don’t forget to clean the filter before putting everything back together.
By following these easy steps, you’ll be able to maintain your Homeright Paint Sprayer and keep your painting projects looking flawless.
Why Regular Cleaning is Important
Regular cleaning is crucial to keep any equipment functioning optimally, and paint sprayers are no exception. Neglecting your paint sprayer’s cleaning routine could lead to several issues, including clogged nozzles, poor atomization, and uneven spray patterns. Each time you finish using your paint sprayer, make sure to clean it thoroughly to prevent any leftover paint from drying and hardening.
By doing so, you’ll ensure that your equipment is always ready to use, saving you time, money, and hassle. Even if you’re using the same color, make sure to clean your paint sprayer before each use, as any leftover paint can accumulate and mix with the new one, leading to color discrepancies. Performing regular cleaning not only extends the life of your paint sprayer but also ensures that your painting projects always have a professional finish.
It’s an investment that is well worth every penny. Therefore, it’s essential to make sure that cleaning your paint sprayer becomes an integral part of your painting routine.

Step-by-Step Guide to Cleaning
If you’re looking for a reliable device to complete your painting job, the HomeRight paint sprayer may be the perfect tool for you. With its high-quality features, it can provide excellent results to your walls, ceilings, and furniture. However, proper maintenance is essential to keep it in its best condition, and cleaning it after use is a crucial step.
Here’s a step-by-step guide on how to clean a HomeRight paint sprayer. First, detach the sprayer from the paint can and empty the remaining paint. Second, fill the cup halfway with water or the recommended cleaning solution.
Third, switch on the sprayer and spray the fluid until it runs clear. Fourth, detach the parts and rinse them thoroughly. Fifth, leave them to dry for a couple of hours before storing them.
By following these simple steps, you can ensure your HomeRight paint sprayer is in tip-top shape for its next use and lasts you a long time.
What You’ll Need
Cleaning your home can be overwhelming, but having the right equipment on hand can make all the difference. To get started, you’ll need basic cleaning supplies like a broom, dustpan, and garbage bags. It’s also a good idea to have specialized tools for different surfaces, such as a vacuum with attachments, microfiber cloths, and a scrub brush for tough stains.
Once you have everything ready, it’s time to start cleaning. Begin by decluttering and organizing your space, making sure to throw away anything you no longer need. Then, move onto dusting and vacuuming all surfaces, including floors, carpets, and furniture.
To tackle tougher cleaning tasks, such as deep cleaning your bathroom or kitchen, consider using specialized cleaning products like bleach, all-purpose cleaners, and oven cleaners. Remember to always follow the instructions on the label and wear protective gear, such as gloves and a mask, if necessary. Cleaning can be a time-consuming task, but by breaking it down into manageable chunks and having the right tools on hand, you can make the process much easier and less daunting.
So, grab your cleaning supplies and get ready to give your home the TLC it deserves!
Preparing for Cleaning
Preparing for cleaning is a crucial step in maintaining a clean and organized home or workplace. To start, you should make a checklist of everything that needs to be cleaned, sorted, or organized. This will give you a clear idea of what you need to prepare for and create a timeline for getting everything done.
Once you have your list, gather all the necessary cleaning supplies and tools, including mops, brooms, vacuum cleaners, cleaning chemicals, and microfiber cloths. Ensure that the cleaning products you choose are safe for your particular surfaces and are environment-friendly. If possible, remove all clutter and unnecessary items before cleaning as it makes the cleaning process more efficient and less stressful.
Finally, don’t forget to wear comfortable attire and gloves to protect your skin while cleaning. Preparing well before starting your cleaning project will give you the confidence and motivation to achieve the desired results.
Cleaning the Spray Gun
Cleaning the spray gun is an essential part of maintaining your equipment. Over time, paint build-up can clog the nozzle and prevent it from operating correctly. To avoid this issue, it’s crucial to clean your spray gun after each use.
Here’s a Step-by-Step Guide to Cleaning your spray gun. Start by unloading any excess paint from the gun. Then disassemble the gun by removing the tip and nozzle and soak them in a cleaning solution.
Scrub any remaining paint residue using a brush, and rinse with water. Wipe the exterior of the gun with a rag, and reassemble the gun. Finally, test the gun by spraying water through it to ensure proper operation.
Remember that thorough cleaning of your equipment will increase its lifespan and quality of work.
Cleaning the Tip
Cleaning the tip of your equipment is an essential part of maintaining and improving its performance. Often neglected, many users do not realize the importance of cleaning the tip until they begin to experience problems. But, fear not! Cleaning the tip is easy, and with this step-by-step guide, you’ll be cleaning like a pro in no time.
First, remove the tip from the equipment. Then, using a soft, clean cloth or a paper towel, wipe away any excess debris or resin build-up. Next, using a small brush, clean the tip’s interior thoroughly.
You can use a specialized cleaning solution to remove stubborn, hard-to-reach material. However, avoid using any harsh chemicals, which can damage the tip. Once the tip is cleaned, reattach it to the equipment and test it.
If you experience any hiccups, repeat the process or seek expert advice. Remember, a clean tip equals better performance and a longer lifespan for your equipment. So, get in the habit of cleaning the tip regularly.
In conclusion, keeping your equipment tip clean is a simple but effective way to ensure top-notch performance. Don’t let build-up and debris reduce your equipment’s lifespan and efficiency. Follow this step-by-step guide and make cleaning your tip part of your equipment maintenance routine.
Cleaning the Filter
Regularly cleaning the filter of your electronic devices, such as your computer or air conditioner, plays a vital role in enhancing their performance and lifespan. Not only does it contribute to better air quality, but it also aids in preventing damage to the machines. Here’s a step-by-step guide to cleaning your filter effectively.
Firstly, locate the filter and remove it from the machine. Examine the filter for any considerable wear and tear. If the filter is damaged, it’s best to replace it with a new one.
Next, use a soft brush or a vacuum cleaner, ideally with a brush nozzle, to remove the dirt and debris on the filter. Gently brush or vacuum the filter in the opposite direction of airflow to shake off any trapped dust. If the filter is particularly dirty, you may have to rinse it gently with water.
Allow the filter to dry entirely before reinserting it into the machine. Overall, cleaning your filter regularly is a simple yet effective way to improve the performance of your electronic devices, ensuring that they continue to function optimally for a long time.
Cleaning the Hose
Cleaning the hose of your vacuum is an essential step in maintaining its efficiency and extending its life. By removing the buildup of debris and dirt, you can avoid clogs that can damage your machine. To clean your vacuum hose, start by disconnecting it from the unit and removing any attachments.
Holding one end of the hose, use a long, flexible brush or a pipe cleaner to carefully scrub the inside of the hose, working your way from one end to the other. If you encounter any stubborn debris, gently tap the hose against a hard surface to loosen it. Once you’ve finished scrubbing, rinse the hose thoroughly with warm water, ensuring there is no remaining debris inside.
To dry, either hang the hose over a clothesline or lay it out flat in a warm and dry area. By following these simple steps, you’ll maintain optimal suction and ensure your vacuum cleaner is fully functional for years to come.
Tips for Maintaining Your Paint Sprayer
Maintaining and cleaning your Homeright paint sprayer is essential for its longevity and efficiency. To keep it in good shape, you’ll need to give it a thorough clean after each use. The first step is to remove the excess paint from the sprayer and then clean the spray gun tip using warm soapy water.
You may need to use a brush to scrub off any stubborn paint buildup. Next, disassemble the paint sprayer and soak the parts in warm water for about an hour, making sure to remove any remaining paint residue. Once the parts have soaked, rinse them, dry them thoroughly, and reassemble the sprayer.
Don’t forget to lubricate the moving parts of your paint sprayer regularly to keep them running smoothly. By following these simple steps, you’ll get the most out of your Homeright paint sprayer, ensuring it will last for years to come.
Storing Your Paint Sprayer
When it comes to storing your paint sprayer, proper maintenance is crucial to ensure it lasts for years to come. After each use, be sure to clean your paint sprayer thoroughly by following the manufacturer’s instructions. This will prevent clogs, buildup, and potential damage.
Once it’s clean, store it in a cool, dry place, preferably away from direct sunlight. If you have detachable parts, such as spray tips and hoses, make sure they’re completely dry before storing them. Also, be sure to use only the recommended storage fluids, such as water or mineral spirits.
Avoid using harsh chemicals or solvents, as this can damage the sprayer. By taking these simple steps, you can ensure your paint sprayer remains in top working condition and is ready for your next project.
Cleaning After Each Use
Maintaining a paint sprayer is crucial for ensuring that it performs well and lasts for a long time. One of the most critical aspects of maintenance is cleaning after each use. This involves emptying the paint container and running clean water or solvent through the sprayer until it runs clear.
It is also essential to disassemble the sprayer and clean each individual part thoroughly, including the spray tip, nozzle, and filter. Failure to clean the sprayer after each use can lead to clogs, corrosion, and damage to the equipment, reducing its effectiveness and lifespan. By taking the time to clean your paint sprayer after each use, you can prolong its life, save money on repairs, and achieve professional-quality results every time.
Conclusion
In conclusion, cleaning your Homeright paint sprayer is a necessary evil if you want to keep it in top working condition. But fear not, my friends. With just a few simple steps and a bit of elbow grease, you can have your sprayer looking like new in no time.
So go forth and spray your heart out, knowing that when it’s time to clean up, you’ll be ready to tackle the task like a pro. Happy spraying!”
FAQs
What solutions can be used to clean a HomeRight paint sprayer?
You can use warm soapy water, mineral spirits, or paint thinner to clean your HomeRight paint sprayer.
Can I use vinegar to clean my HomeRight paint sprayer?
No, it’s not recommended to use vinegar to clean your HomeRight paint sprayer as it might damage the parts.
Should I disassemble my HomeRight paint sprayer before cleaning it?
Yes, it’s recommended to disassemble your HomeRight paint sprayer before cleaning it to ensure thorough cleaning.
How often should I clean my HomeRight paint sprayer?
You should clean your HomeRight paint sprayer after every use to prevent clogging and ensure its longevity.
Can I clean my HomeRight paint sprayer with a pressure washer?
No, it’s not recommended to clean your HomeRight paint sprayer with a pressure washer as it may damage the parts.
How long does it take to clean a HomeRight paint sprayer?
It usually takes about 10-15 minutes to clean a HomeRight paint sprayer.
Can I use compressed air to clean my HomeRight paint sprayer?
Yes, you can use compressed air to clean your HomeRight paint sprayer, but make sure to follow the instructions and safety guidelines.


