How to Set Up a Wagner Paint Sprayer: A Step-by-Step Guide for Beginners

Are you all geared up to start that paint project you’ve been wanting to do, but not sure how to set up your Wagner paint sprayer? Fear not, because we’ve got you covered! With the right tools and a few simple steps, you can easily set up your Wagner paint sprayer and be well on your way to a smooth and professional-looking paint job. Firstly, make sure you have all the necessary equipment at hand. This should include your paint sprayer, a clean bucket, water, and a cleaning solution recommended by Wagner.
It’s important to note that different Wagner models may require slightly different items, so be sure to check the user manual before starting. Next, it’s time to prepare the sprayer for use. Connect the hose to the sprayer and plug it in.
Once it’s ready, fill the bucket with water and add the cleaning solution. Turn on the sprayer and spray the cleaning solution through the hose until it comes out clean. Now that your sprayer is clean and ready to use, it’s time to add your paint.
Mix your paint according to the instructions on the can and pour it into the sprayer’s paint container. Be sure not to overfill the container to prevent any spillage. Finally, it’s time to test out your sprayer and make sure everything is working smoothly.
Hold the sprayer at a comfortable distance from the surface you are painting, and start spraying in a back-and-forth motion, keeping your hand steady. If necessary, adjust the spray settings until you achieve the desired result. Congratulations, you’ve successfully set up your Wagner paint sprayer and are well on your way to completing your paint project with ease and efficiency! Remember to read and follow the user manual carefully for a safe and successful experience.
Unboxing Your Wagner Paint Sprayer
If you’re excited to finally start your DIY painting project using your brand new Wagner paint sprayer but don’t know how to set it up, don’t worry. Unboxing your Wagner paint sprayer is the first step to get started. The package typically includes the sprayer unit, a user manual, and additional parts and accessories.
Make sure to carefully unpack the sprayer components and read the user manual that comes with it. Start by assembling the spray gun, hopper, nozzles, and other attachments as directed in the manual. Depending on the model, you may need to connect it to an air compressor or power source.
Then, test the sprayer to ensure it is working correctly by following the instructions in the manual. It’s important to note that proper setup is crucial for achieving a smooth and even finish, so take your time and follow the guidelines closely. Once you’re set up and ready to go, you can start painting your surfaces like a pro with your new Wagner paint sprayer!
Checking for Missing Parts
Unboxing your Wagner paint sprayer can be an exciting experience! As you start to unpack your new tool, you want to make sure that you have all of the parts that are needed to use it effectively. Checking for missing parts is essential to ensure that your paint sprayer works correctly right out of the box. One way you can check for missing parts is to refer to the manual.
The manual should list all the parts that should come with your Wagner paint sprayer. You can use this list to verify that you have everything you need. If any parts are missing, you can contact the manufacturer to send you the missing parts.
Checking for missing parts is an essential step in making sure that your paint sprayer is ready to use, allowing you to get started on your next painting project right away.

Attaching the Hose and Gun
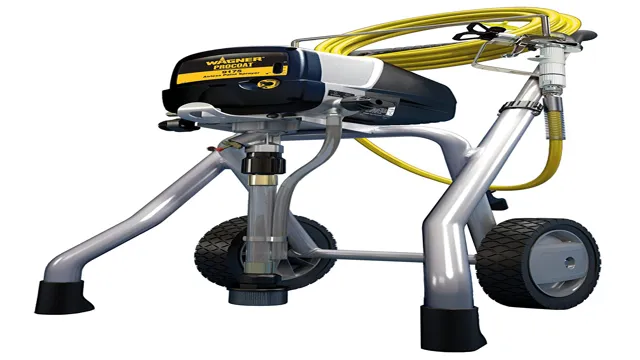
Attaching the Hose and Gun to your Wagner paint sprayer is a straightforward process, but it can be overwhelming if you’re unboxing the device for the first time. Don’t panic, though! After unboxing your paint sprayer, you’ll see that there are only a few parts to assemble. First, locate the hose and unscrew the nut on the back of the paint gun.
Slide the nut onto the hose and tighten it to make sure it’s firmly in place. Then, attach the other end of the hose to the bottom of the paint sprayer by screwing it in. Finally, attach the paint gun to the hose by firmly pushing it in and screwing it into place.
Voila! Your Wagner paint sprayer is now fully assembled and ready to use. Just keep in mind that it’s essential to follow the manufacturer’s instructions to avoid any safety hazards or damage to the device.
Preparing Your Wagner Paint Sprayer for Use
If you want to save time and effort on your painting project, using a Wagner paint sprayer is the way to go. However, before you start spraying, it’s essential to properly set up your sprayer. First, ensure that you have the right paint for your sprayer, then thoroughly clean and choose the appropriate spray tip.
Next, connect the high-pressure hose to the spray gun and the airless paint sprayer, making sure everything is tightly secured and free of leaks. Finally, turn on your Wagner paint sprayer and test it by spraying some paint onto a cardboard or scrap material to make sure there are no issues with clogging or airflow. By following these steps, you’ll be well on your way to achieving a flawless finish with your Wagner paint sprayer.
Filling the Paint Container
If you’re looking to do some home improvement projects, a paint sprayer can make the process a whole lot easier. To get started with your Wagner paint sprayer, one of the first things you need to do is prepare it for use. One crucial step is filling the paint container.
Before you do this, make sure to read the instructions carefully, so you know exactly how to do it without any problems. Once you know what to do, it’s time to choose the right type of paint for your project. You can use anything from water-based latex paint to oil-based enamel or even stains.
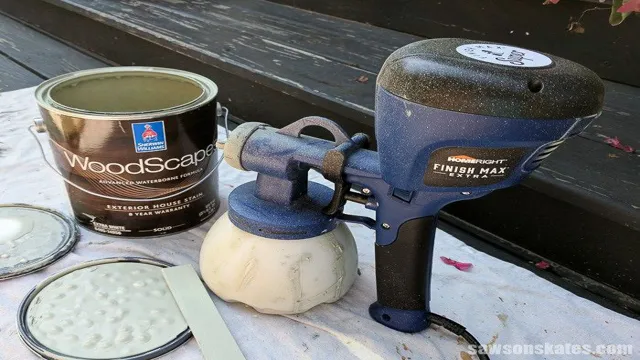
Whatever type of paint you choose, just make sure to strain it first to remove any lumps or debris that could clog the sprayer. After straining, slowly pour the paint into the container, being careful not to overfill it. Once the container is full, reattach it to the sprayer, and you’re ready to start painting.
With these simple steps, your Wagner paint sprayer will be ready to help you tackle any painting project you have in mind.
Adjusting the Spray Pattern and Pressure
One of the most important steps in preparing your Wagner paint sprayer for use is adjusting the spray pattern and pressure. This is crucial to ensure that you achieve the desired finish for your project. First, you need to choose the correct spray tip for your project.
The size of the tip will depend on the type of paint or coating you’re using. Once you’ve attached the spray tip, you can adjust the spray pattern by twisting the nozzle. The spray pattern can be adjusted to vertical, horizontal, or circular.
It’s essential to test the spray pattern on a scrap piece of material to ensure that it’s correct before starting your project. Another crucial step is adjusting the pressure. The ideal pressure will depend on the type and viscosity of the paint or coating you’re using.
You can adjust the pressure on the sprayer by turning the pressure control knob. It’s important to make these adjustments before you start painting to avoid any mistakes or uneven finishes. By taking the time to prepare your sprayer correctly, you’ll achieve the best results for your project.
Connecting Power and Turning On
One of the most important steps in using your Wagner paint sprayer is connecting the power and turning it on. Before getting started, it’s important to make sure all the components are assembled properly, including the spray gun and hose. Once that’s done, you can connect the sprayer to a power source and turn it on.
Some models may have a switch, while others may have a trigger to activate the sprayer. Be sure to read the instructions carefully to ensure you start the sprayer correctly. Once it’s on, you can start painting! By following these simple steps, you’ll be on your way to creating a beautifully painted surface in no time.
Using Your Wagner Paint Sprayer
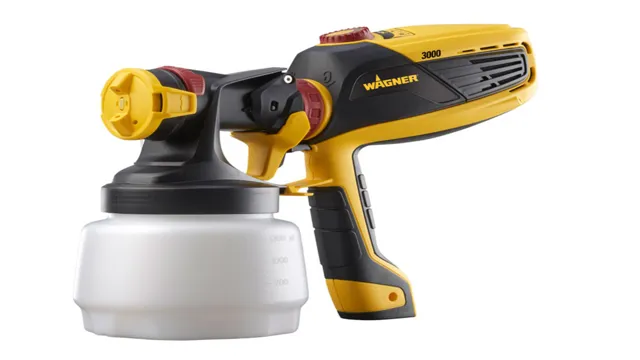
If you’re wondering how to set up a Wagner paint sprayer, fear not! It’s easy and straightforward. Start by assembling the spray gun and attaching it to the spray hose. Next, fill the paint container with the appropriate amount of paint and attach it to the sprayer.
Then, adjust the spray pattern and pressure depending on the type of surface you’re painting. Be sure to test the sprayer on a scrap piece of material before starting your project. Remember to clean the sprayer thoroughly after each use to keep it in good working condition.
With a little practice, you’ll be able to achieve a professional-looking paint job in no time!
Practicing on a Test Surface
When you’re using your Wagner paint sprayer, it’s important to practice on a test surface first. This allows you to get a feel for the sprayer and make sure you’re using it correctly before you start on your actual project. The test surface should be similar in texture and material to what you’ll be painting.
You can use scrap materials or cardboard to create your test surface. Begin by adjusting the sprayer’s settings and testing different nozzle sizes to see how they affect spray patterns. Keep the sprayer moving in a steady back-and-forth motion, overlapping each pass slightly.
Take note of any patterns or uneven coverage and adjust accordingly. Practicing on a test surface can save you time and prevent mistakes on your actual project. So take the time to perfect your technique before you get started!
Painting Your Project
When it comes to painting your next project, using a Wagner paint sprayer can make all the difference. Not only will your project have a smooth and even finish, but it can also be completed in a fraction of the time. First, make sure to properly clean and prep your project before starting.
Next, fill your paint sprayer with the appropriate paint and adjust the settings for the desired spray pattern and pressure. It’s important to start spraying from the top and work your way down, keeping the sprayer at a consistent distance from your project. Don’t forget to overlap each pass to ensure full coverage and a professional-looking finish.
With a Wagner paint sprayer, even complex projects can be tackled with ease, giving you more time to enjoy the finished product.
Cleaning Your Wagner Paint Sprayer
If you’re wondering how to set up a Wagner paint sprayer, the first step is to make sure the device is clean and ready to go. Cleaning your sprayer before each use is essential to ensure that it functions properly and produces the desired results. Start by removing the nozzle and other detachable parts, and soak them in a cleaning solution for a few minutes.
Scrub them thoroughly with a brush, then rinse with water and let air dry. Next, fill the paint container with the desired paint or stain and reattach the nozzle and other parts. Be sure to test the sprayer on a scrap piece of material before starting your project, to check the spray pattern and ensure the device is working correctly.
Remember, proper cleaning and maintenance of your Wagner paint sprayer is crucial for achieving a flawless finish every time.
Flushing the System with Water or Cleaning Solution
Cleaning a Wagner paint sprayer is an essential task that should be done regularly to maintain its efficiency and prolong its lifespan. Flushing the system with water or cleaning solution is a great way to ensure that the sprayer remains in excellent working condition. To do this, follow the manufacturer’s instructions carefully and remove the paint from the sprayer using water or cleaning solution.
It’s essential to clean the filters thoroughly and replace them if necessary to ensure that the paint sprayer works effectively. You can also use a specialized cleaning solution to remove any stubborn stains or residue. Remember always to wear gloves and protective equipment while cleaning your paint sprayer and avoid using harsh chemicals that may damage the internal components of the device.
By maintaining the sprayer, you can achieve professional-grade results, save time and money on costly repairs or replacements, and enjoy using it for many years to come.
Removing Remaining Paint from Container and Hose
If you want to keep your Wagner paint sprayer in tip-top condition, cleaning is an essential step. But what about removing any remaining paint from the container and hose? The easiest way to do this is to fill the container with warm soapy water. Then, attach the sprayer to a bucket of clean water and let the water run through the system until it comes out clear.
If there is still some paint remaining, you can use a cleaning brush or a toothbrush to scrub the container and hose gently. Remember to be gentle with the hoses as they can easily become damaged. After cleaning, make sure to dry everything thoroughly before storing your Wagner paint sprayer.
By following these tips, you can ensure that your sprayer is always ready to use next time you need it. Overall, cleaning your Wagner paint sprayer is an important task that shouldn’t be overlooked. By taking the time to remove any remaining paint from the container and hose, you can prevent clogs and keep your sprayer running smoothly.
Plus, it’s much easier to clean your sprayer after each use than to deal with a major clog later on. So, make sure to clean your Wagner paint sprayer after every use and keep it in top condition for your next project.
Conclusion
Now that you’ve learned how to set up a Wagner paint sprayer, you’re ready to tackle any painting project with ease and efficiency. With the simple steps and helpful tips provided, you’ll be able to achieve a professional-looking finish in no time. So don’t be afraid to unleash your inner artist and transform any space into a work of art – all with the help of your trusty Wagner paint sprayer.
Happy painting!”
FAQs
What are the steps to set up a Wagner paint sprayer?
First, ensure the surface to be painted is clean and dry. Next, attach the paint supply container to the sprayer and fill it with the desired paint. Connect the high-pressure hose and the spray gun. Adjust the settings according to the paint and surface being worked on. Finally, test the sprayer and make any necessary adjustments before beginning the actual painting process.
Can a Wagner paint sprayer be used for outdoor projects?
Yes, Wagner paint sprayers can be used for both indoor and outdoor projects. However, it’s important to choose the right model according to the project and type of paint being used.
What types of surfaces can be painted with a Wagner paint sprayer?
Wagner paint sprayers can be used on a variety of surfaces, including walls, ceilings, furniture, decks, fences, and even cars.
How do I clean a Wagner paint sprayer after use?
First, disconnect the spray gun and hose from the main unit. Then, empty any remaining paint from the container and flush it with water or cleaning solution. Next, fill the container with water or cleaning solution and run it through the sprayer until it runs clear. Finally, clean the spray gun and hose using the same method.
Can a Wagner paint sprayer be used for detailed painting or touch-ups?
Yes, Wagner offers models specifically designed for detailed painting and touch-ups. These models have smaller nozzles and fine-tuned settings to allow for precise, controlled spray patterns.
How often do I need to replace the nozzle on my Wagner paint sprayer?
The frequency of nozzle replacement depends on usage and maintenance. It’s recommended to inspect the nozzle before each use and replace if any signs of damage or wear are present.
What safety precautions should I follow while using a Wagner paint sprayer?
Always wear proper protective gear, such as gloves and eye protection. Follow the manufacturer’s instructions and recommendations for the model being used. Ensure proper ventilation and never spray near an open flame or heat source.


