How to Use a Krause and Becker Electric Paint Sprayer: Tips and Tricks

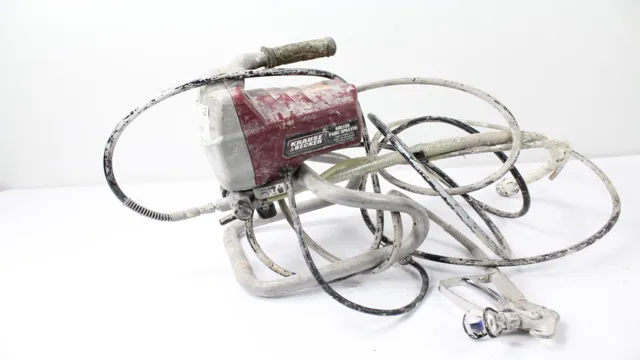
Looking to take on a painting project, but dreading the laborious task of rolling and brushing? Why not give the Krause and Becker Electric Paint Sprayer a try? This versatile tool allows both homeowners and professional painters to complete painting jobs of all sizes with ease. Whether you’re painting a room, updating furniture, or giving your home’s exterior a facelift, the Krause and Becker Electric Paint Sprayer can handle it all. Simply load up the sprayer with your paint of choice, adjust the flow rate to suit your project needs, and you’re ready to go.
The electric motor ensures a consistent spray pattern, while the adjustable nozzle allows for customization of the spray pattern width. Plus, with the ability to handle a variety of paint types, including latex, enamel, and stains, the Krause and Becker Electric Paint Sprayer provides maximum versatility. Say goodbye to tedious hand painting and hello to faster, more efficient paint jobs with the Krause and Becker Electric Paint Sprayer.
It’s time to make your painting projects a breeze!
Preparation
If you want to use a Krause and Becker electric paint sprayer, there are several things you need to consider. The first step is to prepare the surface you want to paint thoroughly. Remove any dirt, grease, or loose paint using a scraper or wire brush.
You can also use sandpaper to create a smoother surface. Once you’ve got a clean surface, you need to cover any parts that you don’t want to paint, like windows, hardware, or trim. Use painter’s tape to seal off these areas.
You should also cover the floor with a drop cloth or plastic sheeting to protect it from paint splatters or drips. Before you start painting, make sure you have enough paint in the sprayer’s container, and make sure the nozzle is clean and free of any obstructions. Once you’ve done these steps, you’re ready to load the sprayer with paint and start spraying! The Krause and Becker electric paint sprayer is an excellent tool to use for a quick and efficient painting project.
Gather materials
When it comes to preparing for a project, it’s essential to gather all the required materials beforehand. But what exactly do you need, and how do you go about getting it? The answer to these questions depends on the specific project you’re undertaking. However, in general, you’ll want to make a detailed list of all the materials and tools you’ll need to complete the task at hand.
This might include things like lumber, screws, paint, brushes, and sandpaper. Once you’ve compiled your list, you’ll need to do some research to find out where you can get your hands on these items. You might be able to find everything you need at a local hardware store, but in some cases, you may have to order specialty items online.
No matter where you source your materials from, make sure to give yourself plenty of time to gather everything you need before you start your project!

Protect surroundings
Preparation is crucial when it comes to protecting our surroundings, be it nature or the built environment. Whether it’s a construction site or a picnic spot, taking necessary steps beforehand can greatly reduce any potential damage to the surroundings. It’s important to identify the specific threats that the area is vulnerable to and to take appropriate measures accordingly.
This could involve setting up barriers, creating preventive measures, or maintaining a responsible level of cleanliness. Being prepared also means planning for the worst-case scenario and having the necessary equipment and personnel on hand to mitigate any harmful effects. By taking these proactive measures, we can ensure that our surroundings remain safe and undisturbed for everyone to enjoy.
Setting up the Sprayer
If you’ve just purchased a Krause and Becker electric paint sprayer, the first step to getting started with it is setting it up. The good news is that the setup process is relatively straightforward. Begin by assembling the spray gun, which typically involves attaching the hose and nozzle.
Next, ensure that you have the right type of paint for the job and mix it according to the manufacturer’s instructions. Make sure to strain the paint before pouring it into the sprayer’s paint cup to ensure that any foreign particles are removed. Finally, adjust the spray pattern and pressure according to the type of surface you will be painting.
With these steps done, you’re now ready to begin spraying with your Krause and Becker electric paint sprayer, which will help you complete your painting jobs with greater efficiency and ease.
Read instructions
Setting up a sprayer can be a daunting task, especially for those who have never used one before. However, with proper instructions and guidance, you can set up your sprayer with ease. Firstly, before assembling your sprayer, make sure you have read the manufacturer’s instructions thoroughly.
This will give you a clear understanding of the parts included, their functions, and the correct way of installing them. Additionally, ensure you have all the necessary tools required for the job. These tools could include a wrench, Phillips head screwdriver, and pliers.
Once you have read through the instructions and gathered the necessary tools, start assembling the sprayer from the bottom up. This means starting with the pump, followed by the pressure gauge, hose, and nozzle. When it comes to connecting the hose to the pump, make sure it is tightly secured to prevent leaking.
Lastly, test your sprayer by filling it with water and attempting to spray it. In case of any difficulties, refer back to the instructions or call customer service.
Assemble sprayer
Setting up the sprayer is a crucial process that needs careful attention. First, assemble all the parts of the sprayer by following the manufacturer’s instructions. Before filling the tank with the spray solution, make sure the sprayer is clean and free of any debris or contamination.
Next, calibrate the sprayer to ensure accurate application rates. Calibration involves determining the sprayer’s flow rate, nozzle output, and pressure. Adjustments can then be made as necessary to ensure the sprayer delivers the desired amount of spray per unit area.
It’s also important to check the sprayer regularly during use to ensure it continues to function properly. By taking these steps, you can ensure that your sprayer delivers reliable and effective results every time.
Fill paint container
When setting up your sprayer for painting, the first step is to fill the paint container. This container is where your paint will be stored as you work, and it’s important to ensure that it’s filled correctly. To begin, choose the type of paint that you want to use and make sure that it’s compatible with your sprayer.
Then, pour the paint into the container, being careful not to overfill it. It’s also important to mix the paint well before pouring it into the container, as this will ensure that it’s even and consistent. Once the container is filled, you’re ready to move on to the next step in setting up your sprayer.
Remember, taking the time to properly fill your paint container will ensure that your paint sprayer works smoothly and efficiently, and that you achieve the best possible results.
Spraying Technique
When it comes to using a Krause and Becker electric paint sprayer, one of the most important things to get right is your spraying technique. Firstly, make sure that your sprayer is set up for the type of paint you’ll be using, and that it’s adjusted to the right speed and flow rate. Next, position yourself correctly, standing about 6 to 8 inches away from the surface you’re painting and holding the gun straight and level.
Move the gun horizontally or vertically in a smooth, steady motion, being careful not to overlap too much or leave gaps. It’s also important to keep the gun at a consistent distance from the surface, and to feather the trigger as you move for a more even coverage. With a little practice, you’ll soon get the hang of using your Krause and Becker sprayer to achieve a professional, streak-free finish.
Test spray pattern
Spraying technique When it comes to spray painting, getting the perfect spray pattern is crucial for achieving the desired result. Whether you’re a professional painter or a DIY enthusiast, it’s important to understand the basics of spraying technique. The ideal spray pattern should be even and consistent, without any drips or splatters.
One way to achieve this is by maintaining a consistent distance from the surface you’re painting, usually around 6-8 inches. Keep your spraying hand moving back and forth in a steady motion to achieve a smooth stroke and avoid buildup of paint in one spot. It’s also important to adjust the air pressure and nozzle settings to suit your individual project requirements.
Don’t forget to practice on a test surface before starting your actual project to fine-tune your spraying technique and achieve the perfect spray pattern. By mastering the basics of spraying technique, you’ll be able to transform any surface into a masterpiece with ease.
Adjust pressure and flow
When it comes to achieving a successful spraying technique, it is important to adjust the pressure and flow of your equipment. This will ultimately affect the quality of your spray and the overall outcome of your project. Pressure and flow are usually interrelated, and one needs to strike a balance between the two for optimal results.
Pump pressure affects the speed and volume of fluid leaving your equipment, while tip size determines the amount of fluid dispensed at a particular time. Finding the right combination of these factors will help you achieve the best spraying results. If your flow is too low, this could cause a low-quality finish while high flow could lead to applications that are thicker than required.
Hence, to avoid wastage and achieve the best results, it is essential to adjust the pressure and flow in your spraying technique.
Keep consistent distance and angle
When it comes to achieving a flawless finish while spraying, it’s essential to keep a consistent distance and angle. Maintaining a steady hand helps avoid any unwanted variations in the coat’s thickness, prevents drips, and ensures an even finish. It’s crucial to practice and experiment to find the perfect distance and angle that works for you before starting on your project.
A helpful tip is to imagine the spray pattern as a fan, and always aim the fan directly at the surface you want to coat. Remember, the further away you hold the sprayer, the broader the pattern will be, and conversely, the closer you hold it, the narrower the pattern becomes. As for the angle, always try to move the sprayer in a sweeping motion from side to side, keeping the nozzle perpendicular to the surface.
Mastery of this technique is instrumental in achieving professional-level results that are sure to impress.
Cleaning the Sprayer
Using a Krause and Becker electric paint sprayer can make your painting projects much easier, but it’s important to know how to clean the sprayer properly to avoid any damage or malfunctions. First, unplug the sprayer and remove any remaining paint from the cup. Next, fill the cup halfway with warm water and turn the sprayer back on to spray the water through the nozzle.
This will help flush out any remaining paint. Then, disassemble the sprayer and soak the parts in a cleaning solution, such as mineral spirits or paint thinner, for a few hours. Rinse the parts thoroughly with warm water and let them dry completely before reassembling the sprayer.
Regularly cleaning your Krause and Becker electric paint sprayer will help extend its lifespan and ensure optimal performance for your painting projects.
Turn off and unplug sprayer
When it comes to cleaning your sprayer, one of the most crucial steps is to turn it off and unplug it. This may seem like a no-brainer, but it’s easy to forget when you’re in the midst of a cleaning frenzy. Turning off and unplugging your sprayer is essential for your safety and ensures that you won’t accidentally trigger the sprayer while you’re cleaning it.
This step is particularly important if you’re using a motorized sprayer since it can be especially dangerous to have the motor running while you’re trying to clean it. Additionally, unplugging the sprayer prevents any accidental electric shocks that could occur if you accidentally touch the prongs with wet fingers. So, before you start cleaning your sprayer, take a moment to turn it off and unplug it to ensure your safety and prevent any unexpected accidents.
Disassemble and clean components
Cleaning your sprayer is an important maintenance task that ensures optimal performance and longevity of the equipment. Disassembling and cleaning the components regularly will prevent clogging, improve spray quality, and minimize the risk of contamination. To start, read the manufacturer’s manual to identify the specific parts that need to be removed, and use the appropriate tools to do so.
Once the parts are disassembled, use warm water and soap to clean them thoroughly, making sure to remove any debris or residue. For more stubborn buildup, use a specialized sprayer cleaner or a vinegar solution. Rinse the parts with water and then allow them to dry completely before reassembling.
It’s important to take care not to damage any gaskets or seals during the cleaning process, as this can affect the sprayer’s functionality. By cleaning your sprayer regularly, you’ll be able to keep it working properly for years to come.
Store sprayer properly
One of the essential parts of maintaining your sprayer is to store it properly after use. Proper storage will prevent damage to the sprayer, and it will ensure the longevity of your investment. Before storing the sprayer, ensure that it’s clean.
Cleaning the sprayer is crucial because leftover chemicals can corrode and damage key components of the sprayer. Remove the nozzle, filter, and strainer to clean and soak them in soapy water. Flush the sprayer with water, and remove any debris or chemicals inside.
Once cleaned, dry the sprayer completely, and store it in a cool, dry place. To avoid any confusion or mishandling, label the sprayer with the chemicals used in it and date of use. Proper cleaning and storage can extend the life of your sprayer, ensure its functionality, and save you time and money.
So, always clean and store your sprayer properly after use to ensure its longevity.
Conclusion
In conclusion, using a Krause and Becker electric paint sprayer is like having your very own paint Jedi weapon. With its precision nozzle and efficient delivery system, you’ll be able to blast away boring paint jobs with ease. Just remember to use the force of proper safety gear and technique, and you’ll be making your home or project look out of this universe in no time.
“
FAQs
What is a Krause and Becker electric paint sprayer?
A Krause and Becker electric paint sprayer is a tool used for applying paint or other coatings to surfaces quickly and evenly.
How do I assemble and set up my Krause and Becker electric paint sprayer?
To assemble and set up your Krause and Becker electric paint sprayer, refer to the instruction manual that comes with the product. It includes step-by-step instructions for assembly and use.
What types of paint can I use with my Krause and Becker electric paint sprayer?
You can use a variety of paints with your Krause and Becker electric paint sprayer, including latex, oil-based, acrylic, and enamel paints.
How do I adjust the spray pattern on my Krause and Becker electric paint sprayer?
To adjust the spray pattern on your Krause and Becker electric paint sprayer, use the adjustment knob or lever located on the gun itself. Refer to the instruction manual for specific instructions.
How do I clean my Krause and Becker electric paint sprayer after use?
To clean your Krause and Becker electric paint sprayer, follow the instructions provided in the manual. Typically, you’ll need to flush the system with water or solvent, disassemble the gun and clean the individual components, and then reassemble.
How do I troubleshoot common issues with my Krause and Becker electric paint sprayer?
Refer to the troubleshooting section in the instruction manual for help with common issues like clogs, uneven spray, or leaking. You can also contact the manufacturer for additional support.
Can I use my Krause and Becker electric paint sprayer for outdoor projects?
Yes, you can use your Krause and Becker electric paint sprayer for outdoor projects, including painting fences, sheds, decks, and more. Just be sure to adjust the spray pattern and use proper safety gear.


