How to Use a Campbell Hausfeld Paint Sprayer: A Beginner’s Guide to Spraying Like a Pro

If you’re looking for an efficient and easy way to paint your home, Campbell Hausfeld Paint Sprayer is the perfect tool for you! Using a paint sprayer can make the painting process faster, smoother, and with fewer mistakes. No more frustrating brushstrokes or uneven areas; with a paint sprayer, you can achieve a flawless finish in no time. Plus, it is suitable for homeowners of all levels, from beginner to expert.
Imagine being able to complete your painting project in half the time it would take you with a roller or a brush. And not only that, but it also helps you reach areas that are difficult to cover, such as corners or tight spaces. With a paint sprayer, you’ll be able to paint any surface with ease, whether it’s walls, ceilings, furniture, or exterior surfaces.
Using a paint sprayer might seem intimidating at first, but with the right guidance, it can be a breeze. In this blog, we’ll cover everything you need to know about using your Campbell Hausfeld Paint Sprayer, from preparation to cleaning. We’ll provide you with tips and tricks to ensure that your painting project is a success.
So, let’s get started! Whether you’re a DIY enthusiast or a professional painter, this blog has something for everyone. Get ready to discover the benefits of using a paint sprayer and how to use it the right way to achieve professional-looking results. Get ready to transform your space into a masterpiece with Campbell Hausfeld Paint Sprayer.
Preparation
If you’re looking to paint your walls with a Campbell Hausfeld paint sprayer, there are a few necessary steps you need to take before getting started. Firstly, make sure the work area is clean and clear of any clutter that could obstruct your movements. It is also essential to cover any floors, furniture or other items that you don’t want to get paint on.
To do this, use a large drop cloth or painter’s tape. Next, you will need to thin your paint to the correct consistency to ensure that it can be sprayed through the nozzle of the paint gun. You can typically find guidance on the packaging or container of the paint to determine how much thinning is necessary.
Once you have thinned the paint, fill the paint cup according to the manufacturer’s instructions and secure it back onto the sprayer. Lastly, before actually starting to paint, perform some test sprays to make sure that the paint is coming out evenly and that the nozzle is set at the right spray pattern. Taking these necessary preparation steps will ensure you have a successful and mess-free painting experience with your Campbell Hausfeld paint sprayer.
Selecting the Right Paint
When it comes to selecting the right paint, preparation is key. Before even thinking about the color or brand, you need to ensure that the surface is clean, dry, and smooth. Any dirt, dust, or grease can interfere with the paint’s adhesion, causing it to peel off or blister.
To prepare the surface, start by cleaning it with soap and water or a degreaser if needed. Then, sand it down to remove any rough spots and ensure a smooth finish. If there are any cracks or holes, fill them with spackle or wood filler and let it dry before sanding.
It may seem like a lot of work, but proper preparation ensures that the paint will last for years to come. Don’t rush this step, take your time to get it right. Investing in good preparation will pay off in the long run with a beautiful and long-lasting paint job.

Preparing Your Work Area
Before starting any project, preparing your work area is essential to achieve success. The first step is to clear and clean the space. Remove any obstructions and debris that may interfere with your work or pose a safety hazard.
A clean work area will allow you to focus on the task at hand and ensure that your tools and materials are easily accessible. In addition, make sure to have the necessary tools and supplies before beginning your project. Organization is key, so arrange your materials in an orderly and accessible manner.
A well-organized work area saves time and reduces stress. Remember, a little preparation goes a long way towards a successful end result. By preparing your work area, you’re setting yourself up for success, reducing frustration, and minimizing the risk of accidents.
Don’t underestimate the importance of preparation in your workflow!
Assembling the Sprayer
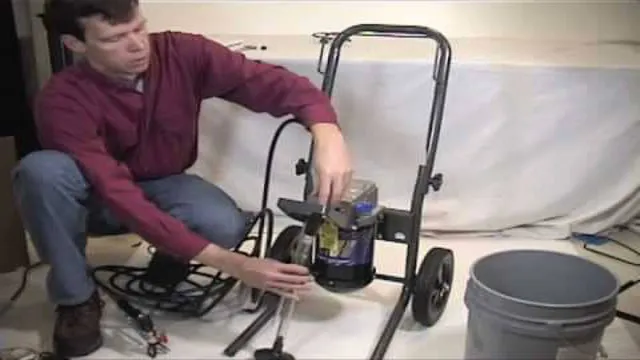
Assembling a sprayer can seem like a daunting task, but with a bit of preparation, it can be a breeze. Before starting, ensure all components are present and in good condition, such as the pump, nozzles, hoses, and tank. It is also essential to read the manufacturer’s instructions thoroughly to understand the assembly process.
This will prevent any mishaps and ensure a smooth assembly. If there are any missing or damaged components, contact the manufacturer before proceeding. It is vital to have all the necessary tools, such as pliers, screwdrivers, and wrenches, readily available.
It’s also important to have a clean and organized workspace to avoid misplacing parts or creating a hazard. By preparing in advance, the assembly process will be smoother and less overwhelming.
Operation
If you’re wondering how to use a Campbell Hausfeld paint sprayer, don’t worry! It’s actually a lot easier than you might think. First, you’ll want to make sure that you have all the necessary equipment, including the sprayer itself, a compressor, and your chosen paint or stain. Once you’re ready to begin, start by practicing on a piece of scrap material to get a feel for the sprayer and its settings.
Then, adjust the spray pattern and flow rate on the sprayer to achieve your desired results. When you’re ready to start painting, hold the sprayer about 6-8 inches away from the surface and move it in smooth, even strokes. Be sure to keep the sprayer perpendicular to the surface and overlap your strokes slightly to ensure an even coat.
With a little bit of practice, you’ll be able to achieve professional-quality results with your Campbell Hausfeld paint sprayer in no time!
Testing the Sprayer
Testing the sprayer is an important step to ensure optimal operation. Before spraying, it’s essential to check the nozzles, hoses, and controls to ensure they are all in working condition. Start by examining the nozzles for clogs and damage, and clean or replace them as necessary.
Then, check the hoses for leaks or damage and replace them if necessary. Finally, test the controls to ensure that they operate smoothly and accurately. It’s also important to calibrate the sprayer to ensure the correct application rate.
This can be achieved by measuring the output of the sprayer over a given distance. Testing the sprayer before every use can help avoid any unexpected issues during application and ensure that your crops receive the appropriate amount of treatment.
Adjusting the Spray Settings
Adjusting the spray settings on your machine can significantly improve the overall effectiveness of your spraying operations. It is essential to make adjustments to the settings so that the spray pattern is targeted to where it is needed most. The first step to adjusting the settings is to identify the type of material you are spraying and the surface you are spraying onto.
For example, if you are spraying a herbicide, you will want a finer mist to cover a larger area. Conversely, if you are spraying a coating onto a flat surface, a wider, more even spray is necessary. Once you have identified the type of material and surface you are spraying onto, you can adjust the spray settings by manipulating the nozzle or pressure.
It is a good idea to practice adjusting your spray settings on a test surface before launching into large-scale spraying operations. This will allow you to fine-tune your settings for maximum efficiency. By taking these steps, you can optimize your spray settings, resulting in better coverage, reduced waste, and ultimately a more efficient operation.
Spraying Your Surface
When it comes to spraying your surface, there are a few things that you need to keep in mind to ensure that you achieve the best results possible. First and foremost, it is essential to choose the right spray nozzle for the job. A nozzle that produces a fine mist is perfect for surfaces that require a smooth, even finish, while a nozzle with a wider spray pattern is ideal for larger, rougher surfaces.
Before you start spraying, make sure that your surface is clean and free of any dust or debris. This will help to ensure that the spray adheres properly to the surface and that you get an even finish. Additionally, it is important to hold the spray nozzle at the correct distance from the surface.
Holding it too close can cause drips and runs, while holding it too far away can result in a patchy finish. By following these simple tips and taking the time to prepare your surface properly, you can achieve professional-looking results that are sure to impress.
Maintenance
If you’re looking to upgrade your paint job game, a Campbell Hausfeld paint sprayer can be an excellent choice. But how do you use it? First, make sure to clean the sprayer after each use. This includes removing any leftover paint and spraying a cleaning solution through the machine.
It’s also essential to use a compatible type of paint with your sprayer, so check the manufacturer’s specifications. Before painting, test the sprayer on a scrap piece of material to check the consistency and adjust the nozzle accordingly. When painting, keep the sprayer perpendicular to the surface, moving in a smooth, continuous motion.
Don’t forget to take breaks and let the sprayer cool down, too. By following these maintenance tips, you can ensure your Campbell Hausfeld paint sprayer is always ready to use effectively.
Cleaning the Sprayer
Maintaining a sprayer is essential to keep it in good condition and ensure that it works properly every time you need it. One crucial aspect of sprayer maintenance is cleaning. Cleaning the sprayer is necessary to remove any residue and prevent it from clogging the nozzle or damaging the pump.
It’s also important for health and safety reasons, especially if you’re using pesticides or other chemicals. To clean your sprayer, start by emptying any remaining liquid and rinsing the inside with water. Then, remove the nozzle and filter and clean them separately.
You can use a brush or a cleaning solution to ensure that all parts are thoroughly cleaned. Remember to read the manufacturer’s instructions before cleaning, as the process may vary depending on the type of sprayer you have. Regular cleaning and maintenance will extend the life of your sprayer and ensure that it operates efficiently when you need it.
So, take the time to care for your sprayer, and it will give you years of reliable service.
Storing the Sprayer
When it comes to maintaining your sprayer, proper storage is essential. After use, it’s crucial to clean and drain the sprayer thoroughly to avoid any damage or corrosion. Once cleaned, make sure to store it in a dry, cool place to prevent any rust formation on metal parts.
It’s also advisable to hang or place the sprayer on a shelf to avoid any damage or deformation. Storing the sprayer in a safe and dry place will add years to its lifespan and ensure it’s in optimal condition when you need it next. Remember to always take care of your tools, and they’ll take care of you.
Troubleshooting
If you’re looking to use a Campbell Hausfeld paint sprayer, there are a few tips that can help ensure a smooth operation. Firstly, make sure to properly clean the sprayer before using it. This can prevent clogs and other issues during the painting process.
Additionally, be sure to thin the paint to the appropriate consistency for your sprayer model. This can vary depending on the type of paint and the specific sprayer being used, so it’s important to refer to the manufacturer’s instructions for guidance. If you do encounter any issues during use, such as a clog or uneven spraying, refer to the troubleshooting section of your instructional manual for guidance.
By following these tips and staying patient and focused, you can achieve great results with your Campbell Hausfeld paint sprayer.
Conclusion
Using a Campbell Hausfeld paint sprayer is like having a magic wand that transforms your home into a masterpiece. With the right technique and a little patience, you can achieve the perfect finish for your walls, furniture, and more. Just like a painter’s brush, the sprayer is an extension of your creativity.
So go ahead, unleash your inner Michelangelo and let the Campbell Hausfeld paint sprayer do the rest. And remember, practice makes perfect – but with this sprayer, you’ll be a pro in no time!”
FAQs
What type of paint can I use with the Campbell Hausfeld paint sprayer?
You can use a variety of paints including latex, oil-based, and enamel.
Is it necessary to thin the paint before using the sprayer?
It depends on the paint’s thickness and the sprayer’s nozzle size. If needed, thin the paint following manufacturer’s instructions.
How do I clean the Campbell Hausfeld paint sprayer after use?
Disassemble the sprayer, flush it with clean water, and use a brush to clean the nozzle and other parts. Lubricate the moving parts before storing it.
Is it easy to control the spray pattern?
The Campbell Hausfeld paint sprayer has an adjustable spray pattern and flow control, allowing you to easily control the paint output and spray pattern.
Can I use the sprayer for DIY projects?
Yes, the sprayer is ideal for DIY projects like painting furniture, cabinets, or walls.
How do I maintain the Campbell Hausfeld paint sprayer?
Regularly check for leaks, replace worn-out parts, and store the sprayer properly in a clean and dry place. Refer to the manual for detailed maintenance instructions.
What is the recommended distance to hold the sprayer from the surface being painted?
It’s recommended to hold the sprayer 6-10 inches away from the surface being painted for best results.


