How to Use a Paint Sprayer for Ceiling: Tips and Tricks for a Professional Finish

Ready to give your old and dull ceilings a fresh look? Using a paint sprayer can be a game-changer in terms of both efficiency and precision when it comes to painting your ceilings. It may seem daunting at first, but once you know how to use a paint sprayer for ceilings properly, you’ll never want to go back to traditional brush and roller methods. In this blog, we’ll walk you through all the steps needed to ensure that your ceiling-painting project turns out to be successful.
From preparing the room to selecting the right paint and sprayer, we’ve got you covered. So, let’s get started on your journey to achieving a beautifully painted ceiling in no time!
Prepare the Room and Equipment
Before starting to use a paint sprayer for a ceiling, it’s important to prepare both the room and the equipment properly. Begin by cleaning the ceiling, ensuring that it is free from any dust or debris. Next, cover any furniture or fixtures in the room with plastic sheets or drop cloths to protect them from the spray.
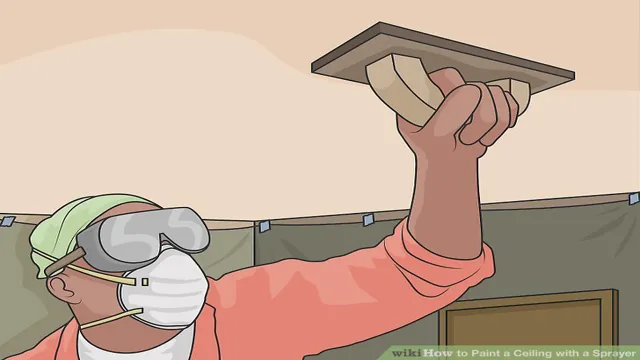
Use painter’s tape to cover any edges or corners that you don’t want to be painted. It’s essential to wear protective equipment such as goggles and a mask to prevent paint from getting into your eyes or lungs. Also, make sure to read the manufacturer’s instructions and set up the paint sprayer correctly.
Test the sprayer on a small area and adjust the pressure and speed according to your comfort level. Using a paint sprayer for the ceiling can save you time and effort, but proper preparation is key to ensure a successful result.
Clear the Room and Cover Furniture
Preparing the room and equipment before painting is crucial for a successful painting job. It is recommended to start by clearing out the room of all furniture, decor, and any other items that could get in the way or be damaged during the painting process. Covering any remaining furniture and floors with plastic or drop cloths is also essential to prevent any accidental paint spills or splatters.
It’s best to prepare the walls by filling in any holes or cracks and sanding any rough patches before painting. Additionally, ensure that all necessary painting equipment, including brushes, rollers, tape, and paint trays, are readily available for use. Taking the time to properly prepare the room and equipment can save time and prevent future mishaps.
So, let’s get started and paint that room!

Set Up the Paint Sprayer
Before you start painting with a sprayer, it is essential to prepare the room and equipment. First, make sure the room is well-ventilated by opening windows or running fans. Cover any furniture or fixtures with plastic drop cloths to protect them from overspray.
Next, gather all the necessary equipment, including the paint sprayer, paint, and stir sticks. Double-check that the sprayer is clean and free of any debris or residual paint from previous jobs. Once you have all the equipment ready, mix the paint thoroughly and strain it to ensure a smooth application.
It is important to follow the manufacturer’s instructions for mixing and thinning the paint as it can affect the outcome of the job. Proper preparation of the room and equipment is key to achieving a flawless finish, so take the time to do it right.
Thin the Paint Accordingly
When taking on a painting project, it’s important to properly prepare the room and equipment beforehand. This means clearing out the space, covering the floor and any furniture with drop cloths or plastic, and ensuring there is proper ventilation. Additionally, make sure all necessary painting tools are on hand and in good condition, such as brushes, rollers, and trays.
One key step that often gets overlooked is thinning the paint accordingly. Depending on the type of paint and the surface it will be applied to, it may need to be thinned with water or a paint thinner to achieve the appropriate consistency for smooth application. Not thinning the paint enough can result in a thick, gloppy mess, while thinning it too much can cause it to run and drip.
By taking the time to properly thin the paint, you’ll ensure a beautiful and even finish on your walls or furniture.
Start Painting the Ceiling
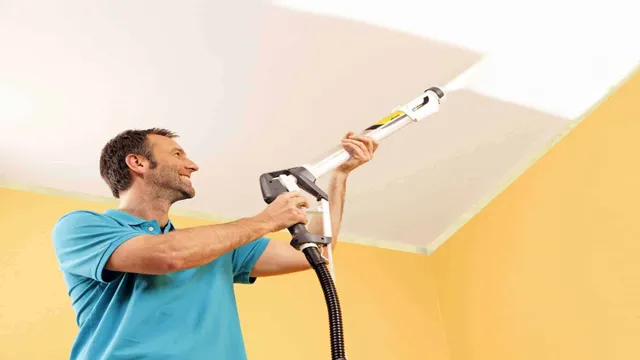
Using a paint sprayer for ceilings can be intimidating, but it doesn’t have to be. To start, make sure you have all the necessary equipment, including a paint sprayer, a ladder, and drop cloths to protect your floors and furniture. First, you’ll want to thoroughly clean the ceiling to remove any dirt and dust.
Next, use painter’s tape to protect any areas you don’t want to be painted, such as light fixtures. Once you’re ready to start painting, begin spraying in a corner and work your way across the ceiling in a back-and-forth motion. Be sure to keep the sprayer moving at a consistent speed to ensure an even application.
Remember to take breaks frequently to avoid fatigue and to allow the paint to dry in between coats. With a little practice, you’ll be a pro at using a paint sprayer for ceilings in no time!
Practice on a Scrap Material First
Before diving into painting your ceiling, it’s crucial to practice on a scrap material first. Doing so will help you determine the right technique, color, and finish to use for your ceiling. It will also give you a chance to test out your painting tools and ensure that the paint is mixing well.
If you skip this step, you might end up with a patchy or uneven paintwork that will require fixing later on. Once you have your scrap piece, make sure to paint it in the same way you plan to paint your ceiling – use the same technique, brush, roller, and paint. This way, you’ll be able to refine and perfect your painting skills before starting on your ceiling.
Remember, practice makes perfect, and taking the time to practice will save you time, money, and stress in the long run. When you feel confident about your painting skills, it’s time to start painting the ceiling. Begin by removing all furniture from the room and covering the floors with a drop cloth or plastic sheet.
You should also cover any remaining fixtures, such as light fixtures or air vents, to protect them from paint splatters. Next, use a roller with an extension pole to apply a base coat of paint using medium pressure. Make sure to apply the paint in even strokes and work in small sections to avoid overlapping.
Once the base coat is dry, use a brush to paint the edges and corners of the ceiling. Finally, use a second coat of paint using the same technique as the first coat. Be patient and allow each coat to dry completely before adding another layer.
With these tips in mind, you’ll be able to paint your ceiling like a pro and achieve a polished and flawless finish.
Start at the Furthest Corner
When it comes to painting a room, starting at the furthest corner from the door may seem like an odd suggestion. But it’s actually a smart way to tackle the task of painting a ceiling. By starting at the corner that’s furthest from the entrance of the room, you’ll avoid accidentally brushing against your freshly-painted walls as you move around.
Plus, the process of painting a ceiling can be a bit uncomfortable, so you’ll want to spend as little time up there as possible. Once you’ve identified your starting point, start painting in a W pattern, working in small sections at a time. This will ensure that you cover the entire surface of the ceiling evenly and avoid missing any spots.
Remember to use a high-quality paint and a roller with an extension pole to make the process as smooth and efficient as possible. By starting at the furthest corner and working your way towards the door, you’ll have a beautifully-painted ceiling in no time!
Overlap Each Pass
When it comes to painting a ceiling, it’s important to start with a solid plan of attack. One helpful tip to keep in mind is to overlap each pass as you paint. This means that when you paint a section of the ceiling, you should slightly overlap onto the previous section you just painted.
This technique ensures that you have proper coverage on the entire surface and helps to avoid streaks or missing spots. It may take a bit more time and patience when it comes to painting a ceiling, but the end result will be well worth it. Remember to take breaks when you need to, as painting overhead can be physically taxing.
With a steady hand and some high-quality paint, you can transform the look of any room.
Clean Up After Use
When it comes to using a paint sprayer for ceiling projects, it’s important to clean up after use. Paint sprayers can create quite a mess, so it’s essential to take the time to clean up in order to keep your tools in good condition and your workspace neat and tidy. The first step is to turn off the sprayer and release any excess paint pressure.
Next, detach the paint container and nozzle and clean them thoroughly with warm water and mild soap. Ensure that all paint residue is removed and rinse them off completely. Afterward, wipe down the sprayer body with a damp cloth and allow it to air-dry.
Lastly, dispose of any leftover paint in accordance with your local regulations. Not only does proper clean up after use help to maintain your paint sprayer, but it also ensures that you have a clean and safe workspace for future projects.
Disassemble the Sprayer
Cleaning up after using your sprayer is an essential maintenance task that keeps it in good working condition. Disassembling the sprayer is necessary to clean it thoroughly, so you should follow the manufacturer’s instructions to do so. Once you have disassembled it, you can clean the parts separately with warm soapy water and a soft brush.
Always use gentle pressure to avoid damaging the delicate parts of the sprayer. Use a cloth or towel to dry all the parts before reassembling the sprayer. This process will prevent clogs from forming and ensure that your sprayer works efficiently and effectively every time you use it.
Remember to clean your sprayer regularly to keep it functioning properly, and always store it in a cool, dry place to prevent rust and corrosion. Don’t forget that proper care will extend the life of your sprayer, and save you money in the long run.
Clean the Sprayer’s Components
Cleaning the components of your sprayer after use is a crucial step in maintaining its efficiency and longevity. Sprayer components often come into contact with different types of chemicals and residues that can stick and build-up over time, leading to clogging and reducing the sprayers’ performance. Cleaning the components immediately after use is recommended, using water and mild soap to remove any loose debris.
Take apart all the components and clean them individually, especially the nozzle, which is a vital component of the sprayer. Use a small brush to eliminate any accumulated debris and avoid using sharp objects that may damage the components. After cleaning, rinse each component thoroughly with clean water and inspect for any remaining buildup.
Properly storing the sprayer is essential, ensuring it is free of moisture and any chemical residues. By consistently and thoroughly cleaning your sprayer components, you can extend the life of your equipment and ensure effective and efficient performance.
Store the Sprayer Properly
One of the most important aspects of maintaining your sprayer’s longevity is properly storing it after use. It’s easy to get caught up in the completion of a task and forget about the necessary clean-up steps. However, skipping this crucial step can cause damage to the parts and components of the sprayer.
Always ensure that all chemicals and water are flushed out of the sprayer, followed by a thorough cleaning using soap and water. Once clean, ensure that all parts are dried and stored in a cool, dry place, away from any potential hazards or contaminants. By taking the time to clean and store your sprayer properly, you can extend its lifespan and guarantee consistent, reliable performance.
Remember, a little extra effort now can save time and money in the long run.
Conclusion
In conclusion, using a paint sprayer for your ceiling is like having a magic wand in your hand. With its ability to evenly distribute paint, it can transform your ceiling from drab to fab in a matter of minutes with just a spritz and a flick of your wrist. Whether you’re a seasoned pro or a DIY newbie, mastering the art of using a paint sprayer will have you saying goodbye to ceiling brush strokes and hello to a flawless finish.
So grab your sprayer and let your inner artist shine – your ceilings will thank you for it!”
FAQs
What type of paint should I use with a paint sprayer for a ceiling?
It is recommended to use a high-quality latex paint with the appropriate consistency for optimal results.
How do I prepare the ceiling before using a paint sprayer?
Make sure to clean the ceiling thoroughly and repair any cracks or imperfections before applying the paint with a sprayer. Cover any furniture and floors with drop cloths.
Can I use a paint sprayer for textured ceilings?
Yes, you can use a paint sprayer for textured ceilings, but it may require a different sprayer tip and more coats of paint for even coverage.
How do I avoid overspray when using a paint sprayer on a ceiling?
Adjust the nozzle and pressure settings on the sprayer and use masking tape to protect any areas that should not be painted.
Is it necessary to thin the paint before using a sprayer on a ceiling?
It depends on the type of paint and sprayer being used. Read the manufacturer’s instructions carefully to determine if thinning is necessary.
How long should I wait before applying a second coat of paint with a sprayer on a ceiling?
Allow the first coat of paint to fully dry before applying a second coat, which typically takes 6-8 hours.
Can I use a paint sprayer on a popcorn ceiling?
It is possible to use a paint sprayer on a popcorn ceiling, but it may require a different sprayer tip and careful application to avoid damaging the texture. Consider testing on a small inconspicuous area before painting the entire ceiling.


