How to Wagner Paint Sprayer: A Step-by-Step Guide to Achieving Professional Results

Painting is a great way to breathe new life into your home or give a fresh look to your furniture. However, traditional brushes and rollers can be time-consuming and leave an uneven finish. This is where the Wagner paint sprayer comes in handy.
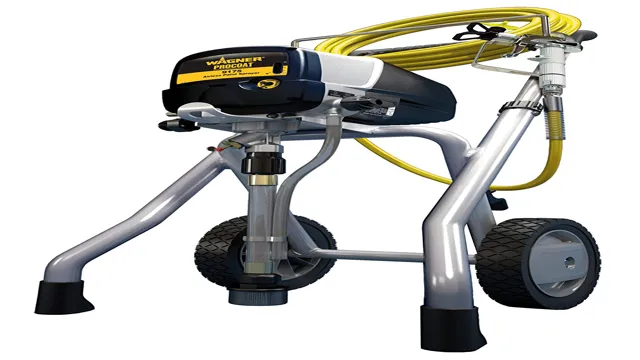
This efficient tool can help make painting a breeze and give you professional-looking results. But how do you use a Wagner paint sprayer? It may seem daunting at first, but with a little practice, you’ll be painting like a pro in no time! In this blog post, we’ll provide you with a step-by-step guide on how to use a Wagner paint sprayer, as well as some tips and tricks to get the best results possible. From learning how to properly prepare your painting surface, to choosing the right settings and techniques for your Wagner paint sprayer, we’ll cover everything you need to know.
Whether you’re a seasoned DIY painter or just starting out, our guide will help you achieve a beautiful and flawless finish. So let’s get started and take the first step towards creating a beautifully painted home or furniture piece with your Wagner paint sprayer!
Preparing the Sprayer
If you’re wondering how to use a Wagner paint sprayer, the first step is always to properly prepare it. Cleaning and setting up your sprayer correctly will ensure optimal performance and a smooth paint application. Start by thoroughly cleaning the sprayer components, including the gun, nozzle, and hose, to remove any dirt or debris that could clog the sprayer.
Next, check the paint viscosity and adjust the sprayer settings accordingly. Always follow the manufacturer’s instructions for the specific type of paint you’re using. Once you’ve cleaned and adjusted the sprayer, you’re ready to fill it with your paint and start spraying.
Proper preparation ensures that you’ll get the best possible results from your Wagner paint sprayer, so take your time and make sure everything is set up correctly before you start painting.
Choosing the Paint
When it comes to preparing your sprayer for painting, there are a few important steps to follow to ensure a smooth and efficient process. First, you’ll want to choose the right paint for the job. Consider the surface you’ll be painting as well as any environmental factors that may affect the paint’s performance.
For example, if you’ll be painting a metal surface that is exposed to sunlight, you’ll want a paint that can withstand UV rays. Once you’ve selected your paint, it’s time to prepare your sprayer. This involves disassembling and cleaning all the parts of the sprayer thoroughly.
Make sure to remove any debris or old paint that may be clinging to the nozzle or other parts. Then, reassemble the sprayer and test it to ensure it’s working properly before you start painting. With the right paint and a properly prepared sprayer, your painting project is sure to turn out beautifully.

Mixing the Paint
Mixing paint and preparing a sprayer can be a daunting task, but it’s crucial for getting a professional-grade finish on your painting project. First things first, make sure the paint is mixed thoroughly before pouring it into the sprayer. A paint mixer attachment for your power drill can make quick work of this step.
Once the paint is thoroughly mixed, it’s time to prepare the sprayer. Start by filling the cup with paint and straining it to remove any impurities that could clog the sprayer. Next, assemble the sprayer according to the manufacturer’s instructions, making sure all parts fit snugly and securely.
Don’t forget to wear personal protective equipment such as goggles, a mask, and gloves while working with the sprayer. With the paint mixed and sprayer prepared, you’re now ready to begin spraying!
Filling the Sprayer
Preparing the sprayer for filling is an essential part of the spraying process. You need to make sure that the sprayer is clean and free from any residue from previous spraying activities. To do this, flush the sprayer with water or a cleaning solution as per the manufacturer’s instructions.
Once it’s clean, you can start to fill it with the right amount of pesticide or herbicide needed for your lawn or garden. Make sure you follow the recommended dilution rates as indicated on the product label, and never exceed the maximum application rate. Over-applying chemicals can lead to poor plant health, leaching into groundwater, and damage to the surrounding ecosystem.
Always wear protective clothing, such as gloves, a mask, and goggles when filling the sprayer, and keep children and pets away from the area. By taking these precautions, you can ensure safe and effective use of the sprayer, providing better results for your plants and a safer environment for all.
Using the Wagner Paint Sprayer
If you’re looking to give your walls or furniture a professional finish, a Wagner paint sprayer might be exactly what you need. Before you start, be sure to select the right nozzle for your project and thin your paint or stain as needed – a good rule of thumb is to aim for a consistency similar to milk. Once you’re ready to go, hold the sprayer about 6-8 inches away from the surface and use short, even strokes to apply the paint or stain.
Keep in mind that overlapping your strokes slightly will help you achieve even coverage. If you’re spraying an entire room, break it down into sections and use a crosshatching technique to avoid leaving any missed spots. When you’re finished, be sure to clean your sprayer thoroughly and store it in a safe, dry place.
With a little practice, you’ll be surprised at how quickly and efficiently you can transform your living space with a Wagner paint sprayer.
Spray Technique
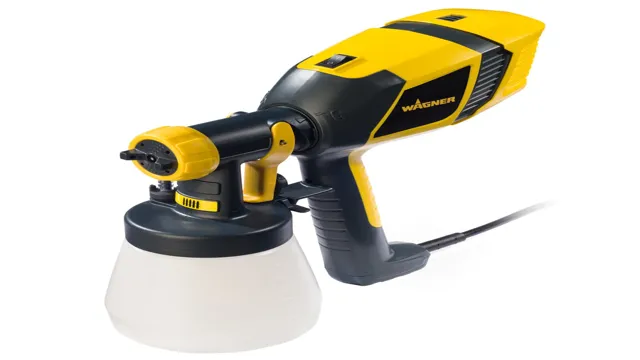
If you’re looking to transform your living space into something more modern and refreshing, using a Wagner paint sprayer is a great option. Spray painting provides a smooth, even finish that you just can’t achieve with a brush or roller. Using your Wagner paint sprayer is easy; simply fill the paint container and adjust the nozzle to your desired spray pattern.
However, the key to achieving a professional-looking finish is all in the technique. To get started, practice on a scrap piece of cardboard until you get the hang of it. Hold the Wagner paint sprayer about 6-8 inches away from the surface and move it in a side-to-side motion.
Keep your arm and wrist steady and use your whole body to move across the space you’re painting. Think of yourself as a human spray gun! You’ll find that you can quickly and easily cover large areas with minimal effort. So, don’t be afraid to embrace the Wagner paint sprayer and take your DIY projects to the next level!
Adjusting the Spray Pattern
Adjusting the spray pattern on your Wagner paint sprayer is an essential step to achieving a professional-looking finish on your DIY painting projects. First and foremost, make sure your sprayer is set to the right pressure level, typically between 1 and Next, you’ll want to adjust the spray pattern itself using the nozzle on your sprayer.
Twisting the nozzle clockwise will narrow the spray pattern, while turning it counterclockwise will widen it. This step is crucial as it allows you to control the paint’s direction and coverage, making it easier to reach tight corners or even surfaces evenly. Additionally, it’s essential to test the spray pattern on a scrap surface before starting the actual painting.
This tip will give you a better idea of how the paint will look on your surface and adjust the settings accordingly. By taking your time to adjust the spray pattern, you’ll achieve a high-quality finish, giving your DIY project a professional touch.
Spraying the Paint
Spraying paint using the Wagner paint sprayer is a relatively easy task. Before starting, make sure you have covered any nearby surfaces that you don’t want to get paint on. Once you have the sprayer set up, apply the paint in even strokes, making sure to keep the nozzle perpendicular to the surface you are painting.
The Wagner paint sprayer allows for adjustable pressure, ensuring the right amount of paint is applied and eliminating any drips or inconsistencies. It’s important to keep a consistent distance from the surface being painted, around 6-8 inches is recommended. Remember to work in sections, completing one section before moving onto the next.
By using the Wagner paint sprayer, you can achieve professional-grade results without the hassle and time commitment of traditional painting methods.
Cleaning the Wagner Paint Sprayer
If you’re a DIY enthusiast, then you’ve probably used a Wagner paint sprayer before and know how messy it can get. However, cleaning your Wagner paint sprayer is essential to ensure it lasts longer and delivers optimal performance. Start by removing any remaining paint from the sprayer by flushing water through it until it runs clear.
Then, disassemble the machine and clean each part individually. Soak the nozzle and spray guard in warm soapy water for approximately 30 minutes before scrubbing with a soft-bristled brush. Rinse them thoroughly and dry them off with a clean towel.
Clean the suction tube and filters by soaking them in mineral spirits for 30 minutes and then let them dry. Lastly, reassemble the machine and test it to ensure everything is functioning correctly. By following these steps, you can maintain your Wagner paint sprayer and enjoy years of flawless performance.
Flushing the Sprayer
Flushing the sprayer is a crucial step in maintaining your Wagner paint sprayer. Proper cleaning of the sprayer after each use not only prolongs its lifespan but also ensures a consistent and even spray pattern. Flushing the sprayer is a simple process that involves running water or a flushing solution through the sprayer to remove any remaining paint or debris.
The first step in flushing the sprayer is to detach the spray gun and the suction set from the sprayer. Then, fill a bucket with either water or a flushing solution recommended by Wagner, and connect the suction set to the bucket. Turn on the sprayer and run the solution through the sprayer until the solution coming out of the spray gun is clear.
Once the solution is clear, turn off the sprayer and detach the suction set from the bucket. Finally, run clean water through the sprayer to remove any remaining solution. By following this simple and easy process, you will be able to keep your Wagner paint sprayer in excellent working condition for years to come.
Cleaning the Nozzle and Tip
When it comes to using a Wagner paint sprayer, cleaning the nozzle and tip is an essential part of keeping your sprayer in good working condition. The buildup of paint or other coatings can quickly clog the nozzle and affect the spray pattern. In order to clean the nozzle and tip, start by turning off the sprayer and unplugging it from the power source.
Next, remove the nozzle and tip and submerge them in a cleaning solution, such as mineral spirits or lacquer thinner. Use a soft-bristled brush to gently scrub away any buildup, and then rinse thoroughly with water. Dry the nozzle and tip completely before replacing them back onto the sprayer.
It’s important to clean the nozzle and tip after every use to ensure the longevity and efficiency of your Wagner paint sprayer. So, don’t forget to add this essential cleaning task to your post-painting ritual.
Conclusion
Well, there you have it – the complete guide on how to use a Wagner paint sprayer! With these tips and tricks, you’ll be bringing your DIY projects to a whole new level in no time. And remember, practice makes perfect – so don’t be afraid to experiment and try new things. Who knows, you might even discover your hidden talent as a master painter! Just don’t forget to clean your sprayer thoroughly afterward.
Happy painting!”
FAQs
What is a Wagner paint sprayer and how does it work?
A Wagner paint sprayer is a device used for painting surfaces quickly and efficiently. It works by utilizing compressed air to atomize paint and spray it on to the surface.
How do I set up my Wagner paint sprayer?
Setting up your Wagner paint sprayer involves attaching the spray gun to the hose, filling the paint container, and adjusting the spray settings according to your needs. Refer to the user manual for specific instructions.
Can I use any kind of paint with a Wagner paint sprayer?
Wagner paint sprayers are compatible with various types of paints, including latex, enamels, stains, and sealers. However, make sure to check the compatibility of your paint before using it with the sprayer.
How do I maintain my Wagner paint sprayer?
Regular cleaning and maintenance of your Wagner paint sprayer is crucial for its longevity and performance. This includes cleaning the spray gun and hose after every use, lubricating the moving parts, and checking for any damages or worn-out parts.
What safety measures should I take when using a Wagner paint sprayer?
When using a Wagner paint sprayer, always wear protective gear such as a respirator, goggles, and gloves. Make sure to work in a well-ventilated area, avoid spraying in windy conditions, and read the safety instructions carefully before use.
How can I troubleshoot issues with my Wagner paint sprayer?
If you are facing issues with your Wagner paint sprayer, refer to the user manual troubleshooting section or contact their customer support for assistance. Common issues include clogging, spraying unevenly, or not spraying at all.
Can I use a Wagner paint sprayer for outdoor painting projects?
Yes, Wagner paint sprayers are suitable for both indoor and outdoor painting projects, as long as you use the appropriate paint and follow the safety guidelines. The sprayers are great for projects such as painting fences, decks, and exterior walls.


