How to Make a Car Battery Charger at Home: A Step-by-Step Guide for DIY Enthusiasts
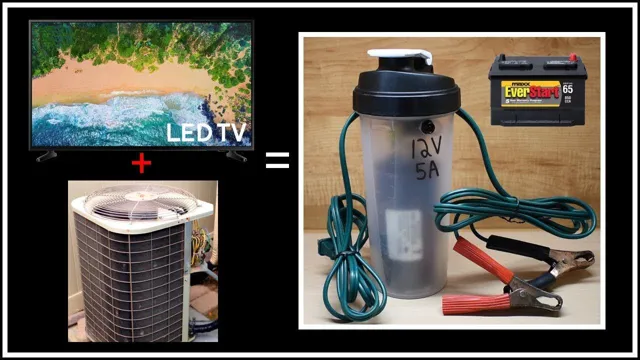
Have you ever found yourself stranded with a dead car battery? It’s a frustrating situation that many of us have experienced. While jumper cables are a quick fix in the moment, they aren’t always readily available. What if you could create a DIY car battery charger at home? That’s right, with a few household items and some basic knowledge, you can save yourself the headache of a dead battery.
In this blog, we’ll go over the steps to making your own car battery charger, including what materials you’ll need and the precautions you should take. By the end of this article, you’ll be ready to take matters into your own hands and never be stuck with a dead car battery again. So, let’s dive in and learn how to make a DIY car battery charger!
Introduction
Are you tired of having to constantly purchase new car batteries? Why not make your own car battery charger at home instead? It’s easier than you might think, and it can save you a lot of money in the long run! To start, gather the necessary materials, such as a transformer, a rectifier, and a voltage regulator. Then, follow the steps to assemble your charger. Don’t forget to double-check all connections and use caution when handling electrical components.
Once completed, you’ll have a reliable and convenient way to charge your car battery whenever needed. By making your own charger, you can customize it to fit your specific needs and potentially extend the life of your car battery. Give it a try and see how easy it is to create your own car battery charger at home!
Explaining the Importance of Car Battery Charger
Car Battery Charger Introduction: If you are a car owner, you surely know the importance of having a well-maintained car battery. It is the heart of your vehicle, and without it, your car is simply a fancy metal box that can’t move. However, even the best car batteries can suffer from self-discharge, sulfate buildup, and other issues.
That’s why a car battery charger is essential for every car owner, whether you drive your car daily or only use it on weekends. In this blog post, we’ll explain why car battery chargers are so important and how they can save you from a lot of trouble in the long run. So, let’s dive in!

Safety Precautions to Observe while Making a Car Battery Charger at Home
When it comes to making a car battery charger at home, it is crucial to observe safety precautions to avoid any mishaps or accidents. Safety should always be a top priority when handling electricity and handling potentially dangerous components. Some safety precautions to consider include wearing protective gear such as gloves and goggles, working in a well-ventilated area, and wearing appropriate clothing.
Additionally, making sure that all the components are properly insulated, avoiding touching parts that may be carrying current, and using a multimeter to test the charger’s output are essential. By observing these safety precautions, you can make a car battery charger at home with peace of mind, knowing that you have taken all necessary steps to ensure safety.
Materials Needed
When it comes to making a car battery charger at home, there are a few materials that you will need to get started. The first thing you will need is a transformer, a device that is used to step down the voltage from your household outlet. You will also need a rectifier, which converts the AC voltage from the transformer to DC voltage, along with a capacitor to smooth out any voltage fluctuations.
A fuse is also a must-have to protect your charger from any electrical surges or overloads. Lastly, you will need some wires to connect everything together. By having all of these materials on hand, you can easily create a functioning car battery charger right in your own home.
So, let’s roll up our sleeves and get started!
List of Materials Needed for Making a Car Battery Charger at Home
If you’re looking to make a car battery charger at home, then you will need a few materials to get started. One of the first things you’ll need is a DC power supply. This will be the power source for your charger.
You will also need a rectifier. This converts the AC current from the power supply to DC current, which can be used to charge your car battery. Another essential tool is a digital voltmeter.
This will help you monitor the voltage of your battery while it’s charging. You will also need some wire and alligator clips to connect everything together. It’s critical to use the right gauge wire for your specific car battery.
Lastly, you’ll need a charger controller. This component helps regulate the charging process to ensure you don’t overcharge your battery and cause any damage. With these materials on hand, you’ll be well on your way to making your own car battery charger at home.
Steps to Making a Car Battery Charger at Home
If you’re looking for a cost-effective way to charge your car battery, making your own car battery charger at home is a great option! It’s a straightforward process that you can complete in a few hours with some basic supplies. To get started, you’ll need a transformer, a rectifier, a capacitor, a voltage regulator, and some wires. The first step is to connect the transformer to an AC power source, then connect the rectifier to the transformer’s secondary winding.
The rectifier will convert the AC voltage to DC voltage and then store it in the capacitor. You’ll then need to connect the voltage regulator to control the charging voltage to avoid overloading the battery. Finally, you can connect the wires to the battery terminals, and your homemade car battery charger is ready to use.
With this DIY approach, not only will you save money, but you’ll also have the satisfaction of knowing you created something useful and functional.
Step-by-Step Guidelines for Making a Car Battery Charger at Home
Making a car battery charger at home might seem like an intimidating task, but it is actually simpler than you may think. Here are some easy-to-follow step-by-step guidelines that will help you create a car battery charger at home. First, gather your materials – you will need a transformer, a bridge rectifier, a capacitor, and some wires.
Next, mount the transformer and rectifier on a heat sink to prevent overheating. Then, connect the transformer to the rectifier and the capacitor in a specific configuration. Finally, connect the charger to your car battery, ensuring that the polarity and voltage are correct.
And that’s it – you now have your very own homemade car battery charger! Remember to follow safety protocols throughout the process and test the charger before use. By following these steps, you can save money and have the satisfaction of knowing that you made the charger yourself.
Testing Your Newly Made Car Battery Charger
Making a car battery charger at home can be a budget-friendly and gratifying DIY project, especially if you are a car enthusiast. If you have just made a car battery charger, the next step is to test it to see if it is working correctly. Firstly, connect the charger to a dead battery to ensure that it is recharging.
Once the battery shows signs of life, disconnect it and check whether the charger is functioning at the right charging rate. You can do this by using a multimeter to measure the voltage and current at different stages of the charging process. If the voltage and current are within the appropriate range, then congratulations! You have made yourself a successful car battery charger.
However, if the readings are not within range, you might need to adjust some settings or consult a professional. Remember, safety should always come first when dealing with electrical devices, so ensure that you take the necessary precautions to avoid accidents.Hence, making a car battery charger can not only help you save money but also prove to be an excellent way to enhance your DIY skills.
Conclusion
To sum it up, making a car battery charger at home is not rocket science. With a handful of easily accessible items and some discernment, you can create a device that is both practical and functional. Not to mention, by assembling your own charger, you can customize it to meet your specific needs and save a few bucks in the process.
So why spend a small fortune on a pre-packaged charger when you can create your own, tailored to your preferences, with a little bit of imagination and skill? Get creative and put your DIY skills to the test – your car and your wallet will thank you.”
Summary: Benefits of DIY Car Battery Charger
Have you ever found yourself in a situation where your car battery dies, and you don’t have a charger? It’s a frustrating and costly experience. But what if you could make your own car battery charger at home? Not only would it save you money, but it could also give you a sense of satisfaction and pride in building something yourself. To make your own car battery charger, you will need some basic tools, including a battery charger, a DC power supply, and a multimeter.
First, you need to remove the battery from your car and connect it to the DC power supply. Then, you can adjust the voltage and current until you get the right charging rate for your battery. Once the charging is complete, you can test the battery with a multimeter to ensure that it is fully charged.
By creating your own car battery charger, you can ensure that your car is always ready to go when you need it, and you have the skills to fix it if something goes wrong. So why not give it a try?
FAQs
What materials do I need to make a car battery charger at home?
To make a car battery charger at home, you will need a transformer, diode, capacitor, and some basic wiring tools.
Is it safe to make a car battery charger at home?
If you have basic knowledge about electronics and follow the instructions carefully, it is safe to make a car battery charger at home.
What is the cost of making a car battery charger at home?
The cost of making a car battery charger at home may vary depending on the quality of the components you use. However, it is generally cheaper than buying a new charger.
Can I use a homemade car battery charger for other batteries?
While a car battery charger is specifically designed for car batteries, you may be able to use it for other types of batteries as well. Just make sure you use the appropriate voltage and read the specifications of the battery before charging.
How long does it take to make a car battery charger at home?
The time it takes to make a car battery charger at home depends on your skill level and availability of components. It may take anywhere from a few hours to a few days.
What precautions should I take when making a car battery charger at home?
It is important to take precautions such as wearing appropriate safety gear, working in a well-ventilated area, and following the instructions carefully to avoid accidents or damage to components.
How do I know if my homemade car battery charger is working?
To know if your homemade car battery charger is working, you can use a multimeter or voltage meter to check the voltage output. You can also test it by charging a car battery.

