How to Make a Solar Car Battery Charger: A Step-by-Step Guide
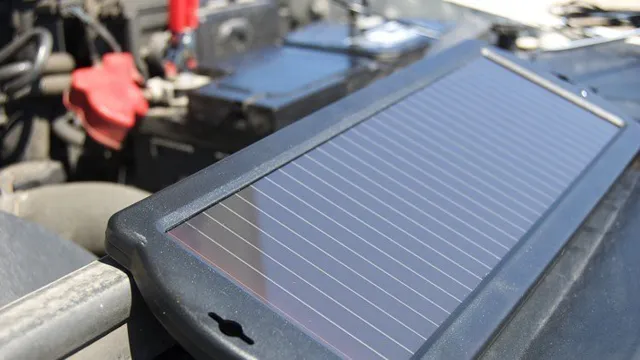
Have you ever found yourself with a dead car battery? It’s frustrating, time-consuming, and can be costly to fix. But what if you could recharge your car battery using the power of the sun? In this blog post, we’re going to show you how to make a solar car battery charger, a cheap and simple way to extend the life of your car battery and reduce your carbon footprint. A solar car battery charger is an ideal solution for those who park their cars outside and don’t have access to a power outlet.
The solar panels on the charger convert sunlight into electricity, which is then stored in the car battery. Not only is it environmentally friendly, but it also saves you money in the long run by reducing the need for costly maintenance and replacements. In this post, we’ll guide you through the step-by-step process of making your own solar car battery charger.
We’ll cover everything from materials needed to how to set it up in your car. You don’t need to be an expert electrician to complete this project, and in fact, it’s a perfect weekend DIY project for anyone looking to reduce their carbon footprint and save a few bucks. So, get ready to harness the power of the sun and keep your car battery charged and ready to go!
Gather Materials
If you’re interested in making a solar car battery charger, the first step is to gather your materials. For this project, you’ll need a 12-volt solar panel, a charge controller, a 12-volt battery, some wires, and some basic tools like pliers and wire strippers. If you’re not sure where to find these materials, try looking online or checking out your local hardware store.
Make sure to choose high-quality components that are compatible with each other to ensure your charger works properly. Once you have all your materials, you can start assembling your solar car battery charger.
Solar Panel
When it comes to building a solar panel, the first thing you need to do is gather all the necessary materials. There are a few key items you’ll need to complete your project, including solar cells, a backboard to mount them on, wires, and diodes. You can typically find these materials at a hardware store or online retailer that specializes in solar panel components.
It’s important to make sure all your materials are compatible with one another, so be sure to double-check your selections before making a purchase. While it may seem like a daunting task, gathering materials is an essential part of building a solar panel and it’ll ensure that you’re well-prepared for the rest of the project. So, before you get started, take the time to gather everything you’ll need to make your solar panel a success!
Charge Controller
When it comes to setting up a solar energy system, the charge controller is a crucial component that cannot be ignored. To gather the materials needed for this part of the system, you should start with a list. The list should include a charge controller, battery cables, a multimeter, MC4 connectors, a voltmeter, and a junction box.
Making sure that all the materials are of suitable quality is equally important. Cheap materials can hinder the performance of the entire system and end up causing more harm than good. Therefore, it is better to invest in good quality materials in the first place and save yourself the hassle of repairs and replacements in the future.
Remember, a good charge controller is vital for the optimal functioning of your solar power system, so make sure you gather the best materials possible to ensure that it performs at its optimal level.
Rechargeable Battery
Rechargeable battery So, you’ve decided to embark on a little DIY project to build your own rechargeable battery. Well, the first thing you need to do is gather all the necessary materials. You’ll need a few basic tools, such as a soldering iron, a pair of wire cutters, and a multimeter to test the battery once you’re done.
As for the materials, you’ll need a few rechargeable batteries, some wires, a battery holder, and some heat shrink tubing to protect the wires from wear and tear. Don’t forget to get some solder, too, as you’ll need to join the wires together. Once you have everything you need, you’re ready to get started!
DC Socket
When it comes to installing a DC socket, it’s essential to gather all the necessary materials beforehand. Firstly, you will need a DC socket with the correct dimensions and amperage rating for your specific needs. You may also require a wiring harness, which consists of wires, connectors, and insulation tubing to connect the socket to the power source.
Additionally, you’ll need a wire stripper and crimping tool to appropriately strip the insulation from the wires and attach the connectors correctly. It may also be beneficial to have electrical tape or heat shrink tubing on hand to protect the wiring connections and prevent any potential hazards. By gathering all these materials ahead of time, you’ll reduce the chances of any problems during the installation process and ensure a safe and successful end result.
Wires
When it comes to working with wires, gathering the necessary materials is key. Make sure you have the right tools for the job, such as wire cutters, strippers, and pliers. You’ll also need the wire itself, which comes in a variety of gauges and materials, from copper to aluminum.
Make sure to choose the right wire for your project, taking into consideration factors such as its intended use and the amount of current it will be carrying. It’s also a good idea to have some connectors on hand, as well as electrical tape or heat shrink tubing to provide additional insulation and protection for your connections. By having the right materials on hand, you’ll be well-equipped to tackle any wiring project that comes your way.
Assemble the Charger
Making a solar car battery charger may seem daunting, but with the right tools and guidance, it can be easily accomplished. One crucial step is to assemble the charger itself. Start by attaching the voltage regulator to the solar panel’s output wires, using a soldering iron and some flux.
Next, connect the input and output wires of the voltage regulator to the battery bank using a fuse and a fuse holder. Make sure to secure all connections with electrical tape or heat shrink tubing. Finally, connect the battery bank to the car battery, using a cigarette lighter adapter or directly to the battery posts with alligator clips.
Once everything is connected and secure, your solar car battery charger is ready to use and will provide a reliable source of power for your vehicle. Remember to always consult the manufacturer’s instructions and take proper safety precautions when working with electrical components. By following these steps, you can now enjoy the benefits of a solar-powered car battery charger.
Connect Solar Panel and Charge Controller
To connect the solar panel and charge controller, you’ll need to first assemble the charger. Installing a solar panel and charge controller is a simple process, and with a little bit of knowledge, anyone can do it effectively. Once you have your solar panel, charge controller and batteries, you’ll want to start by wiring them together.
Connect the positive wire from your solar panel to the positive terminal on the charge controller, then connect the negative wire from the solar panel to the negative terminal. Now, connect the positive wire from the battery to the positive terminal on the charge controller, and connect the negative wire from the battery to the negative terminal. Finally, you’ll need to connect the load terminal to your load, which could be anything from a light bulb to a heating element.
Once everything is connected properly, the sun’s energy will flow through the solar panel and charge the battery, providing a source of power for your device. It’s that simple! Now, sit back and enjoy the power of the sun.
Connect Charge Controller and Battery
To assemble the charge controller and battery, you’ll need to follow a few simple steps. Firstly, you need to ensure that the charge controller you have purchased is compatible with your battery. Once you have confirmed compatibility, connect the charge controller to your battery terminals using the positive and negative connection leads provided with the controller.
The next step is to connect the solar panel or panels to the solar input terminals on the charge controller, and again, you should use the positive and negative leads provided. It is crucial to ensure that the solar panel voltage does not exceed the charge controller’s maximum input voltage. If the voltage is too high, you can damage the controller or the battery.
Once everything is connected, turn on the power switch to start charging your battery. When the battery is full, the charge controller will automatically stop the charging process to prevent overcharging and prolong your battery’s life. Remember to read the manufacturer’s instructions carefully before assembling your charger to ensure you make the right connections.
By following these simple steps, you can easily assemble your charger and start enjoying the benefits of solar energy.
Add DC Socket and Wires
“assemble the charger” Now that you have the necessary parts to build your own electric bike charger, it’s time to start putting everything together. To begin, you’ll need to add the DC socket and wires to the charger. Firstly, take the DC socket that you purchased and position it on the box where you want it to be installed.
Then, take a marker and mark off the position of the holes where you’ll need to drill. After you’ve marked the holes, drill them using a power drill. Once the holes are drilled, put the DC socket back in place and use screws to attach it securely to the box.
Next, strip the insulation off the end of the wires, and thread them through the holes in the DC socket before soldering them in place. For added security, you can use electrical tape to wrap the wires around the DC socket. After you’ve finished soldering and taping the wires, you can test the charger by plugging it into a power outlet.
In order to maintain proper safety, be sure to use a circuit breaker in the design to prevent Fusing and overheating. In sum, assembling your own electric bike charger can seem overwhelming at first, but with some basic electrical knowledge and the right tools, anyone can do it. Just remember to take your time, follow all instructions, and prioritize safety above all else.
Test the Charger
If you’ve successfully built a solar car battery charger, it’s crucial to test it before putting it to use. Testing your charger beforehand ensures that it’s working correctly and can effectively charge your car’s battery. To test your charger, connect it to your car battery while the car is turned off.
Observe if the ammeter gauge display on your charger is showing a charge in amps. Additionally, you can test the voltage output of the charger by using a voltmeter to measure the voltage at the charger’s output. If everything checks out, your charger is ready to use.
Remember to always supervise your charger and keep an eye on the battery while it’s charging. By following these simple testing steps, you can confidently use your solar car battery charger knowing that it’s properly functioning to give you a full charge on the go.
Ensure Voltage and Amperage are Correct
If you want to extend the lifespan of your electronic devices and avoid potential mishaps, it’s crucial to use the correct charger. Before you plug in your charger, make sure the voltage and amperage are suitable for your device. Different electronics have different charging requirements, and using a charger that doesn’t meet these requirements can lead to undercharging, overcharging, overheating, and in the worst-case scenario, explosions.
To avoid these hazards, it’s significant to test the charger. You can employ a multimeter to measure the voltage and amperage output of the charger and compare it to the specifications of your electronic device. If there’s a discrepancy, you can either opt for a replacement charger or adjust the output of the current charger to the needed level.
Keep in mind that using an underpowered or overpowered charger could harm your device’s battery and affect its long-term performance. Always ensure that the charger you’re using provides the right amount of power to your electronic device to maintain its quality and durability.
Check if Charger is Regulating the Charge
When it comes to charging your devices, it’s important to ensure that the charger is regulating the charge properly. A faulty charger can lead to overcharging, which can damage your device’s battery and even make it dangerous to use. So, how do you test the charger to see if it’s regulating the charge correctly? Firstly, check the voltage and current output of the charger using a multimeter.
If the output is within the range specified by the manufacturer, chances are the charger is doing its job properly. Another way to test the charger is by observing the temperature of the charging device. If it’s staying cool to the touch during the charging process, everything is most likely working well.
However, if it starts to warm up or even get hot, this could mean that the charger is not regulating the charge correctly and could potentially damage your device. Remember, it’s always better to be safe than sorry, so never leave your device charging unattended, and always make sure the charger is working correctly.
Charge Your Car Battery with Your New Solar Car Battery Charger
Have you ever found yourself stuck with a dead car battery and no conventional way of charging it? Well, a solar car battery charger can be your savior in such situations. The good news is that you don’t need to be an expert to make one yourself at home. All you need are some basic tools, a solar panel, a charge controller, and a battery.
Cut the wires of the panel and connect it with the controller. Then connect the controller to the battery, and voila, you have your own solar car battery charger! Make sure you use an appropriate sized panel and controller for your battery, and place the panel in direct sunlight for maximum efficiency. With this simple DIY project, you can have a reliable source of power for your car’s battery wherever you go.
Plus, using solar energy reduces your carbon footprint and saves money in the long run. So next time you face a dead car battery, consider making your own solar car battery charger and charge it up with the power of the sun!
Ensure Proper Connection to the Battery
If you’ve invested in a solar car battery charger, congratulations! You’re well on your way to reducing your carbon footprint and saving some money too. But before you start charging your car battery, it’s important to ensure you have a proper connection to the battery. Make sure to read the manufacturer’s instructions carefully and double-check that you have the correct cables and connectors.
You may need to remove the battery from your car to ensure a safe and secure connection. Once you’re all set up, the main keyword, “charge your car battery,” will be easily achieved with the power of the sun. Not only will your car battery be ready to go whenever you need it, but you’ll also enjoy the peace of mind that comes with using clean, renewable energy.
With proper connection and care, your solar car battery charger will last for years and help you save money on traditional gas-powered charging methods. So, get ready to enjoy the benefits of solar power and a fully charged car battery.
Monitor the Charging Process
When you invest in a solar car battery charger, you want to be sure you get the most out of it. Monitoring the charging process is crucial for ensuring your battery is getting charged effectively. You don’t want to overcharge or undercharge your battery, so checking in periodically on the progress of the charging is important.
This is especially true if you’re dealing with extreme temperatures or weather conditions that may affect the charging process. Keep an eye on any LED lights or indicators that come with your charger and pay attention to any instructions or guidelines for optimal charging. With the right approach and attention to detail, your new solar charger will help you make the most of your car battery and keep you on the road worry-free!
Conclusion
In conclusion, creating your own solar car battery charger is not only a smart way to save money on gas and electricity bills, but it’s also a fun and fulfilling DIY project. By harnessing the power of the sun, you can keep your vehicle running smoothly and reduce your carbon footprint. And who knows, maybe one day your solar charger will power your car entirely, making you the envy of all your eco-conscious friends.
So get creative, gather your tools, and start building your own solar-powered solution today!”
FAQs
What materials do I need to make a solar car battery charger?
You will need a solar panel, charge controller, battery, and cables.
How long does it take to charge a car battery with a solar charger?
It depends on the size of the battery and the capacity of the solar panel. Generally, it can take a few hours to a full day.
Can I use a solar car battery charger on cloudy days?
Yes, you can still charge your battery on cloudy days, but the charging may be slower than on sunny days.
How do I connect the solar panel to the battery for charging?
You will need to connect the solar panel to a charge controller and then connect the charge controller to the battery.
Is it safe to leave my car battery charging with a solar panel overnight?
It is generally safe to leave your car battery charging overnight with a solar panel as long as you have a properly functioning charge controller.
Can I use a smaller solar panel to charge my car battery?
Yes, but it may take longer to charge your battery as a smaller solar panel has a lower output of energy.
How do I know if my car battery is fully charged with a solar panel?
You will need a battery tester or a multimeter to test the voltage of the battery. Once it reaches a certain voltage, it is considered fully charged.

