How to Make a Torque Wrench at Home: A Step-by-Step Guide

Have you ever found yourself in a situation where you require a specific torque for a particular task, but can’t find a torque wrench that suits your needs? Fear not! You can make your own torque wrench with just a few simple steps and some basic tools. A torque wrench is an essential tool for any mechanic or DIY enthusiast. It allows you to tighten bolts and nuts to a specific torque, ensuring that they are secure and not over-tightened.
However, torque wrenches come in various sizes and styles, and it can be challenging to find the perfect one for your needs. By making a torque wrench, you have the freedom to customize it to suit your needs. You can adjust the torque range, length, and the type of handle to make the tool more comfortable to use.
Moreover, making your torque wrench is a fun and rewarding project that can save you money compared to purchasing a ready-made one. In this blog post, we will guide you through the process of making your torque wrench. You will learn about the materials and tools you need and the step-by-step procedure to follow.
We will also provide tips and tricks for optimal results and safety precautions to observe. So, grab your tools, and let’s get to work!
Understanding Torque
If you’re looking to tackle mechanical jobs that require accuracy, understanding torque is a must. Torque refers to the rotating force that turns bolts, nuts, and other fasteners. To measure torque accurately, you’ll need a torque wrench.
While torque wrenches are readily available in most hardware stores, you can also make your own if you’re feeling handy. To make a DIY torque wrench, you’ll need a few materials, including a long-handled wrench, a spring, and a dial gauge. Attach the spring to the wrench head and the dial gauge to the end of the spring.
As you turn the wrench, the spring compresses, and the dial gauge displays the torque applied. With some practice, you can also calibrate your DIY torque wrench to ensure precise readings. Keep in mind that torque values vary depending on the size and type of fastener you’re working with, so always consult a torque specification chart before applying torque.
By understanding torque and making your own torque wrench, you’ll be better equipped to tackle mechanical tasks with confidence and accuracy.
Definition of Torque
Torque is a term used in physics that describes the force that causes rotation around an axis or pivot point. It is a crucial concept in understanding how objects move and rotate, and it plays a critical role in many fields, such as engineering, mechanics, and physics. Torque depends on various factors, including the amount of force applied, the distance from the axis of rotation, and the angle of force application.
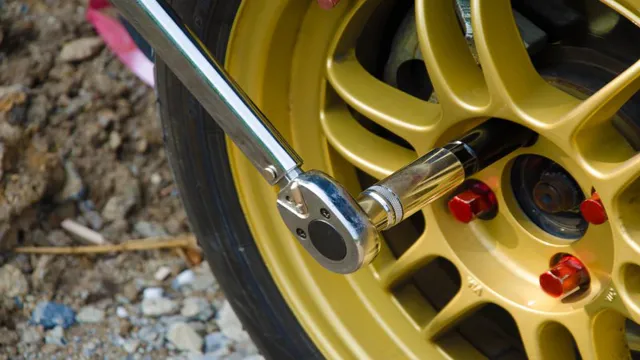
The unit of torque is the Newton-meter or the pound-foot. To visualize torque, think about using a wrench to tighten a bolt. The amount of force you apply to the wrench and the distance from the bolt’s center determine the torque required to tighten the bolt.
Understanding torque is essential in designing and building machinery, engines, and other vital equipment.
Types of Torque Wrenches
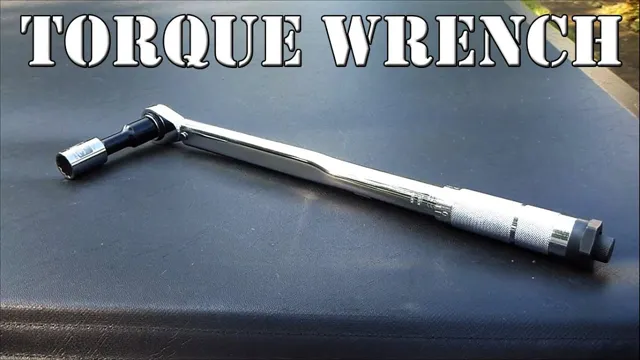
Torque wrenches are essential tools used to torque bolts and nuts accurately. Understanding torque is crucial when choosing the right type of torque wrench for a specific job. Torque is a twisting force applied to an object, such as a bolt or nut.
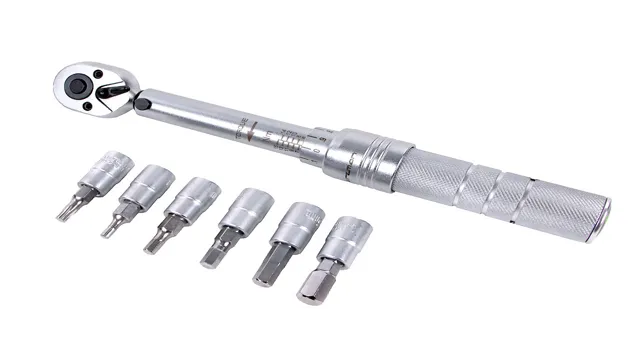
It’s measured in units of force multiplied by distance, which is typically pounds-feet or Newton-meters. Torque wrenches come in three main types, namely beam, click, and digital torque wrenches. Beam torque wrenches are the simplest and most affordable kind.
They work by using a calibrated beam that bends when a certain amount of force is applied. Click torque wrenches come equipped with a mechanism that produces an audible “click” when the desired torque level is reached. Lastly, digital torque wrenches use electronic impulses to measure and display the applied force.
They usually come with various settings and are the most accurate. Understanding the different types of torque wrenches is vital in selecting the right tool for the job and ensuring accurate and consistent torque application.
Materials Needed
If you’re in need of a torque wrench but don’t want to shell out the cash for a pre-made one, why not make your own? Thankfully, the materials needed are relatively simple and easy to obtain. You’ll need a long, sturdy steel rod that can handle a good amount of torque (at least 3/8 inch thick), a torque gauge capable of measuring your desired range (available at most hardware stores), and a grip or handle to make tightening easier. You may also want to invest in a lubricant to ensure smooth rotation and pack some cotton balls to place between the gauge and the grip to prevent slippage and improve accuracy.
With these tools in hand, you’ll be ready to create a reliable and effective DIY torque wrench in no time.
Wrench Body
If you’re planning to work on your car, one of the most essential tools you’ll need is a wrench. But not just any wrench will do, you’ll need to choose the right body material for optimal performance. There are two popular materials you can choose from: steel and aluminum.
Steel wrench bodies are strong, durable, and resistant to wear and tear, making them perfect for heavy-duty tasks. However, they can be quite heavy and fatigue your hand after extended use. On the other hand, aluminum wrench bodies are lightweight, allowing you to work for extended periods without feeling tired.
However, they are not as strong as steel and can wear out over time if used for heavy-duty tasks. Ultimately, the type of wrench body material you choose will depend on the type of project you plan to undertake. If you’re working on a heavy-duty project, choose a steel wrench body.
However, for light-duty tasks, an aluminum wrench body would suffice. Keyword: wrench body material
Torque Mechanism
To create a torque mechanism, you’ll need a few essential materials. One of the most crucial components is the power source, which is typically an electric motor that converts electrical energy into rotational force. You’ll also need a transmission system that allows the energy to be transferred from the motor to the output shaft.
This can be achieved with gears, belts, or chains, depending on the specific requirements of your application. Another critical element is the torque sensor, which measures and controls the amount of force being produced by the mechanism. This can be accomplished using strain gauges, load cells, or other sensing devices.
Lastly, you’ll need a housing or casing to protect the mechanism from external elements and provide a mounting point for any additional components or accessories. By gathering the proper materials and carefully designing your torque mechanism, you can achieve the desired level of rotational force for your application.
Handle and Grip
To ensure a comfortable grip on your next project, there are a variety of materials you can choose from to make a handle that fits your needs. Some common options include wood, metal, plastic, and rubber. Each material has its pros and cons, depending on what you’re looking for in a grip.
For example, wood is a popular choice for its natural feel and ability to be shaped to fit your hand, but it may not be as durable as some other materials. Metal is an excellent option for a sturdy grip that can withstand heavy use, but it may also be prone to rusting or becoming too hot to hold. Plastic is a lightweight option that is easy to mold and comes in a variety of colors, but it may not be as durable as some other materials.
Finally, rubber is a great choice for a firm grip that won’t slip, but it may be prone to wear and tear over time. Whatever material you choose, make sure it fits comfortably in your hand and gives you the control you need for your project.
Assembly
If you’re looking to create your very own torque wrench, the assembly process can be a bit daunting, but with the right materials and some patience, it’s definitely achievable. Firstly, you’ll need to gather a few essential components, including a piece of metal tubing, a torque wrench head, and a handle for grip. Begin by cutting the metal tubing to your desired length, then attach the torque wrench head to one end, making sure it’s secured tightly.
Next, slide the handle onto the other end of the tubing and insert a pin to hold it in place. Once fully assembled, you can test the torque wrench by applying pressure to the handle and ensuring that the reading on the torque wrench head matches up with your desired level of torque. With some practice and a bit of trial and error, you’ll be able to make a custom torque wrench that’s perfect for your specific needs, whether you’re working on cars or other mechanical projects.
Step 1: Prepare Materials
When it comes to assembling anything, preparation is key. This is true for every project, and the same goes for assembling materials. Before starting the assembly process, you need to gather all the necessary materials and tools.
This includes making sure you have all the parts, screws, bolts, and other items needed. You also need to have the right tools on hand, such as screwdrivers, pliers, and wrenches. It’s essential to read the instructions thoroughly and make sure you have a clear understanding of what’s required.
Once you have all the materials and tools ready, you’re ready to begin the assembly process. By taking these steps, you’ll be starting on the right foot and making sure your assembly goes smoothly.
Step 2: Constructing the Handle
The next step in constructing a walking stick is to assemble the handle. This is an essential component as it will determine the comfort and grip of the walking stick. To create the handle, you will need to select the material that you prefer, such as cork, rubber or a hardwood like oak or ash.
Once you have chosen your material, mark the length of the handle and cut it to size, sanding down the edges to remove any roughness. When it comes to shaping the handle, you can use a carving knife or chisel to create a unique design that suits your preferences. It’s essential to take your time and ensure that the handle is symmetrical and comfortable to hold.
After shaping the handle, drill a hole through the centre, matching the diameter of the walking stick. Then, insert the stick into the hole and glue in place, adding additional screws for added strength. Overall, taking the time to create a comfortable and durable handle will make all the difference when using your walking stick out on walks or hikes.
Step 3: Adding the Torque Mechanism
When it comes to assembling your electric bike, adding the torque mechanism is a crucial step. This mechanism is what allows power to be transferred from the motor to the bike’s rear wheel. Typically, this involves attaching a chain to the motor and then extending it to the rear wheel.
It’s important to make sure that the chain is properly aligned and tightened before moving on. Some bikes may also require the installation of a torque sensor, which helps regulate the amount of power being sent to the rear wheel. Once the torque mechanism is in place, it’s a good idea to conduct a test ride and make any necessary adjustments before hitting the road.
By taking your time and ensuring that everything is properly assembled, you can enjoy a smooth and efficient ride on your new electric bike.
Calibration
If you’re wondering how to make a torque wrench, the process isn’t exactly simple. First, it’s important to understand that a torque wrench is a precision tool that requires calibration to ensure accuracy. To make a torque wrench, you’ll need to start by selecting the proper materials and tools, which can include a wrench body, torque measuring device, and a calibration device.
Once you have those materials, you’ll need to assemble the torque wrench and calibrate it to your desired torque range. This process typically includes adjusting the torque settings and verifying the accuracy of the wrench with a calibration device. Keep in mind that every torque wrench is different, so it’s important to consult the manufacturer’s instructions before and during the assembly and calibration process.
Remember, accuracy is key when it comes to torque wrenches, so take your time and ensure that yours is properly calibrated before using it.
Why Calibration is Important
Calibration is an essential process that ensures the accuracy and consistency of measurements in various fields, ranging from industrial settings to research labs. It involves comparing the values obtained from a device or instrument to a standard, and adjusting it accordingly to match the reference value. The importance of calibration cannot be overstated, as inaccurate measurements can result in serious consequences, such as faulty product quality, safety hazards, or legal liabilities.
By calibrating instruments regularly, businesses and organizations can guarantee the reliability of their data, minimize errors, and optimize operational efficiency. In simpler terms, calibration is like checking the weight of a scale against a known weight to make sure it’s accurate and reliable. So the next time you’re using a device or instrument that provides critical measurements, ask yourself, when was the last time it was calibrated?
How to Calibrate the Torque Wrench
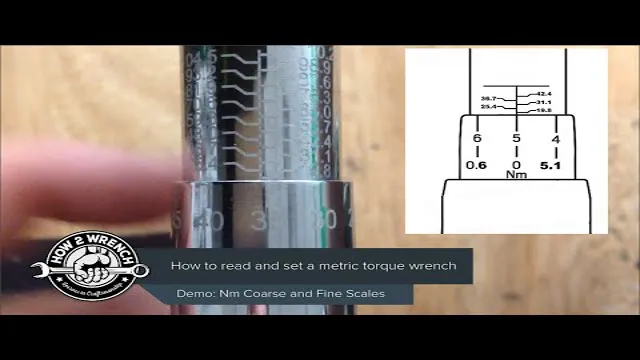
Calibrating a torque wrench is crucial to ensure accurate torque output in various applications. In order to calibrate the torque wrench, you first need to identify the specific torque range and type of wrench you have. A torque wrench calibration tool, also called a torque analyzer, should be used to calibrate the wrench.
The calibration tool provides accurate readings of the torque output produced by the wrench. To calibrate the torque wrench, you need to attach the calibration tool to the wrench and apply force that corresponds to a specific point within the wrench’s range. The calibration tool will then provide readings for each point on the wrench’s range.
Once the readings are obtained, they should be compared to the manufacturer’s specifications to ensure the wrench is producing accurate torque output. By following these steps, you can ensure the accuracy of your torque wrench, helping to prevent equipment damage and accidents.
Conclusion
In conclusion, making a torque wrench requires the perfect balance of precision and power. You’ll need a steady hand, a keen eye for detail and a dash of creativity to create a tool that will tighten bolts with the exact amount of force required. But fear not, for with a bit of ingenuity and resourcefulness, you’ll soon be twisting and turning with the best of them – and all without breaking the bank.
So go forth, budding engineers, and create your own torque wrenches – after all, in this world of modern technology, it’s the DIY enthusiasts who wield the real power.”
FAQs
What is a torque wrench and how does it work?
A torque wrench is a tool used for tightening bolts or nuts to a specific torque value. It works by allowing you to adjust the amount of torque applied to the fastener and then providing a visual or audible signal when that torque has been reached.
How do I calibrate my torque wrench?
To calibrate your torque wrench, you’ll need a torque calibration tool or a professional calibration service. Follow the instructions provided by the manufacturer or calibration service to adjust the torque wrench to the correct calibration level.
What are the different types of torque wrenches?
There are several types of torque wrenches, including beam wrenches, click wrenches, dial wrenches, digital wrenches, and electronic torque wrenches. Each type has its own advantages and disadvantages, so choose the one that best fits your needs.
How often should I calibrate my torque wrench?
The frequency of calibration depends on how often you use the torque wrench and the precision required for your work. Generally, it’s recommended to calibrate your torque wrench every 6 to 12 months or after every 5,000 to 10,000 uses.
What are some common mistakes when using a torque wrench?
Some common mistakes include using the wrong type of torque wrench for the application, not properly calibrating the wrench, not using the correct torque value, and not tightening the fastener in the correct sequence.
How do I maintain my torque wrench?
To maintain your torque wrench, keep it clean and dry, store it properly in a protective case, and avoid dropping or over-tightening it. Use only the recommended accessories, and have it serviced by a professional if it’s not functioning properly.
Can I use a torque wrench to loosen bolts?
No, torque wrenches are designed to tighten bolts or nuts to a specific torque value. If you need to loosen a bolt, use a breaker bar or ratchet instead.

