How to Install Above Ground Sprinkler System: A Step-by-Step Guide

If you’re looking for an easy and efficient way to keep your lawn looking lush and green, installing an above-ground sprinkler system might be just what you need. With the ability to cover more ground and provide consistent watering, these systems have become a popular option among homeowners. However, you may be wondering where to start when it comes to installation.
Don’t worry — we’ve got you covered. In this article, we’ll share some helpful tips and insights that will make the process a breeze. Whether you’re a seasoned DIYer or a first-time homeowner, our guide will help you get the job done right.
Tools You Will Need
To set up an above ground sprinkler system, you will require specific tools that can make the installation much quicker and more manageable. You are going to need a rototiller, a pipe cutter, a tape measure, PVC primer and glue, Teflon tape, pipe clamps, PVC pipe, and sprinkler heads. In order to begin the installation process, you’ll have to map out the layout of your system beforehand.
Once you’ve done that, it’s time to use the rototiller to prepare the soil and remove any debris or rocks in the way. After you have cleared the area, use the pipe cutter to cut your PVC pipe and Teflon tape to seal any joints or connections. The PVC primer and glue will become necessary for creating airtight seals as well.
Use the pipe clamps to secure the piping along the planned route while connecting the sprinkler heads at the appropriate points. Finally, test the system for leaks by running water through it as you verify that water pressure is reaching each of the sprinkler heads and adjust any positioning accordingly. By doing this, you’ll have an easy to install sprinkler system that will keep your lawn looking healthy and beautiful.
Sprinkler Kit
If you’re planning to install a sprinkler kit in your lawn, there are some essential tools you’ll need to have on hand. The first and most important tool is a shovel. You’ll need this to dig out the trenches where the pipes will go.
A shovel with a pointed tip will make it easier to dig through roots and rocks. You’ll also need a trenching tool or a trenching machine to make the trenches more uniform in depth. Once you have the trenches dug, you’ll need a pipe cutter or a hacksaw to cut the pipes to the correct lengths.
A wrench will come in handy for tightening the fittings, and a screwdriver will be necessary to attach the sprinkler heads to the pipes. Finally, a testing kit will allow you to check for leaks before burying the pipes and filling in the trenches. With these tools, you should be able to install a sprinkler kit successfully and enjoy a lush, green lawn all summer long.

Shovel
When it comes to gardening or landscaping, a shovel is one of the most important tools you will need. But, not all shovels are created equal. There are different types of shovels that serve specific purposes, and it’s important to choose the right one for the job.
A standard round point shovel is great for digging and general landscaping work. If you need something to transplant small plants, then a transplanting shovel is the right choice. For heavier duty tasks such as breaking up tough soil or digging post holes, opt for a digging shovel.
Make sure to also consider the handle of the shovel. A wooden handle is comfortable to grip but may not be as durable as a fiberglass or metal handle. Properly maintaining the edge of your shovel with a sharpening tool or file is also important for longevity and efficiency.
So before you start your next outdoor project, be sure to have the appropriate shovel on hand!
Pipe Cutter
When it comes to cutting pipes for plumbing or other projects, a pipe cutter is an essential tool. But what other tools will you need to use it effectively? First and foremost, you’ll need a good, sturdy set of pliers to grip the pipe and rotate it as you cut. Additionally, having a ruler or measuring tape on hand will help you ensure accurate cuts.
You may also want to have a deburring tool to remove any rough edges from the cut end of the pipe to prevent damage to fittings or injuries to your hands. Finally, a pair of gloves and safety goggles are crucial for protecting yourself from cuts and flying debris. By having these tools on hand and using them in conjunction with a pipe cutter, you’ll be able to make precise and safe cuts for a wide variety of plumbing or DIY projects.
PVC Glue
If you’re looking to bond PVC pipes, PVC glue is an essential tool. When working with this type of adhesive, there are certain tools you will need to ensure a proper and secure bond. First and foremost, you will need PVC primer, which helps to clean and prepare the surface of the pipes for the glue.
You will also need PVC cement, which is the actual adhesive that bonds the PVC pipes together. Additionally, a brush is necessary to apply the glue and primer evenly. It’s important to note that you should only use PVC glue for PVC pipes, as using the wrong adhesive can result in weak bonds that could potentially leak.
By using the proper tools and techniques, you can ensure a strong and lasting bond between your PVC pipes.
Preparing the Area
When it comes to adding an above ground sprinkler system to your lawn, preparation is key. The first step is to mark out the area you plan to cover with your system, using stakes and string to create a clear border. Make sure to account for any obstacles, such as trees or garden beds, and consider how many sprinkler heads you will need to adequately cover the entire space.
Once you have a clear idea of the area you will be working with, the next step is to remove any debris or obstacles from the ground. This ensures that the water flow will not be hindered by any obstructions and allows the sprinkler heads to function properly. By taking the time to properly prepare the area for your above ground sprinkler system, you can ensure that your installation will go smoothly and that your lawn will receive the optimal amount of water.
Locate Water Source
When preparing an area for finding a water source, it’s important to take a few steps to ensure you’re doing it properly. First, clear the surrounding area of any debris that may interfere with your search for water. This includes rocks, fallen trees, and any other obstructions.
Make sure the area is free from any potential contaminants, such as animal waste or chemicals, as these can affect the quality of the water you find. Once you’ve cleared the area, take a moment to observe the terrain and identify any potential sources of water. This could be a nearby river or stream, or a low-lying area where water may collect.
By taking these steps, you’ll be able to find a water source that is safe and reliable for your needs. Remember, taking the time to properly prepare the area can save you time and effort in the long run, and ensure that you have access to a clean, healthy source of water.
Plan the Layout
When it comes to planning the layout for your home, the first step is to prepare the area. This involves clearing out any clutter, removing any unwanted furniture, and assessing the space you have available. It’s important to take measurements to ensure that any new furniture or decor you purchase will fit properly.
In addition, you should consider the function of the room and how you want it to look and feel. Will it be a cozy relaxation space or a functional workspace? Once you have a clear idea of what you want, you can start envisioning the layout and making a rough sketch of where everything will go. By preparing the area and taking the time to plan the layout, you’ll be able to create a space that is both functional and visually appealing, making it a place you love to spend time in.
Mark Out Sprinkler Heads
Preparing the area before installing sprinkler heads is crucial for ensuring efficient water distribution. One important step is to mark out the areas where the heads will be located. This involves using spray paint or flags to indicate the exact spot where each head should be placed.
But before marking, you should make sure the area is free of any debris or impediments that could hinder the installation process. Clearing the area of rocks, roots, and other obstacles will allow for easier digging and ensure that the sprinkler heads are installed at the correct depth. Additionally, you should make sure the water pressure and flow rate of your system are tested beforehand to ensure your sprinklers will provide the right amount of water to each zone.
Proper preparation ensures that the installation of your sprinkler heads will go smoothly and ensure that your lawn will receive adequate water coverage.
Installing the Water Line
When installing an above ground sprinkler system, one of the most important steps is to install the water line. First, you’ll need to locate the nearest water source, which is typically a hose bib or an existing irrigation system. Next, you’ll want to determine the size and type of water line needed for your specific system.
This will depend on the number of sprinklers you plan to install and the water pressure in your area. Once you have all the necessary materials, it’s time to install the water line. Start by digging a trench along the path where the line will run.
Make sure the trench is deep enough to prevent damage from freezing and other weather conditions. Then, lay the water line in the trench and connect the ends to the water source and the sprinklers. Finally, cover the trench with soil and test the system for proper water flow and pressure.
By following these steps, you can ensure a successful installation of your above ground sprinkler system.
Cut and Fit the PVC Pipe
Once you’ve planned out the route for your water line, it’s time to start installing it. The first step is to cut and fit the PVC pipe to the right length. Make sure to measure the distance accurately before cutting the pipe to size.
Use a hacksaw or PVC cutter to trim the pipe to the desired length, ensuring a straight and clean cut. Once you have the correct length, you will need to fit the pieces together with PVC fittings. These fittings come in a variety of shapes and sizes, so make sure to choose the right ones for your project.
Be sure to also add PVC primer and glue to ensure a solid seal between the pieces. Remember to let the glue dry completely before moving on to the next step. This will help to prevent any leaks or cracks in your water line.
With the proper preparation and attention to detail, you’ll have your new water line up and running in no time!
Connect to Water Source
Installing the water line is an important step in connecting your home to the water source. Before you begin, make sure you have the necessary materials such as a water line, fittings, and a shut-off valve. Begin by shutting off the main water supply to your home and draining any remaining water from the pipes.
Then, attach the shut-off valve to the main water supply line and connect the water line to the shut-off valve. Secure the fittings with a wrench and turn on the main water supply. Check for any leaks and make sure the water is flowing properly.
If you encounter any issues, don’t hesitate to call a professional for assistance. By installing the water line correctly, you’ll have access to clean and safe water for your household needs.
Install Drain Valve
Installing the water line in your home is a crucial step when it comes to accessing clean water. One essential component that you need to install in the water line is the drain valve. This valve is responsible for draining any excess water that may accumulate in the pipes, preventing any damage from occurring.
When installing your drain valve, be sure to locate the lowest point in your water line and make provisions for the valve to be installed at that point. It’s also crucial to ensure that the valve is placed in an easily accessible location for future maintenance and cleaning. Once installed, you can now enjoy uninterrupted access to clean water without any worries of pipe damage.
Make sure to get a high-quality drain valve to ensure that it performs optimally and lasts for a long time. Remember, a good drain valve can save you a lot of money on repairs and replacements in the long run.
Installing the Sprinkler Heads
When installing an above ground sprinkler system, installing the sprinkler heads is a key component. First, mark the locations where the heads will be installed. Dig a hole deep enough to accommodate the head and its riser.
Make sure the hole is free of debris, rocks, and roots. Place the sprinkler head onto the riser and connect the riser to the main water line using Teflon tape and PVC glue. Adjust the height of the sprinkler head so that it is flush with the ground surface.
Test the sprinkler system by turning on the water supply and check for any leaks or malfunctioning heads. Keep adjusting the height of the sprinkler heads until the water coverage is optimal. Once everything is set, backfill the hole with dirt and ensure the sprinkler head is secure.
With these simple steps, you can easily install the sprinkler heads in your above ground sprinkler system and enjoy a lush green lawn all summer long.
Dig Holes for Sprinkler Heads
Installing sprinkler heads requires digging holes in your yard to ensure precise placement and optimal coverage. Before you start digging, it’s essential to understand the function of your sprinkler system and where each head needs to be placed to achieve maximum efficiency. To begin, mark the location of each head with spray paint, taking care to space them out evenly.
Dig a hole at each marked location that’s deep and wide enough to accommodate the sprinkler head. Be sure to remove any rocks or debris from the hole to ensure a snug and secure fit. Once the hole is prepared, insert the sprinkler head, then cover and level the surrounding area with soil.
Repeat the process for each head until all are securely in place. Before turning on the water and testing your new sprinklers, be sure to double-check that each head is aimed in the correct direction and is level with the ground. With careful attention to detail and proper installation, your new sprinkler system will have your lawn looking lush and green in no time!
Install Sprinkler Heads
Installing sprinkler heads is an essential step to ensure a lush, green lawn all season long. You’ll first need to determine the best placement for your sprinkler heads based on the size and shape of your yard. Once you’ve mapped out your plan, use a trenching tool or shovel to create a narrow trench for your sprinkler pipes.
Place your sprinkler heads at the appropriate intervals along the pipe, ensuring they’re securely in place. Once everything is in position, bury the pipe, making sure the sprinkler heads remain at the same height as the rest of the lawn. Turn on your water supply to test your sprinkler system and make any necessary adjustments.
It’s important to remember that a well-installed sprinkler system can save you time, energy, and money on your water bill. So take the time to install your sprinkler heads correctly and enjoy a beautiful lawn all season long.
Connecting the System
Installing an above ground sprinkler system can seem daunting, but connecting the system is actually fairly straightforward. Once you have installed the sprinkler heads and laid out your piping, it’s time to connect the water source and controller. Begin by determining where you want to connect to your main water supply.
This connection point will most likely need to be threaded or glued onto a water line. Your next step will be to install a valve that will regulate the water flow to your sprinkler system. This valve should be installed before the water source connection point to allow for easy access and control over your irrigation system.
Lastly, connect your controller to the valve and make sure everything is properly wired and set up according to the manufacturer’s instructions. With all of the components connected, you will be able to turn on your sprinkler system and start enjoying a beautiful, green lawn. Remember to regularly maintain and check your system for any leaks or malfunctions.
Connect Water Line to Sprinkler Heads
Connecting the water line to sprinkler heads is an essential step in installing your lawn irrigation system. Firstly, gather all the necessary tools and parts, including a PVC glue, a hacksaw, PVC pipes, fittings, and valves. Then, begin by measuring and cutting the PVC pipes to the required lengths and assembling the pieces together using the fittings.
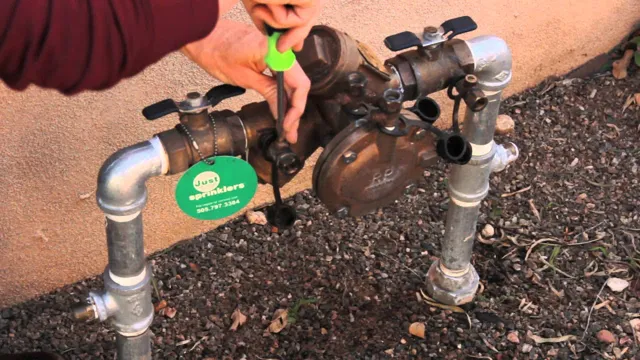
Ensure that all the components, including the valves and sprinkler heads, are connected correctly according to the designated layout. Finally, attach the water line to the irrigation system by connecting it to the main water supply using a backflow preventer to avoid any contamination. Once everything is in place, ensure that the entire system is functioning correctly by conducting a water pressure test and adjusting as necessary.
By taking the time to properly connect the water line to your sprinkler heads, you will have an efficient and well-functioning irrigation system that will keep your lawn healthy and vibrant.
Test the System
When it comes to testing the system, one of the most important steps is connecting all of the necessary components. This includes hardware, software, and any other devices or tools that are part of the system. It’s essential to ensure that everything is properly connected and working together seamlessly before moving on to the next steps of testing.
This not only helps to identify any potential technical issues but also ensures that the system is functioning as intended. By using the right tools and methods, including manual and automated testing, you can thoroughly test the system and verify that it meets all necessary requirements. With careful attention to detail and a focus on quality control, you can successfully build, test, and deploy your system to meet the needs of your users.
So why not take the time to properly connect and test your system today?
Conclusion
In conclusion, installing an above ground sprinkler system is a fantastic way to keep your lawn lush and green. It’s a simple task that can be accomplished with a few basic tools, a bit of creativity, and a lot of determination. So whether you’re a seasoned DIYer or a beginner, don’t be afraid to give it a go.
With a little bit of patience and a whole lot of water, you’ll have a lawn that’s the envy of the neighborhood in no time. Happy sprinkling!”
FAQs
What are the advantages of installing an above ground sprinkler system?
Above ground sprinkler systems are easy to install and maintain, they can cover a larger area than a traditional hose, and they can save water and money in the long run.
How much does it cost to install an above ground sprinkler system?
The cost can vary depending on the size of the area to be irrigated, the brand of sprinkler system, and the installation fees charged by a professional. On average, the cost can range from $500-$3000.
Can I install an above ground sprinkler system by myself?
Yes, it is possible to install an above ground sprinkler system yourself. However, it is recommended to consult a professional or read instructions carefully to avoid any mistakes that can damage the system.
What size of sprinkler heads should I choose for my above ground sprinkler system?
The size of the sprinkler heads depends on the water pressure in your area and the coverage area of your lawn. It is recommended to use a mix of medium and large spray heads for better coverage.
Can I adjust the sprinkler heads in an above ground sprinkler system?
Yes, you can adjust the sprinkler heads based on the coverage and watering pattern you require. Most sprinkler heads come with adjustable features.
How often should I water my lawn with an above ground sprinkler system?
The frequency of watering depends on the type of grass and soil in your lawn. It is recommended to water a lawn 2-3 times a week early in the morning or late in the evening to reduce water loss due to evaporation.
What maintenance is required for an above ground sprinkler system?
Regular maintenance is required to keep the system functioning efficiently. This includes checking for leaks, clogs, and damaged sprinkler heads, and adjusting watering times based on seasonal changes.

