How to Test a Rain Bird Sprinkler System: Step-by-Step Guide for Optimal Performance

Have you ever had trouble with your sprinkler system not working properly? Maybe you notice one section of your lawn is getting too much water, while another is barely getting any. Or perhaps you just can’t seem to figure out the right schedule for watering. Whatever the issue may be, it’s important to get to the root of the problem and fix it as soon as possible to ensure a healthy and green lawn.
That’s where testing your Rain Bird sprinkler system comes in handy. By properly testing your system, you can identify any issues and make adjustments in order to optimize watering and keep your lawn looking its best. In this article, we’ll cover everything you need to know about testing your Rain Bird sprinkler system, including why it’s important, what tools you’ll need, and step-by-step instructions on how to do it yourself.
So let’s get started!
Introduction
Have you installed a Rain Bird sprinkler system and wonder how to test it? Well, you’re in the right place. Testing a Rain Bird sprinkler system is important to ensure that your lawn is getting the right amount of water. First, turn on the water supply to the system and make sure all valves are fully open.
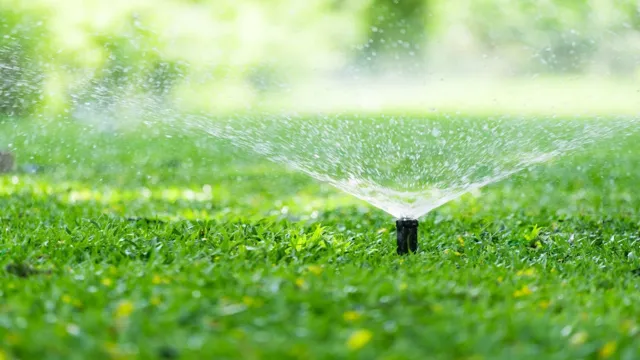
Then, walk through each zone of the sprinkler system, making sure that each sprinkler head is extending and spraying water evenly. Check for any leaks or broken sprinkler heads. Next, check the coverage area, making sure that there are no dry spots or oversaturated areas.
Finally, check the timing of the system to ensure that the water is being distributed at optimal times for your lawn. By following these steps, you can have peace of mind knowing that your sprinkler system is functioning properly and keeping your lawn healthy.
What is a Rain Bird Sprinkler System?
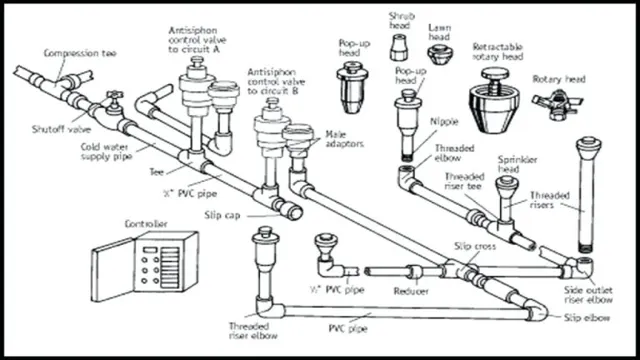
A Rain Bird sprinkler system is an automated irrigation system designed to water your lawn or garden efficiently. It uses a series of spray heads that are attached to underground pipes to deliver water to your plants in a targeted and controlled manner. These systems are especially useful for larger properties or for homeowners who want to keep their lawns lush and green without spending hours dragging a hose around the yard.
Rain Bird sprinkler systems can be programmed to turn on and off at specific times, ensuring that your plants receive the right amount of water they need without wasting water or over saturating your lawn. If you’re looking for an easy way to maintain the health and beauty of your landscaping, a Rain Bird sprinkler system might be just what you need.
Why is Testing Important?
Testing is a crucial and indispensable part of software development. It is a process of identifying the presence of any faults or errors in the software or application before it is released to the public. This helps in detecting and fixing the problems before deployment and ultimately results in high-quality software that meets customer expectations.
It is important to understand that even the smallest error can have significant consequences, such as data loss, security breaches, or system crashes. Therefore, testing plays a critical role in ensuring that the software is functional, secure, and meets the required standards. Neglecting testing can lead to a loss of credibility, customer satisfaction, and revenue.
Hence, testing should be an integral part of the software development life cycle, and all types of testing, such as functional, performance, security, and usability, should be conducted to achieve optimal outcomes.
Preparing for Testing
To properly test your Rain Bird sprinkler system, it is essential to prepare in advance. Firstly, make sure that all of the sprinkler heads are free from obstructions such as dirt or debris. This will ensure that the water can flow freely through the system without any blockages, allowing for an accurate test.
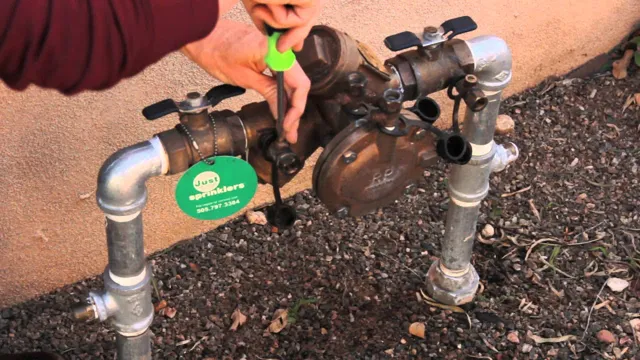
Secondly, check that all of the valves and pipes are in good condition and free from leaks. Any leaks can cause water to be lost from the system, making it challenging to test accurately. Finally, it is crucial to check that the water pressure is set to the correct level for your specific system.
This will ensure that the sprinklers are emitting water at the correct rate and coverage. By following these simple steps, you will be well equipped to test your Rain Bird sprinkler system and identify any issues that may need to be addressed.
Gather Required Tools and Materials
Preparing for Testing: Gathering Required Tools and Materials Before undertaking any testing process, you must ensure that you have all the necessary tools and materials at hand. This includes anything from physical tools to documentation and software programs. Depending on the type of testing you are conducting, you may require a wide range of different items.
Some crucial tools and materials you may need to gather could be test cases, test plans, test data, test environments, software, and hardware. It is essential to have a clear understanding of what you will be testing and what tools and materials you require, so that you can prepare thoroughly for the process. By having everything ready and waiting, you can save critical time and ensure that you are fully equipped to deal with any challenges that may arise during the testing phase.
Remember, being organized and prepared is a vital component for success when undergoing any type of testing.
Inspect the System for Damage
Before diving into the testing process, it’s important to inspect the system for any damage that could potentially affect the results of the test. This means taking a close look at the hardware, software, and any other components that make up the system to ensure there are no visible signs of damage or wear and tear. Checking for loose connections, cracks, or other physical damage is crucial to avoid any safety hazards or inaccurate results during testing.
Additionally, verifying that all software and firmware are up to date and have been properly installed is important to ensure that the system operates smoothly and that all components communicate effectively. By properly preparing and inspecting the system for damage, we can ensure that the testing process runs smoothly and accurately, providing us with reliable data and results.
Adjust and Modify Sprinkler Heads
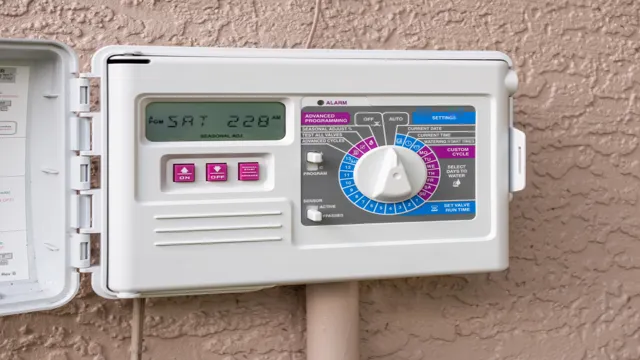
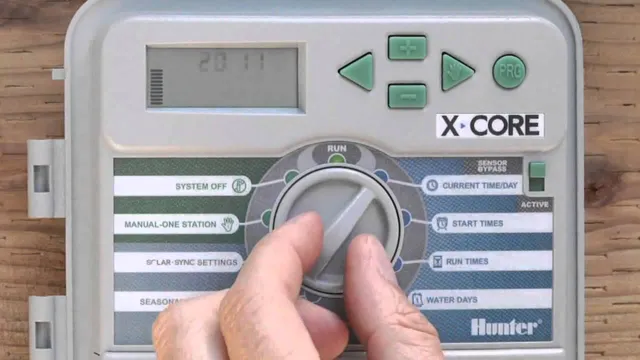
When preparing to adjust and modify sprinkler heads, it’s essential to start by turning off the water supply to avoid any unexpected water damage. Afterward, you can proceed to test the system by turning it on to identify any potential issues. You can do this by either manually turning the system on or through a controller if available.
It’s worth noting that there may be zones that need to be tested separately or special tools required for the task. Once you’ve identified the areas that need adjusting, you can proceed to modify the sprinkler heads accordingly. Ensure that you follow the manufacturer’s instructions during this step and that the sprinkler heads are correctly aligned for even water distribution.
By taking these necessary steps, you can save time and money in the long run while also preventing any unnecessary damage to your property.
Testing Procedure
When it comes to testing a Rain Bird sprinkler system, there are a few key steps to follow. First, you’ll want to make sure that the system is properly turned on and that the water pressure is sufficient for your needs. Then, you’ll want to check each individual sprinkler head to ensure that it’s functioning properly and that it’s aimed in the right direction.
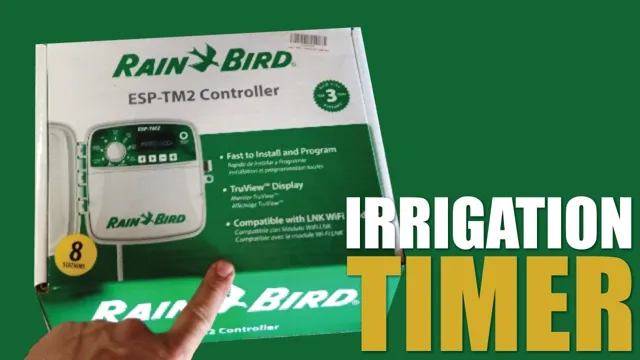
You can do this by turning on each zone of the system and walking around your property to visually inspect each head. If you notice any issues, such as a clogged nozzle or misaligned spray pattern, you’ll need to make adjustments or replace the head altogether. Finally, you’ll want to test the system’s timer to ensure that it’s accurately programmed.
This can be done by manually running each zone and checking that it turns off and on at the appropriate times. By following these steps and taking the time to properly test your Rain Bird sprinkler system, you can avoid costly repairs down the line and keep your lawn and garden looking healthy and vibrant all season long.
Test Each Zone Individually
When it comes to testing your home’s alarm system, it’s important to approach it systematically and thoroughly. Testing each zone individually is a crucial part of the process. This means setting off each sensor and ensuring that it triggers a response from the alarm system.
Start with the main entryway and work your way through each room, testing each window and door sensor. It’s also important to test any motion sensors or glass break sensors you have installed. This may seem like a tedious process, but it’s essential to ensure that your alarm system is functioning properly and that all areas of your home are covered.
Plus, it can give you peace of mind knowing that you have a reliable alarm system in place to protect your home and family.
Check for Adequate Water Pressure
Checking for adequate water pressure is an essential step in maintaining your home’s plumbing system. It ensures that water flows steadily and efficiently through your pipes, faucets, and fixtures, and that they are working at optimal capacity. To test your water pressure, you can purchase a pressure gauge from your local hardware store and attach it to a hose bib or faucet.
Turn on the water and observe the gauge’s reading, which should ideally fall between 45-55 PSI (pounds per square inch). If the pressure is lower than this, you may have an issue with your water supply or a blockage in your pipes that needs to be addressed. On the flip side, high water pressure can damage your plumbing’s connections and cause leaks over time.
So, it’s best to keep it within the recommended range. Regularly checking your water pressure can help you identify any issues early on and save you from costly repairs down the line.
Confirm that Water is Reaching all Sprinkler Heads
When it comes to ensuring that your sprinkler system is working properly, it’s important to confirm that water is reaching all sprinkler heads. To do this, you’ll need to conduct a testing procedure. First, turn on your sprinkler system and walk around your property.
Check to see if each sprinkler head is spraying water evenly and to its full radius. If you find that any are not, you may need to adjust the sprinkler head to ensure proper water flow. Additionally, if you notice that certain areas of your lawn or garden are not receiving water, you may need to adjust the position of the sprinkler heads.
Remember, in order for your sprinkler system to work effectively, all areas must be evenly covered with water. So, take the time to test and adjust your system to ensure it is working properly and providing adequate water coverage. By doing so, you’ll be able to maintain a healthy and vibrant lawn or garden throughout the season.
Ensure Sprinkler Heads are Adjusted Properly
When it comes to maintaining a properly functioning sprinkler system, regular checks on the sprinkler heads are a must. Ensuring they are adjusted correctly is important to avoid wasted water and ensure your lawn gets the proper amount of water it needs. First, turn on the system and check each sprinkler head to determine if they are all spraying in the correct direction and distance.
Adjust them as necessary using a small screwdriver or pliers to rotate the top of the sprinkler. It’s essential to check the system multiple times throughout the season to ensure your lawn is getting the right amount of water, especially during heatwaves when more water may be needed. With these simple steps, you can keep your sprinkler system operating at peak efficiency and ensure a lush, green lawn throughout the summer season.
Troubleshooting Tips
If you want to ensure your lawn gets the necessary watering it needs to stay green and healthy, a functioning sprinkler system is a must-have. Rain Bird is a well-known brand that offers a range of sprinkler systems and accessories for residential and commercial use. Testing the system is an important step to take before the dry season starts.
But how do you test a Rain Bird sprinkler system? First, check that the water flow to the system is turned on. Next, manually operate each zone by turning the corresponding valve in the control box. Make sure each head in that zone rises up and sprays water properly.
If a head doesn’t work, unscrew it and clean out any dirt or debris that may be blocking the nozzle or filter. If that doesn’t work, replace it. Finally, check for leaks in the system by examining each head and inspecting the pipes for signs of moisture or damage.
With these simple steps, you can ensure your Rain Bird sprinkler system efficiently and effectively waters your lawn and landscape.
Identifying and Fixing Clogs
Dealing with a clogged drain can be a pain, but it’s essential to address it as soon as possible to prevent further damage. One common cause of clogs is the buildup of hair, soap scum, and other small debris. To fix this, you can try using a plunger or a drain snake to dislodge the blockage.
If you’re dealing with a more severe clog, you may need to turn to chemical drain cleaners. However, it’s important to use these products with caution, as they can be harsh on your pipes and harmful to your health if not handled properly. Another solution could be using a mixture of baking soda and vinegar to loosen and dissolve the clog.
Remember to regularly maintain your drains by keeping them clean to prevent future clogs.
Repairing Broken Sprinkler Heads
Repairing broken sprinkler heads can be a frustrating task for any homeowner, especially if you don’t know the root cause of the issue. One of the most common reasons for broken sprinkler heads is clogging caused by dirt and debris. A good troubleshooting tip is to check the filter screen on the head to see if it’s blocked.
If so, you can clean it with a toothbrush and reinstall it. Another potential cause of broken heads can be excessive water pressure, which can cause the sprinkler to pop off or break entirely. To fix this, you may need to install a pressure regulator to control the water flow.
Additionally, if the head is cracked or damaged, you’ll need to replace it with a new one. It’s important to remember to match the new head with the same model to ensure proper fit and function. By following these simple troubleshooting tips, you can save money and keep your lawn well-irrigated throughout the growing season.
Conclusion
So, there you have it folks – testing your rain bird sprinkler system can be a breeze. By checking your water pressure, inspecting your heads, timing your zones, and getting some help from a trusted professional, you can ensure that your system is working efficiently and effectively. With all this knowledge, you’ll soon be the envy of your block with your green, healthy lawn.
So, grab your irrigation wrench and get ready to make it rain (bird)!”
Testing Regularly is Key to a Fully Functional Sprinkler System.
Regular testing is the key to maintaining a fully functional sprinkler system. Troubleshooting your system can be a bit tricky, but it’s important to catch any potential problems before they turn into major issues. One of the first things to check is your water pressure.
A decrease in pressure could be caused by a clogged filter, valve or damaged pipes. Another common issue is leaks. Make sure to regularly inspect your sprinkler heads for any signs of water leakage or damage.
You can also perform a simple catch cup test to determine if your system is distributing water evenly. Simply place cups around your yard and run your system for a set amount of time. If there are significant variations in the amount of water caught in each cup, it’s time to adjust your sprinkler heads.
Remember, regular testing and maintenance is essential for keeping your sprinkler system in top-notch condition, and ultimately, ensuring a healthy and vibrant lawn.
FAQs
What is a rain bird sprinkler system?
A rain bird sprinkler system is a type of irrigation system that automatically waters plants and lawns using sprinkler heads and underground pipes.
How do I test my rain bird sprinkler system?
To test your rain bird sprinkler system, turn off the water supply to the system, remove the sprinkler heads, and turn the water back on to flush out any debris. Then, replace the sprinkler heads and turn the system back on to observe the water flow and ensure proper coverage.
How often should I test my rain bird sprinkler system?
It is recommended to test your rain bird sprinkler system at least twice a year, ideally in the spring and fall, to ensure proper functioning and prevent potential issues.
What are common problems with rain bird sprinkler systems?
Common problems with rain bird sprinkler systems include clogged sprinkler heads, leaks in the pipes, and malfunctioning valves.
How can I troubleshoot issues with my rain bird sprinkler system?
To troubleshoot issues with your rain bird sprinkler system, examine the sprinkler heads for clogs or damage, check the pipes for leaks or damage, and test the valves to ensure proper functioning.
Can I install a rain bird sprinkler system myself?
While it is possible to install a rain bird sprinkler system yourself, it is recommended to hire a professional to ensure proper installation and avoid potential issues.
How can I maintain my rain bird sprinkler system?
To maintain your rain bird sprinkler system, regularly check and clean the sprinkler heads, inspect the piping for leaks or damage, and test the system for proper functioning.

