How to Test an Electrical Outlet with a Voltage Tester: A Step-by-Step Guide

Have you ever experienced an electrical outlet that isn’t working, or worse, has a dangerous voltage? It’s important to know how to test your electrical outlets to ensure that your home is safe for you and your family. Using a voltage tester is a simple and effective way to quickly identify any issues with your electrical outlets. It’s like a doctor’s stethoscope, allowing you to listen to your home’s electrical heartbeat and diagnose any problems.
Whether you’re an experienced electrician or a curious homeowner, testing your electrical outlets with a voltage tester is an essential skill. So, let’s dive in and learn how to keep your home safe and sound!
Introduction
If you’re unsure whether or not an electrical outlet is functional, it’s important to test it before plugging in any devices. The easiest way to test an outlet is with a voltage tester. But how exactly do you use one? It’s simple! First, make sure that the tester is working properly by testing it on a known live outlet.
Then, insert one end of the tester into the hot slot of the outlet and the other end into the neutral slot. If the tester lights up, it means there is power flowing through the outlet and it is working correctly. If it doesn’t light up, there may be a problem with the outlet or wiring and you should contact a certified electrician.
Always use caution when dealing with electricity and never hesitate to seek professional help if unsure.
What is a Voltage Tester?
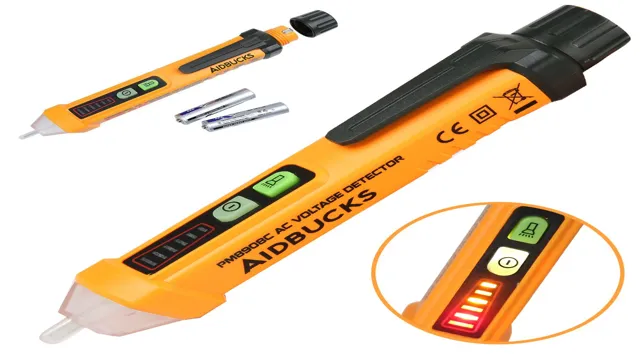
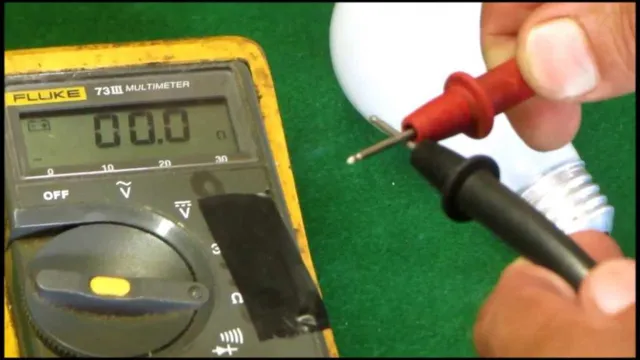
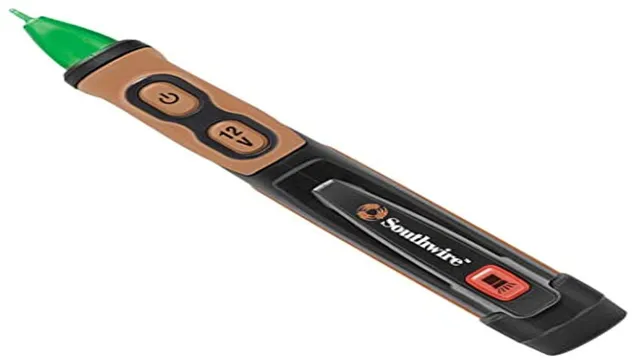
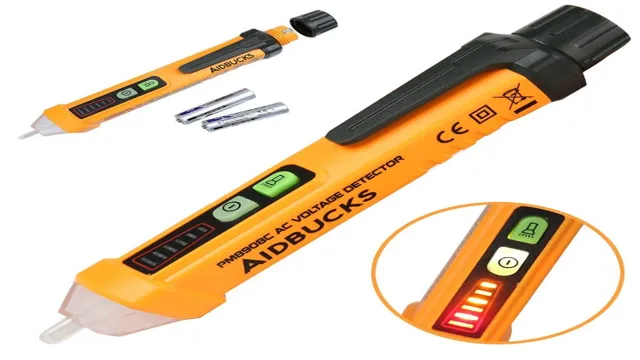
A voltage tester is a device used to measure the electrical potential difference between two points in an electrical circuit. In other words, it helps to confirm whether a circuit is carrying an electrical charge or not. Voltage testers come in various forms, including handheld units and multimeters, and they are commonly used by electricians and DIY enthusiasts alike.
They work by detecting the presence and level of electrical energy in a circuit, which is displayed through a series of readings and alerts. Understanding how to use a voltage tester is essential, as electrical currents can be dangerous if not handled properly. By using a voltage tester, you can ensure your safety and the safety of others when working on electrical circuits.

Why Test Electrical Outlets?
Electrical outlets are essential components of any home’s electrical system. They provide the power needed for all of our electronics and appliances. However, over time, outlets can become worn or damaged, which can pose a serious risk to your household.
That’s why testing your electrical outlets is so important. By doing so, you can detect potential problems before they become major hazards. Testing your outlets can also help you identify areas where you may need additional electrical outlets or upgrades to your electrical system.
By taking the time to test your outlets regularly, you can keep your family safe and ensure that your home’s electrical system is functioning properly. So, why take the risk? Make sure you test your electrical outlets on a regular basis to avoid any potential electrical hazards.
Preparing for Testing
If you want to find out whether an electrical outlet is working correctly, there are a few simple steps you can follow to test it using a voltage tester. First, you should turn off power to the outlet by flipping the circuit breaker switch that controls it, and then unscrew the faceplate covering the outlet to expose the electrical terminals. Next, take your voltage tester and carefully touch one of its probes to the terminal screw on the side of the outlet and the other probe to the round grounding hole or neutral screw.
If the tester shows a reading of 110-120V, it means the outlet is functioning correctly. However, if you don’t get any reading or the voltage reading shows less than what’s expected, then you may need to replace the outlet or seek help from a licensed electrician. Testing your electrical outlet can help ensure the safety of your home and protect your electronic devices from damaging surges or short circuits.
So, it’s always a good idea to know how to test an electrical outlet with a voltage tester.
Gathering Supplies
Gathering supplies is an essential step in preparing for testing. It’s crucial to have all necessary equipment ready ahead of time so that the testing process can run smoothly. Depending on the type of test being administered, you may need different supplies such as testing kits, sterile swabs, tubes or containers to collect samples, or even specialized equipment like microscopes.
Additionally, it’s important to have enough supplies on hand to ensure that you can run multiple tests if needed without having to stop and restock. By staying organized and gathering all essential supplies in advance, you can help ensure a successful testing process with accurate results.
Safety Measures
Preparing for testing involves more than just getting ready physically; it’s also about taking the necessary safety measures. Before you take any tests, it’s essential to understand the risks involved. For instance, if you’re getting a blood test, it’s important to know that there’s a possibility of getting infected if the equipment is not sterilized correctly.
That’s why it’s advisable to choose a reputable healthcare facility that follows strict hygiene protocols. Additionally, you should always disclose your medical history to the healthcare professional performing the test. Give them a comprehensive overview of any medications you’re taking, allergies, and health issues you may have.
By providing accurate information, the healthcare professional can make informed decisions on the best way to conduct the test and minimize any potential risks. Remember, taking the necessary safety measures is crucial in ensuring that the testing process is smooth and successful.
Testing Procedure
If you want to check if an electrical outlet is working properly, you can use a voltage tester. Here’s how to test an electrical outlet with a voltage tester. First, plug the tester into the outlet.
Make sure it’s securely seated. Then, turn on the tester. If the light on the tester does not turn on, the outlet is likely not receiving any power from the electrical panel.
If the light on the tester turns on, this means that the outlet is receiving power. However, it’s important to then test for the presence of hot, neutral, and ground wires. Test the hot wire by touching one probe of the tester to the smaller slot on the outlet and the other to the round hole.
Test for the neutral wire by touching one probe to the larger slot and the other to the round hole. Finally, test for the ground wire by touching one probe to the larger slot and the other to the semi-round hole. It’s essential to understand that you can receive a shock if you come into contact with the electrical outlet while testing, so it’s important to exercise caution.
Turning Off Power
When testing electrical equipment, it’s important to follow proper safety procedures and turn off power before conducting any tests. This not only protects the person conducting the test, but also prevents damage to the equipment being tested. To turn off power, first identify the circuit breaker or switch that controls the equipment.
Then, turn off the circuit breaker or switch and confirm that the power has been disconnected using a non-contact voltage tester. Once the power has been turned off, it’s safe to proceed with testing the equipment. Remember, safety should always be a top priority when working with electricity.
Inserting Voltage Tester
Inserting a voltage tester can seem daunting, but it’s an essential step in ensuring electrical safety when working on circuits. To begin, make sure the circuit you will be testing is de-energized. Next, select the appropriate voltage tester for the job, taking note of any specific instructions or warnings in the user manual.
Once you have chosen the correct tool, insert its prongs into the circuit, ensuring a good connection is made. The tester should light up or produce an audible alert if voltage is present, indicating that the circuit is still active. Remember to always wear appropriate personal protective equipment, such as rubber gloves and safety glasses, while performing this task.
By following these steps, you can confidently test circuits and prevent potentially dangerous electrical accidents.
Reading the Results
When it comes to understanding the results of a testing procedure, it’s important to take a systematic approach to interpreting the data. The first step is to assess the overall accuracy of the test. This involves looking at the rate of false positives and false negatives.
False positives occur when the test indicates the presence of a condition when it’s not actually present, while false negatives occur when the test fails to detect a condition that is actually present. Next, it’s important to consider the sensitivity and specificity of the test. Sensitivity refers to the ability of the test to correctly identify those who have the condition, while specificity refers to the ability of the test to correctly identify those who do not have the condition.
By taking all of these factors into account, healthcare professionals can make informed decisions about diagnosis and treatment plans for their patients.
Common Problems and Solutions
If you want to know how to test an electrical outlet with a voltage tester, there are a few things you should keep in mind. First and foremost, make sure that the tester is working properly and is set to the correct voltage range for the outlet you are testing. To test the outlet, insert the probes into the slots on either side of the outlet and wait for the tester to display a reading.
A properly functioning outlet will show a reading of between 110 and 120 volts. If the tester shows no reading at all, there may be a problem with the outlet or the wiring, so further investigation is warranted. On the other hand, if the reading is too high or too low, this could also indicate an issue that needs attention.
In any case, it’s always a good idea to have a qualified electrician take a closer look if you’re not sure what’s going on. With a little know-how and caution, you can quickly and easily test your electrical outlets and ensure that your home is safe and functioning properly.
No Power Detected
“No power detected” is a frustrating error message that can pop up on your screen when you’re trying to power on your electronic device. This problem can be caused by a variety of issues, including a dead battery, a faulty power cord, or a malfunctioning power supply. If you’re experiencing this issue, the first thing you should do is ensure that all of your connections are secure and that your device is properly plugged in.
If that doesn’t work, you may need to replace your battery or power cord, or bring your device to a professional for repair. Don’t ignore this issue, as it can lead to further damage and potentially even render your device unusable. Don’t worry though, with some troubleshooting, you’ll be back to enjoying your device in no time!
Voltage Reading Too Low
If you’re noticing a lower voltage reading than expected, it can be a sign of a few common problems. One potential issue could be a weak battery that needs to be replaced. Another possible problem is a loose or corroded connection, which can cause a voltage drop.
It’s essential to check for any loose or damaged wires or connections and make sure they are secure. Another cause could be a malfunctioning alternator, which is responsible for recharging your battery while you’re driving. If your alternator isn’t functioning correctly, it can result in a lower voltage reading.
It’s best to have a professional mechanic check your battery, connections, and alternator to determine the cause of your low voltage reading and provide the necessary solutions to fix the issue. Don’t let a low voltage reading leave you stranded on the side of the road; be sure to address the problem promptly to ensure your car’s optimal performance.
Voltage Reading Too High
If your voltage reading is too high, it can be a sign of a few common problems. One issue may be that your voltage regulator is faulty or not working correctly. Another possibility is that your alternator is providing too much power.
To troubleshoot, you can check your battery’s voltage level with a multimeter to see if it’s over 14 volts, which is a sign that it’s being overcharged. The solution to these problems typically involves replacing the faulty components. It’s important to address high voltage levels promptly, as they can damage electronics in your car and shorten the lifespan of your battery.
Remember to maintain regular maintenance checks on your vehicle’s electrical system to keep it running smoothly.
Conclusion
In conclusion, testing an electrical outlet with a voltage tester is crucial in ensuring that you won’t end up like a thunderstruck cartoon character. Simply insert the tester into the outlet and read the readings for a safe and secure power connection. Remember, electricity is nothing to play with.
So, stay wise and always verify!”
FAQs
What is a voltage tester and why is it used for testing electrical outlets?
A voltage tester is an electrical instrument used to check if an electrical circuit is live. It is used to test electrical outlets for safety and to ensure they are properly grounded before attempting any electrical work.
What are the different types of voltage testers available in the market?
There are various types of voltage testers available, such as non-contact, contact, digital, analog, and dual-range voltage testers. Each type of voltage tester has its advantages and limitations.
How do I choose the right voltage tester for testing electrical outlets at home?
When choosing a voltage tester, make sure it is rated for the voltage range of your electrical system. You should also consider the type of voltage tester you need, the level of accuracy required, and your budget.
What precautions should I take while using a voltage tester to test electrical outlets?
Always make sure to turn off the circuit breaker before testing an electrical outlet. Wear protective gear such as gloves and safety glasses. Keep the voltage tester away from your body while testing.
What should I do if the voltage tester indicates a live current in an electrical outlet?
If the voltage tester shows a live current in an electrical outlet, do not attempt any electrical work. Contact a licensed electrician to resolve the issue and ensure your safety.
Can a non-contact voltage tester be used to test an electrical outlet?
Yes, a non-contact voltage tester can be used to test an electrical outlet by holding it close to the outlet without touching the metal contacts.
How often should I test my electrical outlets with a voltage tester?
It is recommended to test your electrical outlets with a voltage tester annually, or before doing any electrical work or renovations in your home.


