How to Remove Rub n Buff: Effective Tips and Tricks for Easy Removal

If you’re an avid DIYer or love to give old items a new lease of life, you’ve likely come across Rub n Buff. It’s a metallic wax that provides a beautiful and long-lasting finish on various surfaces, from furniture to picture frames. However, as much as we love Rub n Buff, sometimes, we need to remove it.
Perhaps you messed up your initial application or want to change the color. Regardless of the reason, removing Rub n Buff can be daunting. Luckily, we’ve got you covered with a step-by-step guide on how to remove Rub n Buff without damaging the underlying surface.
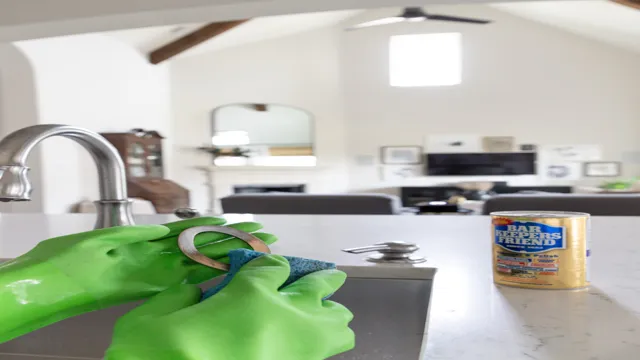
So put on your gloves, grab some paint thinner, and let’s get to work!
What is Rub n Buff?
Rub n Buff is a popular metallic wax finish that is used to give items a vintage look by adding a touch of shine and depth. While it is easy to apply, removing it can be a tricky task. You must remember that Rub n Buff is a wax-based product that bonds quite strongly to surfaces, and simply removing it with water or soap will not work.
There are several ways to remove Rub n Buff, but the safest and most effective method is to use rubbing alcohol. Simply dip a cotton ball in rubbing alcohol and apply it to the surface, then lightly buff it with a soft cloth. Repeat the process until all of the Rub n Buff has been removed.
If you need to remove the wax from a large area, you can use paint stripper or a heat gun, but be careful not to damage the underlying surface. Keep in mind that patience and a light touch are key when removing Rub n Buff, so take your time and proceed with caution.
An introduction to Rub n Buff and its uses
Rub n Buff is a popular metallic wax that can be used to transform objects and surfaces into a glamorous, vintage-looking finish. This product is made from natural waxes and metallic powders, making it a durable and long-lasting option for DIY projects. Rub n Buff comes in a variety of metallic shades, including silver, gold, copper, and bronze, giving you the flexibility to choose the right finish for your project.
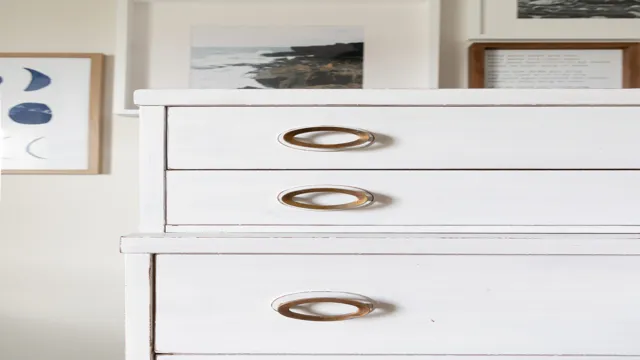
This wax is perfect for revamping old furniture, picture frames, and even walls, bringing new life and texture to any surface. With a little creativity and some Rub n Buff, you can easily upgrade and transform your home decor to achieve a chic and rustic look.

Materials and Tools
If you’ve ever used Rub n Buff, you know that it’s a great way to add a metallic sheen to almost any surface. However, when it comes time to remove it, it can be a bit of a challenge. Fortunately, there are a few tricks you can use to get rid of it without damaging the underlying surface.
First, you’ll need to gather a few materials and tools. You’ll need cotton swabs or a soft cloth, rubbing alcohol, and a plastic scraper or putty knife. Once you’ve got your materials, use the cotton swabs or soft cloth to apply the rubbing alcohol to the Rub n Buff.
Let it sit for a few minutes, then use the plastic scraper or putty knife to gently scrape away the Rub n Buff. Be sure to work slowly and carefully so as not to damage the underlying surface. Once you’ve removed as much of the Rub n Buff as possible, go over the surface with a bit more rubbing alcohol to clean away any remaining residue.
With a little patience and the right tools, you can easily remove Rub n Buff from almost any surface.
A list of everything you’ll need to remove Rub n Buff safely
Rub n Buff removal can be a hassle without the right materials and tools. To ensure that you do a thorough job and don’t damage the surface you’re working on, it’s important to have the appropriate supplies on hand. First, you’ll need protective gear such as gloves, goggles, and a mask to keep you safe while you work.
Additionally, you’ll need a scraper or putty knife to gently remove the Rub n Buff from the surface. A cleaner or solvent like mineral spirits, rubbing alcohol, or acetone can help loosen the Rub n Buff and make it easier to remove. Using a fine abrasive pad or sandpaper can also help smooth out any remaining residue or scratches left by the scraper.
Finally, you’ll need a clean cloth or paper towels to wipe away any excess cleaner or solvent and to buff the surface to a shine. By having all of these materials and tools at your disposal, you’ll be able to remove Rub n Buff safely and effectively.
Preparing the Surface
If you want to remove Rub ‘n Buff from any surface, it’s essential to prepare the area first. Start by wiping down the affected area with a damp cloth to get rid of any dirt or dust. If there’s any wax or sealant on the surface, you’ll need to strip it off first.
You can do this by using a commercial wax stripper or by using sandpaper to smooth the surface. It’s important to avoid using too much force when sanding or rubbing, as this can damage the material underneath. Once the surface is ready, you can start removing the Rub ‘n Buff using a soft-bristled brush or a cotton swab.
With gentle circular motions, work the remover into the surface until the Rub ‘n Buff comes off. Repeat until you’re satisfied that all of it is removed. By following these steps, you can successfully remove Rub ‘n Buff from any surface without causing damage or leaving any residue behind.
How to get your surface ready for Rub n Buff removal
Preparing the Surface for Rub n Buff removal can be quite simple if done correctly. Before you start the process, it is always best to make sure the surface is free of any dirt, grime, or dust. You can do this by wiping it down with a damp cloth or using a soft-bristled brush to get rid of any debris.
After that, take a closer look at the surface to see if there are any cracks, chips, or peeling areas that need to be addressed. If there are any imperfections, you should sand them down and fill them in with a wood filler or spackle. Once you have done this, make sure to let it dry completely before continuing.
By preparing the surface correctly, you can ensure that the Rub n Buff adheres properly and produces the desired result. Remember, the surface preparation is a crucial step in achieving a flawless finish for your Rub n Buff project.
Removing Rub n Buff
Rub n Buff is a popular metallic wax that is often used to add a shiny finish to various surfaces. While it is easy to apply and looks great when freshly applied, removing it can be a bit challenging. One way to remove Rub n Buff is to use a solvent such as acetone or mineral spirits.
These solvents can dissolve the wax and make it easier to remove. Simply apply the solvent onto a cloth and gently rub it onto the surface. Another way to remove Rub n Buff is to use sandpaper.
Start with a coarse grit and sand the surface until the wax is removed. Then, switch to a finer grit and smooth out the surface. While removing Rub n Buff can be time-consuming, it is important to take the necessary steps to ensure that the surface is properly prepped for any future finishes.
Step-by-step instructions for removing Rub n Buff without damage
If you’ve applied Rub n Buff to a surface and want to remove it without causing damage, don’t worry – it’s possible! First, gather a few tools like dish soap, water, rubbing alcohol, a plastic scraper or an old credit card, and some fine-grit sandpaper. Start by cleaning the surface with dish soap and warm water to remove any dirt or grime that may be on it. Then, moisten a cloth with rubbing alcohol and rub the affected area to break down the Rub n Buff.
Using a plastic scraper or an old credit card, gently scrape away the Rub n Buff. If there are stubborn spots, gently sand them using fine-grit sandpaper. Remember to maintain a light touch to prevent any damage.
Once all the Rub n Buff has been removed, re-clean the surface with dish soap and water, and dry it off. And that’s it – a clean slate!
Aftercare
If you have ever used Rub n Buff on a project, you may be wondering how to remove it if you need to. Fortunately, it’s not too difficult to do! First, you’ll want to gently wipe off any excess Rub n Buff with a dry cloth or paper towel. This will help minimize the amount of product you need to remove with a cleaner.
Next, use a non-abrasive cleaner. Rubbing alcohol is a good choice, as it won’t damage the surface underneath. Simply apply a small amount of rubbing alcohol to a cloth or cotton ball and gently rub the affected area until the Rub n Buff begins to come off.
You may need to repeat this process a few times to get all of the product off. If you’re working on a delicate surface, be sure to test the cleaner in an inconspicuous area first to make sure it won’t cause any damage. Overall, removing Rub n Buff is a simple process that shouldn’t cause too much stress or mess!
Tips for maintaining the surface after removing Rub n Buff
Rub n Buff is a fantastic way to give surfaces a shiny, metallic appearance, but how do you maintain that look after removing it? Aftercare is key to keeping the surface looking its best. Start by wiping the surface regularly with a damp cloth to remove any dirt or dust that may accumulate. If you notice any scratches or scuffs on the surface, try using a furniture polish that’s suitable for the type of material.
You can also use a clear coat or wax to protect the surface. When storing items on the surface, use coasters or mats to prevent scratches. Finally, avoid using abrasive cleaners or applying too much pressure when cleaning to prevent damage to the surface.
By following these tips, you can help preserve the beauty of your Rub n Buffed surface for years to come.
Conclusion
In conclusion, removing Rub ‘n Buff is a delicate art. It requires both patience and know-how. But fear not, dear reader! With a few simple tools and a bit of elbow grease, you can banish that stubborn gold metallic finish from any surface.
Just remember to take your time and use care when scrubbing, and soon enough your project will be ready for its next iteration. So go forth and conquer those crafts, armed with the knowledge of how to remove Rub ‘n Buff!”
Summing up the Rub n Buff removal process
After you have successfully removed Rub n Buff from your desired surface, it is important to take care of it properly. This will ensure the surface remains in good condition and prevent any future damage. Firstly, it is advisable to clean the surface with warm soapy water to remove any remaining residue and to allow the surface to dry completely.
Then, you can apply a protective coating to the surface to safeguard it against any accidental scratches, scuffs or damage. This could be a varnish or a layer of wax, depending on the material of the surface. Maintaining a regular cleaning routine and avoiding harsh chemicals or abrasives will help to keep the surface looking its best for longer.
By taking these simple steps, you can keep your newly restored surface looking fresh and vibrant for years to come.
FAQs
What is Rub n Buff and how is it used?
Rub n Buff is a metallic wax finish that can be applied to various surfaces for a metallic finish. To use it, simply apply with a soft cloth and buff to achieve the desired finish.
Can Rub n Buff be removed once applied?
Yes, Rub n Buff can be removed with a solvent like rubbing alcohol or paint thinner.
How can I remove Rub n Buff from a small area?
Use a small amount of rubbing alcohol on a cotton swab to gently rub away the Rub n Buff from the desired area.
Will removing Rub n Buff damage the underlying surface?
It is possible that the underlying surface may be slightly damaged when removing Rub n Buff. It is recommended to test the solvent on a small, inconspicuous area first.
Can Rub n Buff be applied to outdoor surfaces?
Yes, Rub n Buff can be applied to outdoor surfaces, but it may fade or lose its finish over time with exposure to the elements.
How can I prevent Rub n Buff from rubbing off onto other surfaces?
To prevent Rub n Buff from rubbing off, it is recommended to seal the surface with a clear coat of varnish or polyurethane.
How long does Rub n Buff take to dry and cure?
Rub n Buff dries quickly to the touch, but it may take up to 24 hours to fully cure and achieve its proper finish.


