How Can I Revive My Cordless Drill Battery: Top 5 Hacks to Bring Back to Life

Have you been facing the challenge of a dead cordless drill battery? If so, you’re not alone! Even the most robust drill batteries can lose their charge, leaving you stranded in the middle of a project. But don’t worry, the good news is that with a few simple tips and tricks, you can revive your cordless drill battery and get back to work in no time! In this blog post, we’ll explore some of the best ways to bring your battery back to life, such as testing, charging, and storing techniques. We’ll also cover some common mistakes that can damage your battery and how to avoid them, so you can ensure that your drill battery always performs at its best.
So, grab your toolkit and let’s start reviving that cordless drill battery!
Understanding Cordless Drill Batteries
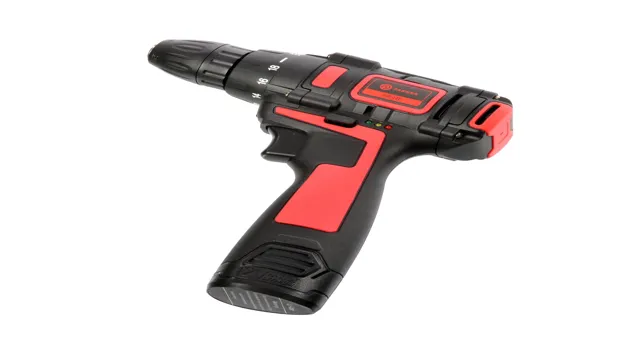
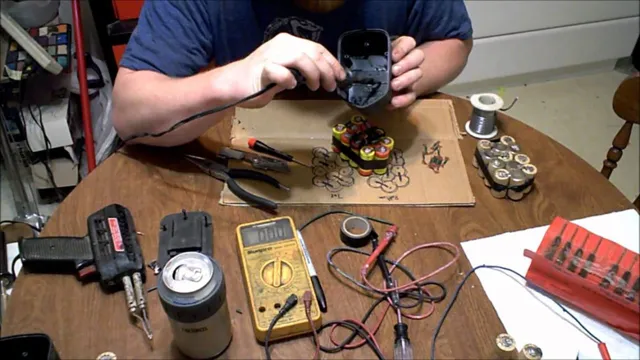
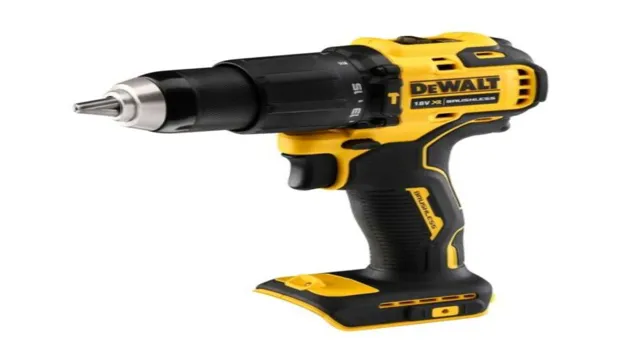
If you’re wondering how to revive your cordless drill battery, don’t worry, it’s actually a common question! Cordless drills are incredibly useful tools to have around the house, but after a while, their batteries start to lose their charge. Luckily, there are a few things you can do to revive your cordless drill battery. One option is to check the battery’s voltage using a multimeter.
If the voltage is low, you can try using a compatible charger to charge the battery back up. Another option is to try the freezer method, which involves putting the battery in the freezer for a few hours before charging it. However, be warned that this method may not work on all batteries and could potentially damage the battery if not done correctly.
Ultimately, the best way to revive your cordless drill battery is to invest in a high-quality replacement battery or take it to a professional for repair. Keep in mind that battery life will vary depending on usage, so it’s important to properly maintain your battery to ensure it lasts as long as possible.
How Cordless Drill Batteries Work
Cordless drill batteries are essential components of cordless drills. They primarily work by converting chemical energy into electrical energy through a process known as redox reaction. This chemical reaction occurs in the cells of the battery, where a negative and positive electrode interact with an electrolyte solution that conducts electricity.
As the drill is used, the chemical energy is gradually depleted, leading to a reduction in power output. Fortunately, these batteries can be easily recharged using dedicated chargers, which can replenish the chemical energy stored within them. Lithium-ion batteries are the most popular type of battery used in cordless drills today because they are compact, lightweight, and offer longer run times compared to other types of batteries.
Understanding how cordless drill batteries work is crucial to ensuring optimal performance and longevity of your cordless drill.
Types of Cordless Drill Batteries
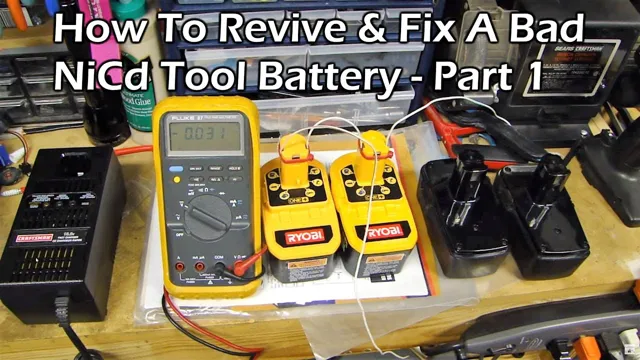
Cordless drill batteries come in different types, and understanding the options available can help you make better purchasing decisions. Nickel-cadmium (Ni-Cd), nickel-metal hydride (NiMH), and lithium-ion (Li-ion) are the three main types of cordless drill batteries. Ni-Cd batteries are the oldest type, and they are known for their long-lasting power and affordability.
However, they have a high self-discharge rate and require frequent maintenance. NiMH batteries have a higher energy density and a lower self-discharge rate than Ni-Cd batteries, making them a more environmentally friendly option. Li-ion batteries are the latest type and offer the best power-to-weight ratio, longer run time, and less maintenance.
Additionally, they are less prone to memory effect and overheating, making them safer and more reliable. Knowing the differences between these types can help you choose the right battery for your cordless drill, ensuring reliable and efficient performance.
Signs Your Cordless Drill Battery Needs Reviving
If you’ve been noticing your cordless drill’s battery isn’t holding a charge as long as it used to, there could be several signs that it’s time to revive it. First, if you’ve had your battery for more than two years, it may be reaching the end of its lifespan. Another common sign is if the drill is struggling to maintain its power even when charged fully.
In addition, if your cordless drill is taking longer to charge than usual, it’s a sign the battery may need reviving. Luckily, there are several ways to revive your cordless drill battery, including removing the battery from the drill, ensuring it’s fully charged, and running it through several charging cycles. However, if none of these methods work, it may be time to invest in a new battery for your cordless drill.
By taking care of your drill’s battery and knowing the signs that it needs reviving, you can avoid unexpected downtime on your next project.
Diminished Performance
If you’ve noticed that your cordless drill isn’t performing as well as it used to, it might be time to revive your battery. Diminished performance is a clear sign that your drill battery is on the fritz. But what should you look out for specifically? Well, there are a few things.
You May Also Love:
First off, you may notice that the drill doesn’t hold a charge for as long as it used to, or that it takes longer to fully charge. Another sign that your battery is struggling is if the drill lacks power during use, either starting slowly or struggling to maintain a consistent speed. All of these issues point to a battery that needs to be revived.
So, what can you do about it? There are a few DIY solutions, such as cleaning the battery contacts or recalibrating the battery pack. However, if none of these work, it might be time to invest in a new battery. By reviving or replacing your drill battery, you’ll be able to restore your cordless drill to its former glory and tackle your projects with ease.
Reduced Run Time
If you’ve noticed a drop in the peak performance of your cordless drill, chances are that its battery requires attention. Reduced runtime is a clear indication of a dying battery, which will slow down even with regular charging. If you find yourself recharging more frequently than ever before or the battery drains too quickly during use, then it’s time to consider reviving or replacing the battery.
A worn-out battery can leave you with a sore wrist and reduced drilling speed and power, slowing down your work and making it harder to complete tasks efficiently. If your cordless drill is showing signs of reduced runtime, it’s time to give the battery another lease of life or go for a replacement. A new battery will give your cordless drill back its vigor, enabling you to complete projects faster and more efficiently.
Optimizing your cordless drill’s battery is essential to avoiding downtime and ensuring productive use, making it a vital aspect of your DIY toolkit.
Batteries Not Holding Charge
If you’re a DIY-enthusiast or a professional handyman, then you understand how frustrating it can be when your cordless drill battery constantly dies on you halfway through a project. It’s a telltale sign that your battery needs reviving. There are a few signs to look out for so you can tell if your battery is on its last leg.
Firstly, if your battery doesn’t charge fully, or it doesn’t hold its charge, then it could mean that the battery’s cells have deteriorated. Secondly, if your battery lifespan has significantly reduced, then the cells inside your battery may have died, reducing the overall capacity of the battery. Lastly, if your charger fails to charge your battery, then your battery cells’ insulation may be compromised.
If any of these signs are present, then it’s time to revive your cordless drill battery.
Reviving Your Cordless Drill Battery
Have you ever been in the middle of a DIY project only to find out that your cordless drill battery is dead? It’s a frustrating experience, but don’t worry, you can revive your cordless drill battery! First, make sure your battery is completely dead. Next, clean the battery terminals with a mixture of baking soda and water to remove any corrosion. Then, leave the battery in the charger for several hours to trickle charge.
If this doesn’t work, you can try jump-starting the battery by connecting it to a good battery using jumper cables. However, be careful to follow all safety precautions and to not leave the battery connected for too long. By taking these steps, you can breathe new life into your cordless drill battery and continue your DIY project without any interruptions.
So, don’t throw away your battery just yet – try these methods to revive it!
Deep-Cycle Your Battery
Reviving Your Cordless Drill Battery: Deep-Cycle Your Battery If you’re tired of your cordless drill battery running out of juice mid-way through your project, then it’s time to deep-cycle your battery. This process involves fully discharging and recharging your battery to restore its full capacity. To begin, make sure to fully charge your battery before deep-cycling it.
Then, use your drill until the battery is completely drained. Once it’s dead, place it back on the charger and let it charge fully once again. This process may take a few cycles to fully revive your battery, but it’s worth it in the end.
By deep-cycling your battery, you’ll ensure that your cordless drill is always ready to go when you need it most. Don’t let a dead battery stop your productivity, simply deep-cycle it to revive it back to life!
Charge it Properly
Reviving Your Cordless Drill Battery: Charge it Properly We’ve all been there – your cordless drill battery is dead right when you need it the most. It’s a frustrating experience, but there are ways to revive your battery and keep it working longer. One of the most important things when it comes to cordless drill batteries is charging them properly.
Make sure to read the manufacturer’s instructions and follow them closely. Overcharging or undercharging your battery can cause damage and reduce its overall lifespan. It’s also important to let the battery cool down after use before charging it.
A hot battery won’t charge as well or hold a charge as long. By taking the time to charge your battery properly, you can help keep it working for years to come.
Store it Correctly
If you want the most out of your cordless drill battery, you have to store it properly. One of the most critical ways of extending your battery life is to keep it away from extreme temperatures. Heat tends to cause your battery to wear out faster, whereas storing it in a cool place will preserve its life.
Another essential tip is to charge your battery correctly. Leaving it on the charger for an extended period will hamper its performance, so it’s advisable to remove it from the charger once it’s fully recharged. Also, it’s a good idea to make sure your battery is entirely discharged before charging it fully.
Doing so will increase its longevity and overall performance. Lastly, ensure that you insulate your battery terminals to avoid rust and damage. Overall, it’s vital to take good care of your battery to extend its life and make your cordless drill battery last longer.
When to Replace Your Cordless Drill Battery
“How can I revive my cordless drill battery?” is a common question asked by DIY enthusiasts who rely on their trusty cordless drill to handle projects big and small. But just like any other battery-powered device, cordless drills lose their charge over time, leaving you with a useless tool. While some people opt to buy a new battery, others may want to save money by reviving their current one.
One way to do this is by using a battery desulfator, a device designed to break down the sulfation buildup that occurs over time and hinders a battery’s ability to hold a charge. Additionally, keeping your battery properly charged, stored, and maintained can prevent the need for these types of solutions in the first place. If you do want to try and revive your cordless drill battery, make sure to research the best method for your particular brand and model.
Conclusion
In conclusion, reviving a cordless drill battery requires a simple yet effective approach. Don’t be tempted to throw away your old and seemingly lifeless drill batteries just yet. By using a combination of battery conditioning, proper storage, and maintenance, you can breathe new life into your cordless drill and power your way through any DIY project with ease.
So put down the duct tape and wire cutters and start taking care of your drill battery today! Your bank account and your projects will thank you for it.”
FAQs
Why is my cordless drill battery not holding a charge?
Over time, rechargeable batteries can lose their ability to hold a charge. If your cordless drill battery is not holding a charge, it may need to be replaced.
How can I extend the lifespan of my cordless drill battery?
To extend the lifespan of your cordless drill battery, avoid leaving it in extreme temperatures, charge it before it becomes fully depleted, and store it in a cool, dry place.
Can I revive my cordless drill battery?
In some cases, it may be possible to revive a cordless drill battery by charging it with a trickle charger. However, this is not always effective and may require multiple attempts.
What is a trickle charger for cordless drill batteries?
A trickle charger is a device that slowly charges a battery over a longer period of time. It is used for maintenance charging and can help extend the lifespan of a battery.
How often should I charge my cordless drill battery?
You should charge your cordless drill battery when it reaches about 30% capacity to avoid fully depleting the battery. This will help prolong its lifespan.
What should I do if my cordless drill battery gets wet?
If your cordless drill battery gets wet, you should immediately remove it from the tool and dry it off with a towel. Do not attempt to charge the battery until it is completely dry.
Can I use a different brand of battery in my cordless drill?
It is not recommended to use a different brand of battery in your cordless drill, as this can damage the tool and void the warranty. Always use the recommended battery for your specific model of drill.

