How to Adjust a Paint Sprayer: Tips and Techniques for Perfect Finishes

Are you tired of wasting time and paint when using your paint sprayer? Do you find yourself frustrated with the inconsistency of the coverage or the difficulty in adjusting the settings? Look no further, because with this simple guide, you’ll be able to adjust your paint sprayer with ease and achieve professional-quality results every time. Think of your paint sprayer as a musical instrument, with each setting acting as a note. Just as a musician must tune their instrument before playing, you must also adjust your paint sprayer before starting your project.
By taking the time to properly adjust the settings on your paint sprayer, you can avoid costly mistakes and ultimately save time and money. Some important aspects to consider when adjusting your paint sprayer include the pressure, flow rate, and spray pattern. A higher pressure setting will result in a more powerful spray, while a lower pressure setting will give you more control.
Similarly, a higher flow rate will produce a thicker coat of paint, while a lower flow rate will allow for more detail work. One of the most important factors in achieving perfect coverage with your paint sprayer is the spray pattern. The spray pattern determines the shape and evenness of the application, with common options including circular, horizontal, and vertical patterns.
By experimenting with different patterns and adjusting the nozzle accordingly, you can find the perfect combination for your desired finish. Overall, adjusting your paint sprayer may seem intimidating at first, but with practice and patience, you can master this essential skill. By treating your paint sprayer like a valuable tool and taking the time to adjust it properly, you can achieve professional-quality results and bring your creative vision to life.
Understanding Your Paint Sprayer
Adjusting your paint sprayer can determine the quality of your final work. Before using the sprayer, ensure it is set up correctly by checking the air pressure, paint viscosity, and nozzle size. Adjusting the fan pattern on the sprayer can also help create better coverage.
For larger projects, use a wider fan pattern. For smaller projects, use a narrower pattern. Adjusting the flow rate can also affect coverage, but keep in mind that this may affect the amount of paint used.
When applying paint, maintain a consistent distance from the surface to keep the amount of paint applied consistent. Following these tips on how to adjust a paint sprayer can help create a professional-looking paint finish.
Types of Paint Sprayers
If you’re new to painting, you might not be familiar with the types of paint sprayers available on the market. Understanding the differences between them is important to choose the right tool for your project. There are three main types of paint sprayers: airless, compressed air, and HVLP (High Volume Low Pressure).
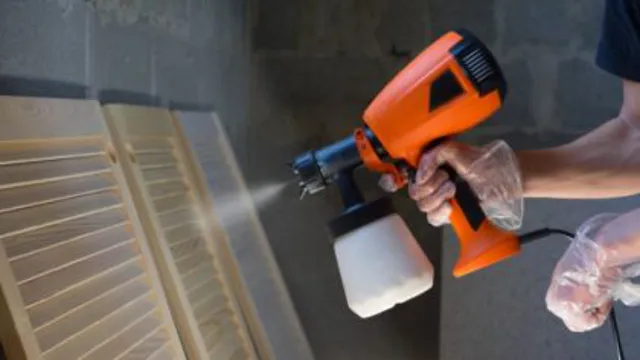
Airless sprayers use hydraulic pressure to atomize paint and can handle thick coatings. Compressed air sprayers are the oldest type and use compressed air to spray paint, but they tend to produce overspray and waste paint. HVLP sprayers use a high volume of air at low pressure, producing a fine mist that is perfect for finishing work, furniture, and cabinets.
Knowing what type of paint sprayer to use for your project will make the job easier and faster, and will ensure the best results.

Components of a Paint Sprayer
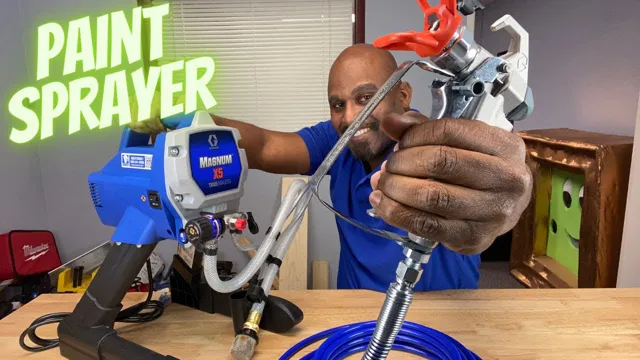
Understanding the components of a paint sprayer is essential if you want to get the best out of your painting project. The three main parts of a paint sprayer are the pump, hose, and gun. The pump is responsible for creating pressure that moves the paint from the container to the spray gun.
The hose is the conduit that connects the pump to the spray gun, allowing the paint to flow. The gun is where the magic happens, as it allows you to control the flow and direction of the paint. It’s important to note that each component plays a crucial role in the overall performance of your paint sprayer.
So, it’s important to choose the right components for your specific project. Whether you’re a professional painter or a DIY enthusiast, understanding the different components of a paint sprayer will help you to achieve your desired results.
Preparation Before Adjustment
Before adjusting your paint sprayer, it’s important to properly prepare it to ensure a smooth and accurate application. First, make sure all parts of the sprayer are clean and free of any debris or residual paint. A dirty or clogged sprayer can cause uneven spraying and a waste of paint.
Next, fill the paint container with the appropriate amount of paint and mix it thoroughly to ensure an even consistency. It’s also essential to select the correct nozzle size for the job at hand as this will affect the flow and pattern of the paint. Lastly, be sure to wear protective gear such as gloves, goggles, and a mask to protect yourself from any harmful chemicals or fumes.
By taking these steps before adjusting your paint sprayer, you can ensure a successful and efficient painting experience with your sprayer.
Clean Your Paint Sprayer
Cleaning your paint sprayer is an essential step in maintaining its quality and avoiding potential clogs on your next project. Before making any adjustments, it is important to properly prepare your sprayer for cleaning. The first step is to relieve any pressure in the unit by turning off the power and making sure the spray gun trigger is locked.
Once the pressure is relieved, remove the spray tip and filter and rinse them out with warm water. Next, flush out your sprayer with water or a cleaning solution, depending on the type of paint you were using. After thoroughly cleaning your sprayer, it is important to lubricate it to prevent any corrosion.
By following these preparation steps before adjustment, you can ensure that your paint sprayer will function properly for years to come.
Prepare the Paint Material
When it comes to painting, you must prepare your paint material before you can begin the actual task. Proper preparation of your paint materials ensures the best possible outcome for your project and ultimately saves you time and money. Before you start painting, the first thing you should do is check the paint tin to ensure that the contents are well mixed.
Mix the paint thoroughly with a stick or a paint mixer to make sure that the pigments are evenly distributed. If you are working with multiple tins of paint, it is best to mix all the tins together in a larger container to eliminate any slight color discrepancies. Once you have ensured that the paint is well mixed, strain the paint to remove any lumps or debris that may cause blemishes on your finished surface.
This simple step will ensure that the paint application is smooth, leaving you with a beautiful and even finish. By following these preparation steps, you’ll be ready to tackle your painting project with confidence and achieve a professional look.
Adjusting the Spray Pattern and Pressure
Want to know how to adjust a paint sprayer? It’s fairly simple once you understand the basics. The two main adjustments you’ll need to make are to the spray pattern and pressure. Adjusting the spray pattern will help you achieve your desired level of coverage and detail, while adjusting the pressure will determine how much paint is sprayed out per minute.
To adjust the pattern, simply turn the nozzle to the left or right until you achieve the desired shape. For example, if you’re painting a wide surface area, you’ll want a wider spray pattern to ensure even coverage. To adjust the pressure, simply turn the knob on the sprayer until you reach your desired level.
Remember, the higher the pressure, the more paint will be sprayed out per minute, so it’s important to find the right balance for your particular project. With a little practice, adjusting your paint sprayer will become second nature and you’ll be able to achieve professional-looking results every time.
Adjusting the Spray Pattern
Adjusting the spray pattern and pressure of your paint sprayer is vital to ensure a flawless finish. If you’re new to using a paint sprayer, it’s important to understand that the spray pattern and pressure settings can have a significant impact on your results. The spray pattern refers to how the paint is dispersed from the nozzle, and the pressure determines how fast the paint is sprayed.
If you’re looking for a fine, even finish, adjust the spray pattern to a horizontal or vertical fan pattern. For larger surfaces, a round or wide spray pattern will cover more area in a shorter amount of time. As for pressure, it’s best to start with a low setting and gradually increase until you achieve the desired coverage.
Keep in mind that higher pressure may cause the paint to bounce back or overspray, while lower pressure may cause the paint to run or sag. Take your time in adjusting the spray pattern and pressure settings, as it can make all the difference in the final result of your painting project.
Adjusting the Spray Pressure
Adjusting the spray pressure and pattern is essential for achieving the desired results while using a spray gun. Before beginning any task, make sure to adjust the spray pressure according to your requirements. To do so, start at lower pressure and gradually increase it until you achieve the desired outcome.
Additionally, various spray tips are available to adjust the spray pattern as per your need. The spray pattern can be adjusted vertically or horizontally. Moreover, a combination of both directions can be achieved as well.
If you’re having difficulty getting the right pattern or pressure, experiment with different tips until you find the one that best suits your needs. Remember, the key is to be patient and take your time in finding the correct settings. By doing so, you’ll be able to produce a perfectly finished project that you can be proud of.
Testing Your Sprayer
If you’re looking for a flawless finish on your painting project, using a paint sprayer can be a game-changer. However, it’s easy to become frustrated if you don’t know how to adjust a paint sprayer correctly. The first step is to test your sprayer before you start painting.
Begin by reading the user manual that comes with your machine, which will provide you with specific instructions for your particular make and model. Then, fill the paint reservoir with water and turn the sprayer on. Use the water stream to spray onto a large paper or cardboard surface and examine the results.
Look for any areas where the spray seems too thick, thin, or unevenly distributed. You might need to make small adjustments to the nozzle or pressure setting to achieve the desired evenness and control. Remember, with practice, you’ll get better and better at your painting projects, so keep experimenting until you achieve the perfect finish.
Checking for Consistency
When it comes to using a sprayer, it is important to ensure that it is working properly and efficiently. One way to do this is through consistency testing. This involves checking that the output of the sprayer is consistent across multiple areas to ensure an even coverage.
To test for consistency, try spraying a piece of cardboard or large piece of paper across its entire surface area. Check for any areas that have excessive spray or none at all, as this indicates that the sprayer may not be working correctly. It is crucial to identify and fix these issues to prevent uneven coverage and wasted product.
Regular consistency testing can help maintain your sprayer’s performance and ensure a successful outcome for your projects. So, make sure to include this step in your sprayer maintenance routine.
Checking for Overspray
Testing Your Sprayer for Overspray: What You Need to Know As a professional painter, checking for overspray is crucial to ensure high-quality results. Overspray occurs when the paint is sprayed beyond the intended surface, creating a mess and potentially damaging nearby objects. To prevent this from happening, it is important to test your sprayer before starting any project.
To begin, make sure that your spray gun comes with an air cap that matches the type of paint you’ll be using. Next, fill the paint container with water and test your sprayer on a scrap piece of cardboard. Spray the cardboard from different angles, distances, and pressures to ensure that the paint is evenly distributed and not splattering.
Once you’re satisfied with the evenness of the application, it’s time to test for overspray. Place a piece of plastic or paper on the floor or nearby objects that need protection. Spray the cardboard again, this time aiming closer to the plastic or paper.
If you see any paint on the protected surfaces, it means that your sprayer is producing overspray. Adjust the air pressure, nozzle, or distance until you get a clean spray pattern. In conclusion, testing your sprayer for overspray is an important step to ensure the success of your painting project.
By taking the time to test and adjust your spray gun, you’ll be able to achieve a clean, even, and precise coat of paint without any messy overspray.
Final Thoughts and Tips
Adjusting your paint sprayer can be an intimidating process, especially if you’re not familiar with the equipment. However, with a little bit of practice and patience, it’s a task that you can easily master. The first thing you need to do is to read the instruction manual for your particular model thoroughly.
This will give you an idea of the different parts of the sprayer and how they work. Once you’re familiar with the equipment, you can start adjusting the settings. The key is to take it slow and make small changes at a time.
For example, if you’re trying to adjust the spray pattern, start by making small adjustments to the nozzle until you get the desired result. Remember that it’s always better to err on the side of caution and make incremental changes rather than trying to make big adjustments right away. By following these simple tips, you’ll be able to easily adjust your paint sprayer and achieve a professional-looking finish with ease.
Conclusion
Adjusting a paint sprayer is like crafting the perfect cocktail – it requires a balance of precision, skill, and a bit of flair. By fine-tuning the pressure, pattern, and flow, you can achieve a flawless finish that will make Picasso jealous. Don’t be afraid to experiment and find the sweet spot that works for you.
With a little practice and patience, you’ll be spraying like a pro in no time!”
FAQs
What are the types of paint sprayers available for adjusting?
The types of paint sprayers available for adjustment include airless, HVLP, and handheld paint sprayers.
How do I adjust the pressure on my paint sprayer?
To adjust the pressure on your paint sprayer, turn the pressure knob on the machine clockwise or counterclockwise depending on your desired pressure level.
Can I adjust the spray pattern on my paint sprayer?
Yes, you can adjust the spray pattern on your paint sprayer by changing the nozzle or using the spray pattern adjustment knob on the machine.
What is the ideal distance to hold the paint sprayer from the surface being painted?
The ideal distance to hold the paint sprayer from the surface being painted is usually around 6 to 10 inches, but it ultimately depends on the type of sprayer and the specific project.
How do I clean my paint sprayer after use?
To clean your paint sprayer after use, fill the paint container with warm water and run it through the machine until the water runs clear. Then dismantle the machine and clean all components with a brush and solvent.
Can I use a paint sprayer to apply stains or varnishes?
Yes, a paint sprayer can be used to apply stains or varnishes, but it is important to use the correct type of sprayer and nozzle for the job.
How do I know if my paint sprayer needs maintenance or repair?
Signs that your paint sprayer needs maintenance or repair include irregular spray patterns, loss of pressure, or strange noises coming from the machine. In these cases, it may be necessary to replace or repair specific parts.


