How to Change a Bench Grinder Wheel: A Step-by-Step Guide for Beginners

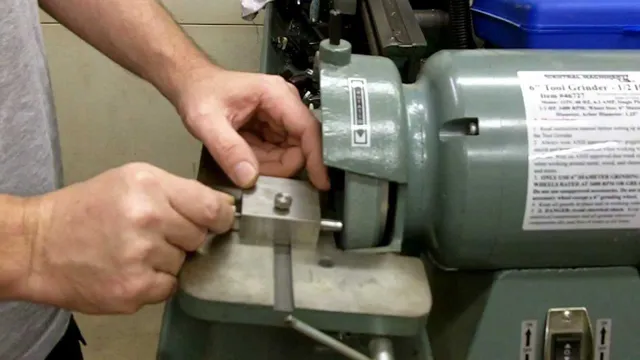
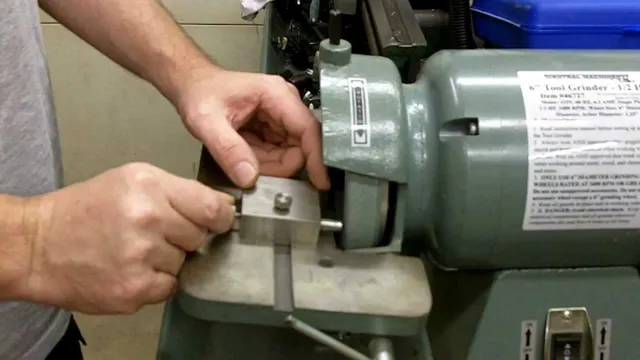
Are you wondering how to change a bench grinder wheel but not sure where to start? Whether you’re a beginner or a seasoned DIY-er, changing a bench grinder wheel can seem daunting at first. But fear not! With these simple steps, you’ll be able to replace your old or worn-out wheel in no time. First things first, make sure that you have all the necessary tools for the job.
You’ll need a wrench, a screwdriver, and of course, a new bench grinder wheel. Once you’ve gathered your tools, begin by unplugging the grinder and removing any attachments. Next, use the wrench to loosen the shaft nut by turning it counterclockwise.
Be sure to hold the wheel in place with your other hand to prevent it from spinning. Once the nut is loose, you should be able to remove the old wheel by gently pulling it off the shaft. Now it’s time to install the new wheel.
Make sure that the replacement wheel is the same size and type as the old one. Carefully slide the new wheel onto the shaft, making sure it is centered and secure. Then, tighten the shaft nut by turning it clockwise until it is snug.
Finally, give the new wheel a test run. Plug in the grinder and turn it on briefly to make sure that the wheel is spinning smoothly and without any wobbling. And voila! You’ve successfully changed a bench grinder wheel and you’re ready to get back to your DIY projects.
In conclusion, changing a bench grinder wheel may seem intimidating, but following these simple steps can make the process a breeze. With a little bit of know-how and the right tools, you’ll be able to swap out your grinder wheel in just a few easy steps. Keep in mind that safety is always the top priority, so be sure to follow all manufacturer instructions and use caution when working with power tools.
Safety First
When it comes to changing the wheel of your bench grinder, safety should always be your top priority. Before starting the process, make sure your grinder is unplugged and that the wheel has completely stopped spinning. You should also wear appropriate protective gear, such as gloves and safety glasses.
When removing the old wheel, be sure to use the proper tools and handle it with care to avoid any accidents. Once the old wheel is removed, carefully inspect the wheel spindle to ensure there are no cracks or damage that could affect the new wheel’s performance. When installing the new wheel, ensure that it is properly aligned and tightened to prevent any wobbling or vibrations.
With proper precautions and attention to detail, changing the wheel of your bench grinder can be a safe and straightforward task to keep your tools running smoothly and efficiently.
Wear Protective Gear
If you’re planning to participate in any sports or recreational activity, then safety always comes first. One of the most important ways to protect yourself from injury is to wear suitable protective gear. Whether you’re biking, skateboarding, or playing contact sports like football or hockey, it’s crucial to make sure you have the appropriate equipment.
Protective gear like helmets, pads, and mouthguards can help reduce the risk of head and bodily injuries. Not only does wearing gear protect you, but it also sets a good example for others to follow. When it comes to safety, there’s no room for compromise, and wearing protective gear is essential to minimize your chances of getting hurt.
So, before you hit the court, field, or street, don’t forget to suit up with the right gear for a safe and enjoyable experience. Remember, it only takes one accident to cause serious harm, so safety should always be a top priority!

Disconnect the Power Source
When handling electrical appliances or performing repairs, safety should always be your top priority. You must never forget to disconnect the power source before anything else. By doing so, you eliminate the risk of electric shock, which can be fatal.
To disconnect the power source, first, switch off the appliance or device. If you are dealing with a wall outlet, switch it off from the main switchboard or unplug it. You can also use a voltage tester to ensure the absence of electrical current.
Remember, electricity is invisible and can be extremely dangerous. Even if you have experience in handling electrical equipment, always take extra precautions and assume that the power source is still connected. Take your time, and don’t rush the process.
Safety first should be your mantra, always. In conclusion, disconnecting the power source when handling electrical equipment is not an option but rather a necessity. The risk of getting shocked is too high, and the consequences could be dire.
Take every step necessary to ensure that the power source is disconnected and use all the necessary tools. Remember, safety is not just a responsibility; it’s a way of life. Therefore, always ensure that you and the people around you are safe and sound even as you undertake your daily routines.
By taking safety precautions seriously, you avoid accidents and keep yourself, your loved ones, and your property safe. Let’s all pledge to be careful and responsible whenever working with electrical equipment.
Remove the Old Wheel
When changing a bench grinder wheel, the first step is to remove the old one. Before doing so, make sure the grinder is unplugged and the wheel guard is in place. Use a wrench to loosen the nut holding the wheel in place.
If the nut is tight, use a rubber mallet to lightly tap the wrench handle to loosen it. Once the nut is loose, unscrew it completely and remove the flange and washers from the wheel spindle. Carefully lift the old wheel off the spindle and inspect it for any cracks or damage.
Dispose of the old wheel properly and remember to wear gloves when handling it to avoid any cuts or injuries. With the old wheel removed, you’re ready to install a new one.
Locate the Wheel Nut
When it comes to changing a tire, one of the first steps is to locate the wheel nut. This little guy can sometimes be tricky to find, but don’t worry, it’s not hiding from you on purpose. Typically, the wheel nut can be found near the center of the wheel and is usually covered by a hubcap.
You’ll need to remove the hubcap first to access the nut. To do this, simply use a flathead screwdriver or pry tool to pop it off. Once you’ve located the wheel nut, it’s time to remove the old wheel.
But be sure to loosen the nut first, before jacking up the vehicle. This will ensure that you can easily remove the nut once the vehicle is raised. So, whether you’re changing a flat tire or just doing some routine maintenance, remember to locate the wheel nut first.
Happy wrenching!
Loosen and Remove the Nut
To remove the old wheel, the first step is to loosen and remove the nut. This may seem like an easy task, but it requires the right tool and technique. First, use a wrench of appropriate size and place it on the nut.
Then, turn the wrench counter-clockwise to loosen the nut. You may encounter some resistance at first, especially if the nut has not been removed in a while. But don’t worry, just use a bit of force and keep turning until the nut is loose.
Once the nut is loose, you can remove it with your fingers or a pair of pliers. Congrats, you have completed the first step in removing the old wheel and are one step closer to installing a new one!
Remove the Wheel
To remove the old wheel, you will need a few tools and a little bit of strength. First, locate the lug nuts and use a lug wrench to loosen them – remember “lefty loosey, righty tighty.” Once all the lug nuts are loose, raise the vehicle using a jack.
Make sure the jack is placed securely and the vehicle is stable before continuing. Then, fully remove the lug nuts and gently pull the wheel off the hub. If the wheel is stuck, gently tap it with a rubber mallet to loosen it before attempting to remove it.
Once the wheel is off, inspect the brake pads and rotor for any wear or damage that may require repair or replacement. With the old wheel successfully removed, you are now ready to install the new one and hit the road.
Choose a New Wheel
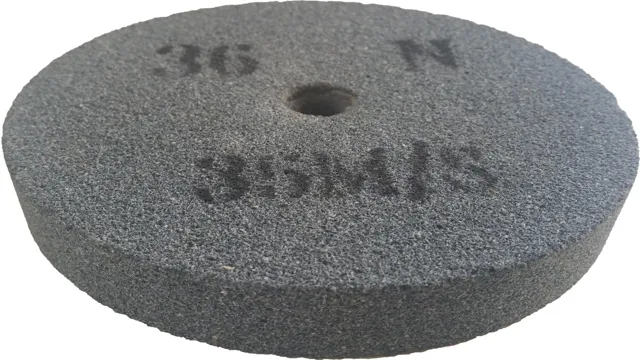
Changing the wheel on a bench grinder is a simple process that can be done in a matter of minutes. The first step is to identify the right type of wheel that will fit your grinder. Bench grinder wheels come in different sizes and shapes, including straight, tapered, and dish-shaped.
It is important to choose one that matches the size and power of your grinder, as well as the job you intend to use it for. Once you have identified the right wheel, you can begin by turning off the grinder and unplugging it from the power source. Use a wrench to loosen the nut that holds the old wheel in place and remove it.
Next, install the new wheel by placing it onto the spindle and tightening the nut. It is important to make sure the wheel is properly secured before turning the grinder back on. With these simple steps, you can easily change the wheel on your bench grinder and continue your work with a smooth and efficient cutting tool.
Select the Correct Size
When it comes to upgrading your bike, choosing the correct wheel size is essential. A larger wheel size, such as a 29er, can provide more stability and better momentum, while a smaller wheel, such as a 26er, can offer better maneuverability and acceleration. To select the right size, consider your riding style and the type of terrain you’ll be riding on.
If you’re a beginner or tend to ride on technical terrain, a smaller wheel may be a better option. Meanwhile, if you prefer smoother trails or are an experienced rider, a larger wheel may be more suitable. Additionally, make sure to check your bike’s compatibility with various wheel sizes before making a purchase.
Ultimately, the key is to find the size that best suits your needs and allows for an enjoyable and safe riding experience.
Choose the Right Type for Your Job
If you’re in the market for a new wheel, you’ll want to make sure you choose the right type for your job. The first step is to determine what kind of vehicle you have and what your intended use is. Steel wheels are great for heavy-duty, off-road vehicles while alloy wheels are better suited to street-driving cars.
If you’re looking for a balance between durability and performance, consider a hybrid wheel made from a combination of materials. Don’t forget to also take into account the size and design of the wheel. Larger wheels can provide better handling and a smoother ride, but they also tend to be heavier and can be more difficult to maneuver.
Choosing the right wheel can greatly impact the overall performance and safety of your vehicle, so take the time to research and make an informed decision.
Install the New Wheel
Now that you’ve successfully removed the old wheel, it’s time to install the new one. Exciting, right? First, check to make sure that your new wheel is compatible with your bench grinder and that its size matches the machine’s specifications. Next, carefully slide the wheel onto the correct spindle and ensure that it fits properly.
The next step is crucial for your safety: make sure that you tighten the wheel onto the spindle securely using the wrench that came with your bench grinder. Turn the wrench clockwise until it’s tight but avoid over-tightening the wheel – this can cause it to crack or break during use. Once the wheel is securely in place, inspect it for any cracks, chips, or other damage that could cause it to fail.
If you notice any issues, stop immediately and remove the wheel before replacing it with a new one. Now that you’re all set, it’s time to start grinding!
Place the Wheel on the Spindle
When installing a new wheel on your vehicle, it’s important to follow the proper steps to ensure a safe and secure fit. The first step is to place the wheel on the spindle, making sure that it fits snugly and is aligned properly. This may require some maneuvering and adjusting, but taking the time to ensure a proper fit will prevent any potential mishaps down the road.
Once the wheel is in place, it’s important to tighten the lug nuts evenly and in a star pattern to ensure that the wheel is secured evenly. Remember to refer to your vehicle’s manual for any specific instructions or torque requirements. By taking the time to properly install your new wheel, you’ll be able to drive with confidence knowing that your vehicle is safe and secure.
Tighten the Nut Firmly
When installing a new wheel, it’s important to ensure that the nut is tightened firmly. This will help to keep the wheel in place and prevent accidents from happening. Before tightening the nut, it’s necessary to place the wheel over the axle and align it correctly.
Once this is done, you can then thread the nut onto the axle. Using a wrench or pliers, tighten the nut as much as you can. It’s important to use a tool that provides a good grip and makes it easy to turn the nut.
Don’t be afraid to use some force, as a loose nut can cause serious problems. Just make sure that you don’t overtighten the nut, as this can also cause issues. Finally, give the wheel a good spin to make sure that it’s turning properly and doesn’t wobble.
With these steps taken, you can be confident that your new wheel is installed securely and ready to use.
Test the Wheel
If you’ve just purchased a new wheel for your vehicle, it’s crucial to ensure that it’s installed correctly before taking it out for a test spin. Start by jacking up the vehicle and removing the old wheel. Position the new wheel over the hub and tighten the lug nuts in a star pattern to ensure they are equally torqued.
Use a torque wrench to get the exact amount of torque specified by the manufacturer. Once the wheel is securely in place, try giving it a little shake to make sure there’s no wobbling or play in the wheel bearings. It’s also a good idea to take the vehicle for a short test drive before heading out on a longer journey.
This will allow you to check for any strange noises or vibrations. Remember, safety should always come first when it comes to working on your vehicle, so take your time and double-check everything before hitting the road.
Conclusion: Keep Your Grinder Running Safely and Efficiently
Changing a bench grinder wheel can be quite an intimidating task for those new to the world of DIY. However, with a few simple steps and a steady hand, you can replace your old, worn-out wheel and get that machine up and running again in no time. Remember to always prioritize safety when working with power tools and to never underestimate the power of a trusty pair of safety glasses.
And who knows, maybe the next time someone asks you how to change a bench grinder wheel, you’ll be able to answer with confidence and a touch of charm. Happy grinding!”
FAQs
What tools do I need to change a bench grinder wheel?
To change a bench grinder wheel, you will need a wrench, pliers, and possibly a screwdriver depending on the type of grinder.
How do I know when it’s time to change my bench grinder wheel?
You should change your bench grinder wheel when it becomes worn down or damaged, or if it starts to produce sparks or unusual noises.
Can I use any type of grinding wheel for my bench grinder?
No, you should only use grinding wheels that are compatible with your specific bench grinder model and are suitable for the type of material you will be grinding.
Is it difficult to change a bench grinder wheel?
It can be a bit challenging, but as long as you have the necessary tools and follow the proper steps, it’s a relatively straightforward process.
How often should I replace my bench grinder wheel?
The frequency with which you need to replace your bench grinder wheel will depend on how often you use your grinder and the materials you are grinding, but it’s generally recommended to replace the wheel every 6 to 12 months.
Can I sharpen other tools with my bench grinder once I’ve changed the wheel?
Yes, once you’ve changed your bench grinder wheel, you can sharpen other tools such as knives, scissors, and chisels with the appropriate attachment.
Is it safe to change a bench grinder wheel on my own?
As long as you take the proper safety precautions and follow the manufacturer’s instructions, it is safe to change a bench grinder wheel on your own.

