How to Change Battery in Welding Helmet: Tips and Tricks for Easy Replacement

Have you ever been in the middle of welding and suddenly your helmet goes dark, hampering your view of your workpiece? Frustrating, isn’t it? Chances are, your helmet’s battery needs replacing. But don’t worry, it’s not as complicated as you might think. In this blog post, we’ll guide you through the step-by-step process of changing the battery in your welding helmet.
It’s an essential skill that every welder should have in their bag of tricks, and we’re here to help you master it. With our easy-to-follow instructions, you’ll be back to welding in no time, without any interruptions. So, grab your helmet and let’s get to work!
Why changing your welding helmet battery is important
Changing your welding helmet battery may seem like a small and insignificant task, but it is actually very important. A fully charged battery ensures that the auto-darkening lens in your helmet functions properly, providing you with the necessary protection from the harsh light generated by welding. Depending on the type of battery your helmet uses, changing the battery can be a quick and simple task.
For instance, if your helmet employs CR2450 batteries, you can replace them by opening the back of the helmet, carefully removing the old battery with a small screwdriver or other tool, and inserting a new one. It is crucial to follow the manufacturer’s instructions when changing your helmet’s battery and to always wear proper personal protective equipment when handling batteries. Keeping an extra battery on hand is also a good idea to avoid any issues that could arise during a welding project.
Overall, changing your welding helmet battery is an essential maintenance task that should not be overlooked.
Preventing welding accidents
Welders face a lot of hazards on the job, including breathing in toxic fumes, getting burns from hot metal, and experiencing eye damage from bright welding arcs. To stay safe, welders need to wear personal protective equipment, including helmets with auto-darkening lenses that prevent glare and protect the eyes. However, it’s not just enough to wear a helmet – welders also need to make sure that their helmets have fresh batteries and are in good condition.
Changing your welding helmet battery might sound like a minor detail, but it’s actually essential for preventing accidents. An old or depleted battery can cause the auto-darkening feature to malfunction, which can lead to eye strain and even blindness. By keeping your helmet in good working order, you can protect your vision and work more safely.
So, don’t overlook the importance of changing your welding helmet battery – it’s a simple step that can make a big difference in your safety on the job.
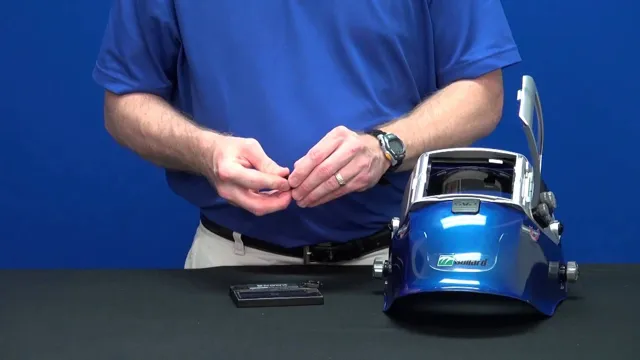
Identifying the type of battery your welding helmet uses
If you’re looking to change the batteries in your welding helmet, it’s important to first identify what type of battery it uses. Most welding helmets use either AAA, AA, or CR2450 coin batteries. To find out which specific type your helmet uses, check the manufacturer’s instructions or look on the battery compartment itself.
Once you know the correct type of battery, simply remove the old one and replace it with a new one of the same type. It’s important to make sure the battery is properly inserted and secure before using your helmet again. Regularly replacing the batteries in your welding helmet is crucial for ensuring optimal performance and safety while welding.
Checking the owner’s manual
When it comes to identifying the type of battery your welding helmet uses, the first step is to check the owner’s manual. The owner’s manual is a comprehensive guide that provides details about every aspect of your welding helmet, including the type of battery it uses. Once you have located the owner’s manual, browse through the pages until you find the section that provides information about batteries.
This section should tell you the type of battery your helmet uses, as well as give you instructions on how to replace the battery when it runs out. In some cases, the owner’s manual may even recommend specific brands of batteries that work best with your welding helmet. If you can’t locate the owner’s manual, don’t worry.
Most welding helmets use either a lithium-ion battery or alkaline battery. Lithium-ion batteries are rechargeable and generally last longer than alkaline batteries. On the other hand, alkaline batteries are disposable, but they are more readily available and cheaper to replace.
It’s essential to know the type of battery your welding helmet uses because it affects your helmet’s performance and longevity. Using the wrong type of battery can damage your helmet or reduce its effectiveness. Therefore, make sure you use the correct battery type and follow the manufacturer’s instructions when replacing it.
Remember that your welding helmet is a valuable investment, and taking care of it properly will ensure that it gives you years of service.
Inspecting the battery compartment
When it comes to inspecting the battery compartment of your welding helmet, one important thing to consider is the type of battery your helmet uses. Typically, welding helmets use either disposable or rechargeable batteries. Disposable batteries are convenient because they can be easily replaced when they run out of power.
However, rechargeable batteries can save you money in the long run since you won’t have to constantly purchase new batteries. To identify what type of battery your welding helmet uses, start by opening the battery compartment and taking a close look at the battery itself. If the battery is removable, it is likely a disposable battery.
However, if it is built-in or can be charged through a cord, it is likely a rechargeable battery. Knowing what type of battery your welding helmet uses can save you time and money when it comes to replacing or recharging your battery.
Steps to change the battery in your welding helmet
If you’ve noticed that your welding helmet’s battery is low or needs changing altogether, there’s no need to worry. It’s pretty straightforward and doesn’t take too long to do. To start, you need to locate the battery compartment on your welding helmet; it’s usually located on the exterior side.
Next, remove the cover of the compartment. Depending on the type of battery used, it may require a screwdriver or a push-button to release. Once the cover is off, take out the old battery and replace it with a new one.
It’s essential to make sure that the battery is facing the right way, the negative side is usually indicated by a minus sign (-). Lastly, replace the cover back onto the battery compartment and test your welding helmet to ensure everything is working correctly. Remember, you should always follow the manufacturer’s instructions for battery replacement.
By following these simple steps, you can change the battery in your welding helmet quickly and efficiently, ensuring that you’re ready for your next welding project.
Step 1: Remove the old battery
Changing the battery in your welding helmet is a simple task that should be carried out regularly to keep your helmet in good working condition. The first step in this process is to remove the old battery. Most welding helmets will have a battery compartment located on the inside.
You will need to open the compartment and check the type of battery used, this is important as many welding helmets use different types of battery. Once you have determined the type of battery in use, remove the old battery by gently prying it out of its socket. Be sure to dispose of the old battery properly, as batteries contain chemicals that can be harmful to the environment.
It’s essential to handle them with care. With the old battery removed, you can now proceed to the next step of replacing it with a new one. Remember that changing your welding helmet’s battery is essential to ensure the continued safety and efficiency of the helmet.
In case you’re unsure, refer to the helmet’s manual for more information.
Step 2: Prepare the new battery
After you have purchased a new battery for your welding helmet, it is important to prepare it properly before installation. The first step is to remove it from its packaging and ensure that it is the correct size and type for your specific helmet model. Next, carefully remove the old battery from your helmet and dispose of it properly according to your local regulations.
Then, take the new battery and inspect it for any damage or defects. If the battery seems to be in good condition, you can insert it into your helmet’s battery compartment. Be sure to follow the proper polarity markings on the compartment to ensure that the battery is installed correctly.
Once the new battery is securely in place, you can replace the cover for the battery compartment and test your helmet to ensure that it is functioning properly. With these steps completed, your welding helmet should be ready to use for your next project!
Step 3: Insert the new battery into the helmet
When it comes to replacing the battery in your welding helmet, it’s important to follow a few simple steps to ensure that your helmet functions properly. After removing the old battery, it’s time to insert the new one. First, locate the battery slot in your helmet.
Then, take your new battery and line it up with the positive and negative terminals in the slot. Carefully slide the battery into place, making sure that it is inserted in the correct orientation. Once the battery is fully inserted, double-check that it is secure and won’t fall out while you’re using the helmet.
With this simple process, you’ll be able to replace the battery in your welding helmet in no time and get back to work with full protection.
Testing your new battery
If you want to ensure your welding helmet is always in top condition, then knowing how to change the battery is essential. First, locate the battery compartment and remove the old battery. Make sure to dispose of it safely and replace it with a new one of the same type.
Once the new battery is inserted, turn the helmet on and test it by putting it on and striking an arc. If the helmet darkens properly and there’s no flickering or delay, then your new battery is working correctly. It’s essential to test your new battery before going back to work to ensure your safety.
So, if you’re wondering how to change the battery in your welding helmet, don’t worry, it’s straightforward and can save you from unnecessary accidents.
Ensuring proper function of your welding helmet
When it comes to welding, safety should be your top priority. And a vital component of your safety kit is a welding helmet. A welding helmet protects your face and eyes from the intense light and heat emitted during welding.
But to ensure that your welding helmet is functioning correctly, you need to test your new battery. A welding helmet battery is responsible for powering your auto-darkening filter, which automatically darkens the lens when the arc is generated. To test your battery, start by checking the manufacturer’s instructions for battery replacement.
Then, remove the battery cover and carefully remove the old battery. Insert the new battery, replace the cover, and turn on your helmet’s auto-darkening function. If the lens darkens correctly, your helmet is functioning as expected.
If the lens does not darken or becomes too dark, you may have a faulty battery, and it’s time to replace it. Remember, a well-functioning welding helmet can be the difference between an accident and a safe welding job. So always perform a quick battery test before starting any welding project, and keep a spare battery on hand for emergencies.
Conclusion
Changing the battery in your welding helmet may seem like a daunting task, but fear not! With these steps in mind, you can feel empowered to take on the challenge and bring new life to your trusty helmet. So grab your screwdriver, put on your safety gear, and get ready to give your helmet the power it needs to shine bright like a welding star. Remember, with great power comes great responsibility – always prioritize safety and follow manufacturer guidelines.
Happy welding!”
FAQs
Can I change the battery in my welding helmet?
Yes, you can change the battery in your welding helmet. It is usually located at the back of the helmet.
What type of battery should I use for my welding helmet?
It depends on the brand and model of your welding helmet. Most welding helmets use either AAA or CR2032 batteries.
How often should I change the battery in my welding helmet?
It is recommended to change the battery in your welding helmet every 6-12 months to ensure maximum performance.
How do I know when it’s time to change the battery in my welding helmet?
If you notice the auto-darkening feature is not working properly or the helmet is dim, it may be time to change the battery.
Can I replace the battery myself or do I need professional help?
You can usually replace the battery yourself by following the instructions provided by the manufacturer. However, if you are unsure or uncomfortable, it may be best to seek professional help.
Is it important to use a high-quality battery in my welding helmet?
Yes, it is important to use a high-quality battery in your welding helmet to ensure reliable and consistent performance.
What should I do with the old battery once I replace it?
It is important to dispose of the old battery properly. Check with your local recycling center or hazardous waste facility for proper disposal methods.

