How to Change Blade in Stanley 10-788 Utility Knife: Step-by-Step Guide
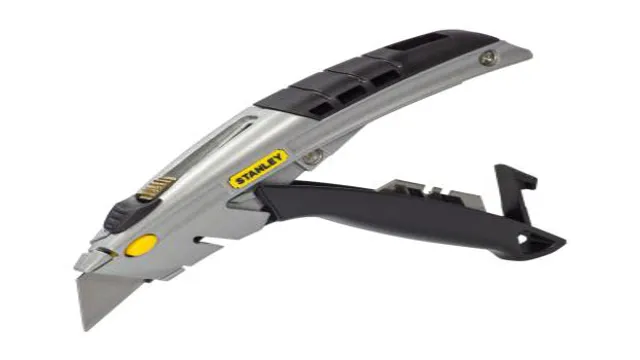
Have you ever struggled with changing a blade on your utility knife? No need to worry because I’ve got you covered! In this article, we will discuss how to change the blade in the Stanley 10-788 utility knife. This process may seem intimidating at first, but with the right steps and tools, it’s a breeze. Whether you’re a seasoned contractor or a DIY enthusiast, it’s important to know how to properly change the blade on your utility knife.
So, grab your Stanley knife and let’s get started!
Step 1: Retract Blade
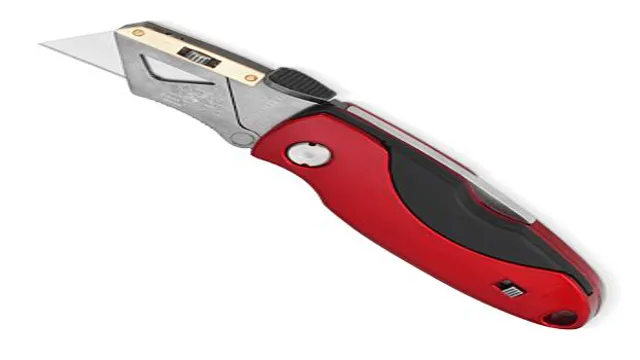
If you’re looking to change the blade in your Stanley 10-788 utility knife, the first step is to retract the blade. The retractable feature is there for your safety and it’s important to press and hold the blade release button while pushing the blade to the fully retracted position. This will lock the blade in place so that you can safely remove or replace it without any risk of injury.
It’s important to note that the blade release button is usually located on the side of the knife and can be easily identified by a small arrow pointing towards it. Once the blade is retracted and locked in place, you’re ready to move on to the next step in the blade changing process.
Use thumb to retract blade fully into knife body
Retracting the blade on a knife is an important step in handling and storing it safely. The first step in retracting the blade is to use your thumb to fully retract it into the body of the knife. This is especially important if you are carrying the knife in your pocket or bag, as a protruding blade can be dangerous and cause injury.
By retracting the blade fully, you can reduce the risk of accidentally cutting yourself or others. It’s important to note that different knives may have varying mechanisms for retracting the blade, so it’s essential to familiarize yourself with your specific knife’s features before attempting to retract the blade. By taking the time to retract the blade properly, you can ensure that you handle your knife safely and effectively.

Step 2: Loosen Screw
To change the blade in a Stanley 10-788 utility knife, the second step involves loosening the screw. This may seem like a simple task, but it’s important to do it correctly to avoid damaging the knife. Begin by locating the screw on the top of the knife, near the blade.
Use a screwdriver to turn it counterclockwise until it is loose enough to remove the old blade. It’s important to use the correct size screwdriver to avoid stripping the screw. Once the screw is loose, carefully remove the old blade, being sure to keep your fingers away from the sharp edge.
With the old blade removed, you’re ready to install a new one and tighten the screw back into place. Remember, taking your time and being careful during each step is crucial to safely and successfully changing the blade in your Stanley 10-788 utility knife.
Turn blade change screw counterclockwise until it is loose
In order to change the blade on your power tool, you’ll need to follow a few simple steps. The second step is to loosen the screw that holds the blade in place. To do this, you’ll need to turn the blade change screw counterclockwise until it is loose.
It’s important to do this carefully so as not to damage the screw or the tool itself. You may need to use some force to get the screw to turn, but be sure not to over-tighten or strip it. Keep in mind that some screws may be tighter than others, so you may need to use a little extra muscle to loosen it up.
Once the screw is loose, you’ll be able to remove the blade and replace it with a new one. With this simple step complete, you’ll be well on your way to finishing your project with a sharp, new blade.
Step 3: Remove Old Blade
Now that you’ve safely locked the blade of your Stanley 10-788 Utility Knife in place, it’s time to remove the old blade. The first step is to locate the blade release button, which is typically located near the middle of the knife handle. This button may be black or silver and is usually marked with arrows pointing towards the blade.
Press this button firmly, and the blade should unlock from the handle. Carefully pull the blade from the handle, being mindful of the sharp edges. Once the blade is removed, dispose of it according to your local laws and regulations.
With the old blade removed, you’re one step closer to safely and efficiently changing your blade on the Stanley 10-788 utility knife.
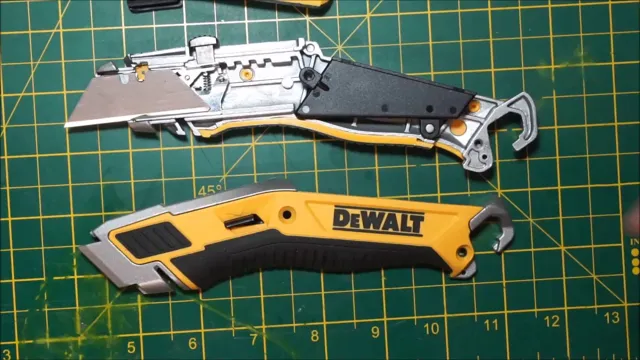
Remove old blade from knife body by sliding it out
Removing an old blade from a knife body may seem like a challenging task, but it’s actually quite simple. First, ensure that you have a flat and stable surface to work on. Then, locate the release button or lever on your knife body.
Press down on the button or slide the lever to unlock the blade. Once it’s unlocked, carefully pull it out of the body. Make sure to handle the blade with care to avoid injury.
If the blade is stuck, try wiggling it gently to loosen it. Once you have the blade removed, it’s important to dispose of it safely. If it’s still in good condition, consider recycling or repurposing it.
Otherwise, wrap it securely in paper or cardboard before throwing it away. By removing an old blade and disposing of it safely, you can keep your knife body in good condition and reduce the risk of injury.
Step 4: Insert New Blade
To change the blade in a Stanley 10-788 utility knife, the next step is to insert a new blade. First, make sure the blade release button is still in the up position. Then, align the notch on the new blade with the pins in the knife’s blade holder.
Push the blade in until it clicks into place. To ensure that the blade is secure, test it by pulling on it gently. If it stays in place, you are ready to use your newly replaced blade.
Changing the blade on a utility knife may seem daunting at first, but with a bit of practice, it becomes second nature. Remember to always prioritize your safety and work carefully when handling sharp objects.
Carefully insert new blade into slot, making sure it is securely in place
Insert New Blade Changing the blade of your tool can be a daunting task if you don’t know how to do it properly. But don’t worry, it’s not rocket science. Step 4 of the process involves inserting a new blade into the slot, making sure it is securely in place.
This step is crucial to ensure that you don’t end up with a loose blade that can potentially cause accidents. To insert a new blade effectively, make sure you have the right size and type of blade. Carefully slide the blade into the slot, making sure it is aligned correctly.
Gently push the blade down until it clicks into place. To ensure it is securely in place, wiggle the blade slightly and make sure it doesn’t move. Congratulations, you have just succeeded in inserting a new blade into your tool! Remember, safety first, so make sure you dispose of the old blades properly and keep your tool clean and maintained for optimal performance.
Step 5: Tighten Screw
Now that you’ve successfully replaced the blade in your Stanley 10-788 utility knife, it’s time to tighten things up. Take the screwdriver and tighten the screw that secures the blade in place. Avoid overtightening, as this can damage the blade or cause it to warp, but ensure that it’s securely in place.
Once you’ve tightened the screw, make sure that the blade is stable and held securely in place. Check that it’s not wobbling or loose, as this could be dangerous when using the knife. Now that you’ve mastered the blade-changing process, you’re ready to tackle any cutting task with confidence!
Turn blade change screw clockwise until it is tight
If you’ve made it to step 5 of changing your blade, congratulations! You’re almost done. At this point, all that’s left to do is to tighten the screw. It’s important to note that you should be turning the screw clockwise until it’s tight.
You don’t want to over-tighten it, as this can cause problems down the line, but you also don’t want it to be too loose. Just use a reasonable amount of force to ensure that it’s secure. Think of it like tightening a jar lid – you want it to be tight enough that it won’t come loose, but not so tight that you can’t open it later.
Once the screw is tight, you’re good to go. Give the blade a little wiggle to make sure it’s secure, and congratulations! You’ve successfully changed your blade.
Step 6: Test Knife
Before putting your utility knife to use, it’s essential to test it out and ensure that it’s sharp enough to tackle any task. To test the blade in your Stanley 10-788 utility knife, carefully slice through a piece of paper or cardboard. The blade should slice through effortlessly and smoothly, leaving a clean cut.
If the blade struggles to cut through or leaves jagged edges, it may be time to change the blade. Don’t forget to dispose of the old blade properly, and always handle the new blade with care. By taking the time to test your knife, you’ll ensure that it’s in top condition and ready to tackle any cutting job that comes your way.
Remember, safety should always be your top priority, so follow all instructions and take proper precautions when handling your knife.
Ensure the knife is operating correctly by extending and retracting the blade
When it comes to using a knife, safety is key. That’s why it’s important to test the knife before you start using it. Start by extending and retracting the blade to make sure it’s working correctly.
This will give you an idea of how easy it is to use and if there are any issues that need to be addressed. It’s also important to check if the blade is sharp enough. A dull blade can be dangerous, as it can slip off the object it’s cutting and cause injury.
You can test the blade’s sharpness by lightly touching it with your thumb. Be careful not to apply too much pressure, as a sharp blade can easily cut through skin. If the blade is sharp, it will make a slight indentation on your skin.
If it’s dull, it won’t leave a mark. By taking the time to test your knife, you can ensure it’s safe to use and won’t cause any harm. Remember to handle the knife with care and always use caution when using sharp objects.
Conclusion
Changing the blade in your Stanley 10-788 utility knife is a simple yet crucial task, like replacing the batteries in a remote or filling up your gas tank. It’s the difference between a smoothly sliced apple or a frustratingly dull attempt at your afternoon snack. So, grab your new blade and approach the task with confidence, remembering that in just a few short steps, you can transform your trusty tool into a slicing superhero, ready to conquer any project that comes your way.
Happy cutting!”
Changing the blade in your Stanley 10-788 utility knife is a simple process that can be completed in just a few steps. By following these instructions, you can ensure that your knife is ready to tackle any task.
Once you’ve successfully changed the blade in your Stanley 10-788 utility knife, it’s important to test it out before putting it to work on any big projects. The testing process is simple, but necessary in ensuring that your knife is functioning properly and that the new blade has been installed correctly. First, retract the blade back into the handle and then engage the blade once again.
This will ensure that it is secure and locked in place. Next, try cutting through a piece of paper or cardboard to get a feel for the sharpness and precision of the new blade. If everything checks out, you’re good to go! With a freshly changed blade in your utility knife, no task is too tough.
FAQs
What is the Stanley 10-788 Utility Knife?
The Stanley 10-788 Utility Knife is a popular type of utility knife that is commonly used for cutting various materials.
How do I safely release the blade on the Stanley 10-788 Utility Knife?
To safely release the blade on the Stanley 10-788 Utility Knife, first ensure that the blade is fully retracted. Then, press the blade release button and slide the blade out of the knife.
How do I change the blade on the Stanley 10-788 Utility Knife?
To change the blade on the Stanley 10-788 Utility Knife, first release the blade using the blade release button and slide it out. Then, insert a new blade into the knife until it clicks into place.
Can I use any type of blade with the Stanley 10-788 Utility Knife?
No, the Stanley 10-788 Utility Knife is designed to be used only with specific blades that are compatible with the knife.
How often should I change the blade on my Stanley 10-788 Utility Knife?
It is recommended to change the blade on your Stanley 10-788 Utility Knife whenever it becomes dull or damaged to ensure optimal performance and safety.
How do I dispose of the used blades from my Stanley 10-788 Utility Knife?
It is recommended to dispose of used blades from your Stanley 10-788 Utility Knife in a designated sharps container to ensure safe disposal.
Can I sharpen the blades for my Stanley 10-788 Utility Knife?
While it is possible to sharpen the blades for your Stanley 10-788 Utility Knife, it is not recommended as it can compromise the integrity and safety of the blade. It is recommended to simply replace dull or damaged blades with new ones.

