How to Change Cutting Disc on Angle Grinder: A Step-by-Step Guide
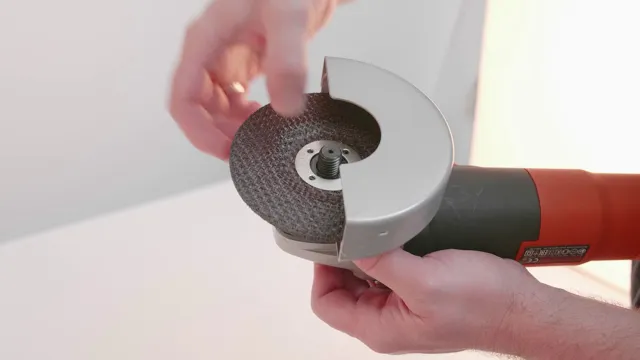
Changing the cutting disc on an angle grinder might seem like a daunting task, but it can easily be done with a few simple steps. If you’re a DIY enthusiast or a professional requiring an angle grinder to complete your daily tasks, it’s crucial to know how to change the cutting disc. A blunt or damaged disc can result in poor quality work and can even be a safety hazard.
Don’t worry, though; we’ve got you covered! In this article, we’ll guide you through the process of changing a cutting disc on an angle grinder. So, grab your angle grinder and let’s get started!
Introduction
Changing the cutting disc on an angle grinder is a simple process but requires utmost care and safety. Before doing anything, ensure that the angle grinder is unplugged and the disc has completely stopped rotating. Remove the disc by turning the locking nut counterclockwise using the spanner provided.
After taking off the disc, clean the spindle thoroughly before mounting the new disc. The new disc’s size should match the angle grinder’s specifications and should be placed onto the spindle’s surface. Use the locking nut to secure the disc onto the spindle’s surface and tighten it using the spanner.
Finally, plug in the angle grinder and test the new disc for any wobbling or vibrations before using it. By following these simple steps, you can safely change the cutting disc on an angle grinder without any issues.
Description of Angle Grinder and Its Parts
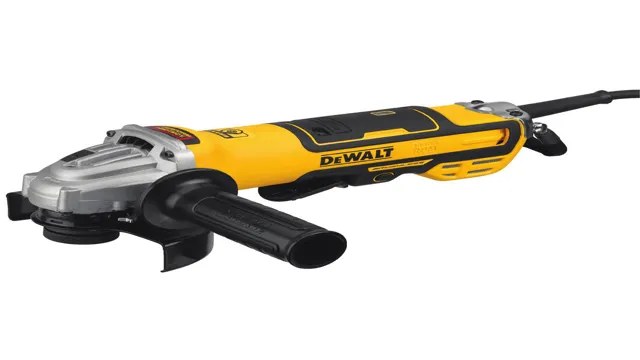
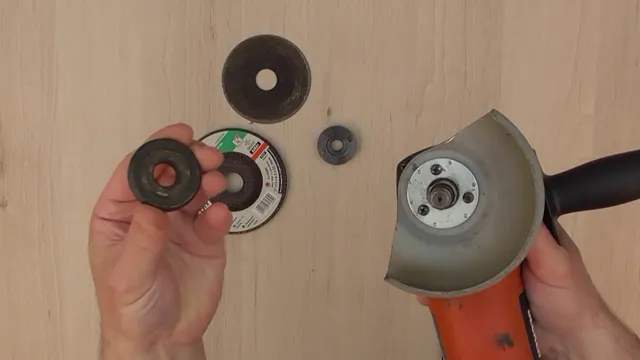
An angle grinder is a versatile power tool that can grind, cut, and polish a wide variety of materials. It consists of several essential parts, including the motor, the gear casing, the spindle, and the guard. The motor is the heart of the tool and provides the power needed to operate it.
The gear casing provides support to the motor and houses the gears that transfer power to the spindle. The spindle holds the grinding disc, which is responsible for grinding and cutting the material. Finally, the guard provides protection to the user by preventing debris and sparks from flying out during use.
Overall, the angle grinder is a powerful and useful tool that should be treated with care and caution to ensure safe and effective use.
Importance of Changing Cutting Discs
Changing cutting discs is an essential aspect of maintaining safety in various cutting applications. Using worn-out cutting discs can be dangerous as they may break or malfunction during use. This can result in accidents that can be costly both in terms of human life and financial repercussions.
If you’re using a cutting disc that has been in use for some time, it might lose its sharpness and become less efficient. This can lead to slower cutting speeds and potential damage to the materials being cut, causing products to be discarded before they fulfill their useful life. In essence, the importance of changing cutting discs cannot be overstated, and it is vital to replace them regularly to ensure maximum safety and efficacy.
Step-by-Step Guide on How to Change Cutting Disc
Changing the cutting disc on an angle grinder is a straightforward process that requires some basic steps. First, you need to ensure that the power supply is turned off and the angle grinder is unplugged. Then, remove the existing cutting disc by using a wrench to loosen the clamp nut and gently pulling the disc off the spindle.
Once the disc is removed, clean up any debris or dust that may have accumulated on the spindle area. Next, select a new cutting disc that matches the diameter and thickness of the previous one. Insert the disc onto the spindle, making sure that it sits flush against the supporting flange.
Then, secure it in place with the clamp nut and tighten it using the wrench. Make sure that the disc is properly secured before turning on the power supply. Always ensure that you wear appropriate safety gear during the process like gloves and eye protection to avoid injury.
Now you know how to change cutting disc on an angle grinder, so get to work and continue working on your projects with ease.
Step 1: Turn off the Angle Grinder and Unplug from Power Source
Safety is the number one priority when it comes to changing the cutting disc on your angle grinder. Before starting, make sure that your grinder is turned off and unplugged from the power source. This will prevent any accidental activation of the grinder while you are changing the disc, which could lead to serious injury.
Once you have ensured that the grinder is turned off, you can proceed with the disc change. It’s important to note that different grinders may have different methods for changing the cutting disc, so it’s always a good idea to refer to your grinder’s user manual for specific instructions. Don’t worry if you’re not familiar with the process at first.
With a bit of practice, you’ll become a pro in no time!
Step 2: Remove the Current Cutting Disc
Now that you have gathered all the necessary tools, it’s time to remove the current cutting disc from your power tool. But before you proceed, make sure that the tool is switched off and disconnected from the power supply. This will prevent any accidental injuries from happening.
Once done, locate the locking mechanism that holds the current disc in place. Depending on your tool, it may be a button or a lever that needs to be pushed or pulled. Press or pull the locking mechanism and hold it in place.
With your other hand, gently wiggle the cutting disc until it dislodges from the spindle. Be careful not to touch the sharp edges of the disc. Once the disc is completely removed, inspect the spindle and the flange for any damage or wear and tear.
If you see any signs of damage, consult a professional before proceeding further. Congratulations, you have now completed the second step on how to change the cutting disc!
Step 3: Install the New Cutting Disc
Now that you’ve removed the old cutting disc, it’s time to install the new one. But before you do that, make sure that the new cutting disc is the same size and type as the old one. This ensures that it will fit properly and work efficiently.
Carefully insert the new cutting disc onto the spindle, making sure that it is seated firmly and securely. Tighten the flange nuts with a wrench, being careful not to overtighten them. This step is crucial because an improperly tightened disc can cause it to wobble or fly off, leading to serious injury.
Once you’re done, double-check the security of the disc before using the tool. Voila! Now you’re all set to start cutting with your new disc.
Tips and Tricks
Changing a cutting disc on an angle grinder can seem like a daunting task, but with the right steps, it is relatively easy. First and foremost, ensure that your angle grinder is switched off and unplugged. Then, use the spanner wrench provided with the grinder to loosen the flange nuts.
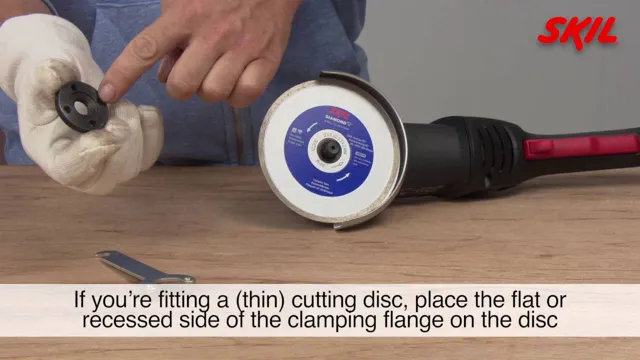
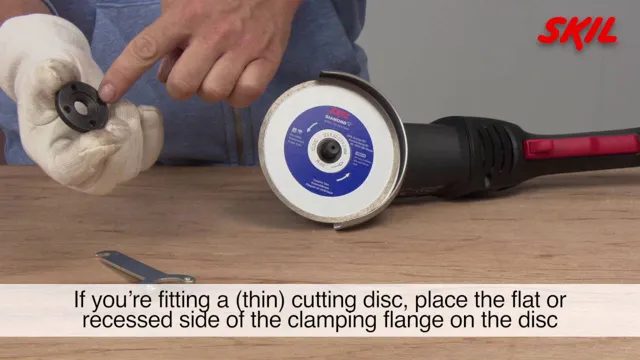
Slide the old cutting disc off the spindle and carefully dispose of it. Now, it’s time to fit the new cutting disc. Place it on the spindle so that the side with the label facing outwards.
Carefully tighten the flange nuts and ensure that the disc is correctly positioned. It is essential to use the correct size and type of disc to avoid accidents and damage to your equipment. Once you have fitted the disc, switch on your angle grinder and let it run for a few seconds before use.
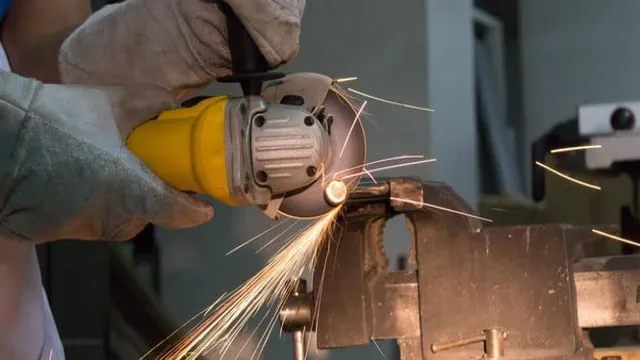
Keep in mind to always wear safety goggles while changing cutting discs and using the angle grinder for added protection. By following these simple steps, you can safely and efficiently change a cutting disc on your angle grinder.
Wear Protective Gear
When it comes to ensuring your safety while engaging in activities such as biking, playing sports, or even skateboarding, wearing protective gear is key. This may seem like a no-brainer, but it’s surprising how many people neglect this essential aspect. Protective gear can come in many forms, depending on the activity you’re participating in.
Helmets, knee pads, elbow pads, and wrist guards can all make a huge difference in reducing the severity of injuries that may occur during accidents. Not to mention, wearing protective gear can boost your confidence-knowing you’re taking all the necessary measures to ensure your safety can help you better focus and enjoy your activity. So, next time you’re about to head out for some fun, don’t forget to gear up! Your safety-and your loved ones-will thank you.
Check Compatibility of Cutting Disc with Angle Grinder
When it comes to using an angle grinder with a cutting disc, it’s important to check the compatibility of the disc with your tool. First and foremost, you need to make sure that the disc is the right size for your angle grinder. Using a disc that is too big or too small can not only be dangerous but can also prevent you from achieving the desired results.
Additionally, you should always check the maximum RPM (revolutions per minute) rating of your angle grinder and make sure that the cutting disc you choose is suitable for that speed. Using a disc that spins too fast for your tool can cause it to shatter, which can be extremely dangerous. Always remember to check the compatibility of your cutting disc with your angle grinder to ensure not only the best results, but also your safety.
Conclusion
And there you have it! Changing a cutting disc on your angle grinder is a breeze with these simple steps. It’s a lot like replacing the batteries in your TV remote – just a bit more dangerous. Remember to always wear your safety gear and handle your tools with care.
Whether you’re a DIY enthusiast or a seasoned professional, this skill will save you time, money, and headaches. Plus, you’ll impress your friends with your newfound expertise. So go forth and conquer those cutting tasks with confidence, knowing that you have the power to switch out discs like a boss.
“
FAQs
What tools do I need to change a cutting disc on an angle grinder?
To change a cutting disc on an angle grinder, you will need a compatible replacement disc, a wrench, and safety gloves and goggles.
How do I remove the old cutting disc from my angle grinder?
Turn off and unplug the grinder, and use the wrench to loosen the nut holding the cutting disc in place. Once the nut is loose, remove it and take the old disc off the spindle.
Can I reuse the old nut from my angle grinder when changing the cutting disc?
It is not recommended to reuse the old nut when changing the cutting disc on your angle grinder. It is best to use a new nut to ensure proper installation and safety.
How do I properly install a new cutting disc on my angle grinder?
First, make sure the grinder is turned off and unplugged. Then, place the new disc on the spindle and secure it with the nut until it is snug. Use the wrench to tighten the nut further, but be careful not to overtighten.
Can I use any cutting disc with my angle grinder?
No, it is important to use a cutting disc that is designed for your specific grinder model and compatible with the material you will be cutting. Using the wrong disc can be dangerous and cause damage to the grinder.
How often should I change the cutting disc on my angle grinder?
The frequency of changing the cutting disc on your angle grinder depends on how often you use it and the materials you are cutting. As a general guideline, it is recommended to change the disc every 8-10 hours of use or when it becomes visibly worn or damaged.
What safety precautions should I take when changing a cutting disc on my angle grinder?
Always wear protective gloves and goggles when handling the grinder and cutting disc. Make sure the grinder is turned off and unplugged before changing the disc. Handle the disc with care, and make sure it is properly installed and tightened before using the grinder again.

