How to Change Grinding Wheel on Bench Grinder: A Step-by-Step Guide
If you love DIY projects or woodworking, then chances are you rely on a bench grinder to sharpen and shape your tools. But what happens when the grinding wheel starts to wear down? Do you know how to change it? Don’t let a dull or damaged grinder wheel put a damper on your project progress. Learning how to easily replace your bench grinder wheel is a valuable skill that every DIY enthusiast should have in their arsenal.
In this blog post, we’ll guide you through the process step-by-step, so you can get back to your projects with sharp, efficient tools. So, grab your safety gear and let’s get started!
Safety First
Changing the grinding wheel on a bench grinder is a simple yet potentially hazardous task. Before beginning, ensure that the machine is turned off and unplugged to avoid any accidental starts. It’s also important to wear safety gear such as gloves and eye protection.
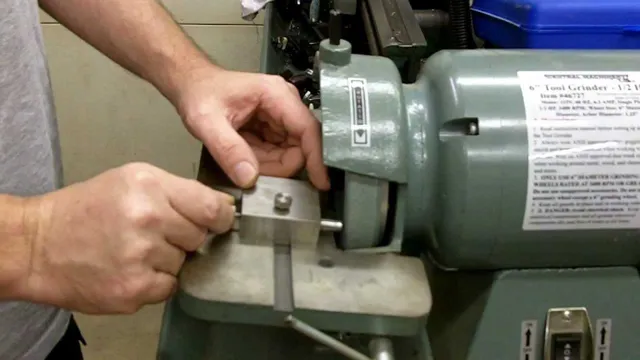
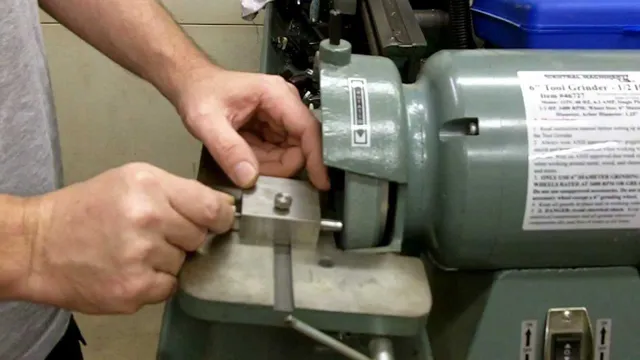
To change the wheel, use a wrench to loosen the nut that secures the old wheel in place. Once the nut is removed, gently lift and remove the old wheel, being careful not to damage the machine or yourself in the process. Next, place the new wheel onto the spindle and tighten the nut securely with the wrench.
Double-check that the wheel is properly aligned and seated before turning the grinder on. Following these steps and taking proper precautions can help to ensure a safe and successful wheel change on your bench grinder.
Turn off and unplug the grinder
When it comes to using a grinder, your safety should always come first. One of the easiest ways to ensure that you are safe while using this equipment is to turn it off and unplug it when it is not in use. This will not only prevent any accidents from happening but also prolong the lifespan of your grinder.
It’s easy to forget to turn off and unplug your grinder, especially if you’ve been using it for a while. That’s why it’s important to make it a habit. As soon as you’re done using the grinder, hit the “off” switch and unplug it.
This way, you won’t have to worry about accidentally turning it on while you’re not using it, which could be extremely dangerous. So, always remember to turn off and unplug your grinder as a precautionary measure.
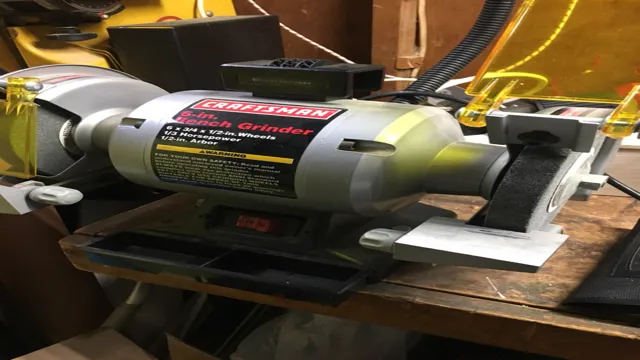
Wear protective gear: gloves and goggles
When working on any project, safety should always come first. One of the most important safety tips when working with your hands is to wear protective gear such as gloves and goggles. Gloves can protect your hands from cuts, scrapes, and burns, while goggles can prevent eye injuries from flying debris or sparks.
It’s essential to choose the right type of glove for the task at hand, as some materials may not offer adequate protection against certain hazards. When it comes to goggles, be sure to select a pair that fits comfortably and provides a clear view of your work area. Safety should never be taken lightly, and wearing protective gear is a simple step you can take to prevent accidents and injuries.
Remember, accidents can happen to anyone, so always take the necessary precautions to ensure your safety.
Removing the Old Wheel
If you need to change the grinding wheel on your bench grinder, there are a few steps you should follow to ensure a smooth process. The first step is to remove the old wheel, which can be done by loosening and removing the nut that holds it in place using a wrench. Once the nut is removed, carefully lift the old wheel off the spindle.
If the wheel is stuck, you may need to tap it gently with a soft-faced hammer to loosen it. Be sure to inspect the old wheel for any signs of wear or damage and dispose of it properly. The next step is to clean the spindle and surrounding area to remove any debris or dust that may have accumulated.
This will help ensure a secure fit for the new wheel. With the old wheel removed and the spindle clean, you are now ready to install the new wheel and tighten the nut securely. By following these simple steps, you’ll have your bench grinder up and running with a brand new grinding wheel in no time.
Remove the retaining nut or flange
When it’s time to replace your old wheel, the first step is to remove the retaining nut or flange. Depending on the type of wheel you have, this may be a simple process or a bit more involved. For instance, if you have a caster wheel, there will likely be a retaining nut that needs to be loosened with a wrench.
On the other hand, if you have a pneumatic wheel, you may need to use pliers to remove a flange that holds the wheel in place. Whatever the case may be, it’s important to follow the manufacturer’s instructions carefully to avoid damage and ensure a safe replacement. After all, the last thing you want is to end up with a wobbly wheel that could cause injury or even damage to your equipment.
So, take your time, use the right tools, and follow the steps carefully to get the job done right.
Slide off the old wheel
When it comes time to replace your bike’s wheel, the first step is removing the old one. To do this, we want to start by flipping your bike over so that it is resting on the handlebars and seat. Then, we need to remove any bolts or quick-release levers that are securing the wheel in place.
Once these have been removed, gently slide the wheel out of the dropouts. It may take some wiggling and maneuvering to get it free, but with a little patience, it should come off without too much trouble. Keeping your bike in good working order sometimes means parting ways with old components, and removing an old wheel is the essential first step towards fitting your bike with a brand new one.
Preparing the New Wheel
So, you’ve made the decision to change the grinding wheel on your bench grinder. Great! The first step is to unplug the grinder from the power source to ensure your safety. Next, you’ll need to remove the old wheel.
Most bench grinders have a locking nut that holds the wheel in place. Use a wrench to turn the nut counterclockwise and remove it. Then, carefully lift the old wheel off of the spindle.
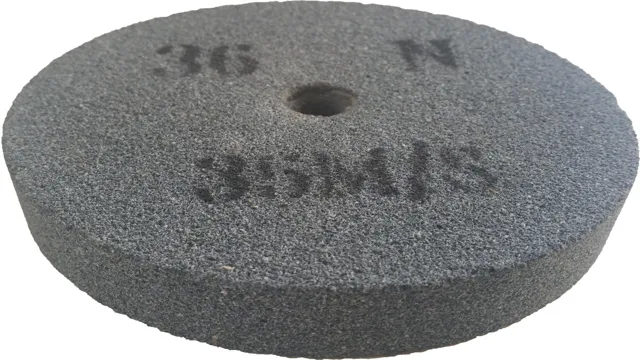
Take note of the size of the old wheel so you can choose the appropriate replacement. Now, it’s time to prepare the new wheel. Before installing it, make sure it is the correct size and type for your grinder.
Inspect it for any damage and ensure it is clean. Then, slide the new wheel onto the spindle and gently tighten the locking nut, being careful not to over-tighten. Congratulations, you’re one step closer to using your bench grinder with a brand new grinding wheel!
Ensure the new wheel matches the grinder model
When replacing the grinding wheel on your grinder, the first step is to ensure that the new wheel matches the model of your grinder. It’s important to check the specifications of both the grinder and the wheel to ensure a good fit. This will not only ensure that the wheel will function properly, but it will also prevent any potential safety hazards.
Once you have confirmed that the new wheel matches the model of your grinder, you can then proceed with preparing the new wheel for installation. This may involve cleaning the wheel or attaching any necessary hardware. By taking the time to properly prepare the new wheel, you can ensure a smooth and efficient grinding experience.
So, make sure to double-check the model numbers before replacing your grinding wheel to avoid any mishaps.
Clean the arbor and flanges
One important step in preparing a new wheel is to clean the arbor and flanges. The arbor is the shaft of the machine that the wheel fits onto, while the flanges are the rings that hold the wheel in place. Over time, dirt, dust, and debris can accumulate on these surfaces, which can affect the performance of the new wheel.
Therefore, it’s crucial to ensure that these surfaces are clean before installing the new wheel. Start by removing any rust or debris using a wire brush or sandpaper. Next, wipe down the arbor and flanges with a clean cloth soaked in rubbing alcohol.
This helps to remove any remaining dirt or oil that may be present. Once cleaned, make sure that the arbor and flanges are completely dry before proceeding with the installation of the new wheel. By taking the time to thoroughly clean these surfaces, you’ll ensure that the new wheel performs at its best and has a longer lifespan.
Inspect for any damages on the new wheel
When preparing to install a new wheel onto your vehicle, it’s important to inspect it thoroughly for any damages or defects. Even brand new wheels can sometimes have imperfections or be damaged during shipping or handling. Take a close look at the surface of the wheel, checking for scratches, dents, or any other signs of wear and tear.
Be sure to also check the rim and the valve stem for any damage. If you do notice any issues, it’s important to address them before proceeding with installation. Ignoring these issues could lead to problems down the road, such as a flat tire or brake issues.
By taking the time to carefully inspect the new wheel beforehand, you can ensure a smooth and problem-free installation process. So, don’t skip this step – it’s an important one!
Installing the New Wheel
Changing a grinding wheel on a bench grinder is a straightforward process that requires some basic tools and a little bit of know-how. Before starting the installation, make sure to turn off the power source to the grinder and unplug the machine from the outlet. Next, remove the old grinding wheel by using a wrench to loosen the nut that holds it in place, being careful not to damage the wheel or the equipment.
Once the old wheel is removed, clean any dust or debris from the shaft and surrounding areas before installing the new wheel. Place the new wheel onto the shaft, threading the nut onto the shaft by hand before using a wrench to tighten it as much as possible. Make sure the new wheel is secured tightly before turning the power back on and testing the grinder.
With these simple steps, changing the grinding wheel on a bench grinder can be done quickly and easily.
Slide the new wheel onto the grinder arbor
To start the process of installing the new wheel, slide it onto the grinder arbor. Begin by loosening the nut located at the center of the old wheel with a wrench. Once it has been removed, take off the old wheel and set it aside.
Carefully inspect the grinder arbor and remove any debris or buildup that may have accumulated on it. Align the hole in the center of the new wheel with the flanges on the grinder arbor and slide it on. Make sure it is secure and level before tightening the nut with a wrench.
Remember not to overtighten as this can cause the wheel to crack or become damaged. Finally, give the new wheel a spin to check for any wobbling or vibrations, and adjust if necessary. Congratulations, you have successfully installed a new grinding wheel on your grinder!
Reattach the retaining nut or flange
Once you have removed the old wheel and replaced it with the new one, you need to reattach the retaining nut or flange to ensure the wheel stays in place. First, make sure you have the correct nut or flange for your new wheel. Then, place it onto the wheel spindle and tighten it securely with a wrench or pliers.
Be careful not to over-tighten as this could damage the wheel assembly. Double-check that the wheel is properly aligned and spinning smoothly before using your equipment. It’s important to always follow the manufacturer’s guidelines when installing new wheels to ensure their safe operation.
By taking the time to properly reattach the retaining nut or flange, you can help prevent accidents and damage to your equipment.
Tighten the nut or flange securely
When installing a new wheel, it’s important to tighten the nut or flange securely in order to ensure a safe and stable ride. This step is often overlooked, but it can have dire consequences if not done correctly. To tighten the nut or flange, use a torque wrench and tighten to the manufacturer’s recommended specification.
If you don’t have access to a torque wrench, you can use a socket wrench and tighten the nut or flange as tight as you can. However, be careful not to overtighten as this can damage the threads or even break the wheel hub. Remember, the safety of your ride depends on the proper installation of your wheel, so take the time to do it right.
Test Run
Are you tired of using a dull grinding wheel? Replacing the grinding wheel on a bench grinder isn’t as complicated as you might think. First, make sure the bench grinder is unplugged from any power source. Locate the lock nut on the wheel and use a wrench to turn it counterclockwise to loosen it.
Then, remove the wheel from the spindle and clean the area with a rag. It’s important to use the correct size replacement wheel, which typically comes with the grinder. Insert the new wheel onto the spindle and hand tighten the lock nut.
Use a wrench to tighten the lock nut firmly and ensure the new grinding wheel is securely in place. Finally, test the new wheel with a piece of scrap metal to make sure it’s installed correctly. Following these steps will have you back to grinding in no time.
Turn on the grinder and let it run idle for a few seconds
When it comes to using a grinder, it’s important to take the necessary steps to ensure everything runs smoothly. Before getting into the thick of it, it’s a good idea to perform a quick test run. This involves turning on the grinder and running it idle for a few seconds.
This may seem insignificant, but it’s an important step in checking that everything is in working order before using it on your materials. Giving it a few seconds to run idle can also warm up the grinder, making it ready for use. It’s always better to be safe than sorry and take the time to perform a test run, ensuring that your grinder is working properly and efficiently.
Check for any vibrations or wobbling
When you take your vehicle for a test run, it’s crucial to pay attention to any vibrations or wobbling that you feel while driving. These can indicate problems with your wheels, tires, or suspension system. Vibrations may be slight, or they could be strong enough to shake the entire vehicle.
In either case, it’s a good idea to take your car to a mechanic and have it inspected as soon as possible. Continuing to drive with vibrations or wobbling can cause further damage to your car and even be dangerous. Don’t hesitate to address these issues to ensure your safety and the longevity of your vehicle.
So, whenever you take your car for a spin, be sure to keep an eye out for any vibrations or wobbling, and get it checked out promptly if you notice anything unusual.
Begin using the newly installed wheel
Congratulations on installing your brand new wheel! Now, it’s time to test run it to ensure that it’s working correctly. To begin, find a safe and open area to roll the wheel. Check the air pressure of your tire and ensure it’s at the recommended level.
Take it for a spin and see how it rolls. Notice if it’s wobbly, if it travels in a straight line, or if it feels smooth. If you sense any issues, stop and inspect your wheel for any visible damages, inconsistencies, or loose parts.
Ultimately, a test run is imperative to ensure a smoother and safer journey. So get out there, spin your wheel, and enjoy the ride!
Conclusion
In conclusion, swapping out a grinding wheel on a bench grinder should not be a daunting task. With the right tools and proper knowledge, it can be a relatively straightforward process that will keep your grinder functioning optimally and your work looking sharp. Whether you’re a DIY enthusiast or a professional tradesperson, remember to always prioritize safety and take your time when changing the wheel.
And who knows, with this new-found expertise, you might just be able to sharpen up your wit and clever comebacks as well!”
FAQs
What tools are needed to change a grinding wheel on a bench grinder?
To change a grinding wheel on a bench grinder, you will need a wrench, a new grinding wheel, and potentially a screwdriver depending on the grinder model.
How do you remove a grinding wheel from a bench grinder?
Begin by unplugging the grinder from its power source. Then, use a wrench to loosen and remove the nut holding the grinding wheel in place. Finally, slide the grinding wheel off the spindle.
Can you reuse an old grinding wheel or should you always use a new one?
It is not recommended to reuse old grinding wheels. Over time, the wheel may have worn down or suffered damage, which can impact the quality of your grinder’s performance and cause safety issues.
How do you tell when it’s time to change a grinding wheel on a bench grinder?
Signs that it may be time to change a grinding wheel include excessive vibration or wobbling during use, decreased performance, and visible cracks or damage on the wheel surface.
How do you install a new grinding wheel onto a bench grinder?
After removing the old grinding wheel, simply slide the new wheel onto the spindle and re-tighten the nut with the wrench. Make sure to align the wheel with the washers and other spacers as necessary.
What are some safety precautions to take when changing or adjusting a grinding wheel on a bench grinder?
Always wear protective goggles and gloves when handling grinding wheels, and be sure to unplug the grinder before removing or adjusting the wheel. Additionally, make sure to follow any specific safety instructions provided by your grinder’s manufacturer.
How often should you change your grinding wheel on a bench grinder?
The frequency with which you need to change your grinding wheel will depend on factors such as how often you use your grinder and the materials you are grinding. As a general rule, it is recommended to replace your grinding wheel at least once a year or whenever signs of wear or damage become apparent.


