How to Clean an Airless Paint Sprayer: Step-by-Step Guide for Spotless Performance

Cleaning an airless paint sprayer can be a daunting task, especially if you have never done it before. But don’t worry, we’ve got you covered! In this blog post, we will provide you with step-by-step instructions on how to clean your airless paint sprayer effectively and efficiently. A paint sprayer is an excellent tool for achieving a professional-looking paint job in no time.
However, if not properly maintained, it can quickly turn into a nightmare. Over time, paint can build up in the sprayer’s nozzle, which can lead to reduced pressure and uneven spray patterns. This buildup can also lead to clogs, which can be frustrating to deal with mid-project.
Cleaning your airless paint sprayer is essential to maintain its performance and extend its lifespan. While the process may seem intimidating at first, it’s quite simple once you know what to do. By following our guide, you can keep your paint sprayer in tip-top condition, ensuring it’s always ready to tackle your next painting project.
So, if you’re ready to learn how to clean your airless paint sprayer like a pro, keep reading! We promise that by the end of this post, you’ll have all the knowledge and confidence needed to keep your paint sprayer in excellent condition.
What is an Airless Paint Sprayer?
If you’ve ever used an airless paint sprayer before, you know how great they can be for getting the job done quickly and efficiently. However, if you don’t take care of your airless paint sprayer properly, it won’t last long and won’t work to its full potential. One of the most important things you can do to maintain your sprayer is to clean it regularly.
So, how do you clean an airless paint sprayer? First, you’ll need to follow the manufacturer’s instructions for disassembling the machine. Then, you’ll need to flush the system with a cleaning solution, usually a mixture of water and a cleaning agent. Finally, you’ll need to reassemble the machine and test it to make sure it’s working properly.
By taking good care of your airless paint sprayer and cleaning it regularly, you can ensure that it continues to work well for a long time to come.
Definition and Purpose
An airless paint sprayer is a highly efficient tool for painting surfaces, whether indoors or outdoors. Unlike traditional paint sprayers, airless paint sprayers don’t require compressed air to operate but instead use a powerful motor to pump paint out at high pressure. This allows for much faster coverage and a more uniform finish, making it an ideal choice for large-scale painting projects.
The purpose of an airless paint sprayer is to save time and effort while still achieving a high-quality result. Additionally, it is cleaner and easier to use than a traditional brush or roller, reducing the amount of mess and clean-up required. Whether you’re painting your home, a fence, or an entire commercial building, an airless paint sprayer can make the job much more manageable.
So, if you want to get the job done quickly and efficiently, an airless paint sprayer is the way to go.

Benefits of Using an Airless Paint Sprayer
An airless paint sprayer is an efficient tool that is used to apply paint or stain to various surfaces. It uses high-pressure technology to atomize paint and create a fine mist that is evenly distributed over the surface. Unlike traditional paint brushes or rollers, which can leave brush or roller marks, an airless paint sprayer produces a smooth finish without any streaks or drips.
Additionally, it can cover large areas quickly, which is especially useful when working on large projects. The benefits of using an airless paint sprayer are many, including reduced labor time, high-quality finish, and more precise control over the application process. Not only does it save time and energy, but it also saves money by reducing the amount of paint used.
Therefore, it is a must-have tool for both professional painters and DIY enthusiasts who want to achieve a flawless finish with ease.
Why is Cleaning an Airless Paint Sprayer Important?
If you want your airless paint sprayer to work efficiently and last longer, regular cleaning is essential. Over time, leftover paint, debris, and other particles can build up inside the sprayer, clogging the filters and nozzles. This can lead to uneven spray patterns, reduced pressure, and even damage to the motor.
Moreover, a dirty airless paint sprayer is a breeding ground for bacteria and mold, which can contaminate your paint and affect the quality of your work. By cleaning your airless paint sprayer after every use, you can prevent these issues and extend the life of your equipment. To clean your airless paint sprayer, you should first flush out any remaining paint using clean water or solvent.
Then, disassemble the sprayer and clean each part with a brush or sponge and some mild detergent. Rinse everything thoroughly and let it dry completely before reassembling it. Don’t forget to lubricate any moving parts and replace any damaged or worn-out components.
With proper cleaning and maintenance, your airless paint sprayer will continue to deliver excellent results for years to come.
Preventing Clogs and Blockages
Keeping your airless paint sprayer clean is essential to prevent clogs and blockages. Over time, paint and debris can build up in the nozzle and hose, causing spray patterns to become irregular or cease altogether. This can lead to a frustrating and time-consuming cleanup process, as well as potential damage to the sprayer itself.
By regularly cleaning your airless paint sprayer, you can avoid these issues and keep your equipment in top working condition. Not only will this save you time and money, but it will also ensure that your paint job is of the highest quality. So don’t overlook the importance of maintaining and cleaning your airless paint sprayer, and enjoy the benefits of a smooth and efficient painting process.
Avoiding Contamination of Paint
When it comes to airless paint sprayers, cleaning them regularly is crucial to avoid contamination of paint. Not only does it ensure that your sprayer is running at optimal performance, but it also prevents any unwanted impurities or debris from ruining the quality of your paint job. Neglecting to clean your sprayer can lead to clogs in the nozzle and hoses, which will hinder paint flow and cause uneven coverage.
In addition, any leftover paint in the system can dry and harden, making it difficult to remove and potentially damaging the equipment. To keep your paint sprayer in top condition, it’s important to clean it after every use with the proper cleaning agents and tools. By doing so, you’ll save time and money in the long run by avoiding costly repairs and replacements.
Steps to Clean an Airless Paint Sprayer
Are you wondering how to clean an airless paint sprayer? Cleaning your sprayer after each use is essential to ensure its longevity and efficiency. The first step is to relieve pressure by turning off your sprayer and pulling the trigger to release any remaining paint. Next, remove the tip guard, filter, and spray tip, and soak them in a cleaning solution.
Use a brush to remove any excess paint from the sprayer’s intake and check valve, and wipe down the exterior with a clean cloth. Reassemble the sprayer with fresh parts, flush the system with water, and run it for a few seconds to ensure it’s cleaned properly. Remember to store your sprayer in a dry, cool place to avoid any damage between uses.
With these steps, maintaining your airless paint sprayer is a breeze and ensures optimal performance during your next painting project.
Step 1: Properly Disposing of Remaining Paint
If you want to keep your airless paint sprayer in great condition for a long time, it’s important to know how to clean it properly after every use. The first step in cleaning your airless paint sprayer is to dispose of any remaining paint in a safe and responsible manner. Avoid dumping any leftover paint down the drain or in the trash, as this can be harmful to the environment.
Instead, pour any excess paint back into its original container or use a paint strainer to collect any solid particles. You can also mix in a paint thinner to help break down the paint and make it easier to dispose of. Once you’ve properly disposed of any remaining paint, you can move on to the next steps of cleaning your airless paint sprayer.
By taking these simple steps, you can ensure that your tool stays in excellent condition for years to come.
Step 2: Flushing the System with Water or Solvent
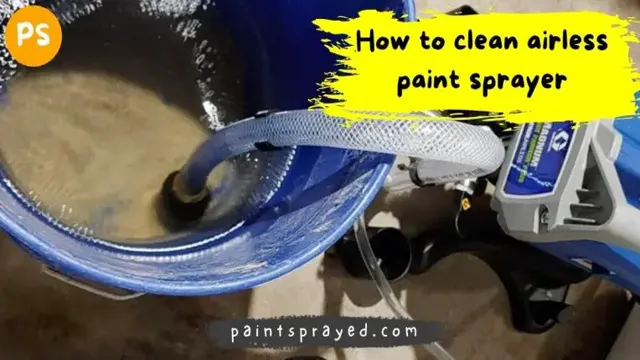
When it comes to cleaning an airless paint sprayer, the second step is crucial. After you’ve emptied out any remaining paint, it’s time to flush the system with either water or solvent. This step is important because it helps to remove any remaining paint particles and prevent clogs in the future.
Flushing the system also helps to prolong the life of your airless paint sprayer, as it removes any leftover residue that could cause damage over time. Whether you choose to use water or solvent will depend on the type of paint you were using. If you were using water-based paint, water is sufficient for flushing the system.
However, if you were using oil-based paint, you’ll need to use a solvent. Whatever you choose, make sure to follow the manufacturer’s instructions and take all necessary safety precautions. A clean airless paint sprayer is an effective one, so don’t skip this important step!
Step 3: Disassembling and Cleaning Components
clean an airless paint sprayer Once you have finished using your trusty airless paint sprayer, it’s essential to give it a thorough cleaning before storing it away. The first step is to ensure that you have disconnected it from the power source. Then, you need to disassemble the various components, such as the spray tip, guard, and filter, to ensure that there is no leftover paint residue left behind.
Once you’ve disassembled everything, you can clean each component separately using a cleaning solution and a soft-bristled brush. Remember to use the manufacturer’s recommended cleaning solution to avoid damaging the components. After cleaning, ensure that each piece is completely dry before reassembling the sprayer.
By properly disassembling and cleaning your airless paint sprayer after each use, you’ll ensure that it stays in top condition and is ready for use the next time you need it.
Step 4: Reassembling and Testing the Sprayer
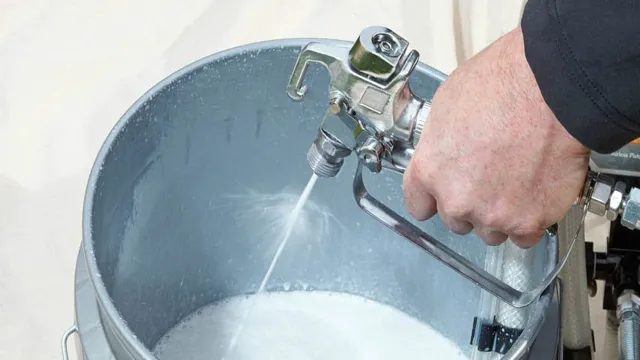
Now that you have thoroughly cleaned your airless paint sprayer, it’s time to reassemble and test it to ensure it’s functioning correctly. First, refer to the manufacturer’s instructions to ensure you put all the parts back in the right order. Once you’ve assembled it, test the sprayer by spraying water onto a test surface.
This will help you ensure that the spray pattern is consistent and that there are no leaks from the fittings or hoses. Checking the spray pattern will help you maintain a steady and even coat of paint without wasting any of it. Remember to always clean your airless paint sprayer after each use and maintain it regularly to prolong its lifespan.
With proper care and maintenance, your sprayer will last for many painting projects to come.
Tips and Tricks for Maintaining an Airless Paint Sprayer
Maintaining an airless paint sprayer is an essential task to ensure its proper functioning and longevity. One of the most crucial steps in this process is to clean the sprayer after each use, especially if you use different types of paint. To clean your airless paint sprayer, you need to flush it with water or a cleaning solution, depending on the type of paint used.
First, remove the spray tip and the guard, and then pour the cleaning solution or water into the hopper. Turn on the sprayer and pull the trigger until the solution comes out clean. Repeat the process until the spray gun is entirely clean.
Once done, dry the equipment thoroughly to prevent rust and store it appropriately. Remember that failing to clean your sprayer after each use can lead to clogging, corrosion, and premature breakdown. Therefore, invest some time and effort in cleaning your airless paint sprayer to ensure its peak performance and longevity.
Regularly Inspecting and Cleaning Components
Regular maintenance is crucial for keeping your airless paint sprayer running smoothly and effectively. One important aspect to focus on is the inspection and cleaning of the components. Before each use, inspect the spray gun, hose, and pump for any damage or wear and tear.
Replace any worn or damaged parts immediately to prevent issues down the line. Additionally, regularly clean the filter, pump, and spray tip to prevent clogs and ensure an even application of paint. Skipping this step can result in an uneven finish or even damage to your equipment.
A clogged tip can cause the paint to spit or splatter, resulting in a messy and time-consuming cleanup. By taking the time to inspect and clean your airless paint sprayer, you can ensure that it will last for years to come and provide you with great results every time.
Using the Right Type of Cleaning Solution
Maintaining an airless paint sprayer can be a daunting task, but with the right tips and tricks, it can be made easier. One important aspect to consider is using the right type of cleaning solution. It is vital to choose a cleaning solution that is compatible with the type of paint that has been used in the sprayer.
Using the wrong cleaning solution can lead to damage of the sprayer and even cause clogging of the tip. It is also important to follow the manufacturer’s instructions to ensure that the cleaning solution is diluted correctly. Investing in a good quality cleaning solution can save time and money in the long run as it will prevent any damage to the sprayer.
So, the next time you are looking to clean your airless paint sprayer, make sure to choose the right cleaning solution that is suitable for your sprayer and paint type.
Storing the Sprayer Properly When Not in Use
Maintaining an airless paint sprayer can be a bit tricky, but one of the key aspects is properly storing the sprayer when not in use. It’s important to clean the sprayer thoroughly and turn off the power before storing it. Make sure to remove any excess paint and clean the filters to prevent clogging.
When storing the sprayer, keep it in a cool and dry place, away from direct sunlight. It’s also a good idea to cover the sprayer with a cloth to protect it from dust and debris. Proper storage can help prevent damage to the sprayer and prolong its lifespan.
When you’re ready to use it again, make sure to prime the sprayer and run water through it to ensure it’s working properly. By following these tips and tricks, you can maintain your airless paint sprayer and ensure it’s always ready to use when you need it.
Conclusion
In conclusion, keeping your airless paint sprayer clean is essential for achieving a perfect finish with every use. Sure, it may seem intimidating at first, but just like with any task in life, all it takes is a little patience, persistence, and a few handy tips. So don’t be afraid to get your hands dirty, roll up your sleeves, and get that sprayer sparkling like new.
Who knows, your newly cleaned airless paint sprayer might just become the envy of all your DIY buddies – or at least, your paint projects will look flawless!”
FAQs
What materials do I need for cleaning my airless paint sprayer?
You will need cleaning solvents, water, rags, and a cleaning brush for cleaning your airless paint sprayer.
How often should I clean my airless paint sprayer?
You should clean your airless paint sprayer after every use to prevent clogging and ensure its longevity.
Do I need to disassemble my airless paint sprayer for cleaning?
Yes, disassembling your airless paint sprayer is necessary for proper cleaning of its components.
Can I use household cleaners for cleaning my airless paint sprayer?
No, you should avoid using household cleaners as they may damage the spray gun and other parts of the sprayer. Use only manufacturer-recommended cleaning solutions.
How long does the cleaning process take for an airless paint sprayer?
The cleaning process may take about 10-20 minutes depending on the extent of paint residue and the size of your sprayer.
How can I prevent clogging of the spray tip when using my airless paint sprayer?
You can prevent clogging of the spray tip by using a strainer and filtering the paint before pouring it into the sprayer.
What should I do if my airless paint sprayer is not spraying evenly after cleaning?
If your airless paint sprayer is not spraying evenly after cleaning, check for any clogs or worn parts that may need replacement.


