How to Clean a Metal Lathe: Simple Steps for Optimal Maintenance
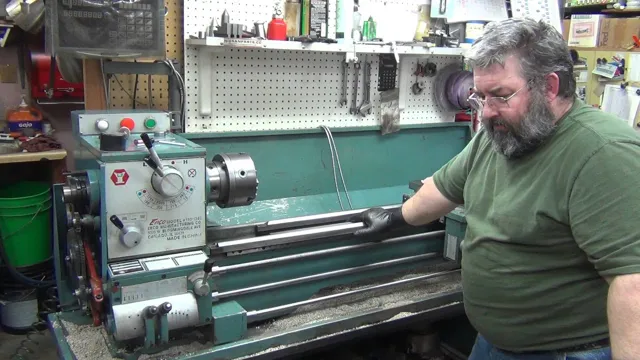
If you have a metal lathe in your workshop, you know just how important it is to keep it clean and well-maintained. A dirty and neglected lathe not only looks bad, but it can also compromise its performance and overall lifespan. However, knowing how to clean a metal lathe can be a daunting task, especially if you are new to metalworking or machine tools.
But fear not! In this post, we will guide you through the process of cleaning a metal lathe, step-by-step, so that your lathe stays in peak condition and delivers the quality results you expect from it. So, roll up your sleeves and let’s get started.
Gather Cleaning Supplies
When it comes to cleaning a metal lathe, the first step is to gather all the necessary cleaning supplies. This includes a soft-bristled brush, cleaning solution, cloths, and safety goggles. Keep in mind that the type of cleaning solution you use will depend on the type of metal and the level of grime buildup on the lathe.
For light buildup, you can use a mild detergent solution, while for heavy buildup, a stronger solution such as a degreaser may be necessary. Before starting the cleaning process, make sure to take all the necessary safety precautions and wear protective gear. Remember to read the instructions on the cleaning solution carefully and follow the manufacturer’s guidelines for best results.
By gathering the proper cleaning supplies and taking the necessary safety precautions, you can effectively clean your metal lathe and ensure its longevity.
Examples: mild detergent, soft cloths, degreaser
When it comes to cleaning, having the right supplies can make all the difference. Start by gathering the cleaning supplies you will need for the task at hand. This may include a mild detergent for gentle cleaning, soft cloths to prevent scratching surfaces, and a degreaser to tackle tough grime.
These supplies will vary depending on the surfaces you are cleaning and the type of grime you are dealing with, so it’s important to identify your cleaning needs before you begin. By having the right supplies on hand, you can be sure your cleaning efforts will be efficient and effective, leaving your home or work space looking and feeling fresh. So, take some time to gather your cleaning supplies, and get ready to tackle your next cleaning project with ease!
Prepare the Lathe for Cleaning
Before you start cleaning your metal lathe, it’s important to properly prepare it for the process. Begin by turning off the power and unplugging the machine. Next, remove any parts or accessories that may obstruct your cleaning, such as the chuck or tailstock.
You can use a soft bristle brush to gently remove any debris or dust from the machine’s exterior. A light coat of oil can also be applied to protect the lathe from rusting. If you plan on disassembling any parts of the machine for deep cleaning, be sure to label them or take photos beforehand to ensure reassembly is successful.
By taking these steps, you’ll be ready to start cleaning your metal lathe and keep it in optimal working condition for years to come.
Examples: turn off and unplug the lathe, remove debris
Before cleaning the lathe, you should ensure that you turn off and unplug it. This is an essential safety measure that should not be overlooked. Once the machine is off and unplugged, you should remove any debris that has accumulated on and around the lathe.
This includes chips, shavings, and dust. You can use a brush or vacuum to get rid of the debris. Cleaning the lathe is an important step in maintaining its performance and durability.
Neglecting to clean it can result in chips getting stuck, a build-up of grime, and damage to the lathe’s components. A well-maintained lathe is more efficient and lasts longer, giving you better value for your investment. So take a few minutes to prepare the lathe for cleaning before you start, and you’ll be rewarded with a lathe that performs at its best.
Clean the Lathe Bed
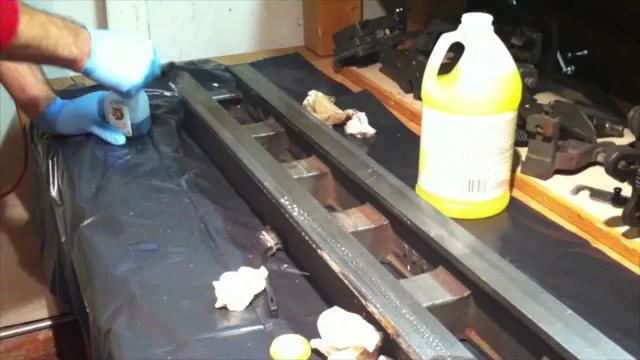
When it comes to maintaining your metal lathe, cleaning the lathe bed is an essential step. The bed of a lathe is the foundation that supports the workpiece as it’s being machined, and it’s crucial that it remains clean and smooth to ensure accurate and precise cuts. To clean the lathe bed, the first step is to remove any swarf or debris that may have accumulated from previous machining operations.
You can use a stiff-bristled brush or a vacuum to sweep away any loose debris, being careful not to scratch the bed’s surface. Next, use a rag or cloth to wipe down the bed with a solvent or degreaser to remove any built-up grime and oil residue. Once clean, apply a thin layer of lubricant to protect the bed from rust and corrosion.
By taking the time to clean your lathe bed regularly, you’ll keep your machine in peak condition and extend its lifespan.
Examples: scrub with mild detergent, wipe with soft cloth
If you own a lathe machine, you know that the bed is one of the most important components of the machine. The bed is the base where the other parts rest, so it’s crucial to keep it clean and in good condition. To clean the lathe bed, you don’t need any special tools or products.
Start by wiping off any debris or dust with a soft cloth. Then, add a few drops of mild detergent to a bucket of warm water and use a scrub brush or soft cloth to gently clean the bed. Be sure to remove any particles on the bed carefully as they can damage your lathe.
Once you’ve finished cleaning, dry the bed with a soft cloth. Regular cleaning of the lathe bed will help extend the lifespan of your lathe and ensure that it operates properly. So, make sure you add cleaning the lathe bed to your routine maintenance checklist.
Clean the Headstock and Tailstock
Cleaning a metal lathe is essential to maintain its functionality and longevity. One of the crucial areas to focus on is the headstock and tailstock. These parts hold the workpiece and provide power to the machine.
Over time, they can collect debris, grease, and rust, which can affect the precision and movement of the lathe. To clean the headstock and tailstock, start by unplugging the machine and removing any attachments. Then, use a degreaser to dissolve the grease and a wire brush to scrub away any rust or dirt.
Once cleaned, wipe the parts with a dry cloth, lubricate the moving parts with oil or grease, and reassemble. By regularly cleaning the headstock and tailstock, you can ensure that your metal lathe works efficiently and produces high-quality work.
Examples: remove debris, degrease
When it comes to cleaning the headstock and tailstock of your machinery, removing debris and degreasing are essential. Headstocks and tailstocks are the primary parts of a lathe machine that hold the workpiece in place, and keeping them clean is vital for optimal performance. First and foremost, you must remove all debris from the headstock and tailstock using a soft-bristled brush.
Solid debris like chips and sawdust can cause significant damage to the machinery if left unchecked. Next, degrease the headstock and tailstock by using a specialized degreaser and a clean cloth. Grease and oil buildup can cause several issues such as reducing the lifespan of bearings, belts, and spindle, which might lead to costly machine repairs.
Regular cleaning of the headstock and tailstock can help extend the life of the machine and ensure that it operates at optimal performance. So, don’t forget to add this cleaning task to your maintenance checklist and use the right tools to get the job done right.
Clean the Chuck and Collets
When it comes to metal lathe maintenance, one important task you shouldn’t overlook is cleaning the chuck and collets. Over time, these parts can accumulate dirt, grit, and debris, which can cause them to function poorly or even damage other parts of the lathe. To clean the chuck, start by removing any debris with a brush or compressed air.
Then, wipe the chuck down with a clean cloth or rag and a mild solvent, such as WD-40 or mineral spirits. For the collets, remove them from the lathe and soak them in a mild solvent for several hours to dissolve any built-up grime. Afterward, rinse them thoroughly with clean water, dry them completely, and lubricate them with a light coating of oil before reassembling them.
By regularly cleaning the chuck and collets, you can ensure your metal lathe stays in top condition and performs at its best.
Examples: remove debris, soak in degreaser
When it comes to maintaining your lathe machine, one essential task is cleaning the chuck and collets. Over time, debris and grease can build up in these parts, which can affect the machine’s accuracy and performance. To clean the chuck, you can remove any debris by wiping it down with a clean cloth or using compressed air to blow away the debris.
After the debris has been removed, you can soak the chuck in a degreaser solution to remove any built-up grease. Similarly, collets should be removed from the machine and soaked in degreaser solution to ensure that they are thoroughly cleaned. Once cleaned, it’s essential to dry these parts thoroughly to avoid rust and ensure longevity.
By regularly cleaning the chuck and collets, you can help ensure that your lathe machine performs optimally, and you can avoid costly repairs and replacements.
Reassemble the Lathe
After properly cleaning a metal lathe, it’s time to put it back together. The first step is to carefully reattach the chuck, making sure it’s fully tightened. When reassembling the tailstock, ensure that it is aligned with the rest of the machine and secured in place with the appropriate bolts and screws.
It’s important to take great care when aligning the machine’s gears and belts, making sure they are not too tight or too loose. Once all the components are reconnected, it’s time to test the machine and make sure all parts are functioning as they should. Remember, regular maintenance and cleaning of your metal lathe will ensure it operates smoothly and efficiently for years to come.
So, the next time you need to clean your metal lathe, remember to reassemble it with the same care and attention you gave it during the cleaning process.
Examples: ensure all parts are properly secured
When reassembling a lathe, it’s essential to ensure that all parts are properly secured to prevent any accidents from occurring. The first step in this process is to make sure that the parts are clean and free from any debris or dirt that could affect their functionality. Once you have cleaned the parts, carefully attach each piece according to the manufacturer’s instructions.
Take your time when connecting the components, and double-check each joint and bolt to ensure that everything is secure. It might be tempting to rush through this process, but taking your time to do it right will save you from potential issues later on. Don’t forget to lubricate any moving parts, as this will help to reduce friction and extend the life of the machine.
With a little patience and attention to detail, your lathe will be up and running in no time, ready to tackle any project you throw its way.
Conclusion
Cleaning a metal lathe may seem like a daunting task, but it’s actually quite simple with the right tools and techniques. Just like a surgeon scrubbing in before a procedure, make sure to fully prepare your space and gear up. Clean your lathe regularly to prevent build-up and maximize its longevity.
And, remember, a clean lathe is a happy lathe – and a happy lathe means happy machinists!”
Examples: cleaning your lathe regularly can improve its performance and prolong its lifespan
After finishing cleaning your lathe, it’s time to reassemble it. Reassembling the lathe is not a difficult task if you know all its parts and their functions. While reassembling, you have to ensure that all the screws and nuts are tightened.
Loose screws can cause misalignment and make the lathe vibrations. You can start by attaching the headstock to the bedways. The lathe bed plays a crucial role in keeping the lathe stable and sturdy, and attaching the headstock to the bedways ensures proper alignment and accuracy.
Then, it’s time to attach the tailstock and the tool rest. The tailstock helps in holding the other end of the workpiece, while the tool rest supports the cutting tools. You also need to lubricate the lathe’s moving parts, like bearings and gears, using the recommended oil or grease.
Proper lubrication ensures smooth movement and prevents wear and tear. Finally, inspect the lathe thoroughly before plugging it back in. Turn on the lathe and check that it’s running quietly without any unusual vibrations.
Reassembling your lathe correctly after cleaning it can positively impact the lathe’s performance and prolong its lifespan.
FAQs
What cleaning materials are safe to use on a metal lathe?
It is recommended to use mild solvents like degreasers, mild detergents, and alcohol-based cleaners on metal lathes.
Can I use water to clean a metal lathe?
It is not recommended to use water on a metal lathe as it may cause rusting. Instead, use a dry cleaning method.
What are some tips for keeping a metal lathe clean?
Always clean your metal lathe after every use, avoid using abrasive materials, use a soft brush to remove debris, and cover your lathe when not in use.
How do I remove rust from a metal lathe?
Use a rust remover solution or a mixture of vinegar and baking soda to remove rust from a metal lathe. Follow up with a rust inhibitor to prevent future rusting.
Should I lubricate my metal lathe after cleaning?
Yes, it is important to lubricate your metal lathe after cleaning to prevent rusting and ensure smooth operation. Use a high-quality lubricant recommended for metal lathes.
Can I use compressed air to clean a metal lathe?
Yes, compressed air can be used to remove debris and dust from a metal lathe but ensure that the pressure is not too high to avoid damaging any parts.
How often should I clean my metal lathe?
It is recommended to clean your metal lathe after every use or at least once a week, depending on how frequently it is used. Regular cleaning and maintenance of a lathe can prolong its lifespan.

