How to Clean Your Orbital Sander in 5 Easy Steps for Better Results
If you’re a DIY enthusiast, then having an orbital sander is often a crucial investment. Whether you’re using it to restore old furniture or smoothing out rough edges, an orbital sander is a reliable tool to have in your workshop. However, like any power tool, it needs proper maintenance to keep it in good condition and to ensure it continues to work effectively.
Cleaning your orbital sander is one of those crucial maintenance tasks that you should do regularly. But, how do you do it? In this blog post, we’ll be covering some tips and tricks on how to clean your orbital sander properly to ensure it works efficiently for years to come. So, let’s get started!
Why Clean Your Orbital Sander?
If you own an orbital sander, it’s important to clean it regularly to maintain its performance and extend its lifespan. Over time, sawdust and debris can collect on the sandpaper, clog the air vents, and damage the motor. This can reduce the efficiency of the machine and make it more difficult to achieve the desired smooth finish.
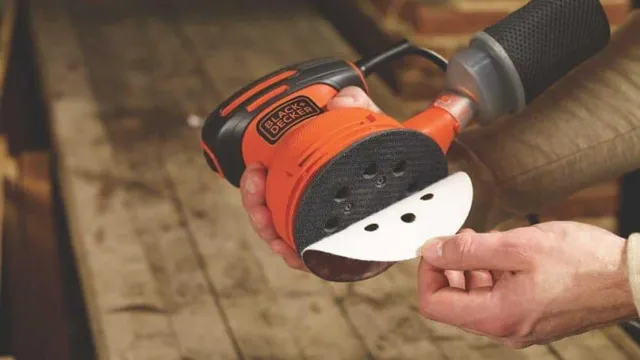
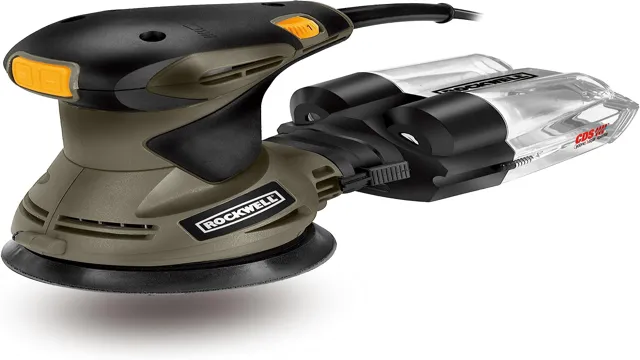
To clean your orbital sander, start by unplugging it and removing the sandpaper. Use a dry, soft cloth to wipe down the surface of the sander, including the dust collection bag and the air vents. For more stubborn debris, you may need to use compressed air or a small brush.
Make sure to clean the sandpaper discs as well, either by blowing off the sawdust or using an adhesive cleaner. When you’re finished cleaning, store the sander in a dry, cool place to prevent rust and corrosion. By taking the time to clean your orbital sander regularly, you can ensure that it operates at peak performance and lasts for years to come.
Sanding Dust Can Cause Damage
If you are an avid DIYer, you probably know how important it is to maintain your tools. Cleaning your orbital sander is a necessary but often overlooked step that can make a big difference in the longevity and performance of your tool. Sanding generates a lot of dust, which can accumulate in the sander and cause damage over time.
In particular, dust can clog the sander’s motor or bearings, making it less efficient and putting it at risk of overheating. This is why it is crucial to clean your orbital sander regularly, especially after each use. By doing so, you can ensure that the tool operates at its optimal level, and it lasts longer, saving you time and money in the long run.
Using a dirty sander also poses health risks. Inhaling sanding dust can cause respiratory problems that can lead to long-term damage. Furthermore, if the dust contains harmful substances such as lead or chemicals, they can pose a significant health risk.
Therefore, it is essential to wear a mask whenever you use a sander to protect yourself from dust inhalation. And remember to clean the sander thoroughly after use to prevent the accumulation of dust that might otherwise harm your health and the tool itself. In conclusion, cleaning your orbital sander is necessary to ensure its longevity and peak performance.
Accumulated dust can cause significant damage to your sander over time, leading to costly repairs or even the need to purchase a new one. Additionally, the health risks associated with inhaling sanding dust should be taken seriously. By taking the time to clean your sander regularly and using proper protective gear, you can enjoy your projects knowing that you are keeping yourself safe while extending the life of your tool.

Maintain Optimal Performance
Maintaining optimal performance of your orbital sander is crucial to ensure that it continues to function properly and deliver high-quality results. One of the key aspects of maintaining your sander is to keep it clean. Regularly cleaning your sander helps to prevent dust and debris from accumulating on the sanding pad and the motor, which can damage the tool and reduce its lifespan.
Moreover, a dirty sander can negatively affect the quality of the sanding job by leaving behind scratch marks or swirls on the surface being worked on. To prevent this, it’s essential to clean your orbital sander properly after each use. This involves removing the sanding pad and using a brush or compressed air to remove any debris that may have accumulated.
Additionally, make sure to wipe down the dust collection bag or canister to prevent clogging. By keeping your orbital sander clean, you can ensure that it operates efficiently and produces smooth, professional results every time you use it.
Cleaning Supplies Needed
If you want to keep your orbital sander working properly, it’s essential to clean it regularly. To get the job done, you will need some specific cleaning supplies. First, you will need an air compressor or access to a can of compressed air.
This will help blow out any debris or sawdust that may be clogging up the sander. Next, you will need some lubricating oil to keep the motor running smoothly. You may also want to invest in some sandpaper cleaner to remove any buildup on the sanding pad.
Finally, a soft-bristled brush will come in handy for gently scrubbing away debris from the hard-to-reach areas. By using these cleaning supplies regularly, you can help prolong the life of your orbital sander and ensure it remains in top working order for years to come.
Soft Bristle Brush
If you’re looking to clean your delicate items, using a soft bristle brush is an excellent option. Although cleaning your items might seem like a straightforward task, using the wrong tools can lead to damage and ruin your items. Therefore, it’s imperative to have the necessary cleaning supplies to avoid costly mistakes.
When it comes to a soft bristle brush, it’s best to look for one that has natural bristles. This type of brush will be gentle on fabrics and surfaces, making it an excellent tool for cleaning delicate items like silk or suede. Additionally, you should look for a brush that is small enough to fit into tight spaces, ensuring you can reach all nooks and crannies.
When you have the right cleaning supplies, taking care of delicate items becomes a breeze, and you’ll be able to maintain them for years to come.
Vacuum or Compressed Air
When it comes to cleaning supplies, the age-old question of whether to use a vacuum or compressed air often arises. While both are useful tools for cleaning different types of surfaces and materials, there are some key differences that differentiate the two. Vacuums are great for picking up debris from carpets, floors, and upholstery.
They work by creating suction, which sucks in dirt and dust particles, and stores them inside a filter or bag. They come in a variety of types, such as upright, canister, handheld, and stick, making them versatile for different cleaning needs. On the other hand, compressed air works by blowing air out at high pressure, which disperses dust and debris.
This makes them great for cleaning keyboards, electronics, and machinery. They come in cans or can be generated through compressors, but they are not ideal for larger surfaces or areas that require deep cleaning. Ultimately, the choice between vacuum or compressed air comes down to the specific cleaning needs and the type of dirt or debris that needs to be cleaned.
Both can be effective tools when used appropriately and can make cleaning a lot easier and efficient. So, the next time you’re faced with the choice of which to use, think about what you’re trying to clean and choose the tool that will get the job done best.
Lint-Free Cloth
When it comes to keeping your home or office space clean, having the right cleaning supplies is essential. One item that should be in everyone’s cleaning kit is a lint-free cloth. These types of cloths are specialized for cleaning glass surfaces without leaving any lint or fibers behind.
They are perfect for cleaning windows, mirrors, and other glass surfaces around the home or office. Lint-free cloths are also great for cleaning computer screens, televisions, and other electronic devices that require a gentle touch. They are made from materials that are soft, absorbent, and non-abrasive, ensuring that your surfaces stay scratch-free.
Investing in a good quality lint-free cloth is a smart choice for anyone who wants to keep their space looking shiny and spotless. So why wait? Add this important cleaning tool to your arsenal, and watch how quickly and easily you can make your glass surfaces and electronics shine like new.
Rubbing Alcohol or Cleaner
When it comes to cleaning, having the right supplies can make all the difference. One essential item to have in your cleaning arsenal is rubbing alcohol or a cleaner. Rubbing alcohol is a versatile cleaning agent that can be used to sanitize surfaces effectively.
It’s great for cleaning electronics, countertops, and other non-porous surfaces. On the other hand, cleaners are designed to get rid of dirt, stains, and grime on various surfaces. They come in different formulations, including all-purpose cleaners, bathroom cleaners, and kitchen cleaners.
When choosing a cleaner, it’s essential to consider factors like the surface to be cleaned and the type of dirt or grime you’re dealing with. Ultimately, having both rubbing alcohol and a cleaner is essential for keeping your home clean and germ-free. So, whether you’re dealing with spills, stains, or everyday dirt, make sure you have the right cleaning supplies on hand.
Step-by-Step Cleaning Process
Cleaning an orbital sander is an essential part of its maintenance, and it’s important to do it regularly to keep it functioning at its best. Here’s a step-by-step process on how to clean an orbital sander. Firstly, unplug the tool and remove the sanding pad.
Check for any damage and replace it if necessary. Use compressed air to blow off any debris in the sanding pad and its housing. Next, remove the dust collector bag and empty it into a trash can.
Using a soft-bristled brush, clean the interior of the dust collector. Wipe the exterior and body of the sander using a damp cloth. It’s also essential to check the motor area for any debris and clean it.
Finally, inspect the power cord for any sign of damage before storing it in a clean and dry area. By taking good care of your orbital sander, it will last longer and provide better results during sanding.
Unplug the Sander
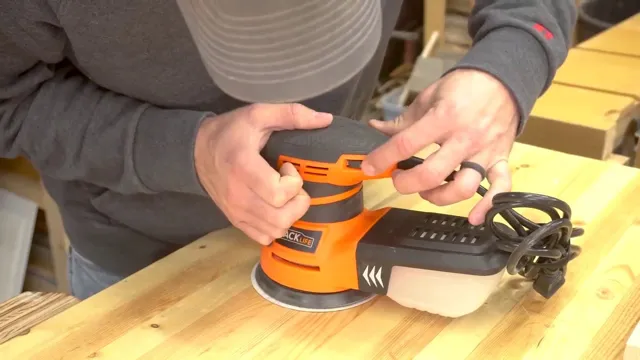
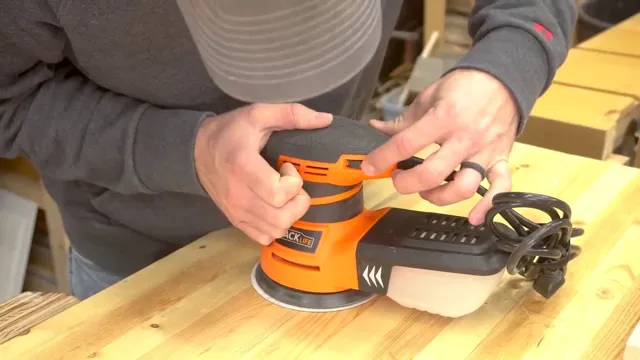
When it comes to getting the best results from your power sander, proper maintenance is key. Cleaning your sander regularly ensures that dust and debris don’t build up in the motor or clog the sandpaper, preventing it from doing its job effectively. The first step in this process is to unplug the sander completely before doing anything else.
This ensures that you don’t accidentally turn it on and hurt yourself while cleaning it. Next, remove any visible debris from the sanding pad and dust collection port. You can use compressed air or a brush to sweep away any remaining dust.
If your sander has an internal dust collection system, you may need to open it up and clear any blockages manually. This will help extend the life of your sander and ensure that it’s always ready to tackle your next project.
Detach Dust Bag or Canister
When it comes to cleaning your vacuum, it’s essential to start by detaching the dust bag or canister. This may vary depending on the make and model of your vacuum, but generally, the dust bag or canister is located at the back or bottom of the vacuum. Once you’ve located it, take hold of it, and with a gentle twist or pull, detach it from the main body of the vacuum.
Once the bag or canister is detached, take it to a bin or garbage disposal and empty its contents. If you’re using a reusable canister, wash it with warm soapy water and let it air dry before reattaching it to the vacuum. Remember, regularly cleaning your dust bag or canister can help maintain the suction power of your vacuum, ensuring it performs optimally for a more extended period.
By following this simple step-by-step process, you can keep your vacuum running smoothly and effectively, leaving your floors spotless and tidy.
Remove Any Loose Dust and Debris
Before you start deep cleaning your space, it’s important to remove any loose dust and debris that may be lingering around. This step is crucial to ensure that the dust and debris don’t spread around and make your cleaning process even harder. You can start by vacuuming the floors, furniture, or any other surfaces that may have accumulated dust and debris.
For hard-to-reach areas, you can use a soft bristle brush or microfiber cloth to gently sweep away any loose dirt. Additionally, if you’re cleaning a room with windows, you should dust and clean the window sills and frames to remove any dust or debris that may have collected over time. This easy step will help ensure that your cleaning process is efficient and thorough.
Remember, removing dust and debris is the first step towards maintaining a clean and healthy environment.
Clean the Dust Bag or Canister
One of the most important steps in maintaining your vacuum cleaner’s performance is to clean the dust bag or canister. The accumulation of dirt, dust, and debris can clog the vacuum’s suction power, leading to poor cleaning results. To ensure your vacuum cleaner is working at peak performance, follow this step-by-step cleaning process.
First, switch off the vacuum and disconnect it from the power source. Remove the dust bag or canister and empty its contents into a trash can. If the bag is not disposable, dump the contents, and wash the bag in cold water.
Next, use a soft-bristled brush attachment to remove any remaining dirt and dust from the canister or bag. Rinse the canister or bag with cold water and allow it to dry completely. Remember to replace the dust bag or canister before using the vacuum again.
By following this straightforward cleaning process, you can ensure your vacuum cleaner is working effectively and efficiently for all your cleaning needs. So, the next time you’re cleaning your house, make sure you give your vacuum cleaner the TLC it deserves!
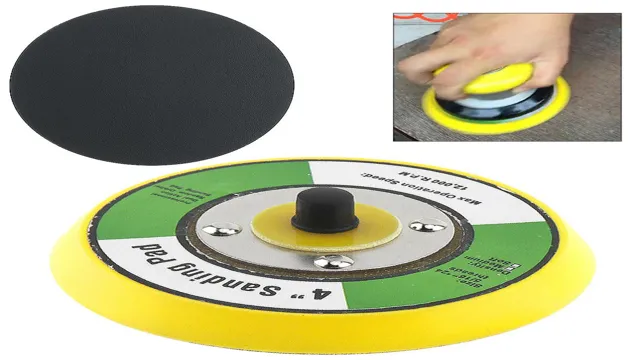
Clean the Sanding Pad
When it comes to woodworking, cleaning the sanding pad is an essential task that you shouldn’t skip. Over time, the pad’s surface can become clogged with sawdust, debris, and residue, reducing the abrasive power and ultimately leading to unsatisfactory results. Fortunately, cleaning a sanding pad is not a complicated task, and you can perform it in a few simple steps.
First, remove the pad from the sander and clean it with a soft brush or compressed air, making sure to remove any visible debris. Then, soak the pad in warm water mixed with a mild detergent for a few minutes to loosen up any stubborn residue. Finally, rinse the pad with clean water and let it dry completely before reinstalling it.
By following these steps regularly, you can ensure that your sanding pad remains in excellent condition and keeps giving you perfect results every time you use it. Keyword: Sanding Pad.
Clean the Housing and Body of the Sander
One of the essential steps in maintaining your sander and keeping it in good condition is by cleaning it regularly. Not only will it ensure that your equipment operates at optimum efficiency, but it will also extend its lifespan. Here is a simple, step-by-step guide on how to clean the housing and body of your sander.
First, unplug the sander and remove the sanding pad. Use a soft-bristled brush, such as an old toothbrush, to remove any debris and dust from the housing and vents. For stubborn grime and buildup, use a mild detergent solution and a damp cloth.
Be careful not to get water into the sensitive parts of the sander, such as the motor. Once you have thoroughly cleaned the housing and body, wipe the sander dry using a clean, dry cloth. Finally, reattach the sanding pad and plug the sander back in.
Voila! Your sander is now clean and ready to go. Remember to clean your sander after every use as a part of regular maintenance. By doing so, you’ll guarantee that it’s always up to the task when you need it most.
Wipe Down the Cord
When it comes to keeping your electronics clean and functional, one crucial step is wiping down the cords. Over time, cables and cords can accumulate dust, dirt, and grime, which can not only make them unsightly but also hinder their performance. To clean your cords, start by unplugging them and laying them flat on a clean surface.
Then, use a soft, damp cloth or microfiber towel to gently wipe the entire length of the cord, being careful not to snag or pull on the surface of the cord. If you encounter any particularly stubborn spots or stains, you can try using a bit of rubbing alcohol or vinegar to break up the grime. When you’re finished, make sure the cord is completely dry before plugging it back in.
By taking just a few minutes to wipe down your cords regularly, you can help extend the lifespan of your electronics and ensure they continue to function at their best.
Final Thoughts
In conclusion, cleaning your orbital sander is an essential step to maintain its efficiency and prolong its lifespan. By using the right tools and technique, you can get rid of sawdust, debris, and residue that may affect the performance of your machine. Remember to unplug your sander and wear protective gear before starting the cleaning process.
Use a soft brush or cloth to wipe off the dust and vacuum the dust collector and vents regularly. You can also use compressed air or a cleaning solution to remove stubborn stains, but make sure to follow the manufacturer’s recommendations. By following these tips, you can ensure that your orbital sander is always ready to perform at its best and deliver the results you need for your DIY projects or professional tasks.
So, don’t neglect the cleaning part and take good care of your tool to make the most out of it!
Regular Maintenance Leads to Longer Tool Life
In conclusion, it’s essential to recognize the significance of regular maintenance when it comes to extending the lifespan of your tools. Neglecting this crucial aspect will only lead to inevitable breakdowns or premature failures. Therefore, investing time and effort in maintenance routines, such as cleaning, lubricating, sharpening, and inspecting, can save you from costly repairs or replacements, enhance performance, and ensure safety.
Remember, just like how we take care of our bodies by eating healthy and exercising regularly, tools deserve the same care for optimal functionality and longevity. So, take pride in your tools, give them the attention they need, and watch them serve you better and longer!
Repeat Cleaning Process After Every Use
To ensure the longevity of your cleaning tools, it’s essential to repeat the cleaning process after every use. Not only will it prevent the accumulation of dirt and grime, but it will also ensure that your cleaning tools remain hygienic and effective. You don’t have to spend a lot of time cleaning them; a quick rinse and wipe-down with a cleaning solution will suffice.
Neglecting to clean your cleaning tools will cause them to deteriorate over time, leading to poor performance and even damage to the surfaces you’re trying to clean. By incorporating this simple habit into your cleaning routine, you’ll be guaranteed to prolong the life of your cleaning tools and achieve better cleaning results.
Conclusion
In summary, cleaning your orbital sander doesn’t have to be a daunting task. With a few simple steps, you can keep your tool in tip-top shape and ensure that your sanding projects are always a success. Remember to remove the dust bag regularly, wipe down the sander with a cloth, and use a soft-bristled brush to clean any stubborn debris.
By taking care of your sander, you’ll extend its lifespan and save money in the long run. So go ahead and get sanding, your clean and happy sander will thank you for it!”
FAQs
What is an orbital sander?
An orbital sander is a power tool used for sanding wood or other materials. It operates by vibrating in small circles, creating a smooth finish.
Why is it important to clean your orbital sander?
It is important to clean your orbital sander to maintain its effectiveness and prolong its lifespan. Buildup of dust and debris can clog the machine and cause it to malfunction.
What materials do I need to clean my orbital sander?
To clean your orbital sander, you will need a soft-bristled brush, a cloth, compressed air, and sandpaper for any stubborn debris.
How often should I clean my orbital sander?
It is recommended to clean your orbital sander after every use, especially if you have been working on a project for an extended period of time.
How do I clean the sandpaper on my orbital sander?
To clean the sandpaper on your orbital sander, you can use an abrasive cleaning stick or a rubber sandpaper cleaner. Simply run the cleaner over the sandpaper to remove any debris.
Can I use water to clean my orbital sander?
No, water should not be used to clean an orbital sander as it can cause damage to the machine. Instead, use a dry cloth or compressed air to remove dust and debris.
How do I store my orbital sander after cleaning?
Once you have cleaned your orbital sander, store it in a dry and clean place, away from any moisture or debris. It is best to keep it in its original case or a designated storage container.

