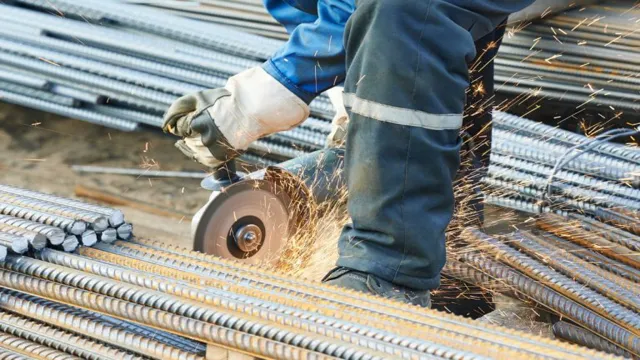
How to Cut Brick Pavers with Angle Grinder: A Complete Guide in 2021

Have you recently decided to tackle a DIY project in your backyard? Perhaps you’re looking to install a new patio, and you’ve decided to use brick pavers. While brick pavers look great and can give your yard a classic, timeless look, cutting them can be a bit of a challenge. One tool that many DIYers turn to is an angle grinder.
This powerful, handheld tool can make quick work of cutting through brick pavers, but you need to know what you’re doing to ensure you get the results you want. In this blog post, we’ll cover everything you need to know about cutting brick pavers with an angle grinder, including safety tips, step-by-step instructions, and more. So, grab your safety glasses and let’s get to work!
Introduction
Cutting brick pavers can be a tricky task, but with the right tools and techniques, it can be done with ease. An angle grinder is a useful tool for cutting brick pavers quickly and efficiently. However, it’s essential to follow some safety precautions before starting the task.
Firstly, it’s important to wear a pair of safety glasses and earplugs as the angle grinder is a loud and noisy tool. Secondly, make sure to wear gloves to protect your hands from any kind of injury. Once you are ready, mark the brick to be cut with a pencil or chalk, and then secure the brick onto a stable surface.
Use the angle grinder to make the cut slowly and gradually to avoid any damage to the brick. Remember to take breaks in between as the angle grinder can get hot and uncomfortable to handle. Using an angle grinder to cut brick pavers is a useful technique that can save you a lot of time and effort.
Why cut brick pavers?
Cutting brick pavers can seem daunting, but it is a necessary process for achieving the desired shape and size for your landscaping or paving project. There are a variety of reasons why you may need to cut brick pavers, including creating curves, corners, or intricate designs. Additionally, cutting pavers allows for a more precise fit and reduces the amount of waste during installation.
By investing in proper tools and techniques, cutting brick pavers can be a simple and rewarding experience for any DIY homeowner or landscaping professional. So why not take your project to the next level and achieve the perfect fit with cut brick pavers?

What You Will Need
If you’re looking to learn how to cut brick pavers with an angle grinder, you’ll need a few essential tools. Firstly, you’ll need a sturdy angle grinder with a diamond blade, as this will provide the precision and power needed to cut through brick pavers easily. It’s also important to have safety gear, such as goggles, gloves, and a dust mask, as cutting brick pavers can produce a lot of dust and debris.
Additionally, you’ll need a measuring tape, a straight edge, and a marker to ensure accurate cuts. Finally, a workbench or stable surface to secure the pavers during cutting will make the process much smoother. With these tools in hand, you’ll be able to easily cut brick pavers to your desired shape and size without any hassle.
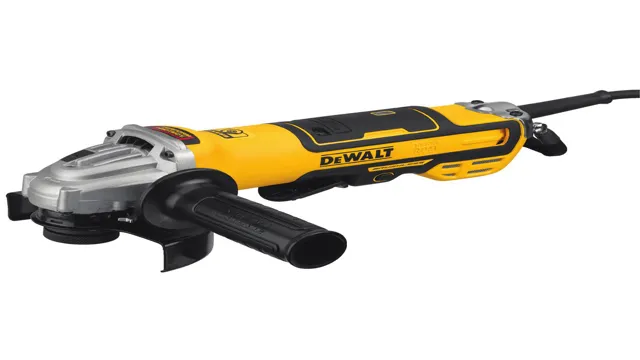
Angle grinder
If you’re planning to use an angle grinder, there are a few tools and equipment you’ll need before getting started. First, you’ll need the angle grinder itself, as well as a power source for it. You’ll also need the appropriate grinding disc for the task at hand.
There are different types of discs available, including those for metal, concrete or stone, and wood. It’s crucial to choose the right one to avoid any damage or accidents while grinding. Along with the grinder and disc, you’ll need safety gear such as protective eyewear, gloves, and a face mask to prevent dust and debris from entering your lungs.
It’s also a good idea to have a sturdy workbench or table to secure your workpiece and a clamp to hold it in place during grinding. With the right equipment and precautions, you’ll be able to use your angle grinder safely and efficiently, achieving the desired results.
Safety equipment
If you are going to be engaging in any activities that entail even the slightest risk of injury, you need to invest in safety equipment. The type of equipment will depend on the activity you are doing, but there are a few things that are good to have regardless. Firstly, you should always have a helmet.
Whether you are cycling, skateboarding, climbing, or doing anything else where you can fall and hit your head, a helmet is essential. Secondly, you need to consider eye protection. Safety goggles or glasses are crucial for activities that involve flying debris or hazardous substances.
Earplugs are also important to have if you will be exposed to loud noises for an extended period. Lastly, you might want to invest in some protective gloves, knee pads, or elbow pads depending on the activity. Remember, your safety should always come first!
Brick pavers
If you are planning to install brick pavers for your patio or walkway, there are a few things you will need to get started. Firstly, you will need to decide on the type of paver you want to install. There are various types of brick pavers, including clay and concrete pavers, each with its unique features.
You will also need to ensure that you have the right tools and equipment. Tools you may need include a measuring tape, a level, a masonry saw, and a rubber mallet, among others. Additionally, you will need to prepare the area where the brick pavers will be installed.
This includes removing any existing pavers or debris, leveling the ground, and adding a layer of base material before laying the pavers. By having all the necessary materials and equipment, you can ensure your brick paver installation project goes smoothly and efficiently.
Measuring tape
When it comes to accurately measuring objects, a measuring tape is a must-have tool. But before you begin your project, there are a few things you’ll need to ensure you’re prepared. Firstly, you’ll obviously need a measuring tape; ideally, one with easy-to-read markings and a locking mechanism to hold the tape in place.
Next, consider the distance you’ll be measuring. For longer distances, you may require a longer tape, while shorter measurements may only require a smaller, pocket-sized tape. Additionally, it’s important to have a level surface to measure on, as any slight variations can result in inaccurate measurements.
Finally, keep in mind the precision required – if you need to measure down to the millimeter, you’ll need a tape with smaller markings and a more precise locking mechanism, while larger projects may allow for slightly more leniency. With the right tools in hand, measuring with a tape becomes a breeze, and you’ll be able to complete your projects with precision and accuracy every time.
Marker
When it comes to using a marker, there are a few things you will need to ensure your project is a success. Firstly, you will need to choose the correct type of marker for your project. There are various types available, such as permanent markers, water-based markers, oil-based markers, and chalk markers.
Each type has its own unique properties, so it’s important to choose the right one for the job. Secondly, you will need to select a marker in the appropriate color that matches the project you are working on. It’s also a good idea to have a few different colors on hand for added creativity.
Finally, you will need a suitable surface to use the marker on. This could be paper, cardboard, fabric, glass, or plastic, depending on the type of marker you are using. By having these three essential items, you can be confident in taking on any drawing or writing project with your markers.
Straight edge
When it comes to living a straight edge lifestyle, there are a few things you will need to consider. First and foremost, it’s important to have a clear understanding of what it means to be straight edge. This typically involves abstaining from drugs, alcohol, and other substance abuse, as well as engaging in other healthy habits such as exercise and mindfulness meditation.
You may also want to consider finding a supportive community of like-minded individuals who share your values and can help you stay on track. Additionally, it’s important to have a plan in place for how you will handle situations where temptation may arise, such as social gatherings or stressful situations. By prioritizing self-care and making intentional choices about your lifestyle, you can successfully embrace the straight edge lifestyle and achieve greater health and happiness in the long run.
Chalk line
To start any construction job, having a chalk line is essential. This tool is used to create straight lines over long distances, ensuring accuracy and precision. To create a chalk line, you will need a few items.
Firstly, you will need chalk. Chalk comes in various colors, but blue is the most common for creating straight lines. Next, you will need a chalk line reel.
This is a small rectangular box that contains a string or cord, and a hook at the end. Lastly, you will need a flat surface to create the line on. Creating a chalk line is a straightforward process.
Firstly, fill the chalk line reel with chalk and then attach the hook to the surface where you want to create the straight line. Hold the reel in one hand and the hook in the other, and then stretch the cord out to the desired length. Once the cord is taut, snap it down onto the surface.
This will create a white or blue line, depending on the color of chalk used. The line will be thin, but can easily be seen from a distance. In conclusion, if you’re planning on doing any construction or DIY jobs, having a chalk line is a no-brainer.
It’s an inexpensive tool that can save you time and headaches in the long run. To create your chalk line, all you need is chalk, a chalk line reel, and a flat surface. With these items, you’ll be able to create straight lines over any distance with ease.
Preparation
If you’re looking to do some landscaping work or create a DIY pathway, cutting brick pavers with an angle grinder is a great way to get the job done. Before starting, it’s important to prepare the area and gather the necessary tools. Clear the space where you’ll be working, making sure there are no tripping hazards or obstacles.
You’ll need an angle grinder with a diamond blade, safety goggles, ear protection, and a dust mask to protect your eyes, ears, and lungs. Once you’ve gathered everything, double-check your surroundings to ensure you have enough space to move around safely. With these preparations out of the way, you’re ready to start cutting your brick pavers with an angle grinder.
Marking the pavers
Marking the pavers is a crucial step in preparing for the installation of your outdoor paver project. To accurately mark the pavers, you’ll need a measuring tape, stakes, string, and spray paint. The first step is to measure out the length and width of the paver area and then mark the corners of the project with stakes.
After that, use string to connect the stakes and create a clear border for the paver project. Once you have the border set up, use spray paint to mark the inside area of where the pavers will be installed. This will ensure that the paver project is symmetric and visually appealing.
It’s important to take your time during this step to ensure accuracy since this will affect the final result of your project.
Setting up the work space
Preparing your work space before starting any work is crucial for ensuring efficiency and success. This includes choosing a comfortable and well-lit area that is free of distractions such as noise or clutter. It is also important to have all the necessary tools and supplies readily available and organized before beginning, so that you do not waste time searching for things mid-task.
By taking the time to properly prepare your work space, you can increase your productivity and focus, ultimately leading to better quality work. So, do not overlook this critical step in your work process, and make sure to set yourself up for success right from the start.
Cutting the Pavers
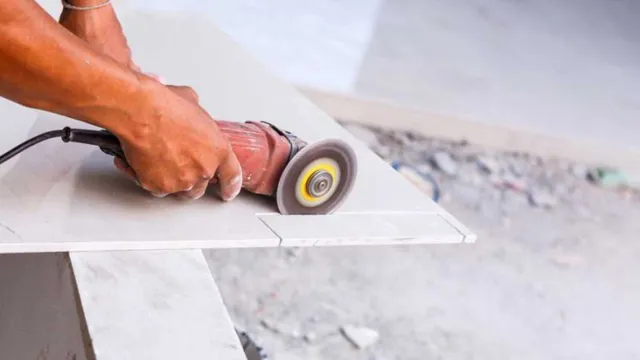
Cutting brick pavers with an angle grinder might seem like a daunting task, but with the right technique and equipment, it can be done with ease. Firstly, it’s important to make sure you have all the necessary safety gear, including gloves, eye protection, and a mask. Then, make sure your angle grinder has a diamond blade installed, as this is the best type of blade for cutting through hard materials like brick.
Next, measure out and mark the pavers where you need to make a cut, ensuring that your lines are straight and accurate. Then, start up your grinder and slowly begin to cut, using a steady hand and making sure not to put too much pressure on the blade. It’s also a good idea to make several shallow passes rather than one deep cut, as this will help to prevent the blade from overheating and wearing out too quickly.
With a bit of practice, you’ll be able to cut your brick pavers to the perfect size and shape in no time!
Putting on safety equipment
As with any construction job, when cutting pavers, it’s important to make sure you have all your safety equipment on before you start. This means wearing the right type of gloves and safety glasses, as well as a dust mask to prevent breathing in any harmful dust particles that may be produced during the cutting process. It’s important to choose the right cutting tool for the type of paver you are working with, as using the wrong tool can be dangerous and may damage the pavers.
For larger jobs, it may be best to use a wet saw, which uses a water-cooled blade to cut through the pavers without producing excessive dust. Alternatively, a hand-held saw or angle grinder may be sufficient for smaller jobs. Always make sure to wear ear protection, as the noise produced by cutting through concrete can be damaging to hearing over time.
Once you have your safety gear on and your tool of choice ready to go, it’s time to start cutting your pavers into the desired shape and size.
Securing the paver
Cutting the pavers can be a tricky task, but it is essential to secure them in place for long-lasting stability. To begin, ensure you have the proper tools, including a diamond blade saw or a chisel. With the saw, you can make clean and precise cuts, while the chisel allows you to break off the edges for a more natural look.
Before cutting, measure the pavers and mark where you want to make your cuts. Remember to wear protective gear, including gloves, goggles, and earplugs, as the process can be noisy and dusty. With steady hands and patience, you can cut the pavers to fit any uneven edges or angles and create a secure and seamless surface.
By cutting the pavers, you’ll have greater flexibility in your design, enabling you to create unique patterns and shapes. Now that you have your cut pavers, you can place them in position, level them, and secure them in place with sand or concrete to prevent any movement or shifting. With these tips, you can confidently cut and secure your pavers, creating a beautiful and durable landscape.
Starting the cut
Starting the cutting process for your pavers can seem intimidating, but with the right tools and techniques, it can be a breeze. One essential tool is a masonry chisel, which can be used to score the paver along the cutting line. Another option is a wet saw, a tabletop device that uses water to keep the blade cool and prevent dust from flying up.
Whichever tool you choose, make sure to mark your cutting line with a pencil or chalk and wear eye and ear protection. For thicker pavers, you may need to make multiple passes or flip the paver over and cut from both sides to ensure a clean cut. With these tips, you’ll be on your way to perfectly cut pavers for your next outdoor project.
Cutting through the paver
Cutting through the pavers can be a challenging task, but it’s essential to get it done right. Whether you’re creating a new walkway or patio, or repairing an existing one, you’ll need to cut some pavers to fit your design. The good news is that cutting pavers is not as hard as you might think, especially if you have the right tools.
The first step is to mark the paver where you want to cut it. You can use a pencil or chalk to make the line. Next, use a masonry saw or a diamond blade to cut the paver.
Make sure to wear safety goggles and gloves when you’re cutting pavers, as the dust and debris can be harmful to your eyes and skin. With a little patience and practice, you’ll soon be cutting pavers like a pro.
Finishing the cut
When it comes to cutting pavers, finishing the cut can be a bit tricky. You want to make sure the cut is clean and straight, without any rough edges or jagged edges that could lead to tripping hazards. One way to ensure a clean cut is by using a wet saw, which uses water to cool the blade and prevent the paver from cracking.
Another option is to use a diamond blade on a circular saw, which will provide a smooth cut without damaging the paver. No matter which method you choose, make sure to wear safety gear like goggles and gloves, and take your time to ensure a precise cut. With a bit of patience and practice, you’ll be able to finish your paver cuts like a pro.
Clean-Up
If you’re looking to cut brick pavers with an angle grinder, there are a few important steps you’ll need to follow. First and foremost, make sure you have the right safety equipment on hand, including gloves, eye and ear protection, and a dust mask. Next, set up your work area in a well-ventilated space, and use clamps to secure the paver in place while you work.
When cutting, be sure to use a diamond blade, which will be much more effective than a standard cutting blade. Bear in mind that this can be a messy task, so be prepared to do some clean-up afterwards. A wet/dry vac can be helpful for cleaning up dust and debris, and a broom and dustpan can be used to sweep up any remaining particles.
With a little patience and attention to detail, you’ll be able to achieve the perfect cut for your brick pavers.
Removing debris
Removing debris after a storm or natural disaster is essential. Debris can block roads, damage buildings, and even injure individuals. It is important to take the necessary steps to remove debris so that the area can be safe for everyone.
This can be a daunting task since there can be many different types of debris, including fallen trees, broken glass, and even hazardous waste. It is important to wear appropriate safety gear, such as gloves and sturdy shoes, when removing debris to protect yourself. You can start by separating the debris into different piles, such as recyclables, hazardous waste, and non-recyclables.
Once the debris is sorted, it can be hauled away and disposed of properly. By taking the time to remove debris, you are helping to restore the affected area and make it safe for the community.
Conclusion
So, there you have it – the art of cutting brick pavers with an angle grinder. Remember to grab your safety gear, measure twice, and cut once. With a steady hand and some patience, you’ll master this skill in no time.
Plus, with the money you save doing it yourself, you’ll have plenty left over for a well-deserved cold beverage. Cheers to DIY home improvement projects!”
Safety reminders and final thoughts
Clean-Up After finishing your DIY project, it’s essential to clean up the area. This ensures not only the safety of those around you but also prolongs the life of your tools and equipment. Begin by picking up any debris or waste materials left on the floor or workbench, and dispose of them properly.
Next, wipe down your tools to remove any dust or debris that may have accumulated during the project. This keeps them free from rust and makes them look like new. As you clean, remember to store your tools in their proper place to ensure easy access and prevent accidents.
Cleaning up after a project may seem like an unnecessary task, but it’s crucial to protect yourself and your tools, ensuring that they last for future use. Don’t skip this important step, considering it part of the job.
FAQs
What safety precautions should I take when using an angle grinder to cut brick pavers?
It’s important to wear safety gear such as gloves, eye protection, and a dust mask. Also, make sure the paver is secure and avoid cutting near water or flammable materials.
Can I use a regular grinding disc to cut brick pavers?
No, you should use a diamond-tipped blade specifically designed for cutting hard materials like brick.
How do I choose the right size angle grinder for cutting brick pavers?
A 4 1/2 inch or 5-inch angle grinder is usually sufficient for cutting brick pavers. However, larger pavers may require a larger grinder.
How can I ensure a straight cut when using an angle grinder to cut brick pavers?
You can use a straightedge or a chalk line to mark a straight line on the paver before cutting.
How do I maintain the blade on my angle grinder when cutting brick pavers?
Keep the blade clean and free of debris by using a wire brush. Also, make sure to regularly inspect the blade for signs of wear and replace as needed.
Can I use an angle grinder to cut curved shapes in brick pavers?
Yes, by using a smaller blade and taking your time, you can cut curved shapes into brick pavers.
How can I prevent my angle grinder from kicking back while cutting brick pavers?
Use even pressure and don’t force the blade. Also, make sure to keep the grinder steady and avoid sudden movements.


