How to Cut Ceramic Tile with an Angle Grinder: A DIY Guide for Precision Cuts

Have you ever needed to cut ceramic tile for flooring or backsplash projects but don’t want to spend the money on a tile cutter? Look no further than your trusty angle grinder. While it may seem counterintuitive to use an angle grinder on delicate ceramic, with the right blade and techniques, it can be a game-changer for DIY enthusiasts. In this blog post, we will discuss the steps to properly cutting ceramic tile with an angle grinder, as well as some tips and precautions to ensure a successful and safe project.
So grab your gloves and safety glasses, and let’s get started on this cutting-edge task!
Safety Precautions
Cutting ceramic tile with an angle grinder can be a tricky task, but with proper safety precautions, it can be done easily and efficiently. Firstly, it’s important to wear protective gear such as gloves, safety glasses, and a dust mask to prevent injury. Secondly, make sure to position the tile and angle grinder in a stable and secure manner to avoid accidents.
Thirdly, keep the angle grinder at a low speed to prevent overheating and shattering of the tile. Fourthly, use the correct blade for the type of tile being cut, as a blade designed for a different material can cause damage. Lastly, practice patience and take breaks when needed to ensure a steady hand and avoid fatigue.
By following these safety precautions, you can confidently and safely cut ceramic tiles with an angle grinder.
Eye and ear protection
When it comes to working in hazardous environments, safety precautions should always come first. Two essential pieces of protective equipment are eye and ear protection. The importance of these safety tools cannot be emphasized enough, especially for people who work in construction areas, factories, or laboratories.
Eye protection is necessary to prevent eye injury from dust, flying debris, or chemicals. In addition, ear protection is essential to prevent hearing damage that can result from loud noises, which can cause long-term hearing loss over time. Therefore, choosing the right protective eyewear and hearing protection devices is crucial for ensuring a safe work environment.
So, always rely on high-quality protective gear that meets the necessary safety standards to keep you safe from harm while you work.
Gloves and long-sleeved clothing
When it comes to working with potentially dangerous materials or substances, it’s always better to err on the side of caution. One of the simplest yet most effective ways to protect yourself is by wearing gloves and long-sleeved clothing. Gloves provide a barrier between your skin and whatever substance you’re handling, reducing the risk of absorption or direct contact.
Long-sleeved clothing, on the other hand, can help prevent splashes or spills from reaching your skin and causing harm. But it’s important to keep in mind that not all gloves and clothing are created equal – some may not be resistant enough to certain substances, or may not fit properly. Always choose gloves and clothing that are specifically designed for the task at hand, and make sure they cover as much of your skin as possible.
By taking these simple precautions, you can help protect yourself from potentially serious harm.
Secure the tile before cutting
When it comes to cutting tiles, safety should always be the top priority. One important aspect of tile cutting that is often overlooked is securing the tile before the cutting process. This step may seem tedious, but it can prevent accidents and ensure the tile is cut accurately.
Before cutting your tile, make sure it is securely fastened to a stable surface. You can use a clamp or a suction cup to hold the tile in place. By securing the tile properly, you will have better control of the cutting process and eliminate the risk of it slipping or moving during the cutting.
This will not only ensure your safety but also save you from breaking or damaging the tile. Remember, taking adequate safety precautions before tile cutting is crucial to prevent any injuries or mishaps. So, always secure your tile before cutting to do the job with confidence and peace of mind.
Choosing the Right Blade
When it comes to cutting ceramic tiles with an angle grinder, choosing the right blade is crucial. The blade you use will depend on the type of tile you’re cutting, as well as the specific task you’re performing. For example, if you’re cutting a large section of ceramic tile, you’ll want to use a diamond blade that’s specifically designed for cutting through hard materials like stone and ceramic.
On the other hand, if you’re just cutting a small notch out of a tile, you might be able to use a standard abrasive cutting disc. It’s important to read the label on the blade before you use it, to make sure it’s suitable for the task at hand. By choosing the right blade, you can ensure that you get the cleanest, most efficient cut possible with your angle grinder.
So, if you’re planning on cutting ceramic tile with an angle grinder, be sure to choose the right blade for the job.
Diamond blades
When it comes to cutting through a variety of materials, diamond blades are the way to go. However, choosing the right blade can be a daunting task, especially for those who are just starting out. One of the most important factors to consider is the material that you will be cutting.
Diamond blades come in a variety of types, each designed for specific materials such as asphalt, concrete, or granite. It’s important to choose a blade that is compatible with the material you will be cutting in order to achieve the best results. Additionally, considering the size of the job, frequency of use, and the type of cutting you will be doing will play a big role in your decision.
If you are unsure of which blade to choose, consulting with a professional can be beneficial. By taking the time to do your research and selecting the appropriate blade, you can ensure a successful and efficient cutting process.
Continuous rim blade
When it comes to choosing the right blade for your cutting needs, there are several factors that you need to consider. One of the most important things to keep in mind is the type of blade that you need. One popular option is the continuous rim blade, which is known for its ability to make precise cuts without chipping or breaking the material being cut.
This type of blade is particularly useful for cutting through thicker materials like ceramics, stone and concrete. With a continuous rim blade, you can be sure that you’ll get a smooth, clean cut every time. So, if you’re looking for a reliable and high-quality blade for your next project, consider investing in a continuous rim blade.
It will make your cutting tasks a breeze and ensure that you get the results you’re looking for.
Turbo rim blade
When it comes to choosing the right blade for your cutting needs, there are many factors to consider. One popular option is the turbo rim blade, which is designed to provide fast and efficient cutting for various materials such as concrete, brick, and stone. The turbo rim blade features a continuous rim with serrated edges that allow for smoother cutting and reduced chipping.
It also has a high-quality diamond grit that ensures durability and longevity. However, it’s essential to choose the right blade size and horsepower based on the material and tool you’re using. Using the wrong size or horsepower can result in inefficient cutting or even damage to the blade or tool.
Additionally, it’s crucial to follow recommended operating speeds and techniques to ensure safe and efficient use of the turbo rim blade. With the right selection and usage, a turbo rim blade can provide clean and precise cuts with minimal effort. So, choose wisely and happy cutting!
Preparing the Tile for Cutting
Cutting ceramic tile with an angle grinder requires some preparation before actually starting the cutting process. First, you will need to measure the tile and mark it with a pencil or a tile marker where you want to make the cut. Next, secure the tile onto a flat surface with a clamp or a vise grip to prevent it from moving during the angle grinder operation.
Make sure to wear protective gear such as gloves, goggles, and a dust mask to shield yourself from debris and dust generated during the cutting process. Before starting, it is also advised to check the blade on your angle grinder and ensure it is compatible with ceramic tiles. Once everything is set up, you can turn on the angle grinder and start cutting through the tile.
Start by holding the grinder at a slight angle to the tile and make small, light cuts. Gradually increase the pressure as needed to achieve the desired cut. With these preparations and precautions, cutting ceramic tile with an angle grinder can be done with ease and efficiency.
Measure and mark the tile
Preparing the tile for cutting is an essential step in any tiling project. To begin, measure and mark the tile where it needs to be cut. It’s important to use a straightedge to ensure accurate measurements and to ensure that the line you draw is precise.
Use a pencil or tile marker pen to mark the cutting line on the tile. When marking the tile, it’s a good idea to mark both sides of the tile so that you can double-check your measurements before cutting. Double-checking may save you from making costly mistakes.
Once you have marked the tile, it’s time to move on to the next step of the tiling process. By measuring and marking the tile precisely, you can guarantee a perfect fit for your tile, and it ensures the overall appearance of your tile layout is just the way you want it.
Create a template
Creating a template is an essential step before cutting tiles. Templates provide a guide for the precise shape and size needed for the tiles. To create a template, first, measure the surface area where you plan to install the tiles.
Then, using a craft paper or cardboard, trace the perimeter of the area onto the material. Cut out the traced shape using scissors or a craft knife. Take the template and lay it onto the tiles, marking the shape onto each one.
Carefully cut each tile along the marked lines to ensure a perfect fit when they are installed onto the surface area. The key to a successful tile installation is precision, and a template can help achieve this. By taking the extra time to create a template, you can save yourself headaches and frustration in the long run.
Cutting the Tile with an Angle Grinder
Cutting ceramic tiles with an angle grinder may seem like a daunting task for new DIY enthusiasts, but with a little bit of know-how and the right tool, it can be accomplished with ease. An angle grinder is a versatile power tool equipped with a spinning abrasive disc that can cut through tiles quickly and efficiently. To get started, prepare the tiles by marking the cut line and securing them in place.
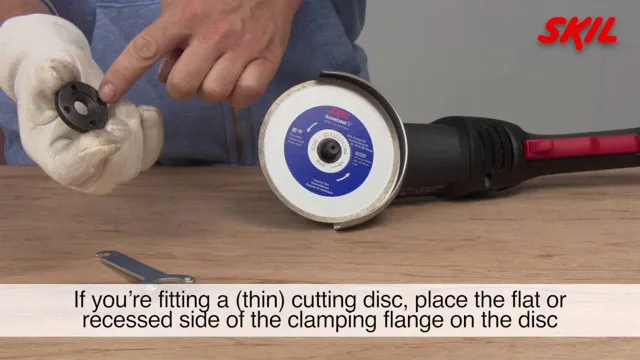
Next, adjust the angle grinder’s guard and disc to the appropriate settings. The recommended disc to use for cutting ceramic tiles is a diamond-tipped disc. Start by making small cuts along the marked line and gradually increasing the depth until the tile is completely cut through.
Remember to use safety equipment, such as goggles and gloves, to protect yourself from debris and sharp edges. With a little practice and patience, cutting tiles with an angle grinder can be a breeze, giving you the perfect results that you desire for your next DIY project.
Position the tile and grinder
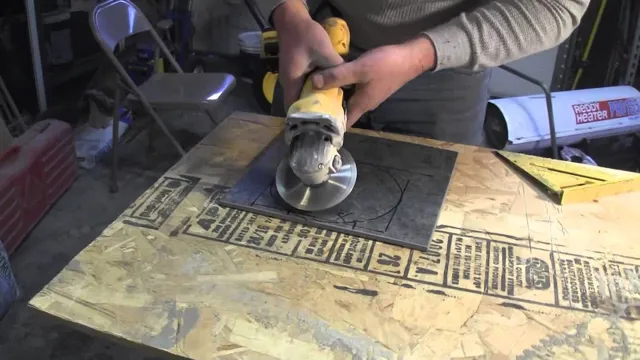
Cutting tiles with an angle grinder can be intimidating at first, but it’s actually quite easy once you get the hang of it. After measuring and marking out where you want to make the cut, position the tile on a stable surface that’s easy to clean up, like a piece of scrap wood. Make sure it’s stable and won’t move around as you work.
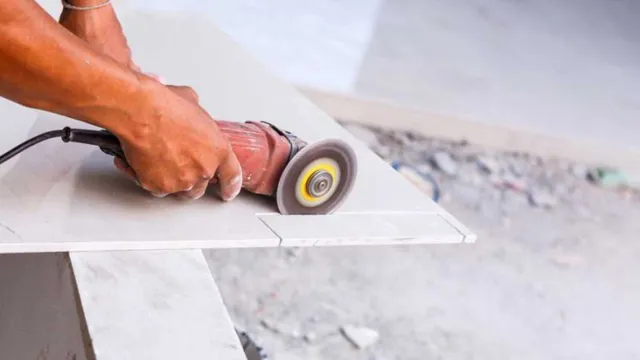
Next, you’ll want to position the angle grinder with a diamond cutting wheel in place. It’s important to wear proper safety gear when doing this, such as eye and ear protection as well as gloves to prevent cuts. Once positioned, turn the grinder on and slowly lower it down onto the tile’s surface.
Aim to keep the grinder perpendicular to the tile to ensure a straight cut. Take your time and move the grinder in a straight line along the mark you’ve made on the tile. Keep the speed of the grinder consistent for best results.
When you approach the end of the cut, carefully ease off the grinder to prevent damage to the remainder of the tile. Overall, positioning the tile and grinder for cutting is fairly straightforward. By taking the time to mark your tile properly and wearing the appropriate safety gear, you’ll be ready to make your cuts with ease.
Remember to use a consistent speed and keep the grinder perpendicular to the tile – and before you know it, you’ll have beautiful, precisely cut tiles to work with.
Turn on the angle grinder and start cutting
Cutting tile with an angle grinder may seem intimidating, but with the right tools and technique, it can be a fairly simple process. Before you begin, make sure you have the appropriate safety gear, including eye and ear protection and a dust mask. Next, attach a diamond blade to your angle grinder and adjust it to the appropriate depth for your tiles.
Hold the grinder firmly and begin cutting along your marked line, using slow and steady movements. Be sure to keep the blade perpendicular to the tile and avoid applying too much pressure, as this can damage the blade or your tile. Use a constant stream of water to keep the blade cool and reduce dust.
Once you have finished cutting, use a tile file or sandpaper to smooth out any rough edges. With a little practice, cutting tile with an angle grinder can become a simple and efficient way to tackle any tile cutting job.
Follow the marked lines
Cutting tiles with an angle grinder can sound intimidating for a beginner, but with the right technique and equipment, you can achieve a clean and precise cut every time. First, firmly attach a diamond cutting blade onto your angle grinder and make sure you have eye and ear protection. Then, follow the marked lines on the tile using the angle grinder at a 45-degree angle.
It’s important to keep a steady hand and let the blade do the work. Don’t force it or apply too much pressure, as this can cause the tile to crack or break. Once the cut is complete, use sandpaper to smooth out any rough edges.
With practice and patience, cutting tiles with an angle grinder can become a breeze.
Final Touches
When it comes to cutting ceramic tiles with an angle grinder, there are a few final touches that can make all the difference between a perfect cut and a jagged mess. First and foremost, it’s important to choose the right blade for the job. Look for a continuous rim diamond blade, which will provide the cleanest and most accurate cuts.
Before you begin cutting, make sure you have all the necessary safety gear, including eye and ear protection, as well as a dust mask to avoid breathing in any airborne ceramic dust. To ensure a smooth and precise cut, take your time and make small, controlled movements, gradually working your way through the tile. Finally, once you’ve made the cut, use a tile file to refine any rough edges and ensure a clean finish.
With these tips and a little bit of practice, you’ll be cutting ceramic tiles with an angle grinder like a pro in no time!
Smooth rough edges with the angle grinder
When it comes to DIY projects or home renovations, it’s important to pay attention to the small details. One of the final touches that can make a big difference in a project is ensuring that any rough edges are smoothed out. This is where the angle grinder comes in handy.
With its rotating abrasive disc, an angle grinder can quickly and easily smooth out edges on various materials such as metal, stone, and concrete. By gently guiding the angle grinder along the edges, you can create a clean and professional finish. So, whether you’re working on a new countertop or polishing up an old metal railing, don’t forget to add in some final touches to smooth out those rough edges.
Clean up debris and dust
Now that you’ve successfully renovated your home, it’s time for the final touches. One of the most crucial steps is cleaning up all the debris and dust that’s accumulated during the renovation process. You don’t want to start your newly renovated space with dirt and debris scattered all over the floors and surfaces.
The good news is that cleaning up doesn’t have to be an overwhelming task. Start by sweeping or vacuuming all the surfaces to get rid of any debris or dust. Then, use a damp cloth or mop to wipe down walls, windows, and floors.
Don’t forget to pay attention to areas like ceiling corners and baseboards, where dust can accumulate unnoticed. Remember, a clean home isn’t just pleasing to the eye, it’s also essential for maintaining good hygiene and health. So, take your time and do a thorough job, and once you’re done, sit back and enjoy your beautiful new space.
Conclusion
In a world where precision and style are paramount, cutting ceramic tiles with an angle grinder can be your secret weapon. With a steady hand and a well-adjusted grinder, you can slice through tiles like a hot knife through butter. Just remember to always be safe, wear protective gear, and take your time.
Whether it’s for your next mosaic masterpiece or a stunning bathroom remodel, cutting ceramic tiles with an angle grinder is the perfect DIY solution for anyone looking to add a touch of flair and finesse to their tiling game. So go ahead and give it a try – you might just surprise yourself with how easy and fun it can be!”
FAQs
What safety measures should I take while cutting ceramic tiles with an angle grinder?
You should wear safety goggles, gloves, and a face mask to protect yourself from flying debris. Additionally, you should keep your hands away from the blade, and make sure the tile is securely held in place before cutting.
Can I use any blade with my angle grinder to cut ceramic tiles?
No, you must use a diamond-tipped blade that is specifically designed for cutting ceramic tiles. A regular metal blade will not be effective and will likely cause damage to the tile.
How do I ensure that the ceramic tile stays in place while I am cutting it with the angle grinder?
You can use a clamp or a piece of wood to hold the tile in place while cutting. This will prevent the tile from moving or sliding while you are cutting, which can lead to uneven edges and damage to the tile.
Are there any tips for making straight cuts when using an angle grinder to cut ceramic tiles?
Yes, you can use a straight edge or a ruler as a guide for the angle grinder. This will help you to make straight cuts and ensure that the edges of the tile are even.
What is the best angle for cutting ceramic tiles with an angle grinder?
The best angle for cutting ceramic tiles with an angle grinder is between 30 and 45 degrees. This will help you to achieve a smooth and even cut without damaging the tile.
How do I clean the area after cutting ceramic tiles with an angle grinder?
You should use a damp cloth or mop to clean up the dust and debris after cutting ceramic tiles with an angle grinder. It is important to clean the area thoroughly to ensure that no debris is left behind, which could be dangerous or cause damage to other surfaces.
Can I use an angle grinder to cut curved shapes in ceramic tiles?
Yes, you can use an angle grinder to cut curved shapes in ceramic tiles, but it requires some skill and practice. Use a smaller diamond-tipped blade and move the grinder slowly and carefully along the curve to achieve the desired shape.


