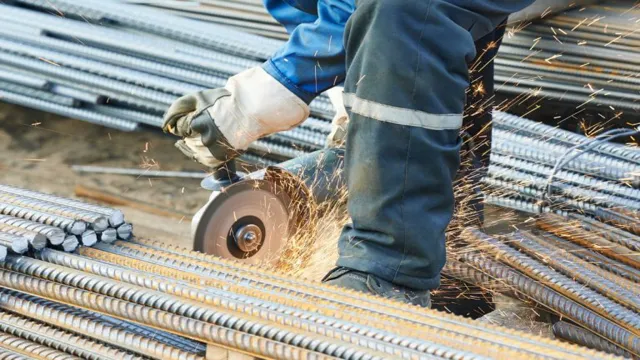
How to Cut Metal with an Angle Grinder: A Step-by-Step Guide for Beginners

When it comes to cutting metal, there are many tools that can get the job done. However, one of the most versatile and efficient tools for this task is the angle grinder. With its spinning disc and powerful motor, an angle grinder can slice through a variety of metals with ease.
But before you start cutting away, there are a few things you need to know to get the best results. So, grab your safety gear and let’s dive into the world of cutting metal with an angle grinder!
Safety Precautions to Take Before Cutting Metal
Cutting metal with an angle grinder can be a handy skill to have, but it’s important to take safety precautions before diving in. First, make sure you have the proper Personal Protective Equipment (PPE). This should include eye protection such as safety glasses or a face shield, as well as gloves and sturdy work boots.
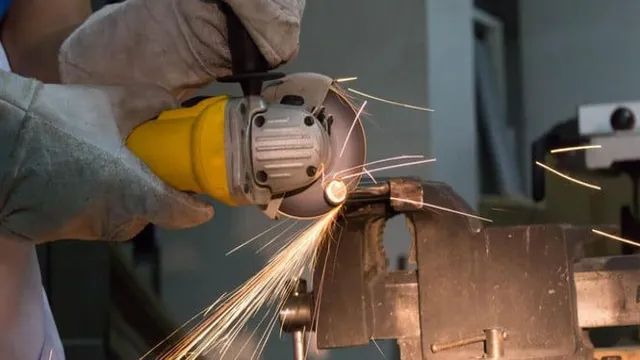
Next, ensure the metal to be cut is secured on a stable surface and use clamps or a vice to hold it in place. Double-check the work area is clear of any flammable materials or debris that could cause sparks. When turning on the angle grinder, hold it with both hands and maintain a firm grip on the tool throughout the cut.
Be sure to maintain a safe distance from any bystanders. With these precautions in place, you should be able to safely cut metal with an angle grinder.
Wear Protective Gear
When it comes to cutting metal, safety should always be a top priority. One of the most important safety precautions you can take is to wear protective gear. This gear should include safety glasses or goggles to protect your eyes from flying debris, as well as a face shield for additional protection if necessary.
You should also wear gloves to protect your hands and sturdy, close-toed shoes to protect your feet from sharp metal edges. A good quality respirator is another important piece of protective gear to consider, especially if you’ll be cutting or grinding for extended periods of time. By taking the time to properly gear up and protect yourself, you’ll reduce the likelihood of injury and be able to focus more fully on getting the job done right.
So don’t skimp on safety gear – it could make all the difference.
Check for Flammable Materials Nearby
Before cutting metal, it’s crucial to take certain safety precautions to ensure a secure working environment. One of the most crucial things to do is to check for any flammable materials nearby. A small spark can easily ignite these materials and lead to a fire outbreak, and this risk becomes even higher when using power tools like grinders or plasma cutters.
With that said, it’s essential to keep any flammable materials and substances far away and make sure that there’s no fuel for a potential fire. Clearing the area and making it free of any potentially hazardous materials can greatly reduce the risk of fire accidents, so make sure to check your workspace before you start cutting metal. It’s always better to be safe than sorry!
Secure Workpiece in Place
Before you begin to cut metal, one of the most important safety precautions you need to take is to secure your workpiece in place. This involves using a vise or clamp to hold the metal firmly and prevent it from moving during the cutting process. Failure to do so could not only damage your workpiece but could also pose a serious safety hazard.
A loose workpiece could fly off the table, causing injury to you or someone nearby. It’s a good idea to make sure the clamp or vise is securely attached to the work table and that the metal is positioned so that it won’t slip out of place. By taking the time to properly secure your workpiece, you can help ensure a safe and successful metal cutting experience.
Remember, safety should always come first when working with power tools and machinery.
Choosing the Right Disc for Metal Cutting
If you want to know how to cut metal with an angle grinder, you need to choose the right disc for the job. There are several types of discs available on the market, and each one is suitable for different materials and applications. When it comes to cutting metal, the most common type of disc is the abrasive disc.
These discs are made from abrasive materials, such as aluminum oxide or zirconia, which grind away the metal as you cut. Some abrasive discs are designed specifically for cutting through thick or hard metals, while others are better suited for thinner gauges. It’s important to choose a disc with the appropriate thickness and grit for your project.
Additionally, you may want to consider using a diamond blade for cutting through especially hard materials like stainless steel. With the right disc in hand, cutting metal with an angle grinder can be a breeze.
Type of Discs Available
When it comes to cutting metal, choosing the right type of disc is crucial. There are various types of discs available, each designed for different purposes. For instance, if you need to cut through thick pieces of metal quickly, then a diamond blade would be your best bet.
These types of discs are incredibly durable and can handle a lot of wear and tear. On the other hand, if you want to make precise cuts on thinner sheets of metal, then a carbide disc would be more suitable. It all depends on your specific needs and preferences.
Other options include abrasive discs, which are excellent for grinding and shaping metal, and chop saw blades, which are perfect for cutting through steel pipes and bars. In summary, it’s important to understand your project’s requirements and research the various disc types to make an informed decision about what would work best for you.
Selecting the Right Grit
Choosing the right grit is crucial when it comes to metal cutting discs. The grit number indicated on the disc represents its coarseness or fineness. Generally, high grit numbers mean finer and more precise cuts, while lower grit numbers are more suited for rough cuts.
For instance, a 24-grit disc is ideal for removing thick coatings or heavy rust, while 60-grit or higher discs are better for producing smooth finishes. Additionally, the type of metal being cut will also determine the appropriate grit level. So, it’s essential to consider the condition of the metal, job requirements, and the mandatory level of precision when selecting the right disc.
With the right grit, you’ll be able to complete your task quickly and efficiently with minimal wastage. Therefore, it’s best to research and select the right grit to ensure that your project is a success.
Choosing the Correct Diameter
When it comes to metal cutting, choosing the correct diameter of the disc is crucial. The diameter of the disc affects the cutting speed and the amount of force required to make the cut. For thicker metals, a larger disc diameter is recommended, while a smaller diameter disc is more suitable for thinner metals.
It’s essential to consider the size of the metal in question before selecting a disc diameter to ensure the best results. Additionally, choosing the correct disc diameter can help prolong the life of your cutting tools and reduce overall costs. So next time you’re cutting metal, remember to take a moment to consider the correct diameter disc to use.
Cutting with an Angle Grinder
If you’re wondering how to cut metal with an angle grinder, it’s actually quite straightforward. First, make sure you have the right type of disc for the task at hand. For cutting metal, you’ll want to use a grinding disc with a thickness of about 1/8 inch.
Next, secure the metal you want to cut in a stable position, being careful not to damage the surface you’re working on. Then, turn on the angle grinder and slowly guide the spinning disc along the metal, applying steady pressure. Remember to wear protective gear, such as safety goggles and gloves, as well as ear protection, as angle grinders can be quite loud.
With a little practice, you’ll be able to make precise cuts through metal like a pro. So, don’t be intimidated – with the right tools and techniques, cutting metal with an angle grinder can be a quick and easy process.
Marking the Cut
When it comes to cutting with an angle grinder, marking the cut is an important first step to ensure accuracy and precision. To begin, use a measuring tape and a marker to mark the exact starting and ending points of the cut on the material you will be working with. Next, use a straight edge or a square to draw a straight line connecting the two points.
This will serve as your guideline for the cut. It’s important to make sure your markings are clear and easy to follow before beginning to cut, as this will help prevent mistakes or errors. By taking the time to measure and mark your cut before getting started, you’ll have a much easier time achieving the desired result with your angle grinder.
So take a deep breath, grab your marking materials, and let’s get started!
Adjusting Angle Grinder Depth
Adjusting the depth of your angle grinder is essential when it comes to cutting with precision. Whether you’re a DIY enthusiast or tradesperson, mastering this technique can help you achieve professional results. First, it’s essential to ensure that the depth adjustment mechanism is in good condition.
Next, you can adjust the depth using the tool’s locking nut. By loosening the nut, you can adjust the height of the blade and then re-tighten it at the desired position. It would be best to keep adjusting the depth incrementally until you achieve the desired cutting depth.
It’s always crucial to ensure that the angle grinder is secure before making any adjustments to avoid accidents. With practice, you can master this technique and get the desired results. Next time you plan to cut with an angle grinder, don’t forget to adjust the depth for enhanced precision.
Turning on the Angle Grinder
If you’re planning to cut metal or stone, an angle grinder can be a useful tool in your arsenal. But before you start cutting, you need to know how to turn it on. First, make sure the grinder is unplugged and that the blade is securely fastened.
Next, find the power switch and press it down to turn the grinder on. Depending on your model, the switch may be located on the side or the top of the grinder. Once the grinder is on, you can then adjust the speed and start cutting.
But be careful, as the grinder can be dangerous if not handled properly. Always wear eye protection and gloves, and be aware of your surroundings. With practice, cutting with an angle grinder can be a quick and efficient way to get the job done.
Making the Cut
Cutting with an angle grinder is a powerful way to make clean, precise cuts in a variety of materials. Whether you’re cutting metal pipes, ceramic tiles, or even just sharpening your woodworking tools, an angle grinder can make quick work of even the toughest jobs. When using an angle grinder, the most important thing to remember is safety.
Always wear eye protection and heavy-duty gloves, and keep loose clothing and long hair out of the way. Before starting, make sure the grinder is properly adjusted and that the blade is securely fastened. Once you’re ready, apply firm, steady pressure to the material you’re cutting, and let the angle grinder do the rest.
With a little practice, cutting with an angle grinder can become second nature, and you’ll be able to tackle even the most challenging projects with ease.
Repositioning the Workpiece
When cutting with an angle grinder, it’s important to reposition the workpiece to ensure precision and safety. This involves taking breaks at regular intervals to check the angle and adjust as needed. Repositioning also helps prevent the blade from jamming or overheating, which can lead to dangerous situations.
It’s important to maintain a secure grip on the workpiece while repositioning to prevent slippage or movement. By taking the time to reposition properly, cuts can be made with ease and confidence, resulting in a professional-looking finish. Remember, safety should always be a top priority when using power tools like angle grinders.
By following proper repositioning techniques, you can ensure both a high quality and safe cut.
Finishing Touches
Cutting metal with an angle grinder can seem like a daunting task, but with the right technique, it can be done quickly and efficiently. Start by selecting the appropriate disc for the type of metal you are cutting, as each disc is designed for a specific purpose. Place the metal firmly on a stable surface and secure it in place.
Next, adjust the angle grinder to the desired cutting depth and begin cutting, moving the grinder back and forth along the marked line. Be sure to wear protective gear such as goggles and a face mask to avoid metal shards and dust. Take breaks as needed and let the grinder cool down to avoid overheating.
With these simple steps, cutting metal with an angle grinder can be a breeze!
Grinding Burrs and Edges
Grinding burrs and edges might seem like a small detail, but it can make a huge impact on the quality and durability of your project. When you are working with metal or other materials that require precision cutting, you want to ensure that the edges are smooth and free from burrs that could cause damage or wear down faster over time. Grinding burrs and edges is a process that involves using an abrasive wheel to smooth out rough edges and remove any burrs that may have formed during the cutting process.
This not only makes the edges smoother and safer to handle, but it also improves the overall appearance of the finished product. By taking the time to add these finishing touches, you can ensure that your project is of the highest quality and will stand up to even the toughest wear and tear. So, if you want to create a professional-looking project that will last for years to come, be sure to consider grinding burrs and edges as part of your finishing process.
Polishing the Surface
When it comes to completing a project, it’s important to not only focus on the big picture but also on the small details. That’s where the concept of “polishing the surface” comes in. It’s all about the finishing touches, the small adjustments that could make a big difference in the overall quality of your work.
Whether it’s ensuring that everything is aligned correctly, double-checking for typos or adjusting the formatting, making these small changes can elevate your project to the next level. Think of it like putting the cherry on top of a sundae. The cherry is just a small addition, but it can turn a good sundae into a great one.
So, the next time you’re working on a project, take the time to polish the surface and pay attention to those small details. Your hard work will not go unnoticed, and the end result will be something to be proud of.
Conclusion
So there you have it, folks! Cutting metal with an angle grinder doesn’t have to be a daunting task. With the right equipment, safety measures, and technique, you can slice through metal like a hot knife through butter. Just remember to always wear protective gear, keep your cut straight and steady, and don’t be afraid to experiment with different blades and angles.
And if all else fails, you can always just hire a professional…
but where’s the fun in that? Get your grind on!”
FAQs
What safety precautions should I take before cutting metal with an angle grinder?
Before cutting metal with an angle grinder, make sure to wear gloves, safety glasses, and ear protection. Secure the work piece and clear the area of any flammable materials or debris.
What type of blade should I use for cutting metal with an angle grinder?
Use a cutting wheel with a thickness suitable for the job you are doing and make sure it is specifically designed for cutting metal.
How do I properly hold and control an angle grinder when cutting metal?
Hold the angle grinder firmly with both hands, brace yourself, and use a steady motion. Avoid applying too much pressure as this can cause the blade to bind and kick back.
Can an angle grinder be used for cutting thicker pieces of metal?
Yes, but it may take longer and require a more powerful angle grinder. Make sure to choose a blade with the appropriate thickness for the job.
Is it possible to cut curved shapes in metal with an angle grinder?
Yes, you can use a specialized curved cutting wheel or make multiple cuts around the perimeter of the shape to gradually remove the excess metal.
What should I do if the blade becomes dull or damaged during use?
Replace the blade immediately to prevent injury and ensure efficient cutting. Follow the manufacturer’s instructions for proper blade replacement.
Can an angle grinder be used to remove rust or paint from metal surfaces?
Yes, using a wire wheel or abrasive disc can effectively remove surface rust or paint. However, take care not to damage the underlying metal surface.


