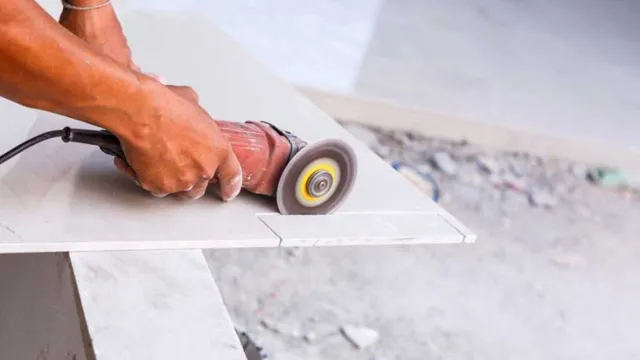
How to Cut Porcelain Tile with an Angle Grinder: Step-by-Step Guide for Perfect Cuts
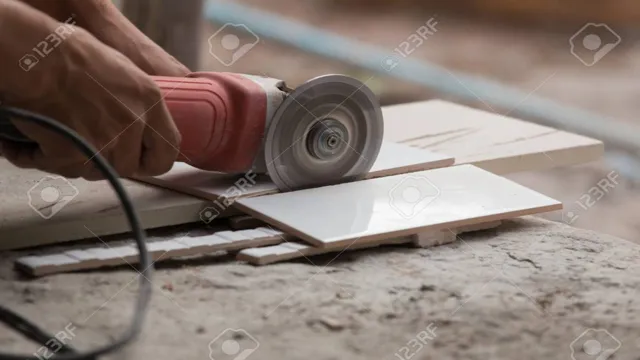
Are you looking to renovate your bathroom or kitchen but don’t want to spend a fortune on professional tile installation? Well, cutting porcelain tile with an angle grinder might be the solution you’ve been searching for! Not only is it inexpensive, but it’s also relatively easy to do, even for newbies in the DIY world. Porcelain tiles are known for their toughness, making them a popular choice for high-traffic areas or floors that need to withstand moisture and stains. They’re also notoriously difficult to cut, which is why many people opt for professional installation.
But with the right tools and a little bit of practice, you can achieve a clean, precise cut without breaking the bank. In this guide, we’ll cover everything you need to know about cutting porcelain tile with an angle grinder. We’ll explain how to choose the right angle grinder and diamond blade for the job, as well as provide step-by-step instructions on how to make the cut.
We’ll also share some tips and tricks for achieving a professional-looking finish and avoiding common mistakes. So, if you’re ready to take on your next home improvement project, grab your angle grinder and let’s get started! By the end of this guide, you’ll be cutting porcelain tile like a pro.
What You Will Need
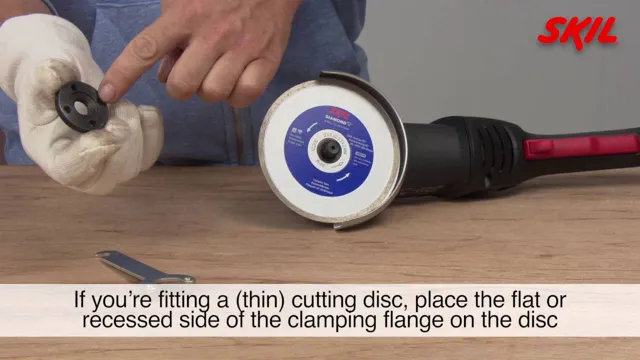
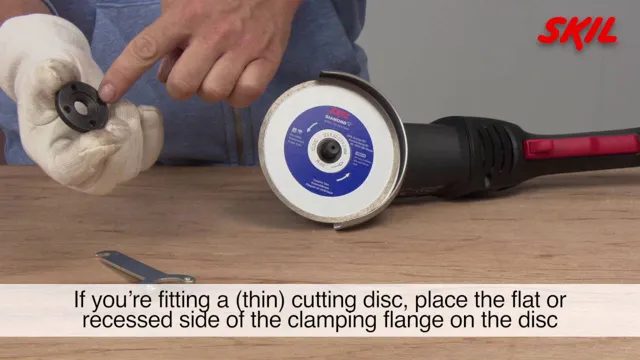
If you are looking to cut porcelain tile with an angle grinder, there are a few items you will need to get started. Firstly, you will need an angle grinder with a diamond cutting wheel. The diamond cutting wheel is necessary as it can grind through the hard material of the porcelain tile whereas regular cutting wheels may break or cause chipping.
You will also need a dust mask, safety glasses, and gloves to protect yourself from the dust and debris that will be created during the cutting process. If you’re looking for even more protection, you may want to wear a long-sleeved shirt and pants to cover your skin. Lastly, you’ll need a straight edge or ruler to draw a line along the tile where you want to cut and a marker to make the line visible.
With these items in hand, you’re ready to cut your porcelain tile with an angle grinder.
Angle grinder
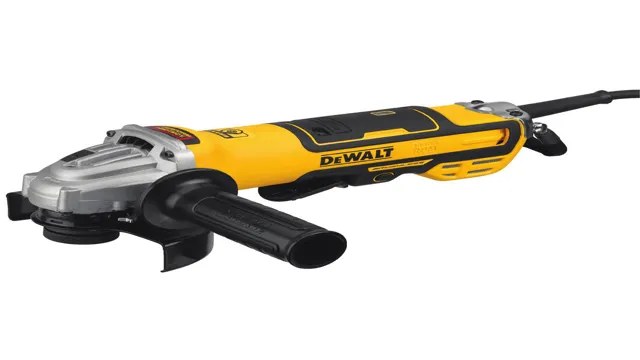
If you’re planning on using an angle grinder, it’s important to have the right tools and equipment to ensure a successful and safe experience. First and foremost, you’ll need an angle grinder itself, which can be found at most hardware stores and online. As for the accessories, a set of wheels is crucial for grinding and cutting tasks.
You should also invest in protective gear such as safety glasses, gloves, and a dust mask to keep yourself safe from flying debris and dust particles. Don’t forget to have a stable work surface and clamp to hold the material you’re working on, so it remains stable throughout grinding tasks. It’s also a good idea to have a good extension cord, considering you’ll be using heavy-duty power tools.
With these essentials in hand, you’ll be ready to tackle your angle grinding projects with ease and confidence.
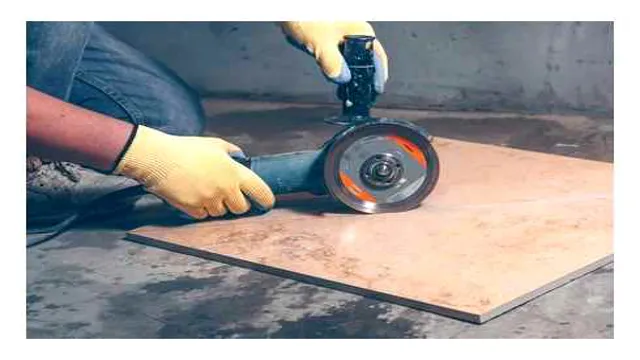
Diamond cutting blade
When it comes to using a diamond cutting blade, you’ll need a few things to ensure a successful and safe job. Firstly, you’ll require protective gear such as gloves, safety glasses, and a dust mask to protect yourself from flying debris and harmful dust particles. Next, make sure you have the right blade for the job.
Different blades are designed for specific materials, so ensure you have the correct one for the material you’re cutting. It’s also important to have the correct tools for the job, such as a wet saw or a hand-held grinder, depending on the type of cut you need to make. Lastly, remember to keep the blade lubricated to prevent overheating and damage to the blade.
By following these key steps, you’ll be well-equipped to handle your diamond cutting task with ease and safety.
Tape measure
If you’re planning a home renovation or just need to measure something around the house, a tape measure is an essential tool to have. But what do you need to have on hand to use a tape measure effectively? First and foremost, you’ll need a tape measure itself. Look for one with a sturdy, durable tape that extends at least 25 feet.
This will give you plenty of length to work with for most projects around the home. Additionally, you may want to consider a tape measure with both standard and metric measurement markings, if you’ll be working with both types of measurements. In addition to the tape measure itself, you may also want to have a notepad and pen handy.
This will allow you to record your measurements as you go, helping you keep track of multiple measurements or dimensions. Lastly, don’t forget to keep a level on hand as well. This will help ensure that your measurements are accurate and your projects turn out level and straight.
By having a tape measure, notepad and pen, and level on hand, you’ll be well-prepared to tackle any home renovation or measurement project that comes your way. And for those who want to add a little extra flair to their tool collection, there are even tape measures with built-in laser levels or bubble levels! So go ahead and get measuring – it’s easier than you think.
Marker
Marker If you’re looking to create bold, bright and beautiful designs, then markers are the perfect tool for you. But which markers are best for your needs? There are a few things you’ll need to consider before making your decision. First, think about the type of project you’ll be working on.
Different markers work better on different surfaces, so make sure you choose the right marker for the job. Second, consider the colors you’ll need. Some brands offer a wider range of colors than others, so it’s important to choose a brand that has the colors you need.
Third, consider the tip of the marker. Do you want a fine point or bold tip? This will mainly depend on the size of the area you’ll be coloring. Finally, think about the quality of the markers.
While cheaper markers may seem like a good deal, they won’t last as long or produce the same quality results as more high-end brands. By considering these factors, you’ll be able to choose the perfect markers for your project!
Safety goggles
If you work with tools or chemicals, safety goggles are an essential piece of equipment to keep you safe on the job. But what exactly do you need to get started? First and foremost, you’ll need a pair of goggles that are designed to protect against the specific hazards you’ll be facing. For example, if you’re working with corrosive chemicals, you’ll need goggles that are specifically designed to resist those chemicals and won’t corrode or break down over time.
You’ll also want to make sure that your goggles fit properly and are comfortable to wear for extended periods of time. Finally, be sure to check that your goggles meet all relevant safety standards and regulations so that you can get the most protection possible from your equipment. With the right gear and a little bit of care, you can stay safe and stay focused on your work no matter what challenges you encounter.
Dust mask
If you’re working on a project where dust is a problem, whether it’s sanding wood or cutting drywall, you’ll want to consider wearing a dust mask to protect your lungs. The good news is that dust masks are affordable and widely available, so you shouldn’t have any trouble finding one. You’ll want to look for a mask that’s appropriately rated for the type of dust you’ll be exposed to, since different masks can filter out different types of particles.
You may also want to consider comfort features, such as an adjustable nose bridge or elastic ear loops, since you’ll be wearing the mask for extended periods of time. Overall, investing in a quality dust mask is a small price to pay to protect your health in the long run.
Earplugs
Looking for the right earplugs can be overwhelming, especially if you don’t know what to look for. To ensure maximum comfort, protection, and longevity, it’s essential to invest in a pair that meets your specific needs. First, consider which type of earplug is most suitable for you.
Foam earplugs are the most commonly used and are designed to fit snugly inside the ear canal, blocking out noise. If you prefer something reusable, silicone earplugs are a great option as they can be washed and reused multiple times. You may also want to consider earmuffs for higher levels of noise protection.
Additionally, be sure to check the Noise Reduction Rating (NRR) for each pair of earplugs. The NRR measures how many decibels of sound an earplug can block out, so if you’re frequently in noisy environments, you’ll want to choose earplugs with a higher NRR. By taking these factors into account, you’ll be able to select a pair of earplugs that provides maximum protection and comfort for your ears.
Preparation
Cutting porcelain tile with an angle grinder may seem daunting at first, but with proper preparation, the task can become manageable. First, make sure you have the right equipment – a diamond blade, water source, and safety gear, such as goggles and gloves. Set up your workspace in a safe and controlled environment, ensuring you have ample space to maneuver and cut the tile.
Next, measure and mark the tile where you want to cut it, using a pencil or marker. If you need to make complex cuts or curves, consider creating a template out of cardboard or paper to guide your blade. Finally, ensure your tile is securely clamped down to prevent movement and slipping while cutting.
Following these steps will set you up for success when cutting porcelain tile with an angle grinder. Remember to always put safety first and take breaks if needed to prevent fatigue and mistakes.
Measure and mark the tile
When it comes to tiling, proper preparation is key to achieving a successful installation. Before you even think about applying mortar, you’ll need to measure and mark the tiles. This involves making sure your surface is clean, dry, and flat, then measuring the area where you want to lay the tiles.
Once you have your measurements, you can mark the tiles accordingly, either using a pencil or chalk. This way, you’ll have a good idea of where each tile will go and can ensure everything lines up correctly before you start laying them down. Remember, the key to a successful tile installation is taking your time and making sure everything is properly prepared before you begin.
And with that, you’re ready to move onto the next step of the process!
Secure the tile to a work surface
If you’re about to start tiling, one of the essential tasks will be to secure the tile to a work surface before you begin any cutting or shaping. This preparatory step is crucial because once the tiles are secure, you can use various tools to shape them, confident that they won’t shift around as you work. The most common way to secure tiles is to use a strong adhesive, such as a construction adhesive, and spread it evenly over the entire surface area of the tile’s underside.
Once the adhesive is spread, place the tile firmly onto the work surface, and apply gentle pressure to press it into the adhesive. Depending on the type of adhesive you use, you may need to wait several hours before you can begin cutting or shaping the tiles. By properly preparing each tile with secure attachment to your work surface, you can confidently begin any cuts or modifications to create a stunning tile installation.
Put on safety gear
“Put on safety gear” Before you start any task that involves potential hazards, it’s essential to put on appropriate safety gear. Wearing the right gear can help protect you from injuries and even save your life. The gear you need depends on the task at hand, but some common items include safety glasses, gloves, earplugs, hard hats, and safety shoes.
Safety glasses are crucial for protecting your eyes from flying debris or harmful chemicals, while gloves protect your hands from cuts or burns. Earplugs help prevent hearing damage caused by loud noises, and hard hats protect your head from falling objects or impacts. Lastly, safety shoes with solid soles and slip-resistant soles can keep you from slipping or tripping over debris.
In any situation, safety should always be a top priority, and wearing safety gear is an easy way to ensure that you and those around you stay safe. So, before you begin any task, take a few extra minutes to put on the appropriate gear and double-check that your gear fits properly and is in good condition. It may seem like a small step, but it can make a significant difference in protecting your health and well-being.
Remember, it’s always better to be safe than sorry!
Cutting the Tile
Cutting porcelain tile with an angle grinder can be a challenging task that requires patience and skill. Before starting the cutting process, it is essential to wear protective gear, including safety glasses and a dust mask, to prevent injuries and inhalation of dust particles. Once you have the necessary protective gear, you can start by marking the cutting line using a marker or chalk.
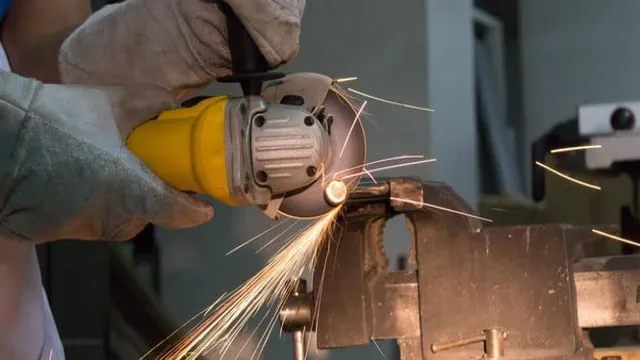
Next, attach a diamond blade to your angle grinder and adjust the depth of cut to the thickness of the tile. Start the angle grinder and slowly move it along the cutting line, applying gentle pressure to avoid cracking. It is essential to keep the blade cooled to prevent it from overheating, which can result in damage or breakage.
Whether you are a DIY enthusiast or a professional, following these steps can help you cut porcelain tile with ease, precision, and safety. So, the next time you need to cut porcelain tile, you can use an angle grinder confidently and achieve excellent results.
Start the angle grinder and make the cut
When it comes to cutting tiles, an angle grinder is an indispensable tool that will make the job a lot easier. First, make sure that the tile is secured in place so that it won’t slip while you’re cutting. You can then proceed to put on the necessary protective gear, such as goggles and a mask, to keep yourself safe from flying debris.
Once you’re all set, it’s time to start up the angle grinder and make the cut. Move the tool in a slow and steady manner, allowing the blade to do its job and making sure not to put too much pressure on the tile. It may take a bit of practice to get the hang of it, but with a few cuts, you’ll soon find that cutting tiles with an angle grinder is an efficient and effective way to get the job done.
Just remember to take breaks as needed and stay focused on your task at hand.
Follow the marked line
When it comes to cutting tiles, following the marked line is crucial to ensure a clean and accurate cut. This can be achieved by using a tile cutter, which is specifically designed for cutting tiles. First, measure and mark the tile where you want to cut it.
Place the tile onto the cutter and align the marked line with the cutting wheel. Apply gentle pressure on the handle to score the surface of the tile. Then, use the lever to snap the tile along the scored line.
It’s important to ensure that the pressure is evenly distributed on both sides of the scored line to avoid breaking the tile. Remember to wear safety glasses and work gloves to protect yourself during the cutting process. By following these simple steps, you can achieve a precise and neat cut for your tiles, making your DIY project a success.
Apply gentle pressure to the grinder
When it comes to cutting tiles, using a grinder can be extremely helpful. Applying gentle pressure to the grinder is crucial for achieving a smooth and consistent cut. If you push too hard, you risk damaging the tile or even shattering it.
However, if you don’t apply enough pressure, the grinder won’t be able to effectively cut through the tile. Finding the right balance may take some practice, but it’s important to take your time and be patient. Remember that the grinder should do most of the work, so you don’t need to use excessive force.
With proper technique, you can achieve a clean and precise cut every time. So, take a deep breath, keep your hands steady, and apply gentle pressure to the grinder to get the job done right.
Avoid overheating the blade
When it comes to cutting tiles, it’s crucial to avoid overheating the blade. This is because overheating can quickly dull the blade and even cause it to warp or crack over time. To prevent this from happening, make sure to use a slow and steady cutting motion with your tile saw or cutter, rather than trying to rush through the job.
You should also take breaks every so often to allow the blade to cool down and prevent it from overheating. Finally, make sure to clean the blade after every use, removing any buildup of tile dust or debris that could cause it to become clogged or bogged down. By taking these simple steps, you can ensure that your blade stays sharp, strong, and ready for whatever tile cutting needs you may have.
Finishing the Cut
Cutting porcelain tile with an angle grinder can seem like a daunting task, but with the right technique, it can be done easily. Once you have made the initial cut, it’s time to finish the cut. To do this, you’ll need to move the tile towards the blade and let the grinder do the work.
Don’t apply too much pressure as it can cause the tile to crack or break. Keep a steady pace and let the angle grinder cut through the tile. Use the same technique to make any necessary notches or curved cuts.
Remember to wear protective gear, including goggles and a respirator mask, to keep yourself safe from the tile debris and dust. With these tips in mind, cutting porcelain tile with an angle grinder can be a breeze.
Use a tile file to smooth the edges
If you want to achieve a smooth finished cut, consider using a tile file to smooth out any rough edges. This handy tool offers an easy way to file off any excess material, ensuring your cut has a clean edge. Make sure to hold the file at a perpendicular angle to the cut, using even strokes to avoid any unevenness.
It’s also important to keep the file clean, brushing away any debris after each stroke to prevent clogging. With a little bit of practice, you’ll be able to achieve a professional-looking cut in no time. So, why not give it a try? Your finished project will thank you!
Wipe down the tile to remove debris
As you approach the end of your tile cutting process, it’s important to give your newly-cut tile a final wipe-down to remove any debris or residue that may have collected on its surface. This step is crucial in ensuring that your tile is smooth and clean, free of any debris that could affect its placement or longevity. Begin by dipping a clean cloth or sponge into warm water, wringing out any excess to prevent soaking your tile.
Gently wipe down your tile, focusing on any areas where debris is most likely to accumulate, such as edges and corners. Ensure that you remove all debris thoroughly, taking care to avoid any damage to the surface of your tile. With the debris removed, your tile will be ready for installation and will provide a cleaner, smoother finish to your project.
Remember that taking the time to wipe down your tile is a simple yet necessary step that can make a big difference in the final outcome of your project. So don’t skip it – your newly-cut tile will thank you!
Final Thoughts
Cutting porcelain tile can be a bit of a challenge, but using an angle grinder can make the task much easier. To ensure a successful cut, it’s important to use the right blade, such as a diamond blade, and to keep the tile steady and secure while cutting. It’s also essential to wear safety gear, such as eye protection and a dust mask.
Taking the time to prepare the area with drop cloths and marking the tile before cutting can also help achieve a clean and precise cut. Remember to work slowly and carefully, adjusting the angle of the grinder as needed. With these tips in mind, you can confidently tackle cutting porcelain tile with an angle grinder.
Conclusion
There you have it, folks! Cutting porcelain tile with an angle grinder may seem daunting at first, but with the right tools and techniques, it can be a smooth and easy process. Just remember to wear protective gear, keep a steady hand, and take your time. And if all else fails, don’t be afraid to call in the professionals.
After all, cutting tile is not something to be taken lightly – unless, of course, you’re in the business of DIY puns.”
FAQs
What safety precautions should I take when cutting porcelain tile with an angle grinder?
It is recommended to wear safety glasses, gloves, and a mask to protect against flying debris and the inhalation of dust particles.
What type of blade should I use for cutting porcelain tile with an angle grinder?
A diamond blade is recommended for cutting porcelain tile with an angle grinder.
Can I use a regular angle grinder to cut porcelain tile?
Yes, you can use a regular angle grinder, but it is important to make sure the blade is suitable for cutting porcelain tile.
How do I prevent the porcelain tile from cracking while cutting with an angle grinder?
To prevent cracking, make sure to start with a small notch and gradually increase the length of the cut.
What is the best angle to hold the angle grinder when cutting porcelain tile?
Holding the angle grinder at a 45-degree angle will provide the best results when cutting porcelain tile.
What should I do if the blade gets stuck while cutting porcelain tile?
Turn off the angle grinder and carefully remove the blade from the tile.
Can I use water to cool down the blade while cutting porcelain tile?
Yes, using water can not only cool down the blade but also help reduce dust and debris. However, be sure to take proper safety precautions when using water with an angle grinder.

