How to Fix a Wobbly Drill Press Chuck: Tips and Techniques

Is your drill press chuck wobbling and making your projects spin out of control? Frustrating, isn’t it? Well, fear not! You don’t have to go out and buy a new drill press. You just need to fix the wobbly chuck. A drill press chuck can wobble for many reasons, including a loose chuck key or keyless chuck, a bent spindle, or worn out bearings.
But don’t worry. With just a few simple steps, you can easily fix the wobbly chuck and get back to work in no time. In this blog post, we’ll guide you through step-by-step instructions on how to fix a wobbly drill press chuck.
We’ll cover all the possible causes and provide easy-to-follow solutions that will get your chuck running smoothly again. So, grab your tools and let’s get started!
Identify the Problem
If you’re experiencing a wobbly drill press chuck, the first step in fixing the problem is to identify the cause. The most common reason for a wobbly chuck is a damaged or worn out spindle. This can happen when the chuck is tightened too much or if it is not seated properly.
Another reason could be a loose arbor or collet holder, which can cause the chuck to move during operation. One way to confirm the issue is it to insert a drill bit into the chuck and check for runout, which is measured by observing if the bit moves up and down as it rotates. Once the issue has been identified, it’s important to fix it as soon as possible to avoid further damage to the machine or injury to the operator.
Check the Chuck
When it comes to checking the chuck, identifying the problem is key. Chuck problems can range from loose screws to worn out parts. One common issue is a chuck that won’t tighten, and this can be caused by a variety of factors.
One possible cause of a chuck that won’t tighten is a damaged or worn out chuck key. Another possible cause is debris or dust in the chuck, which can prevent it from closing properly. Poorly lubricated or dirty threads can also cause a chuck to fail to tighten properly.
Whatever the cause, it’s important to identify the problem before attempting any repairs. By understanding the underlying issue, you can take the appropriate steps to fix the problem and get your chuck back in working order.

Inspect the Arbor
When inspecting the arbor, it’s essential to identify any possible problems that may arise. One common problem is worn or damaged bearings. If the arbor has excessive vibrations or has trouble running smoothly, it’s a sign that the bearings may need to be replaced.
Another issue to look out for is rust or corrosion on the arbor, which can cause the machine to rust or pitting, leading to premature wear and tear. Cracks or chips in the arbor’s surface can also compromise its structural integrity and cause significant safety concerns, so it’s crucial to check for any signs of damage. Checking the arbor for problems is an essential part of maintaining a safe and effective machine and should be done regularly to ensure optimal performance.
Tighten the Chuck
If you own a drill press, you may have experienced a wobbly chuck at some point. This can be extremely frustrating, especially when you need precision in your drilling. One of the main causes of a wobbly chuck is loose jaws.
To tighten the chuck, start by removing the key and inserting a drill bit into the chuck. Once you have a drill bit in place, tighten the chuck jaws around it. Next, use a wrench to tighten the chuck even further.
You may need to use a bit of force, but be careful not to overtighten the chuck as this can damage the jaws. Finally, remove the drill bit and re-attach the key. Your chuck should now be tight and ready for use! Remember to occasionally check the tightness of your chuck to avoid any future wobbling.
Use a Chuck Key
When it comes to tightening the chuck on your drill, it’s essential to use a chuck key. This small tool is designed to fit into the chuck and grip the drill bit securely, ensuring it doesn’t slip out of place while you’re using it. Without a chuck key, you’re likely to find that your drill bit becomes loose over time, compromising your safety and the quality of your work.
To use a chuck key, you simply insert it into the chuck and rotate it in a clockwise direction until the chuck grip tightens around the drill bit. It’s that easy! Always make sure your chuck key is accessible and properly stored to avoid any accidents. By using a chuck key, you’ll be able to work confidently and efficiently with your drill, knowing that your drill bit is securely in place.
Apply Pressure
When working with power tools, such as a drill, it’s important to know how to properly tighten the chuck. The chuck is responsible for holding the drill bit securely in place and ensuring that it doesn’t come loose during use. To tighten the chuck, apply pressure by using the drill’s chuck key or by holding onto the chuck and turning the tool on.
With the chuck key, insert it into the hole on the side of the chuck and turn clockwise to tighten. If you’re holding the chuck, firmly grip it with one hand and use your other hand to turn the tool on. This will cause the chuck to tighten automatically.
Remember to always double-check that the chuck is secure before use to prevent any accidents or mishaps. By tightening the chuck properly, you’ll ensure that your drill is ready to take on any project and perform at its best.
Replace the Chuck
If your drill press chuck wobbles or doesn’t hold bits tightly, you might need to replace it. A wobbly or loose chuck can cause problems with precision and accuracy while drilling, which could be frustrating at best and dangerous at worst. Fortunately, replacing the chuck is a relatively simple process that can be done in a few steps.
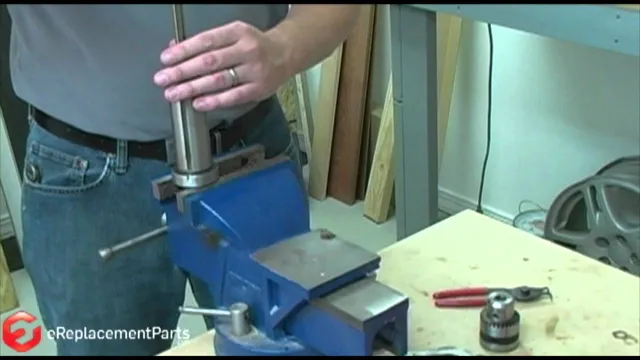
First, remove the old chuck from the spindle by loosening the retaining screw or bolt with a chuck key or Allen wrench. Then, insert the new chuck and tighten it securely using the same method. Make sure that the new chuck is centered and aligned properly before using your drill press.
With just a little effort, you can fix a wobbly drill press chuck and get back to work with confidence!
Remove the Chuck
If you need to remove a chuck from your drill, it’s important to know how to replace it correctly. First, make sure your drill is unplugged and the old chuck is removed. Then, check the specifications of your drill to ensure you purchase a new chuck that matches the size and type required.
Next, line up the new chuck with the spindle and insert the short end of the chuck key into the hole located on the side of the chuck. Tighten the chuck by turning the key clockwise until it is secure. Finally, test the chuck by tightening and loosening it a few times before using your drill again.
By following these simple steps, you can easily replace a chuck and ensure your drill is in proper working order for your next project.
Attach the New Chuck
Now comes the exciting part of replacing the chuck – attaching the new one! Before getting started, make sure to select the appropriate chuck that suits your needs. Once you have the new chuck, it’s time to attach it to your tool. Begin by inserting the chuck key into the hole located on the side of the old chuck, and then turn it counterclockwise to loosen it.
Remove the old chuck from the spindle by twisting it until it’s completely detached. Set it aside and pick up the new chuck. Align the spindle with the hole in the center of the new chuck and then slide it onto the spindle.
Use your hand to tighten it by twisting it clockwise until it’s snug. Next, insert the chuck key into the hole on the new chuck and turn it clockwise to secure it into place. Make sure it’s firmly attached before using it.
That’s it – you’ve successfully replaced the chuck on your tool like a pro!
Conclusion
So there you have it, folks! Fixing a wobbly drill press chuck is as easy as tightening the drawbar, cleaning the taper, and checking for wear and damage. And if all else fails, don’t be afraid to replace the chuck altogether. With these simple steps, you’ll be drilling accurately and wobble-free in no time.
Remember, a stable chuck is key to a successful drill press operation, so don’t let a wobbly chuck hold you back! Keep your tools in top shape and watch your precision and efficiency soar. Happy drilling!”
FAQs
What causes a drill press chuck to become wobbly?
A drill press chuck can become wobbly due to worn out jaws, damaged bearings, or a loose spindle.
How can I check if my drill press chuck is wobbly?
You can check if your drill press chuck is wobbly by chucking a straight drill bit and checking if its axis wobbles when the chuck is rotated.
Can a wobbly drill press chuck be fixed?
Yes, a wobbly drill press chuck can be fixed by tightening the spindle or replacing the chuck jaws or bearings if they are damaged.
How do I tighten a drill press chuck spindle?
To tighten a drill press chuck spindle, use a wrench to hold the spindle and another wrench to turn the chuck clockwise. Make sure to tighten the chuck evenly on all sides.
What type of lubricant should I use for my drill press chuck?
You should use a light machine oil or a dry lubricant like graphite powder for your drill press chuck.
Can I use a drill press chuck key from another model on my drill press?
No, you should always use the chuck key that is recommended for your drill press model to avoid damage or injury.
How often should I clean and maintain my drill press chuck?
You should clean and maintain your drill press chuck regularly, depending on how frequently it is used. It is recommended to clean it after every use and lubricate it every 6 months.


