How to Install Fire Sprinkler System: A Comprehensive Guide for Beginners
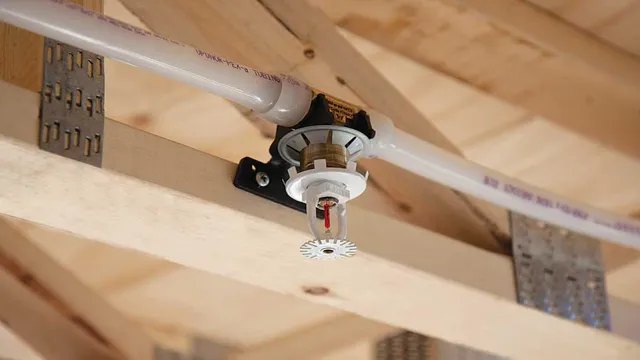
Are you concerned about the safety of your property and the people within it in the event of a fire? Installing a fire sprinkler system may be the solution you’ve been looking for. While it may seem like a daunting task, you’ll rest easy knowing you’ve taken the proactive steps to protect what matters most. Think of a fire sprinkler system as a superhero ready to tackle any potential flames.
It’s a system that can detect and control fires quickly before they have a chance to grow. The system monitors heat, smoke or flames and reacts by releasing water over the area to prevent further damage. Now, you may be wondering how to install a fire sprinkler system.
The process can be broken down into a few steps. You will need to plan, design, construct, test, and maintain the system. Planning involves gathering all of the necessary information about the site and the building’s requirements, while designing the system involves drawing up blueprints and deciding where the sprinklers will be placed.
If you’re constructing a new building, the installation of a fire sprinkler system may be required by local building codes. However, if you’re adding a system to an existing building, it’s important to ensure that the system won’t disrupt any of the existing structures or walls. Testing and maintaining the system is equally important, as regular inspections will ensure that the system remains functional and can react quickly in the event of a fire.
Don’t hesitate to reach out to a professional to guide you through the process. Installing a fire sprinkler system is a worthwhile investment for the safety and security of those occupying the space.
Understand Your Local Fire Codes
If you’re considering installing a fire sprinkler system in your home or business, it’s essential to understand your local fire codes. Each area has specific regulations regarding fire safety that must be followed to ensure the system is installed properly and effectively. These codes dictate the type of system required, the placement of sprinkler heads, the distance between them, and the water pressure needed for them to function correctly.
Additionally, local building codes may require the system to be installed by a licensed professional. It’s crucial to research and understand the regulations in your area before attempting to install a fire sprinkler system yourself. Don’t take any chances when it comes to the safety of your property and occupants.
Ensure that the system is designed and installed according to your local codes to provide optimal protection in the event of a fire.
Check with Your Local Fire Department
It is always a good idea to be aware of your local fire codes and regulations when it comes to fire safety. One of the easiest ways to ensure that your home or office is up to code is to check with your local fire department. They can provide you with a list of codes and regulations that are specific to your area and let you know if there are any changes that may impact your safety.
This can include things like having working smoke detectors, ensuring your exits are clear, and having fire extinguishers available. It’s important to understand that fire codes are in place to help keep you and your loved ones safe in the event of a fire. By taking the time to check your local codes and regulations, you can help ensure that you are doing your part to protect yourself and your community.
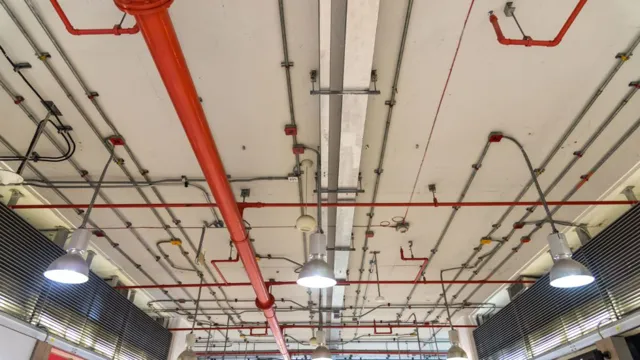
Know the Type of Sprinkler System Required
When it comes to installing a sprinkler system in your building, it is important to first understand your local fire codes. Different areas have different codes and regulations regarding fire safety, which means that the type of sprinkler system required may vary. For instance, an area prone to wildfires may require a higher level of fire protection than an area that doesn’t experience these types of natural disasters.
It is important to consult with your local fire department to determine the type of sprinkler system that is required to keep your building safe and up to code. By understanding your local fire codes, you can select the right type of sprinkler system and ensure that your building is properly protected in the event of a fire. Don’t leave things to chance, take the time to know your local fire codes and take the necessary precautions to keep your building and occupants safe.
Gather Materials and Tools
To install a fire sprinkler system, gathering the necessary materials and tools is the first step. You will need pipes, fittings, valves, and sprinkler heads, as well as a variety of tools such as a pipe cutter, wrench, and Teflon tape. It is essential to ensure that you have the proper materials for your particular system, as there are different types of sprinkler systems available.
Make a list of all the materials you need beforehand, so you do not forget anything. Additionally, be sure to inspect all materials for any defects or damage before starting the installation process. With the right materials and tools handy, installing your fire sprinkler system will be much smoother and safer.
Sprinklers, Pipes, and Fittings
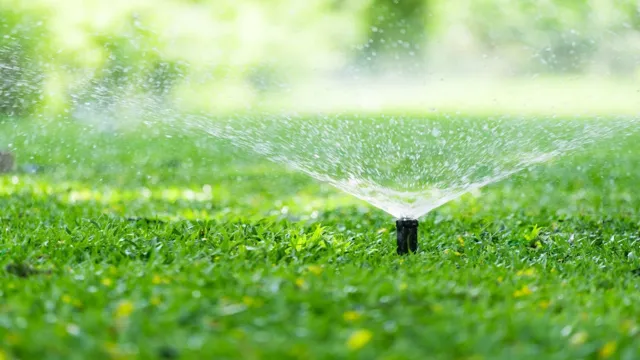
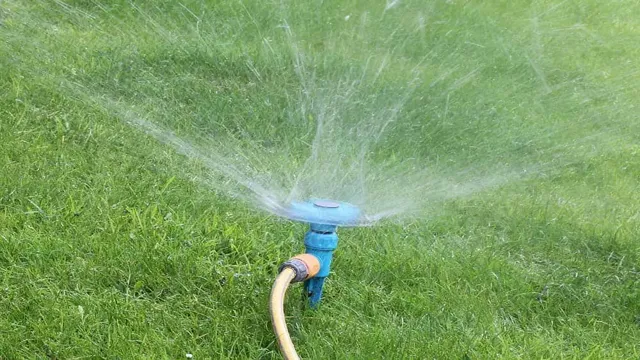
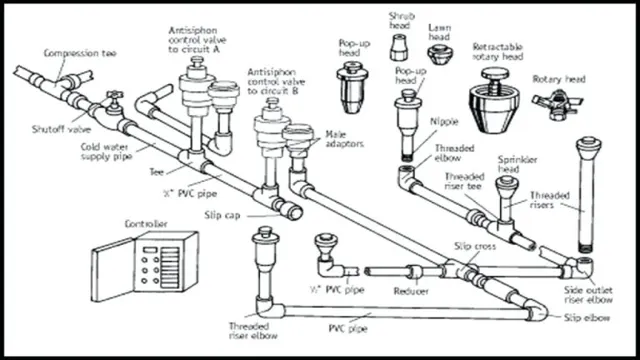
Sprinkler system installation involves a range of materials and tools, including sprinklers, pipes, and fittings. Before getting started, it’s important to gather all the necessary materials and tools to ensure a smooth installation process. You’ll need sprinklers, which come in various types such as pop-up and rotor, based on the size and shape of the area to be covered.
Pipes are another essential component that carry water from the source to the sprinklers, usually made of PVC or polyethylene material. Fittings connect pipes and sprinklers together, also available in various types such as tees, elbows, and couplings. To install the sprinkler system, you’ll need tools such as a shovel, trencher, pipe cutter, glue, primer, and a controller.
Don’t forget to also refer to your sprinkler system installation plan to ensure proper placement and spacing of all components. By gathering all these materials and tools, you’ll be prepared to install a sprinkler system that keeps your lawn and garden looking lush and healthy!
Valves, Control Panel, and Alarm Bell
When it comes to building or repairing a water tank system, gathering the necessary materials and tools is crucial. One of the key components of this system is the valve, which allows you to regulate the flow of water in and out of the tank. You’ll need to make sure you have the correct type of valve for your specific tank, and that it is properly sized to handle the flow of water.
Additionally, you’ll need a control panel to monitor and adjust the system as needed. This may include gauges, switches, and other control devices. Another important component is the alarm bell, which sounds an alert if there are any issues with the system, such as a leak or low water levels.
To ensure a smooth and successful installation or repair, make sure you have all the necessary materials and tools on hand before starting. This may include wrenches, pipe cutters, and other plumbing equipment. By taking the time to gather everything you need beforehand, you can avoid delays and ensure a job well done.
Drilling Machine, Wrenches, and Pipe Cutters
When planning to work on a plumbing project, it’s essential to ensure that you have all the necessary materials and tools before getting started. Some of the primary tools you’ll need include a drilling machine, wrenches, and pipe cutters. A drilling machine will allow you to create holes for pipes to fit through walls or floors, while wrenches are necessary for tightening and loosening nuts and bolts holding pipes together.
Pipe cutters, on the other hand, are essential for cutting pipes to the correct length and ensuring precise cutting angles, making it crucial to have a high-quality cutter. It’s imperative to gather all the materials and tools before starting the project to avoid delays and setbacks. By doing this, you will be able to complete your plumbing project successfully and with minimal stress.
Create a Sprinkler System Plan
Installing a fire sprinkler system can be a daunting task, but with a well-designed plan, it can be done effectively. The first step in creating a sprinkler system plan is to determine the layout of the building and identify the areas that require protection. This can be done by conducting a thorough risk assessment, which involves analyzing the potential fire hazards that exist within the building.
Once the layout has been determined, the next step is to calculate the water supply required to adequately protect the building. This includes determining the available water pressure, the required sprinkler head coverage, and the number of sprinkler heads needed. With this information, you can now design a sprinkler system that meets the requirements of the building and maximizes the protection provided to occupants and property.
By carefully planning the installation process, you can ensure that your fire sprinkler system is effective and provides reliable protection in case of a fire.
Design the Layout
When it comes to designing a sprinkler system plan, it’s important to start with a clear layout. One of the first steps is to determine the water source and pressure available for the system. This will help determine the size and type of mainline needed.
From there, it’s important to map out the zones of the lawn or garden that will be irrigated, taking into account any areas that will need special attention, such as high-traffic areas or plants with specific watering needs. The layout should also consider any obstacles in the way, such as trees or buildings, as they can affect the distribution of water. Once the zones have been established, the next step is to select the appropriate sprinkler heads and nozzles for each zone.
This will ultimately determine the amount of water that will be dispersed and how evenly it will be distributed. By carefully planning and designing the layout, you can ensure that your sprinkler system will function efficiently and effectively, keeping your lawn or garden healthy and vibrant.
Calculate Water Pressure and Coverage Area
Creating a sprinkler system plan can be a daunting task, but it’s essential to ensure that your lawn and garden receive the appropriate amount of water. When designing your system, one critical factor to consider is water pressure. If the water pressure is too low, your sprinkler heads won’t function efficiently, leading to uneven watering and dry spots.
To calculate water pressure, you’ll need to measure the water flow rate in gallons per minute and the size of your water supply line. You can use a pressure gauge to measure the water pressure, which should be between 30 and 50 PSI for optimal sprinkler performance. Another important factor to consider is the coverage area of your sprinkler heads.
The coverage area is determined by the type of sprinkler head, water pressure, and spacing between the heads. You’ll need to calculate the coverage area to avoid overlapping or underlapping, which can lead to inefficiencies and wasted water. With proper planning and calculations, you can design an efficient sprinkler system that keeps your lawn and garden looking healthy and vibrant.
Install the Sprinkler System
Installing a fire sprinkler system is crucial in protecting not only your property but also the lives of those inside it. To begin the installation process, it’s important to first create a detailed plan of where the sprinklers will be placed and how the system will be connected. You’ll need to measure the space and calculate how much pipe you’ll need to run throughout the area.
It’s important to follow all local and national codes and regulations when installing the system. Once you have your plan and all necessary permits, it’s time to begin installation. This process will typically involve running the piping throughout the space, connecting it to the water supply, and installing the sprinkler heads.
After the system is installed, it’s important to have it inspected by a professional to ensure everything is working correctly. Proper maintenance and routine inspections are critical to ensuring the system is always ready to protect your property and loved ones. Installing a fire sprinkler system may seem like a daunting task, but it’s an investment that ultimately provides peace of mind and protection.
Install Main Water Line and Control Valve
If you want to have a lush and healthy lawn, installing a sprinkler system is a great idea. However, before you can start digging trenches and laying pipes, you need to make sure you have a reliable and efficient water source. That’s where installing the main water line and control valve comes in.
The main water line is the pipeline that brings water from your home’s main water supply to your sprinkler system. Before you start digging, make sure to call the utility companies and get clearance to avoid any underground hazards. Once you have a clear path, dig a trench that’s deep enough to accommodate the pipes.
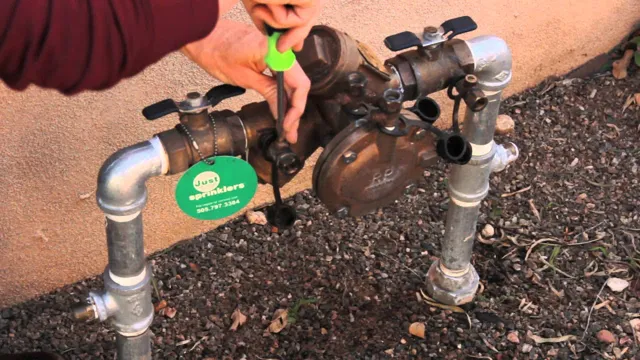
Then, lay the pipes and connect one end to the main water supply and the other end to the control valve. The control valve is like the heart of your sprinkler system. It regulates the flow of water to the different sprinkler heads and zones, so you have full control over when and how much water is used.
Make sure to choose a valve that’s compatible with your sprinkler system and can handle the water pressure in your area. Once installed, test the valve and make sure everything is functioning properly. In conclusion, installing the main water line and control valve is a crucial step in setting up your sprinkler system.
It may seem daunting at first, but with careful planning and execution, you can have a reliable and efficient watering system for your lawn and garden. So, roll up your sleeves, grab a shovel, and let’s get digging!
Install the Sprinkler Pipes and Fittings
When it comes to installing a sprinkler system, one of the most important steps is installing the sprinkler pipes and fittings. This process requires careful planning to ensure that the pipes and fittings are properly placed to avoid any potential leaks or problems. Before beginning the installation process, it’s important to carefully measure the space and determine the best layout for your system.
Then, you can begin installing the pipes, starting with the higher elevation areas and working your way down. It’s important to make sure that each pipe is securely connected to the fittings and that all of the fittings are in the correct position to allow for proper water flow. A great way to ensure that everything is properly installed is to use a pressure gauge to test the system for any leaks or other issues.
By taking the time to properly install your sprinkler system, you can enjoy a beautiful and healthy lawn for years to come.
Mount the Sprinkler Heads
Now that you have laid down the pipes, it’s time to mount the sprinkler heads. One important aspect to consider is the distance between the sprinkler heads. Typically, the distance should not be more than the recommended distance mentioned by the manufacturer.
Mounting the sprinkler heads should be done with precision and care because it determines the effectiveness of water distribution. You can use a riser to elevate the heads if there are any obstructions or irregularities in the soil. To fix the sprinkler heads in place, dig holes, and install the head by pushing it into the riser or the fitting.
Ensure that it’s level with the ground before backfilling the hole. Make sure not to damage the heads or any of the pipes during the installation process. Once you have mounted all the sprinkler heads, test the system to detect and fix any leaks or other malfunctions.
This will help you ensure that your sprinkler system is functioning properly and will keep your lawn healthy and green.
Connect the Control Panel and Alarm Bell
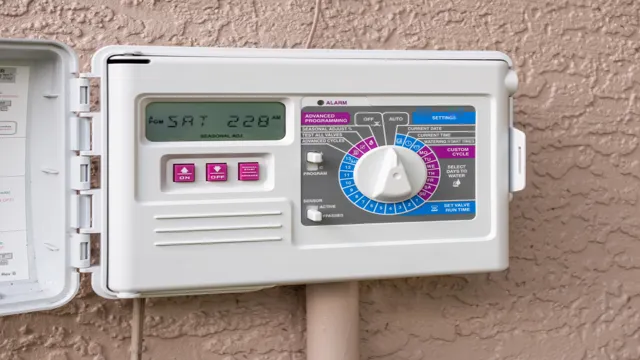
Now that you’ve installed the fire sprinkler heads and pipes, it’s time to connect the control panel and alarm bell to ensure the safety of your building. The control panel is essentially the brain of the fire sprinkler system. It receives signals from the sprinkler heads and is responsible for activating the alarm, notifying the authorities and shutting off gas lines and electrical devices in the event of a fire.
You’ll need to find the right location to mount the control panel and make sure that it’s easily accessible for maintenance and testing. Then, it’s a matter of connecting the wiring to the control panel and the alarm bell so that they can communicate with each other. The alarm bell is typically mounted near the control panel and sounds an audible alert when the sprinkler system is activated.
It’s important to test the control panel and alarm bell regularly to make sure they’re functioning properly and fix any issues promptly. By connecting the control panel and alarm bell, you’ve completed the final step in installing a fire sprinkler system to protect your building from a potential disaster.
Electrical Wiring and Power Supply
When it comes to electrical wiring and power supply, connecting the control panel and alarm bell is an essential task. The control panel is the brain of the electrical system, and it helps to regulate all the electrical components and devices present in the building. The alarm bell, on the other hand, is vital for alerting the occupants in case of a fire or any other emergency.
Connecting the control panel and alarm bell is a straightforward process, but it requires a certain level of expertise. You need to ensure that the wiring connections are correctly made and that the electrical devices are functioning correctly. In most cases, the alarm bell is integrated into the control panel, which makes the installation process more manageable.
However, it is crucial to follow all safety procedures and guidelines, such as turning off the power before commencing any electrical work. Remember, the safety of the building occupants relies heavily on how well you connect the control panel and alarm bell. With the right expertise and caution, you can ensure a safe and reliable electrical system for your building.
Test the Sprinkler System
After connecting the sprinkler system’s control panel and alarm bell, it’s crucial to test the system to ensure it’ll work correctly in case of an emergency. The first step is to turn on the water supply and activate the control panel. Check to make sure that all the sprinkler heads pop up, and water is reaching them correctly.
If there are any issues, it’s necessary to fix them before proceeding with the test. Once everything seems to be working correctly, you can simulate a fire by pressing the “test” button on the control panel. Doing so will activate the alarm bell and cause the sprinklers to start spraying water.
It’s essential to monitor the system’s performance during the test. Make sure that all areas are getting adequate coverage and that no areas are being missed. Once the test is complete, turn off the water supply and reset the control panel.
Remember to make a note of any issues that arose during the test and fix them promptly before using the system again. Testing the sprinkler system is a necessary step in ensuring that it’ll work when needed, so don’t neglect it.
Final Inspection and Approval
After the installation of your fire sprinkler system, the final step is to conduct an inspection to ensure everything is working correctly. The inspection consists of reviewing the system’s hardware, including ensuring all pipes are properly connected, inspecting the valves and sprinkler heads, and testing the alarm system. A properly installed fire sprinkler system should activate immediately, dousing flames even before the fire department arrives on site, potentially saving lives and property.
Once the inspection is complete, the fire department will issue an approval that indicates the system adheres to all safety standards, allowing it to remain in operation. It is crucial to remember that regular inspections and maintenance are necessary to keep the system running efficiently, potentially preventing a catastrophic outcome in the future. With a well-maintained fire sprinkler system in place, you can be confident that your property is safe from the dangers of fire.
Schedule a Final Inspection with the Fire Department
After completing all the necessary paperwork and meeting all the requirements, the next step is to schedule a final inspection with the fire department. The final inspection is important because it ensures that your building meets all fire safety codes and regulations. During the inspection, a fire marshal will conduct a thorough examination of your property, checking for any potential hazards or violations.
This inspection includes checking the building’s emergency exits, smoke detectors, and fire alarms. Depending on the size of the building, the inspection process may take hours or days. Once the inspection is complete, the fire marshal will grant final approval if the building meets all safety requirements.
It’s important to ensure that everything is in place and up to code before scheduling the final inspection, so you can avoid any potential delays or complications in the approval process. Overall, completing the final inspection and obtaining the fire department’s approval is a crucial step in securing the safety of your building and occupants.
Make Necessary Adjustments and Repairs
Before giving the final approval, it is essential to carry out a thorough inspection of the adjustments and repairs made during the renovation project. While undertaking renovations, it is normal for issues to arise. After all, renovation projects usually involve handling previously concealed spaces and structures that might have underlying issues that surface during the renovation process.
As such, it is essential to identify and address any unanticipated problems. This last inspection gives you a chance to ensure everything is up to standard before closing the chapter on the renovation project. For instance, you may want to check if all the necessary adjustments have been made.
Do the floors squeak? Are the wall colors consistent throughout the home? Have you replaced the damaged drywall? These little details may seem insignificant in the grand scheme of things, but they can significantly impact the overall look and feel of the home. Once all necessary adjustments have been made, the property owner can inspect and approve the final project. The inspection process provides assurance that everything has been done to meet the desired specifications and makes it easier to close the project.
Receive Approval and Certification
After a lengthy and extensive inspection process, receiving final approval and certification can feel like a huge weight lifted off your shoulders. This final step in the certification process involves a close examination of your product or service to ensure that it meets all of the necessary requirements and standards. Once the inspecting body is satisfied with your product or service, they will officially declare it certified, giving you the green light to move forward and release it to the public.
This certification process not only provides peace of mind to consumers, knowing that they are purchasing a well-vetted and high-quality product or service, but it also contributes to the overall credibility and reputation of your business. So don’t cut corners during the inspection process – put in the work and effort upfront to ensure that your product or service will pass inspection with flying colors and receive the coveted certification you deserve.
Conclusion
Well folks, there you have it – installing a fire sprinkler system is as easy as 1-2- Just make sure to do your research, hire a certified professional, and follow all necessary safety precautions. Remember, fire safety is no joke – it’s better to be prepared and never have to use your sprinkler system than to regret not having one when it’s too late.
So go ahead, install those sprinklers, and rest easy knowing that you’ve got your bases covered. As we like to say in the sprinkler business, “when in doubt, sprinkle it out!”
FAQs
What is a fire sprinkler system?
A fire sprinkler system is a network of pipes that are installed in a building and that contain water under pressure. The system is designed to detect and extinguish fires in their early stages, minimizing damage and protecting lives.
How does a fire sprinkler system work?
When a fire is detected by a smoke detector or heat sensor, the fire sprinkler system is activated. Water is released from the sprinkler heads, and the fire is suppressed or extinguished. The system works automatically, without the need for human intervention.
Is it easy to install a fire sprinkler system?
Installing a fire sprinkler system is not a do-it-yourself project. It requires specialized knowledge and training, as well as compliance with local codes and regulations. You should always hire a professional fire sprinkler contractor to install your system.
What are the benefits of a fire sprinkler system?
A fire sprinkler system can save lives and property by quickly and effectively suppressing fires. It can also reduce insurance premiums and provide peace of mind, knowing that your building is protected in the event of a fire.
How much does it cost to install a fire sprinkler system?
The cost of installing a fire sprinkler system can vary depending on the size and complexity of the building, as well as other factors such as local codes and regulations. Generally, the cost per square foot can range from $1.00 to $2.50 or more.
Do fire sprinkler systems require maintenance?
Yes, fire sprinkler systems require regular maintenance to ensure that they are working properly. This includes inspections, testing, and cleaning of the sprinkler heads and pipes. You should always follow the manufacturer’s recommendations and local codes and regulations.
Can a fire sprinkler system cause water damage?
While a fire sprinkler system can cause some water damage, it is typically much less than the damage that would be caused by a fire. The system is designed to release water only in the area where a fire has been detected, and the water is released in a controlled manner.

