How to Install Staples in Arrow Staple Gun: A Step-by-Step Guide
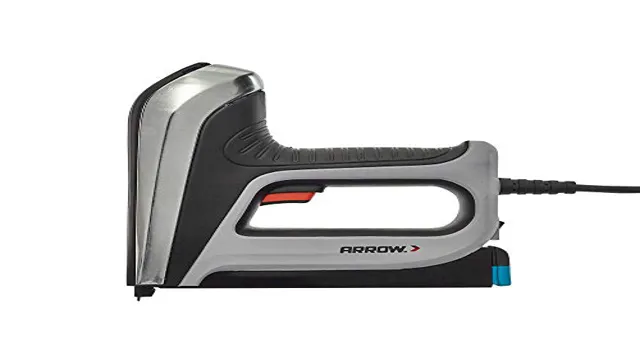
If you’re looking to get some quick and efficient DIY work done, then a staple gun should be a staple in your toolkit. The Arrow staple gun is one of the most popular and reliable brands in the market that can help with fixing things around the house, building furniture, and even arts and crafts projects. However, installing staples in your Arrow staple gun can be tricky if you’re a beginner.
In this blog post, we will guide you through the process and give you some tips and tricks so that you can use your Arrow staple gun like a pro. So, let’s get started!
Step 1: Choose the Right Staples
Installing staples in an Arrow staple gun can be a bit tricky without the right knowledge and tools. To begin, it’s important to choose the right staples for your project. Arrow staple guns are compatible with a variety of staple types and sizes, so it’s important to select the right option for your specific application.
For lighter duty projects such as crafting or DIY home repairs, a fine wire staple with a narrow crown is a good option. For heavier duty projects such as construction or upholstery, a heavy duty staple with a wider crown and larger gauge wire is needed. It’s important to note that using the wrong size or type of staple can result in jams or improper bonding of materials.
So, to ensure your staple gun works correctly, take the time to select the right staples for your project.
Use the Correct Size and Type of Staples
When it comes to stapling, it’s important to use the correct size and type of staples for your project. The first step in choosing the right staples is to consider the size of the paper you’ll be stapling. For standard 20-pound paper, you’ll want to use standard staples, which are 1/4 inch in length.
Longer staples, such as 3/8 or 1/2 inch, are better suited for thicker stacks of paper. Additionally, consider the type of stapler you have. A standard desktop stapler will typically only accept standard staples, while a heavy-duty stapler may require stronger and longer staples.
By choosing the right staples for your project, you’ll ensure a secure and neat finish.

Refer to the Arrow Staple Gun Manual for Recommendations
When it comes to using an Arrow Staple Gun, the first step is to choose the right staples for your project. The Arrow Staple Gun Manual is the best place to start to find out what types and sizes of staples are recommended for the materials you are working with. Using the wrong type of staple can result in a weak seal or damage to the material.
It’s important to keep in mind that staples come in different sizes and shank types. For example, a round shank staple is ideal for softwood, while a flat shank staple is better suited for hardwood. Additionally, different types of materials require different staple sizes.
For thin fabrics, you may need a size 6mm, while thick upholstery may require a size 10mm. By referring to the manual, you can ensure you have the right staple for the job and achieve the best results.
Step 2: Load the Staples
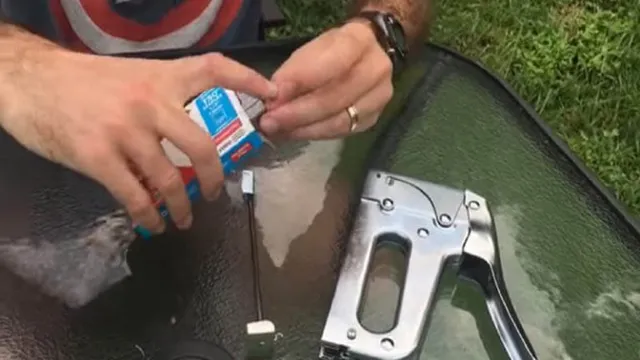
Now that you’ve loaded the proper staples for your Arrow staple gun, it’s time to load them into the gun itself. First, locate the pusher rod at the back of the staple gun and pull it back all the way. This will create a space for the staples to be loaded into.
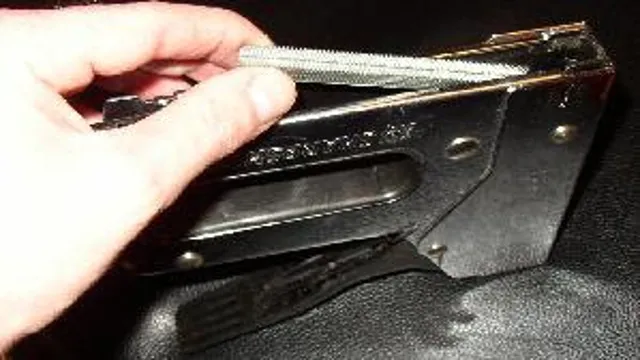
Next, take your strip of staples and insert them into the slot with the legs of the staples facing downwards. Push the strip in until it clicks into place. Once the staples are loaded in, release the pusher rod slowly until it is firmly pressed against the staples.
You’re now ready to start stapling! Remember, it’s important to use the correct size and type of staples for your project to ensure the best results. With these simple steps, you’ll be well on your way to mastering the art of staple gun use.
Open the Chamber and Secure It in Place
Before taking the next step in loading the stapler, make sure the chamber is open and secure in place. This allows for easy access to the staple magazine and reduces the risk of accidental discharge. Once you’ve confirmed the chamber is secure, it’s time to load the staples.
Begin by finding the staple magazine release button and pressing it down. This will open the magazine and allow you to insert a strip of staples. Make sure the staples are facing the correct direction, with the pointed ends facing down.
Slide the magazine back into place until you hear a click, indicating it’s secured. Be sure to double-check that the staples are loaded correctly before proceeding to use the stapler. Remember, safety always comes first, so take the necessary precautions to avoid any accidents or mishaps.
By following these simple steps, you’ll be on your way to successfully loading your stapler and making those documents look professional in no time.
Insert the Staples into the Chamber
When it comes to using a staple gun, loading the staples is a crucial step. To do so, follow these simple instructions. Begin by locating the chamber where the staples are inserted.
Next, slide the latch or release mechanism to open the chamber. This will give you access to where the staples go. Take a stack of staples and insert them into the chamber, making sure they are all facing the same direction.
Push the stack firmly into place, ensuring that it is secure and won’t fall out. Once the staples are in place, close the chamber by sliding the latch or release mechanism back into place. It’s important to note that different staple guns may have slightly different mechanisms for loading staples, so be sure to consult the manual if you’re unsure.
Overall, loading staples is a fairly simple task that can be easily accomplished with a little bit of practice. So go ahead and get started on that next DIY project – you’ve got this!
Close the Chamber and Lock It
Now that you’ve opened the staple gun and cleared out any jams, it’s time to load the staples. The first step is to make sure you have the right size staples for your specific staple gun. Once you have the correct size, locate the chamber where the staples will be loaded.
This is usually located on the bottom of the staple gun. Open the chamber by pulling back on the latch or lever. Take a strip of staples and insert it into the chamber, making sure the staple points are facing downwards towards the surface you will be stapling.
Push the strip of staples all the way to the back of the chamber, ensuring they are lined up correctly. Finally, close the chamber and lock it securely in place. It’s important to note that loading the staple gun correctly can impact the performance of your tool.
So take your time and ensure that the staples are loaded correctly. Remember, a staple gun is only as good as its staples.
Step 3: Test the Staple Gun
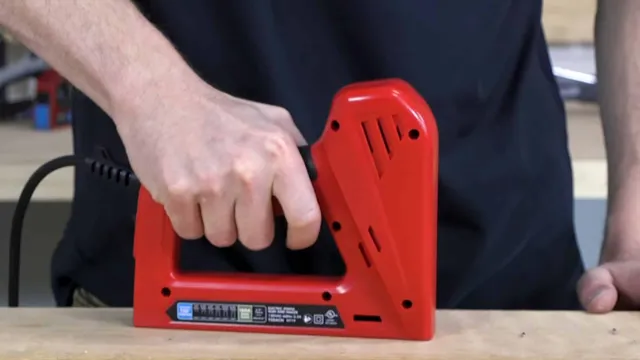
Now that you’ve loaded your Arrow staple gun with staples, it’s time to test it out. First, make sure the gun is pointed away from you and any other people or objects. Then, place the stapler over the surface or material you want to staple and firmly press the trigger.
If the staple goes in smoothly and flush with the surface, you’re good to go! If it doesn’t, check to make sure the staples are loaded correctly and that there aren’t any jams or blockages in the gun. It’s always a good idea to do a test run before using the staple gun on a larger project to make sure everything is working as it should be. With these tips, you’ll be a pro at installing staples in your Arrow staple gun in no time!
Practice Stapling on a Scrap Piece of Material
Before diving into the actual task of stapling, it’s important to test out the staple gun first. This can be easily achieved by practicing on a scrap piece of material. The last thing you want is to damage your actual project because you didn’t take the time to test the equipment beforehand.
So take a few minutes to load the staple gun and test it out on a spare piece of material. This will give you a good idea of how the staple gun functions and will help you adjust the settings if necessary. It also allows you to get a feel for the force required to use the staple gun, which can vary depending on the material you are using.
Once you are comfortable with the staple gun and feel confident in your ability to use it properly, you’re ready to move on to the next step.
Step 4: Begin Your Stapling Project
Now it’s time to begin your stapling project with the Arrow staple gun. First, ensure that you have the correct size and type of staples for your project. Once you have the staples ready, load them into the gun by pulling the magazine release button and sliding the staple tray out.
Insert the strip of staples into the tray, with the pointed end facing downward. Slide the tray back into the gun and push the magazine release button back in to secure it. Next, aim the staple gun at the surface you want to staple and press the trigger to release the staple.
Be sure to apply enough pressure to push the staple into the material, but not so much that it causes damage. With a little practice, you’ll be able to quickly and efficiently install staples with your Arrow staple gun.
Choose the Right Spot for Your First Staple
When starting your stapling project, it’s important to choose the right spot for your first staple. This can make or break the success of your project, so take some time to consider your options. Ideally, you want to choose a spot that is easy to access and offers a stable foundation for your staple.
Avoid areas that are too thin or fragile, as the staple may not hold properly or could even cause damage. Look for a flat surface that is sturdy and can handle the pressure of the staple gun. You might even want to try a few practice staples on a scrap piece of material to get a feel for the gun and ensure you’ve found the right spot.
Remember, the first staple sets the tone for the rest of the project, so take your time and choose wisely before making your first move.
Apply Pressure and Press the Trigger
When it comes to stapling, applying pressure and pressing the trigger are crucial steps in beginning your project. Before pulling the trigger, make sure the stapler is properly aligned with the surface you are stapling. Apply firm pressure to keep it steady and prevent any mishaps.
Once you’re confident in the stapler’s position, pull the trigger with a firm, consistent grip. It’s important to make sure the staple is fully recessed into the surface, so double-check to ensure it’s flush before moving on to the next staple. Applying too little pressure can result in loose staples, while applying too much can make them difficult to remove if needed.
Practice with a scrap piece of material to get the hang of it before starting your project. With a little patience and some practice, you’ll be stapling like a pro in no time.
Continue Stapling as Needed
Starting a stapling project can be intimidating for anyone, but there’s no need to worry if you follow these easy steps. When you have your stapler and paper clamped together, it’s time to start stapling. Begin by positioning the stapler at one edge of the paper and pressing down firmly.
Then move to the opposite edge and repeat the process. If your stack of paper is thick, you might need to add a few more staples to ensure that the pages will stay securely in place. Just remember to continue stapling as needed until all the pages are properly bound together.
It might take some time, but with patience and practice, you’ll have a stapling masterpiece in no time!
Step 5: Store Your Arrow Staple Gun Properly
When you’ve finished your project and it’s time to put your Arrow Staple Gun away, make sure you store it properly to leverage its longevity. One easy way to protect your staple gun and prevent damage or loss is to put it in its original carrying case if you have one. Ensure the trigger is locked, and the gun is empty of staples before storing it.
Also, make sure to store your staple gun away from excess moisture and high temperature. When it comes to how to install staples in Arrow Staple Gun, the process is generally effortless and straightforward. But, make sure to check for compatibility, use the right staples, load them correctly, and ensure the safety switch is on before use.
If you follow these tips, your Arrow Staple Gun will always be ready to tackle your next project efficiently and safely.
Remove Any Remaining Staples from the Chamber
Now that you have removed all the staples from your arrow staple gun, it’s time to store it properly. First of all, use a dry cloth to clean any dust or debris that may have collected on the tool. Make sure to wipe the handle, casing, and trigger as well.
Next, carefully place the staple gun in a safe and dry place. You can either place it in a toolbox or a drawer, but make sure it doesn’t get banged around or exposed to moisture. It’s important to store it appropriately as it will keep it in good condition and extend its lifespan.
That way, the next time you need it, it will work just as perfectly. By taking good care of your tools, you ensure that they will always be ready to be used when you need them.
Store the Staple Gun in a Safe and Dry Place
When it comes to maintaining the longevity and functionality of your Arrow staple gun, proper storage is key. After using your staple gun, always make sure to clean it thoroughly and remove any remaining staples. Once you’ve done so, it’s time to find a safe and dry place to store it.
Avoid leaving your staple gun out in the open where it can collect dust or get knocked around. Instead, stow it away in a toolbox or storage container to protect it from the elements. Be mindful of the temperature and humidity of the storage area, as excessive heat or moisture can damage the tool.
By taking the time to store your Arrow staple gun properly, you’ll prolong its lifespan and ensure it’s always ready to use when you need it.
Conclusion
Now that you’re a self-proclaimed staple gun expert, go forth and staple away with confidence! Remember to always ensure the safety of yourself and others when handling tools. And remember, a wise man once said, ‘with great power comes great stapling responsibilities.'”
FAQs
What is an Arrow staple gun?
The Arrow staple gun is a tool used for fastening materials together using staples.
How do I load staples into my Arrow staple gun?
First, locate the staple pusher rod at the end of the gun. Then, slide the staples into the chamber until they click into place.
What size staples should I use for my Arrow staple gun?
The size of staples to be used depends on the type of material being fastened. Refer to the instruction manual for guidance on which size staple to use.
Can the Arrow staple gun be used for heavy-duty jobs?
Yes, the Arrow staple gun is designed to handle heavy-duty tasks such as construction and upholstery.
How do I troubleshoot a jammed Arrow staple gun?
To fix a jammed Arrow staple gun, first, unplug it, then remove any staples jammed in the chamber. Use pliers or a screwdriver to remove any stuck staples.
What safety precautions should I take when using an Arrow staple gun?
Always wear safety glasses when using the staple gun to prevent eye injuries. Keep the gun away from children and always unplug it when not in use.
What is the warranty on an Arrow staple gun?
The warranty on an Arrow staple gun varies. Refer to the product manual or contact the manufacturer for warranty information.

