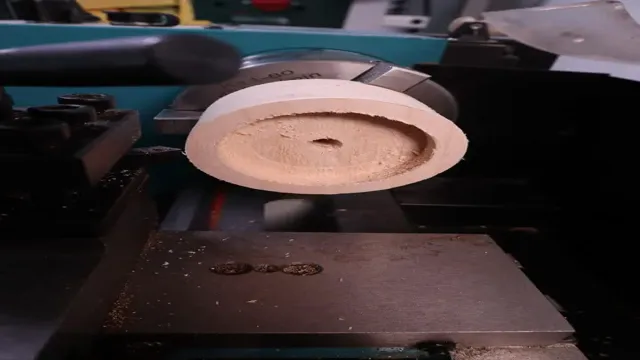
How to Make a Homemade Metal Lathe: A Comprehensive Guide for Beginners
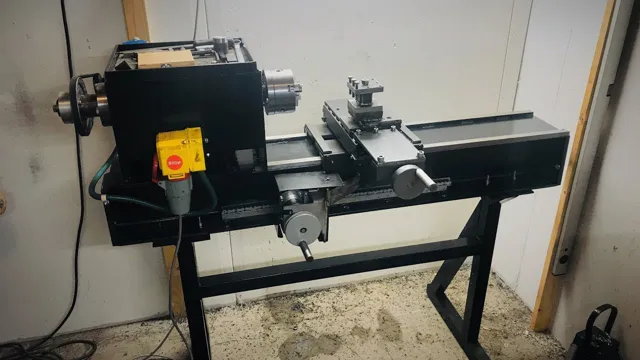
Are you interested in learning how to make a homemade metal lathe? Whether you’re a DIY enthusiast or a seasoned metalworker, building your own lathe is an exciting and rewarding project that can save you money while giving you a powerful tool for your metalworking projects. In this blog, we’ll guide you through the process of constructing your own metal lathe from scratch. First, we’ll cover the basic components and tools you’ll need to get started, including materials like steel rods, bearings, and motors.
Then, we’ll walk you through the step-by-step process of creating the main body and headstock of the lathe, as well as the tailstock, slide rest, and other essential components. Throughout the process, we’ll offer tips and tricks for optimizing your design and ensuring that your lathe is both functional and safe to use. We’ll also discuss how to calibrate your lathe and troubleshoot common problems that may arise during construction.
With this guide, you’ll have all the knowledge and inspiration you need to create your own homemade metal lathe and take your metalworking projects to the next level. So why wait? Let’s get started building your dream lathe today!
Introduction
If you’re someone who loves tinkering with machines and making things from scratch, then creating a homemade metal lathe might be the perfect project for you. While it may seem daunting at first, with the right tools and a bit of patience, you can create an efficient and fully functional lathe in your own backyard. One of the first steps is to gather all the necessary materials, which can include a motor, metal pipes, bearings, and gears.
You’ll also need to create a sturdy base to support your lathe and ensure it doesn’t wobble or tip over. Once you have all your materials, you can start piecing everything together, taking care to test the machine after each step to ensure it’s running smoothly. With a little bit of effort and dedication, you’ll soon have your very own homemade metal lathe to use for all kinds of projects.
What is a metal lathe?
A metal lathe is a tool that is used to shape and cut metals into various shapes and designs. It is a powerful machine that allows you to create intricate and precise metalwork projects. Metal lathes come in various sizes and types, but they all work on the same principle of rotating an object while a cutting tool is used to shape and trim it.
These machines can be used to create a variety of objects, from simple metal rods to complex parts for machines. With a metal lathe, you can unleash your creativity and create amazing metal projects. So, if you’re looking for a way to get started in metalworking, investing in a metal lathe is a great first step.
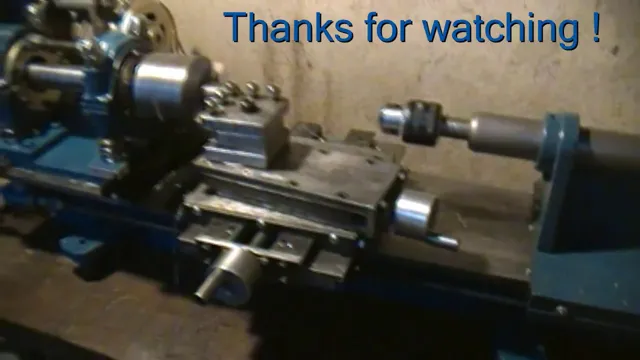
Why make your own?
Introduction There are a few reasons why making your own products can be a great idea. For one, it allows you to have complete control over the quality of the ingredients used. You can choose organic, sustainable, and cruelty-free options that align with your personal values.
Additionally, making your own products can save you money in the long run because you only have to pay for the initial ingredients, rather than paying for the branding and packaging of a store-bought product. Plus, it can be a fun and rewarding hobby that allows you to tap into your creativity and express yourself in a unique way. So, whether you’re interested in making your own skincare products, cleaning supplies, or even food items, there are plenty of benefits to giving it a try.
Tools and Materials
If you’re looking to make a homemade metal lathe, there are a few tools and materials you’re going to need. Firstly, you’ll need a sturdy workbench or table to mount the lathe on. You’ll also need a variety of cutting tools such as chisels and scrapers, as well as a metal saw and drill.
In addition, you’ll need a variety of metal tubing and rods to use as the lathe’s components, as well as a motor and power source to drive the lathe. Other useful materials may include sandpaper and polishing compounds to finish the metal components, as well as any necessary bolts, screws, and nuts to secure everything in place. By gathering these supplies and following a detailed set of instructions, you can craft your very own homemade metal lathe and enjoy the satisfaction of building something from scratch with your own two hands.
Required tools
When it comes to woodworking, having the right tools and materials is essential to ensure you get the best results. First and foremost, you will need several types of saws, such as a circular saw, jig saw, and a miter saw to make precise cuts. A drill with various drill bits is a must-have tool for creating holes in the wood.
In addition, you’ll need a hammer, screwdrivers, and pliers to fix different parts of the projects together. The level and measuring tape are essential for ensuring everything is correctly placed. To sand and smooth the wood surfaces, you will need sandpaper and a sanding block.
Safety is a priority, so always wear safety glasses, ear protection, and a dust mask. While the type of materials needed for woodworking projects varies, the most common ones are wood glue, screws, nails, and wood putty. With these essential tools and materials in your arsenal, you’re ready to take on any woodworking project with confidence!
Required materials
When starting any project, having the necessary tools and materials is crucial to success. This is particularly true when it comes to DIY projects. Whether you’re building a piece of furniture, renovating a room, or repairing something around the house, having the right tools and materials on hand can make all the difference.
Some essential tools to have include a hammer, screwdrivers, pliers, a level, and a tape measure. You’ll also want a good pair of work gloves and safety goggles to protect your hands and eyes while you work. When it comes to materials, it will depend on the project at hand.
For woodworking projects, you may need lumber, screws, and wood glue. For painting or decorating, you’ll need brushes, rollers, and paint or wallpaper. Make sure to gather all of your tools and materials before starting your project to ensure it goes smoothly.
With the right tools and materials at your disposal, you’ll be able to tackle any DIY project with confidence.
Building the Bed
If you’re an avid DIY enthusiast, you might want to learn how to make a homemade metal lathe. One essential step in building a lathe is constructing the bed. This is the foundation of your lathe and where you’ll mount the other lathe components such as the headstock, tailstock, and tool rest.
Most homemade lathes use rectangular steel tubing or channel for the bed. You’ll need to cut and weld the steel to create the desired length and shape of your bed. Before you begin welding, ensure that the material is level, straight, and square.
It’s also crucial to clean the steel to remove any impurities that could weaken the welds. Remember that the quality of the welding will determine the strength and stability of your bed, so take your time to do it correctly.
Measurements and cutting
When it comes to building a bed, accurate measurements and precise cutting are crucial for a sturdy and functional final product. You will need to determine the size of the bed frame you want to build based on the dimensions of your mattress or desired sleeping area. Once you have those measurements, you can create a cut list that includes all the necessary lumber and their respective lengths.
It’s important to use a high-quality circular saw or miter saw to make clean and straight cuts, ensuring that all pieces fit together seamlessly. Take your time when cutting and double-check your measurements to avoid costly mistakes. With the right tools and attention to detail, you’ll be able to create a beautiful and long-lasting bed frame that fits your specific needs.
Drilling and tapping
Drilling and tapping are crucial steps in building a bed. When creating a bed frame, it’s important to ensure that all the pieces fit together perfectly. That’s why drilling and tapping are necessary to create holes and threads in the right places.
Drilling involves making a hole in the wood, while tapping involves creating a thread inside that hole. This allows screws and bolts to be inserted and tightened securely, providing stability for the bed frame. When drilling and tapping, it’s important to use the right tools and techniques to prevent splitting the wood or damaging the threads.
It may take some practice, but once mastered, drilling and tapping will make building a bed frame much easier and more efficient.
Making the Headstock and Tailstock
When building a homemade metal lathe, one of the most important elements to consider is the headstock and tailstock. These components work together to hold and rotate the workpiece, allowing you to shape and cut the metal with precision. To make a headstock and tailstock for your lathe, you’ll need to start by selecting the right materials.
Many homemade lathe builders use cast iron or steel, but you can also use aluminum or other metals. Once you have your materials in hand, you can start cutting and shaping them to fit your specific lathe design. It’s important to take your time with this process and make sure each piece fits precisely into place.
Once everything is in position, you can tighten the components together and test your lathe to make sure it’s spinning smoothly and accurately. With a little patience and attention to detail, you can create a high-quality headstock and tailstock for your homemade metal lathe.
Creating the spindle
One of the key components of a lathe is the spindle, which holds and rotates the workpiece while it is being shaped by the cutting tool. To create the spindle, the headstock and tailstock need to be made. The headstock is the fixed part of the lathe that houses the spindle and motor, while the tailstock is the moveable part that supports the other end of the workpiece.
The headstock and tailstock are typically made from cast iron or steel, with precise measurements and tolerances to ensure their accuracy and stability. The headstock needs to be designed to accommodate the spindle and motor, with provisions for adjusting the speed and direction of rotation. The tailstock is usually designed with a drill chuck or center, which can be adjusted to hold the workpiece securely.
With these two components in place, the lathe can be used to create a wide range of cylindrical shapes and profiles, from simple knobs and handles to complex engine parts and sculptures. So, if you want to create your own spindle for your lathe, make sure to focus on creating precise and accurate headstock and tailstock components.
Attaching the bearings
“Making headstock and tailstock” If you want to make your own lathe machine, one of the most important components you need to create is the headstock and tailstock. These are the mechanisms that allow you to fix your workpiece in place and rotate it as needed. To start making your headstock and tailstock, you will need to attach the bearings to the headstock spindle.
The main bearings are essential in supporting the spindle and allowing it to rotate smoothly. You will need to choose a robust bearing that can handle high-speed rotational forces without overheating or failing. Once you have selected your bearings, you can attach them to the spindle using a press-fit or other mounting methods.
Just ensure that they are secured tightly and do not have any play when the spindle is rotating. Overall, creating your headstock and tailstock can be a challenging but rewarding process, and having well-attached bearings is an essential part of that.
Creating the Carriage
If you’re wondering how to make a homemade metal lathe, creating the carriage is an essential step. The carriage is the part that holds the cutting tool and moves back and forth along the lathe bed. To build a carriage, you’ll need to start by cutting and drilling the casting that will hold the tool post.
The tool post casting should be squared up on each end and drilled to accept the tool post bolts. Once this is done, you’ll need to attach the carriage saddle to the casting, which will hold the rest of the tooling in place. This can be done with bolts or welding, depending on your preference.
To ensure that the carriage moves smoothly along the lathe bed, you’ll need to install carriage wheels that slide along the attached V-ways. These are usually made from brass or similar materials to protect the bed and ensure smooth movement. With these steps done, all that’s left is to install the lead screw and handwheel, which will allow you to move the carriage along the bed with precision.
By following these steps, you can build a sturdy and reliable carriage for your homemade metal lathe.
Machining the carriage
When it comes to creating the carriage for your machining project, precision is key. Machining the carriage involves carefully cutting, shaping, and assembling the various components that will support and guide the movement of your machine’s cutting tool. This process must be done with great care, as even the smallest mistake can throw off the accuracy and consistency of your finished product.
One important factor to consider when machining the carriage is the material used. Different materials will have varying levels of wear resistance, which can affect the overall lifespan and performance of your machine. Additionally, the type of tooling and cutting techniques used during the machining process can greatly impact the quality and precision of your finished work.
With proper planning and attention to detail, you can create a carriage that provides the stable support and guidance necessary for optimal machining performance.
Making the cross-slide
Creating the carriage is an essential step in making the cross-slide. This part holds the cutting tool and moves along the lathe bed. To create the carriage, start by creating a flat base using a large piece of steel.
This will serve as the foundation for the carriage. Then, create a set of columns that will hold the cross-slide in place. These columns should be properly aligned and secured to the base of the carriage.
Once the columns are in place, you can install the cross-slide and saddle. This part moves back and forth along the columns and holds the cutting tool. When creating the carriage, accuracy and precision are crucial to ensure optimal performance and longevity.
By following these steps carefully and taking the time to create accurate measurements and cuts, you’ll be able to create a carriage that is reliable and efficient in its functionality.
Final Assembly
As we near the final assembly stage of building your own homemade metal lathe, it’s important to double-check that all of your components are properly aligned and secured. This includes attaching the spindle to the bed and mounting the carriage onto the bed, ensuring that both move smoothly without any binding. Make sure your tailstock is aligned with the headstock and properly secured to prevent any slipping during operation.
Additionally, don’t forget to install the tool post and cutting tool, and adjust them to the desired height and angle. Finally, check that all of your belts and pulleys are properly tensioned and connected to the motor. With all components in place and properly aligned, your homemade metal lathe is almost ready to begin machining!
Mounting the headstock and tailstock
Assembling a lathe can be a daunting task, but mounting the headstock and tailstock is a crucial step in the final assembly process. Both components are responsible for holding and rotating the workpiece, and must be aligned accurately to ensure precise cuts. The headstock houses the motor and spindle assembly, while the tailstock is used for support.
When mounting the headstock, it’s important to ensure that it is level and securely fastened to the bed of the lathe. The tailstock should also be aligned with the headstock, and adjusted so that it applies enough pressure to hold the workpiece in place without causing excessive friction. By taking the time to properly mount the headstock and tailstock, you’ll be on your way to creating beautiful and precise woodworking projects with your lathe.
Attaching the carriage
Attaching the carriage is the final step in the assembly process of a carriage or stroller. This step is crucial, as it ensures that the baby or toddler is safe and secure while riding in the carriage. Typically, attaching the carriage involves securing the fabric or seatbelts onto the frame of the stroller.
It’s important to double-check that everything is secure and stable before placing the baby in the carriage for the first time. Some carriages also come with additional accessories, such as a sun shade or rain cover, that need to be attached at this stage as well. Remember, safety should always be the top priority when assembling a baby carriage or stroller.
Conclusion
So, there you have it – your very own homemade metal lathe! With the right tools, a bit of creativity, and some patience, you can create a valuable piece of machinery that will last you a lifetime. And who knows? Maybe you’ll even become the envy of all your metalworking friends. So get to it, metalworking mavens – it’s time to start crafting your own DIY machines!”
FAQs
What materials do I need to make a homemade metal lathe?
The materials you’ll need will depend on the design and size of the lathe you want to make. Generally, you’ll need a sturdy frame, bearings, a motor, metal rods and plates, a chuck, and various tools.
Can I make a metal lathe without welding equipment?
Yes, it’s possible to make a metal lathe without welding equipment. You can use bolts and nuts or other fasteners to assemble the frame, and you may be able to find pre-made bearings that don’t require welding.
How long does it take to make a homemade metal lathe?
The time it takes to make a homemade metal lathe will depend on your skill level, the design you’re following, and the tools and materials you have available. It could take several weeks or even months to complete the project.
Are there plans online for making a homemade metal lathe?
Yes, there are many plans and tutorials online for making a homemade metal lathe, ranging from simple designs to more complex machines.
How much does it cost to make a homemade metal lathe?
The cost of making a homemade metal lathe will depend on the materials you choose and the design you follow. It could cost anywhere from a few hundred to several thousand dollars.
What are some safety precautions to take when making a homemade metal lathe?
Safety is very important when making a homemade metal lathe. Be sure to wear eye and ear protection, use caution when working with power tools or electricity, and follow all instructions carefully.
Can I use my homemade metal lathe to make precision parts?
Depending on the accuracy of your design and construction, it may be possible to use your homemade metal lathe to make precision parts. However, you may need to invest in additional tools or upgrades to achieve the desired level of accuracy.

