How to Make a Marking Gauge: Step-by-Step Guide for Woodworkers
Have you ever found yourself in search of a marking gauge for woodworking projects but couldn’t get your hands on one? Well, the solution is easier than you think! Building your own marking gauge can prove to be an enjoyable and practical endeavor, especially if you’re fond of woodworking. In this blog, we’ll provide you with a step-by-step guide on how to make a marking gauge in no time. From choosing the right materials to honing your woodworking skills, we’ve got you covered.
So roll up your sleeves, as we delve into the world of crafting a homemade marking gauge that will serve you well in all your future woodworking projects.
Introduction
If you’re a DIY enthusiast, you know how important it is to have the right tools to get the job done. A marking gauge is one such tool that you’ll need for woodworking projects. A marking gauge is a tool that helps you create precise markings on wood.
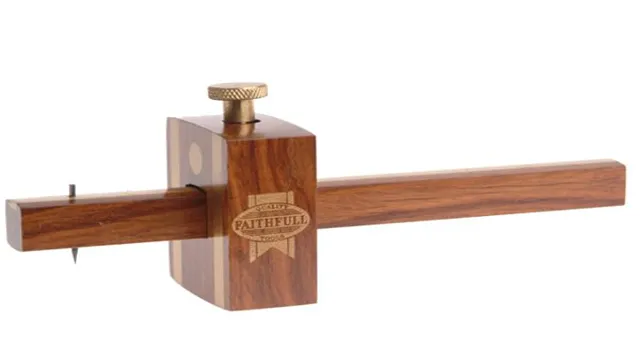
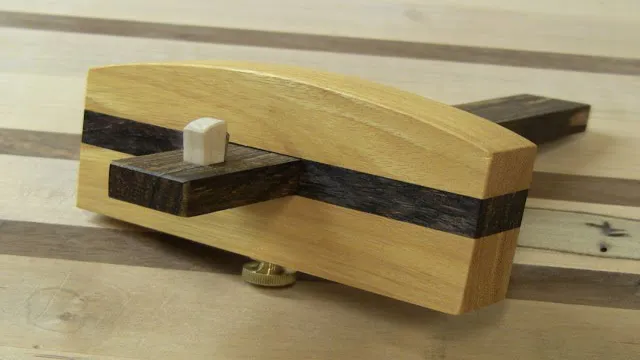
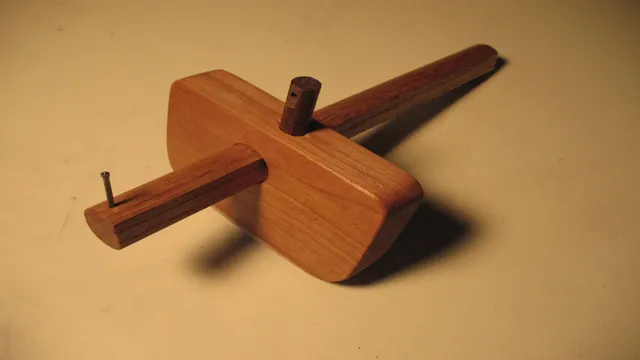
It consists of a beam, a marking guide, and a fence. The beam is a long, narrow piece of wood that is used to mark the distance between two points. The marking guide is a pin or blade that is used to make the actual marking on the wood.
The fence is a piece of wood that is used to hold the marking guide in place. Making a marking gauge is not difficult, and with a few tools and some basic woodworking skills, you can make one yourself. In this article, we’ll show you how to make a marking gauge that you can use for your woodworking projects.
What is a Marking Gauge?
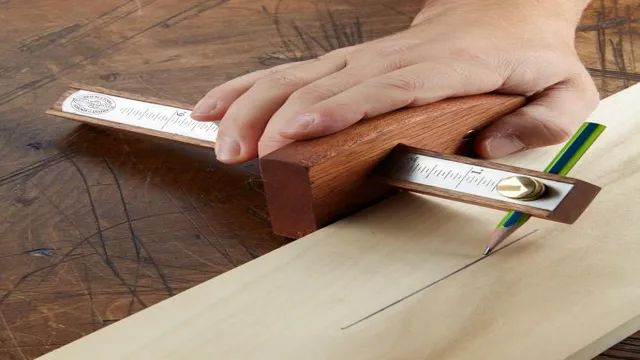
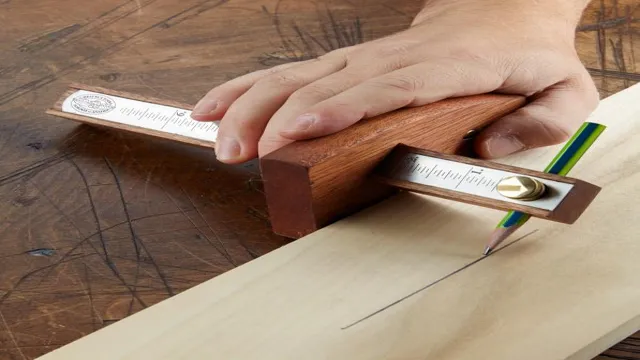
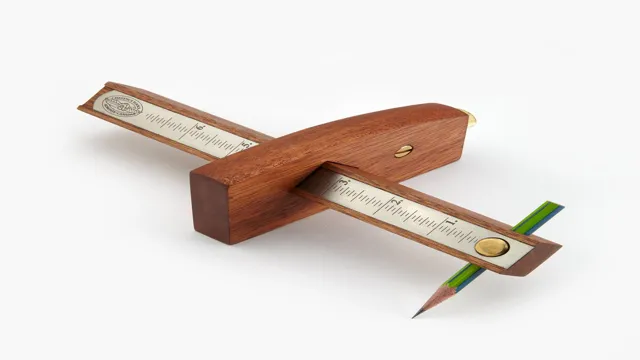
In woodworking, precision is key to crafting a beautiful finished product. That’s where a marking gauge comes in handy. Essentially, it’s a tool that allows you to create a consistent line or groove on a piece of wood, helping you achieve accurate cuts and joints.
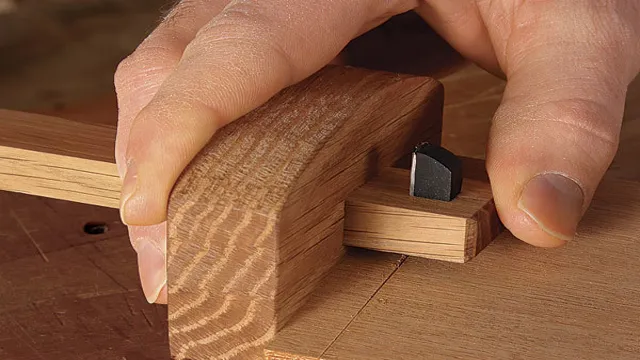
It’s a simple device composed of a stem that holds a marking wheel or blade in place. The blade or wheel is adjusted to the desired distance from the stem, and then the gauge is run over the surface of the wood. This creates a mark or groove that serves as a guide for your saw or chisel.
Whether you’re a seasoned woodworker or just starting out, a good marking gauge is an essential tool to add to your shop.
Why Make Your Own?
If you’re wondering why you should make your own something instead of buying it pre-made, there are plenty of reasons to consider. Firstly, making something from scratch allows you to personalize it and tailor it to your specific preferences. Whether it’s a piece of clothing, a piece of furniture, or even a meal, there’s something satisfying about knowing that you made it yourself and put your own unique spin on it.
Additionally, making things from scratch can often be more cost-effective than buying pre-made items. You can save money by buying materials in bulk and using them for multiple projects. Finally, making things yourself can be a fun and rewarding hobby that allows you to develop new skills and express your creativity.
Overall, there are plenty of benefits to making your own things that go beyond just the finished product. So why not give it a try and see what you can create?
Materials and Tools Needed
When it comes to making your own marking gauge, you’ll need a few materials and tools to get started. First, you’ll need a piece of hardwood, preferably maple or cherry, that’s at least three-quarters of an inch thick. You’ll also need a marking gauge blade, which you can purchase from a woodworking supply store or make yourself using high-carbon steel.
In addition, you’ll need a drill bit, a saw, a chisel, sandpaper of varying grits, and a wood-finishing product of your choice. It’s important to take your time with the process and make sure your tools are sharp and in good working condition to ensure precision and accuracy. By using these simple materials and tools, you’ll be able to create a marking gauge that suits your specific needs and preferences.
Wood
When it comes to working with wood, there are a few essential materials and tools that you’ll need to have on hand to get the job done. Firstly, you’ll need the wood itself – this might seem like an obvious point, but it’s important to make sure you have the right type of wood for your project. There are many different types of wood available, each with its own strengths and weaknesses, so be sure to do your research before making a purchase.
You’ll also need a saw or other cutting tool to shape the wood to your desired size and shape. Depending on the specifics of your project, you may also need sandpaper, screws, nails, glue, and other fasteners. Finally, you’ll need measuring tools like a tape measure or straightedge, as well as a level to ensure your project is properly aligned.
With these basic materials and tools, you’ll be well on your way to creating something beautiful and functional with wood.
Cutting Tool (Saw)
If you’re considering taking up woodworking, you’ll need some basic tools and materials to get started. One of the most essential tools you’ll need is a cutting tool. Specifically, a saw is an invaluable tool for cutting wood and making precise cuts.
You can find a variety of saws in the market, such as hand saws, circular saws, and jigsaws. The type of saw that you require depends on the type of project you’ll be undertaking. For example, if you’re only cutting through small pieces of wood, a hand saw is ideal.
If you’re going to make quick and precise cuts, a circular saw is perfect. To ensure your saw remains sharp, you’ll need to use a sharpening stone regularly to maintain its sharpness. Safety equipment, such as goggles, face masks, and gloves, should be on your list of materials.
A saw can be a dangerous tool, so it’s essential to practice caution and use safety equipment when operating one. By investing in a quality saw and safety gear, you’ll be well on your way to enhancing your woodworking skills.
Drill and Bit
If you are planning to embark on a do-it-yourself construction project that involves drilling and fastening, you will need a few essential tools and materials. A drill and bit are among the most important tools you will need. A drill can be powered by mains electricity or battery, depending on the model.
You can choose a corded or cordless drill depending on your preference. A corded drill will give you more power and is suitable for bigger projects, but it will limit your movement. On the other hand, a cordless drill is more convenient to use and gives you more flexibility since you can use it anywhere, but it is less powerful.
When choosing a drill bit, you must choose one that matches the size of the hole you intend to drill. A good drill bit should be sharp, strong, and durable to ensure effective drilling. Additionally, you need to ensure that the bit is compatible with the drill you intend to use.
Investing in good quality tools will ensure that your DIY project is a success.
Sandpaper
When it comes to sanding wood, metal, or other surfaces, the right sandpaper is crucial for achieving a smooth finish. To get started, you’ll need a variety of grits, ranging from coarse to fine. Coarser grits, such as 60 or 80, are ideal for removing rough spots or old finishes, while finer grits, such as 220 or 320, are perfect for smoothing out the surface and preparing it for painting or staining.
In addition to a selection of sandpaper, you’ll also need a sanding block or pad to hold the paper in place and prevent it from folding or tearing. A good quality block or pad will have a comfortable grip, and can be reused multiple times. Don’t forget to wear protective goggles and a dust mask to keep dust and debris out of your eyes and lungs.
With the right materials and tools, sanding can be a satisfying and rewarding part of any DIY project.
Marking Tool (Nail or Screw)
When it comes to DIY projects or home renovations, having the right tools and materials on hand can make all the difference. If you are looking to mark a spot on a wall to hang something, a nail or screw can be the perfect solution. To ensure accuracy, a marking tool is necessary.
For this project, you will need a hammer, nails or screws, a measuring tape, and a marking tool. The marking tool can be a pencil or pen, but it is important to make sure the mark is visible and will not easily rub off. Some great options for marking tools include a chalk line, laser level, or a simple string and weight.
Once you have the right materials and tools, mark the spot on the wall where you want to place the nail or screw. Double-check your measurement before proceeding to prevent mistakes. With the right marking tool, you can easily and accurately hang your picture frame or decor without risking damage to the wall.
Steps to Make a Marking Gauge
If you’re looking for a DIY project to enhance your woodworking skills, making a marking gauge is an excellent place to start. A marking gauge is a simple yet effective tool used to mark straight lines along wood, making it an indispensable tool in the woodworking arsenal. The good news is that making a marking gauge is a straightforward process.
First, select a hardwood with straight grains and cut a piece measuring about 200mm long. Next, mark one end of the piece at a distance of about 30mm and saw a shallow kerf into the wood perpendicular to the grain. Drill a hole at the opposite end to create a holding point, and you’re set.
Finally, slide the gauge along the edge of the board, adjusting the depth of the blade to your desired distance for uniformity. There you have it, a homemade marking gauge perfect for all your woodworking projects!
Step 1: Cut Your Wood Pieces to Size
Making your own marking gauge is a great way to save money and create a tool that fits your specific needs. The first step in making a marking gauge is cutting your wood pieces to size. It’s best to start with a hardwood that will be durable and resist warping over time.
You’ll need two pieces of wood, one for the shaft and one for the fence. The shaft should be around 8-10 inches long and 1/2 inch thick, while the fence should be 3-4 inches long and 3/4 inch thick. Use a saw to cut your pieces to size, making sure to measure and mark accurately beforehand to avoid any mistakes.
Once you have your wood pieces cut to size, you can move on to the next step in creating your marking gauge. Remember, taking your time and being precise in your measurements will result in a better-quality tool in the end.
Step 2: Drill the Hole for the Marking Tool
To make a marking gauge, the second step is to drill a hole for the marking tool. Marking gauges are an essential tool for accurate layout work, and it’s vital to ensure the hole for the marking tool is precisely placed. The first step is to mark the location of the hole with a square and a pencil.
Next, use a 3/8-inch drill bit to drill a hole in the center of the marked location. It’s essential to drill the hole perpendicular to the surface of the wood to ensure the marking tool slides smoothly. Once the hole is drilled, you can insert the marking tool into the hole to check the fit.
If the tool is too loose, you can fill the hole with wood glue and let it dry before attempting to insert the tool again. With this simple process, you can create your marking gauge and ensure that you’ll have a precise tool for all your woodworking needs.
Step 3: Sand Your Wood Pieces Smooth
After cutting the wood pieces for your marking gauge, the next step is to sand them smooth. This is an important step to ensure that the edges are free of bumps and rough spots that could affect the accuracy of your gauge. Sanding also helps to give your gauge a more professional look.
It is recommended to start with a coarse sandpaper, such as a 120 or 150 grit, to remove any large imperfections. Then, move on to a finer grit, such as 220 or 320, to get a smoother finish. Remember to sand in the direction of the grain to avoid any scratches that could affect the accuracy of your gauge.
Once you are satisfied with the smoothness of your wood pieces, wipe them clean with a cloth, and you are ready to move on to the next step in making your marking gauge.
Step 4: Insert the Marking Tool
A marking gauge is a handy tool used by woodworkers to make precise measurements and markings on wooden surfaces. Once you have marked the gauge on your project, you need to insert a marking tool which will allow you to make marks repeatedly without losing accuracy. There are several options to choose from, including a pencil, knife or a pin.
Pens or pencils are a good choice if you want to draw lines that are easy to see and unobtrusive. If you prefer a more distinctive line, you can use a knife or a pin instead. Before making your final decision, consider the type of wood you are working with and how you want the markings to appear.
You may need to experiment with each option until you find the one that works best for you. Once you have chosen your marking tool, insert it into the gauge securely and proceed with your project. With a bit of practice, you’ll be making precise markings in no time!
Step 5: Adjust the Gauge to Desired Width
After completing the first four steps of making a marking gauge, it’s time to adjust the gauge to the desired width. This is the crucial step that ensures accurate marking of the dimensions. To adjust the gauge, loosen the locking screw and slide the beam’s marker up or down as required to obtain the desired width.
Once done, tighten the locking screw back into place to ensure a firm grip. It’s essential to remember that the gauge’s width will determine the measurement of the marked line, so precise adjustment is necessary. It’s a good idea to double-check the width by measuring it with a ruler to make sure it’s accurate.
With the gauge successfully set, you’re now ready to use it to mark your workpiece accurately.
Step 6: Test Your Gauge
To ensure that your marking gauge is accurate and precise, testing it is crucial. Begin by marking a reference line, then adjust the gauge until it aligns perfectly with the line. Move the gauge along the reference line, and notice whether it veers off-course.
If it does, you may need to adjust the fence or blade to maintain accuracy throughout use. Another method is to mark a line and measure the distance from the reference line to the marking gauge line at various points along its length. Any inconsistencies may suggest that some parts of the gauge need further adjusting.
By thoroughly testing your marking gauge, you can prevent inaccurate measurements that may result in costly errors.
Conclusion
By following these simple steps, you can easily make your own marking gauge, and never have to settle for imprecise markings again! With just a few basic materials and some patience, you’ll have a trusted tool that will serve you well in all your woodworking projects. And who knows, maybe one day someone will ask you how you made it, and you can impress them with your expert craftsmanship! Happy woodworking!”
Benefits of Making Your Own Marking Gauge
If you’re a woodworker, making your own marking gauge can be an excellent idea. The benefits are numerous, and it can be a lot of fun to create your own tool. First off, creating your own marking gauge allows you to customize it to your specific needs.
You can make it longer or shorter, wider or narrower, and adjust it to suit your preferences. Additionally, making a marking gauge yourself is often more cost-effective than buying one. You can choose high-quality materials and create a customized tool that will last you for years.
Another perk of making your own marking gauge is the satisfaction of knowing you’ve crafted something with your own two hands that will help you create precise cuts. To make your own marking gauge, you’ll need a few materials: a wooden stick, a pencil, and a blade. Cut the wooden stick down to a size that’s comfortable for you to use.
Next, drill a hole at one end of the stick, large enough to fit the pencil. Then, insert the pencil into the hole, sharpening the end that will be used for marking. At the other end of the stick, attach the blade, making sure it’s secure.
You can then adjust the width of the gauge by sliding the blade along the stick. Sand down the edges to make sure they’re smooth and voila! You’ve successfully made your own marking gauge! Overall, making your own marking gauge provides numerous benefits and can be a fun and easy woodworking project. It allows you to customize the tool to your specifications, save money, and create a quality tool that will last you for years.
So, next time you need a marking gauge, consider making one yourself following these simple steps.
Final Thoughts
In conclusion, making your own marking gauge can be a fun and rewarding DIY project. By following the steps outlined in this article, you can create a reliable and accurate tool for measuring and marking wood pieces. Remember to choose high-quality materials, take precise measurements, and work carefully and patiently.
Whether you’re a beginner or an experienced woodworker, a marking gauge is an essential tool for creating beautiful and functional woodworking projects. So, why not try making one yourself? With a little practice and some creativity, you’ll soon be marking like a pro!
FAQs
What is a marking gauge used for in woodworking?
A marking gauge is used to make precise marks and measurements on wood, particularly for woodworking projects.
What materials are needed to make a marking gauge?
To make a marking gauge, you will need a wooden dowel, a metal point, a locking mechanism, and a ruler or tape measure.
Can you use a marking gauge for both rough and finished wood surfaces?
Yes, a marking gauge can be used on both rough and finished wood surfaces.
What are the benefits of using a marking gauge versus other measuring tools?
The benefits of using a marking gauge include greater accuracy, repeatability, and consistency in marking measurements on wood.
How does a marking gauge differ from a ruler or tape measure?
A marking gauge is a specialized tool designed specifically for making precise marks on wood, whereas a ruler or tape measure is a general purpose measuring tool.
What are some common types of marking gauges?
Some common types of marking gauges include wheel gauges, mortise gauges, and cutting gauges.
How do you adjust and use a marking gauge properly?
To adjust and use a marking gauge properly, first adjust the locking mechanism to the desired measurement, then hold the gauge firmly against the wood and slide it along the surface to make a precise mark.

