How to Make a Welding Helmet: A Beginner’s Guide to Crafting Your Own Protective Gear
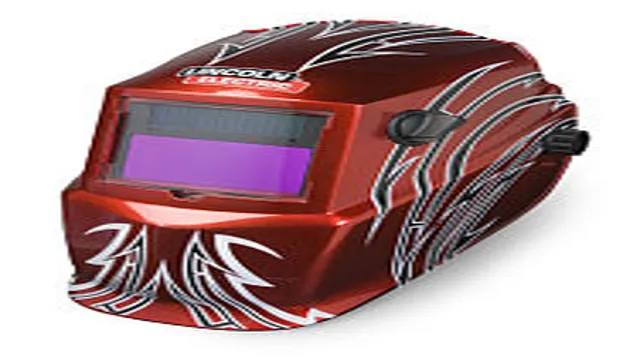
Welding helmets are an essential tool for any welder, providing protection from the intense light and sparks generated by the welding process. But not all welding helmets are created equal. Some can be expensive, while others may not offer the level of protection you need.
If you’re looking to save money or want to customize your welding gear, you might be wondering how to make a welding helmet. Fortunately, with a little bit of work and some ingenuity, you can create a helmet that’s just as effective as one you might buy from a store. In this article, we’ll go over some simple steps you can follow to make your own welding helmet.
Whether you’re a seasoned pro or just starting out, this guide will help you create a helmet that’s both functional and unique. So, let’s get started!
Materials Needed
To make a welding helmet, you will need a few materials. First and foremost, you will need a welding helmet shell. This is the hard and protective outer part of the helmet that covers your face and head.
You can purchase a welding helmet shell from a hardware or welding supply store. Next, you will need a standard welding lens, which is usually made from a special type of glass that is designed to protect your eyes from the intense light and heat generated during welding. You can also purchase this from the same welding supply store.
In addition, you will need some foam padding material, such as polyurethane foam or a similar type of foam, to provide cushioning and comfort inside the helmet. Lastly, you will need some elastic straps and a chin strap, which will help keep the helmet in place during use. With these few materials and some basic knowledge of welding safety, you can create a custom welding helmet that will protect you while you work with metal.
Helmet Shell
When it comes to making a helmet shell, there are several materials you can use. One commonly used material is thermoplastic, which is lightweight and durable. Another option is fiberglass, which can provide excellent impact resistance, making it a popular choice for motorcycle helmets.
Carbon fiber is also a material that can be used to make a strong and lightweight helmet shell. Additionally, some helmets are made with a combination of materials, such as Kevlar and resin, which provide both strength and flexibility. But the type of material used depends largely on the intended use of the helmet and the standards it needs to meet.
For example, helmets used for extreme sports may require different materials than those used for cycling or skiing. It’s important to choose the right material to ensure that the helmet provides the necessary protection while still being comfortable to wear.
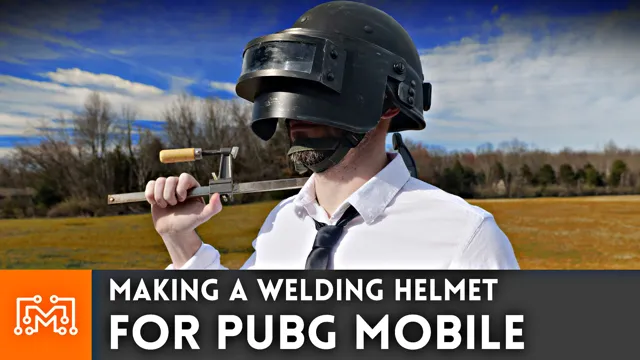
Auto-Darkening Lens
Auto-Darkening Lens When it comes to using welding equipment, safety should always be a top priority. One essential safety feature you should invest in is an auto-darkening lens. This nifty tool automatically darkens when the welding arc is initiated, protecting your eyes from harmful UV and infrared rays.
But what materials do you need to install an auto-darkening lens? Firstly, you’ll need to replace the standard lens in your welding helmet with the auto-darkening lens. You’ll also need a battery or solar-powered component that automatically adjusts the lens’s shade level when the arc is struck, so you don’t need to adjust it manually. These components are typically sold as a complete kit, so you shouldn’t have any issues finding what you need.
Investing in an auto-darkening lens is a wise decision that will ensure you can see what you’re working on while keeping your eyes safe from harm.
Foam Padding
If you’re planning to do some cushion or foam padding work, you must have the right materials to do the job. The materials that you’ll need vary depending on the type of foam padding that you’ll be doing, and one of the most crucial materials is the foam padding itself. There are different types of foam padding, so you’ll need to choose wisely, based on your needs.
Memory foam, polyurethane foam, and closed-cell foam are some of the most popular foam padding types. Other materials that you’ll need include a measuring tape for accurate measurements, scissors for cutting the foam, a marker for labeling the material, and an adhesive to glue the foam into the position you want. Some projects may need additional materials like a straight edge for making straight cuts or foam sculpting tools for carving foam into specific shapes.
Make sure you have all the materials close by before you start the project to avoid any delays or frustration during the work process.
Adjustable Strap
For creating an adjustable strap, you will need a few essential materials. First and foremost, you will need the proper type of webbing material. Generally, nylon or polyester webbing works well as it’s soft, durable and can withstand a significant amount of weight.
Additionally, you will require some sturdy buckles to connect and fasten the strap securely. A slider buckle or a tri-glide buckle is both suitable options for creating an adjustable strap. Finally, you will need a few basic tools such as scissors, thread, a sewing machine, and a measuring tape to ensure accurate measurements and clean cuts.
These materials are easy to source, and once you have all the necessary items, you can start creating your adjustable strap from scratch. With a little bit of patience and effort, you can fashion a comfortable and functional strap that meets all your requirements.
Steps to Assemble Helmet
If you’re looking to make your own welding helmet, there are some simple steps you can follow to assemble your own. Firstly, gather all the necessary materials that you’ll need for the project. This includes the welding helmet shell, auto-darkening lens, headgear, and attachment hardware.
Next, install the lens into the helmet shell, following the manufacturer’s instructions carefully to ensure a secure fit. After that, attach the headgear to the shell, and make any necessary adjustments to ensure a comfortable and snug fit. Finally, attach any additional accessories, such as a respirator, to the helmet if required.
With these basic steps, you should be able to assemble your own welding helmet with ease. Whether you’re a professional welder or a DIY enthusiast, a customized welding helmet can be a great addition to your personal protective equipment collection.
Step 1: Prepare Helmet Shell
To assemble a helmet, the first step is to prepare the helmet shell. The helmet shell is the outer layer that provides protection against impacts. It is usually made of high-quality plastic or fiberglass composite materials.
Before starting the assembly process, make sure the helmet shell is clean and free of any debris or residue. Begin by examining the helmet shell for any cracks or damage. If you notice any damage, do not attempt to use the helmet.
It is important to make sure the helmet is in good condition before assembly to ensure maximum protection. Next, remove any stickers or decals from the helmet shell. These can create an uneven surface that can impact the performance of the helmet.
Use a soft cloth and mild cleaning solution to remove any adhesive residue. Once the helmet shell is clean and undamaged, you can begin the assembly process. Follow the manufacturer’s instructions carefully to ensure proper assembly.
This typically involves attaching the inner padding and lining to the helmet shell. When attaching the padding and lining, make sure they are placed correctly and fit snugly. A loose or improperly fitted helmet can reduce its effectiveness in protecting against impacts.
Overall, taking the time to properly prepare the helmet shell before assembly is crucial for ensuring the helmet provides maximum protection. Take care to examine the shell for damage, remove any decals or stickers, and follow the manufacturer’s instructions carefully to achieve a safe and secure fit.
Step 2: Install Auto-Darkening Lens
Now that you’ve assembled the shell of your welding helmet, it’s time to install the auto-darkening lens. This step is critical in ensuring the safety and comfort of your welding experience. The auto-darkening lens may come as a separate part or may already be installed in your helmet.
If you need to install the lens, first remove any protective covers or film from the lens. Then, carefully insert the lens into the helmet’s designated slot, making sure it’s securely in place. The next step is to attach the lens cover, which protects the lens from dust, scratches, and other debris.
Make sure the cover is snugly attached, but be careful not to over-tighten it, as this could damage the lens. Now that your helmet is fully assembled, it’s time to put it to use and enjoy a safe and comfortable welding experience. The main keyword used organically: auto-darkening lens
Step 3: Add Foam Padding
Foam Padding Now that you have the helmet shell and interior lining in place, it’s time to add the foam padding. This crucial step not only provides comfort but also helps with impact protection. The foam padding should fit snuggly inside the helmet and be evenly distributed to ensure maximum protection.
Depending on the helmet model, you may need to remove some of the liner to make space for the foam. Once you have the foam in place, press down firmly to ensure it’s securely in place. If there are any gaps, fill them with additional foam pieces.
Don’t forget to check that your helmet still fits comfortably with the added padding. A well-fitting helmet is essential to ensure proper protection in the event of an accident. With the foam padding in place, your helmet is now ready for use.
Step 4: Attach Adjustable Strap
Adjustable Strap Now that you’ve secured the helmet’s lining and attached the chin strap, it’s time to add the adjustable strap. This feature is essential to ensure that the helmet fits securely and comfortably on your head. Look for the adjustment points on the back of the helmet, which are usually indicated by small tabs or buttons.
Once identified, pull the strap through each point and adjust the length until the helmet fits snuggly, but not too tight. You want to be able to move your head freely, but without any shifting or wobbling of the helmet. Double-check that the strap is fastened, and the fit feels comfortable.
If not, continue adjusting until it’s just right. Remember, a well-fitted helmet is crucial for your safety on the road, so take the time to make sure everything is in place before you head out.
Customizing Your Welding Helmet
Making a welding helmet is a great way to showcase your personality and add some personalized touch to your gear. First, decide on the design or theme you want for your helmet. Then, you can use paint or decals to customize the exterior of the helmet.
Some people choose to add stickers or even airbrush their designs onto the helmet. You can also add some extra features to your welding helmet such as a magnifying lens, extra padding or ventilation, or even a built-in flashlight. While making a welding helmet from scratch may be challenging, customizing an existing helmet is a fun and easy way to make it unique to you.
Overall, making a welding helmet is a great way to express your individuality and make your gear stand out in the shop.
Painting and Decal Placement
Customizing your welding helmet can enhance your welding experience. Painting and decal placement are some ways to make your helmet stand out and reflect your personality. Before painting your helmet, ensure that it is clean and free of dirt or grease.
Use sandpaper to remove any existing finish or decals. Choose a paint that adheres well to metal surfaces and has high heat resistance. Once the painting is done, let it dry for at least 24 hours before applying decals.
Decals must be placed in areas that will not be exposed to heat, such as the sides or back of the helmet. Avoid putting them near the welding lens, as they might obstruct your vision. Customizing your welding helmet is not just about making it look cool but also about safety.
By following these tips, you can personalize your welding helmet while maintaining its functionality.
Adding Additional Accessories
Customizing Your Welding Helmet One great way to personalize and customize your welding helmet is by adding additional accessories. While standard welding helmets often come with basic features like adjustable headgear and auto-darkening lenses, adding accessories can take your welding experience to the next level. There are several different options to choose from, including magnifying lenses, helmet graphics, and even cooling systems to keep you comfortable during long welding sessions.
By selecting accessories that meet your specific needs, you can truly make your welding helmet your own. Whether you’re a professional welder or just enjoy welding as a hobby, customizing your helmet can add an extra level of comfort and enjoyment to your craft. So don’t hesitate to explore the different accessory options available and find the perfect additions to your welding helmet.
Final Thoughts
If you’re looking to create your own welding helmet, it’s important to remember that safety should always be your top priority. It may be tempting to cut corners and save money by using subpar materials or cutting corners, but doing so can put you at risk. Instead, invest in a quality helmet shell and lens, and make sure to follow all instructions carefully.
If you’re not comfortable with the idea of creating your own helmet, it may be best to leave the job to the professionals. However, if you are up for the challenge, making a welding helmet can be a fun and rewarding project. By following the right steps and taking the necessary precautions, you can create a helmet that will keep you safe and comfortable during every welding job you take on.
Conclusion
In conclusion, creating your own welding helmet is a great way to combine practicality with creativity. Not only can you ensure that your helmet meets your specific needs, but you can also customize it to reflect your unique personality. Whether you choose to use a vintage motorcycle helmet, a hard hat, or even a retrofitted diving mask, there’s no limit to the possibilities.
Just remember to prioritize safety first, and it won’t be long before you’re a master of welding with a helmet that’s both functional and fashionable. Weld on, my friends!”
FAQs
What materials do I need to make a welding helmet?
You will need a welding helmet kit, welding lens, headgear, and helmet shell.
Can I make a welding helmet on my own?
Yes, you can make a welding helmet on your own using a welding helmet kit and some basic tools.
How long does it take to make a welding helmet?
It typically takes 2-3 hours to make a welding helmet, depending on your experience and skill level.
What is the cost of making a welding helmet?
The cost of making a welding helmet varies based on the materials used, but it can range from $30 to $100.
What are the safety precautions I should take when making a welding helmet?
You should wear safety goggles, gloves, and a face mask to avoid getting injured by flying debris or harsh chemicals.
How do I choose the right lens for my welding helmet?
You should choose the lens based on the type of welding you will be doing and the level of brightness protection that you need.
Can I customize my welding helmet?
Yes, you can customize your welding helmet with decals or paint to make it reflect your personal style or business logo.

