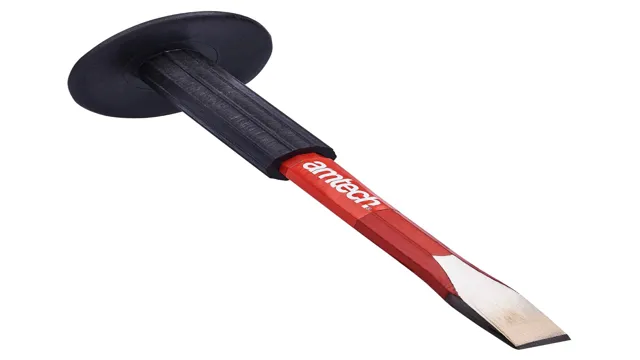
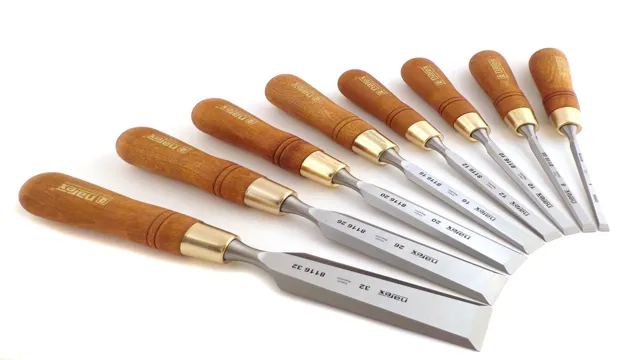
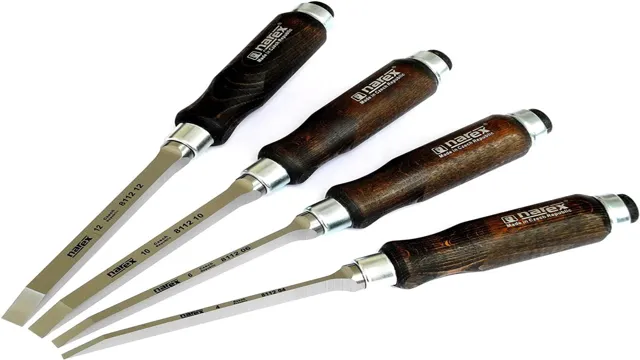
How to Make Wood Carving Chisels: A Step-by-Step Guide to Crafting Your Own Tools

If you’re a woodworking enthusiast, then you know the joy of creating something beautiful out of raw wood. Whether it’s a piece of furniture, a carving, or a sculpture, there’s something special about the process of turning a block of wood into a work of art. And one of the most important tools in a woodworker’s arsenal is the chisel.
But what if you could make your own wood carving chisels? Would it be worth the effort? In this blog post, we’ll explore the benefits of making your own chisels, the steps involved, and some tips to help you get started. So grab your hammer, sharpen your blades, and let’s get carving!
Introduction
Wood carving chisels are essential tools for sculptors, woodworkers, and DIY enthusiasts who want to create their own unique designs. While there are many types of chisels available on the market, making your own set can be a rewarding experience and can help you create custom designs that match your style. To make your own wood carving chisels, you will need to select the right materials, including high-quality steel blanks, handles, and tools like a grinder, vice, and file.
It is important to have a clear plan and design in mind before starting the creation process, to ensure that your chisels meet your specifications. With patience, perseverance, and the right tools, you can create your own set of wood carving chisels that will last for years and enable you to create stunning designs. By using higher quality materials and ensuring the proper manufacturing process, you can make chisels that will be comfortable to hold, easy to use and sharpen, and durable enough to last for a long time.
Whether you’re an experienced woodworker or just starting out, making your own set of chisels is a fun and rewarding experience that can help you create beautiful works of art.
Overview of Wood Carving Chisels preparation
Wood carving chisels are an essential tool for any woodworker. They come in a variety of shapes and sizes, each designed for a specific task. But before using them, it’s important to properly prepare them for use.
Preparing wood carving chisels involves sharpening the blades and honing the edges. This will help ensure clean cuts and prevent any damage to the wood or the chisels. A sharp chisel also reduces the amount of force required to make a cut, minimizing the risk of injury.
Sharpening stones, honing guides, and strops are useful tools for preparing wood carving chisels. By taking the time to properly prepare your tools, you can achieve the best results and prolong the lifespan of your chisels. So don’t skip this crucial step and start your wood carving projects off on the right foot.
Types of Wood Carving Chisels to make
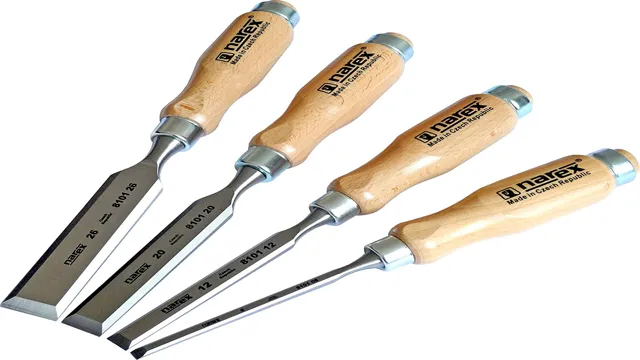
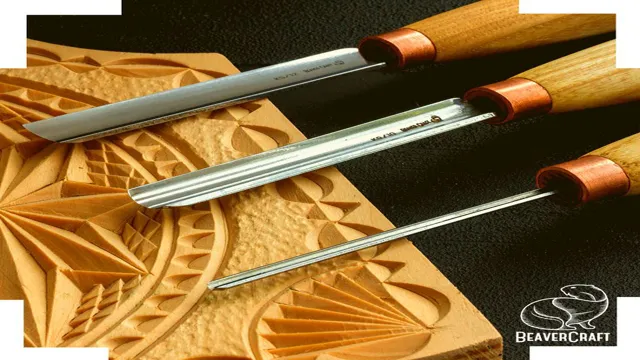
If you’re an avid woodworker, you know that having the right tools can make all the difference when it comes to creating beautiful pieces of art. That’s why it’s important to understand the different types of wood carving chisels available to you. Wood carving chisels are available in a variety of shapes and sizes, each with a unique purpose.
From flat chisels to gouges, there are many options to choose from depending on your project’s needs. The key is to find the right balance between sharpness, strength, and control to obtain a perfect cut without damaging the wood. Whether you’re a beginner or a seasoned woodworker, understanding the different types of wood carving chisels is key to making intricate and detailed artwork.
Materials and Tools Required
If you’re interested in woodcarving, you might be curious about how to make your own chisels. It’s a great way to customize your tools to your specific needs and preferences. To get started, you’ll need a few essential tools and materials.
First, you’ll need high-quality steel blanks for the chisel blades. Look for steel that’s tough and durable, as this will make your chisels last longer and hold an edge better. You’ll also need a grinder or belt sander to shape the blades and sharpen the edges.
Additionally, you’ll need a forge or heat source to heat-treat the blades and give them the proper hardness. Finally, you’ll need wooden handles, file(s), and a drill press or hand drill to attach the blades to the handles securely. With these tools and materials, you can start making your own custom chisels in no time!
Details on the essential materials needed
When it comes to sewing, having the right materials and tools is essential to make any sewing project a success. Firstly, you will need a good quality sewing machine that is appropriate for the type of sewing you want to do. Thread is a crucial material, and you will need different colors depending on the particular fabric you are working with.
Fabric scissors are also essential for cutting fabric accurately, and pins and needles are necessary for holding fabric in place. You may also need a seam ripper to fix any mistakes along the way. Other useful tools include a measuring tape, a ruler, and a chalk pencil for marking out patterns and designs.
With these essential materials and tools on hand, you will be well on your way to creating beautiful sewing projects.
List of tools required and their functions
When it comes to DIY projects, it’s always important to gather the required materials and tools beforehand. For building a bookshelf, you’ll need a few essential tools such as a drill, screwdriver, saw, measuring tape, and level to ensure your bookshelf is evenly installed. Additionally, a hammer, sandpaper, and wood glue will come in handy when attaching pieces securely and sanding down rough edges.
You will also need materials, such as wood planks, screws, nails, and paint or varnish to add a finishing touch to the bookshelf. With these tools and materials, building a bookshelf from scratch will be a breeze. Just ensure you have all the supplies to make the process smooth and enjoyable.
Step-by-Step Guide to Wood Carving Chisels Making
If you’re looking to get your hands on a set of wood carving chisels, why not try making your own? Not only will it be a fun and rewarding DIY project, but it will also allow you to customize your tools to suit your specific needs. Here’s a step-by-step guide to help you get started on making your own wood carving chisels. The first step is to choose the right steel for your chisels, as it’s important to choose a high-quality steel that will hold up well under heavy use.
Once you have your steel, you’ll need to shape it into the desired chisel shape using a grinder or file. Next, you’ll need to drill a hole for the handle and shape the handle to fit the chisel. Finally, you’ll need to sharpen the blade and hone the edge to make sure your chisels are ready to use.
With a little patience and effort, you’ll have a set of custom-made wood carving chisels that are perfectly tailored to your needs.
Preparing and shaping of the blades
Wood carving chisels are essential tools for those who enjoy woodworking. But have you ever thought about making your own? One of the first steps in making wood carving chisels is preparing and shaping the blades. To do this, you’ll need a high-quality steel blank, which can be purchased online or through a specialty store.
Begin by filing and sharpening the edges of the blank to form a pointed tip. Take care to keep the angle consistent and to avoid dulling the steel. Once the tip is formed, use a bench grinder or belt sander to shape the blade.
This is where your creativity can really come into play – whether you prefer a curved or straight blade, you can shape it to fit your preferences. Just remember to keep the blade narrow enough to fit within the handle. With your blade shaped to your liking, you can then move onto the next step of assembling the chisel.
Making handles for the chisels
One crucial step in making wood carving chisels is creating the handles. The handle is essential for comfort and stability during carving, so it’s essential to get it right. First, choose a piece of wood that is comfortable to hold and carve, like maple or cherry.
Use a saw to cut the wood to the desired length, and then use a chisel to create a rectangular shape on one end. Next, drill a hole in the center of the rectangle, making sure it’s big enough to fit the tang of the chisel. Now, use a chisel or carving knife to shape the handle.
You can make it smooth and round or give it a unique design. Remember to sand it down with fine-grit sandpaper for a polished finish. Finally, insert the tang of the chisel into the hole and secure it in place with glue.
With these steps, you can create a handle that fits comfortably in your hand and provides stability when carving.
Fixing blades onto the handles
When it comes to wood carving chisels, fixing blades onto the handles may seem like a daunting task, but it is an essential part of the process. Luckily, with a few easy steps, you can make sure that your blades are securely attached. First, make sure your blade is sharp and clean, as this will ensure a clean fit.
Next, insert the blade into the handle by hitting it gently with a mallet until it is fully seated. Then, drill a hole through the handle and blade, making sure it is in the center of the blade and deep enough to accommodate the wedge. Next, insert the wedge into the hole, ensuring that the blade is securely held in place.
Finally, trim the wedge so that it is flush with the handle. This will ensure that your wood carving chisels are both sturdy and safe to use.
Sharpening and Finishing of the chisels
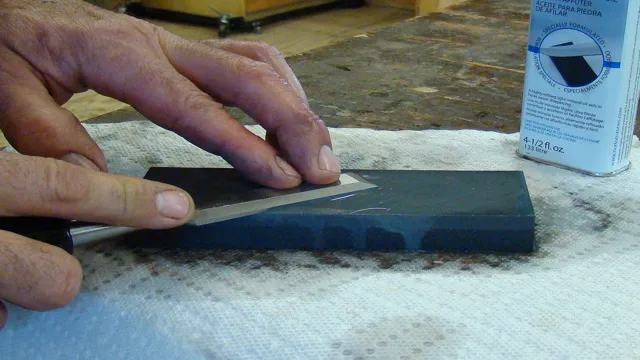
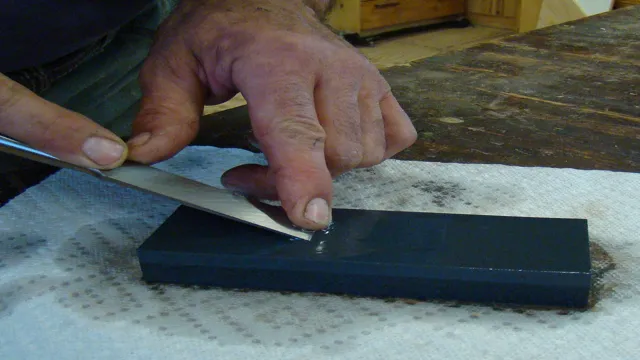
When it comes to wood carving, sharpening and finishing the chisels are crucial steps in creating a masterpiece. To start, you’ll need a sharpening stone and honing compound, which can be found at any hardware store. Begin by holding the chisel at a 20-degree angle and moving it along the sharpening stone, applying even pressure to both sides.
Repeat this process until the chisel is sharp enough to shave hair off your arm. Next, apply honing compound to a leather strop and drag the chisel along the surface in a back-and-forth motion. This will polish the edges and remove any burrs.
Finally, test the sharpness of the chisel by making some practice cuts on a scrap piece of wood. If the chisel slides through the wood with ease, you’re good to go. Remember to regularly sharpen and hone your chisels to maintain their sharpness and effectiveness during carving.
Conclusion
In conclusion, making wood carving chisels is not just a craft, it’s a labor of love. It requires patience, precision, and a keen eye for detail. But if you’re willing to put in the time and effort, the end result will be a set of chisels that are not only functional but also uniquely tailored to your own personal carving style.
So go ahead, put your creativity to work, and let your inner woodworker shine through with a set of handcrafted wood carving chisels.”
FAQs
What materials are needed to make wood carving chisels?
To make wood carving chisels, you will need high-carbon steel stock, a grinder, a forge or torch, a hammer, and heat-resistant gloves.
Can wood carving chisels be made by hand?
Yes, wood carving chisels can be made by hand through the process of forging and grinding the high-carbon steel stock.
What is the best type of steel to use for wood carving chisels?
High-carbon steel is the best type of steel to use for wood carving chisels as it has the durability and strength needed to withstand frequent use.
How do you sharpen wood carving chisels?
Wood carving chisels can be sharpened using a fine grit sharpening stone or diamond plate to remove any nicks or dullness in the blade.
What is the difference between a flat chisel and a gouge chisel?
A flat chisel is used for making straight and flat cuts in wood, while a gouge chisel is used for making curved or scooped cuts in wood.
Can wood carving chisels be used on other materials besides wood?
Yes, wood carving chisels can be used on other soft materials such as clay, wax, and soap.
How do you care for and maintain wood carving chisels?
To care for and maintain wood carving chisels, it is important to keep them clean and dry, sharpen them regularly, and store them in a dry and safe place when not in use.

